
Insulate a Cape Roof to Avoid Ice Dams
Wood-fiber panels, blown cellulose, and a taped air barrier help solve the comfort and ice-dam problems common with Cape-style houses.
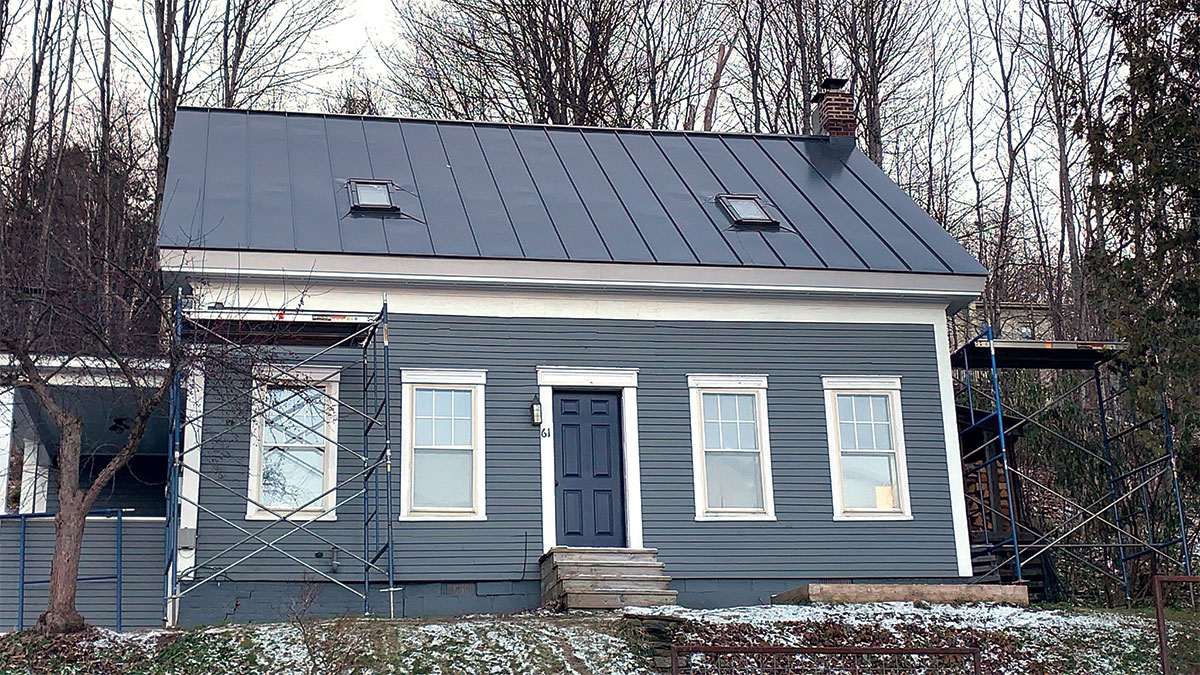
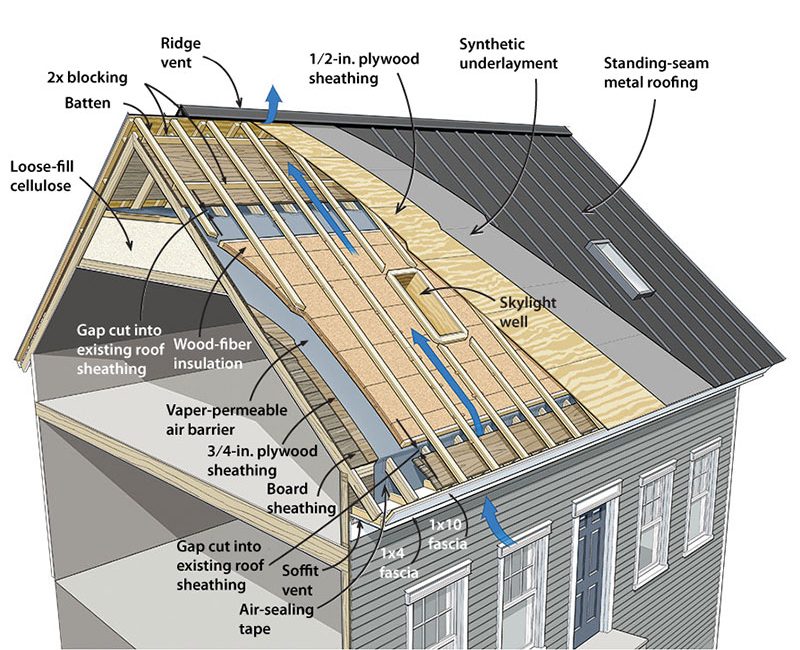
Synopsis: Because of their kneewalls and transitions from sloping to flat ceilings, Cape roofs are notorious for problems with icicles and ice dams. On this Cape roof, the builder added a continuous air barrier that transitions from roof to wall and from sloping ceiling to flat ceiling through slots cut into the roof sheathing. Wood fiberboard insulation adds R-value to the sloping sections of the roof, and is covered in standing-seam metal for durability and longevity. Two-part fascia details at the eaves and gables mask the additional roof thickness caused by the rigid insulation.
When it came time to replace the 30-year-old asphalt roof on my clients’ Cape Cod-style house, they decided it was also time to address the ice dams and resulting icicles that in some winters reached close to the ground. When they bought the house in 2007, they did basic air-sealing and insulated the walls and rafter bays with dense-pack cellulose, but the house was still leaky and had only 5 in. of cellulose (R-17 at best) in the sloping ceilings upstairs.
We begin a project by first understanding the client’s goals, values, and priorities, and then we do a thorough performance audit, checking the structure and assessing the building enclosure and mechanical systems. When a client goes to the trouble and expense of a project like this, it’s important as builders that we first understand what is happening with the house and the client’s needs before working on solutions.
This audit also tells us our starting point, so we can compare the data when we’re done with the project to know if our envelope and mechanical improvements were successful. For this house, we decided with the homeowners to install a flexible air barrier, add exterior wood-fiber insulation on the sloping part of the ceiling, and add loose-fill cellulose on the flat section of ceiling.

Capes come with challenges
Cape-style houses, because of their sloping ceilings and kneewalls on the second floor, make it difficult to create a continuous air barrier, which is why my client’s house had icicles every winter. Warm air rising through leaks in the building envelope reaches the roof sheathing, where it melts snow that later refreezes into ice. The cycle of thawing and refreezing leads to icicles and ice dams.
Although some roofers use peel-and-stick membranes or even electric heating cables to deal with ice dams, a better solution is to retrofit a continuous air barrier and add insulation. This controls warm-air leaks and keeps the roof sheathing cold. Transitioning the air barrier from the roof deck to the eave walls, gable walls, and flat ceiling is one of the trickiest and most critical aspects of Cape roof retrofits.
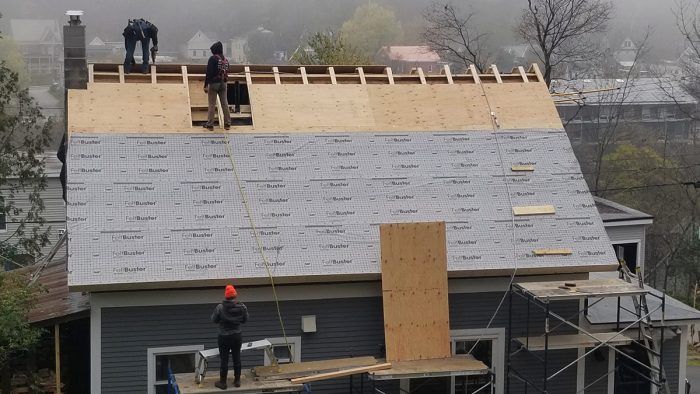
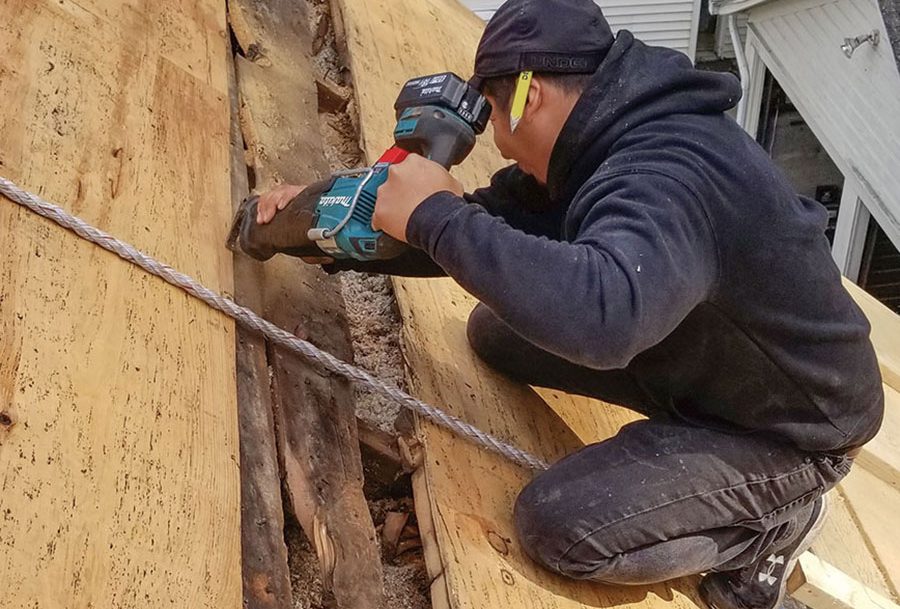
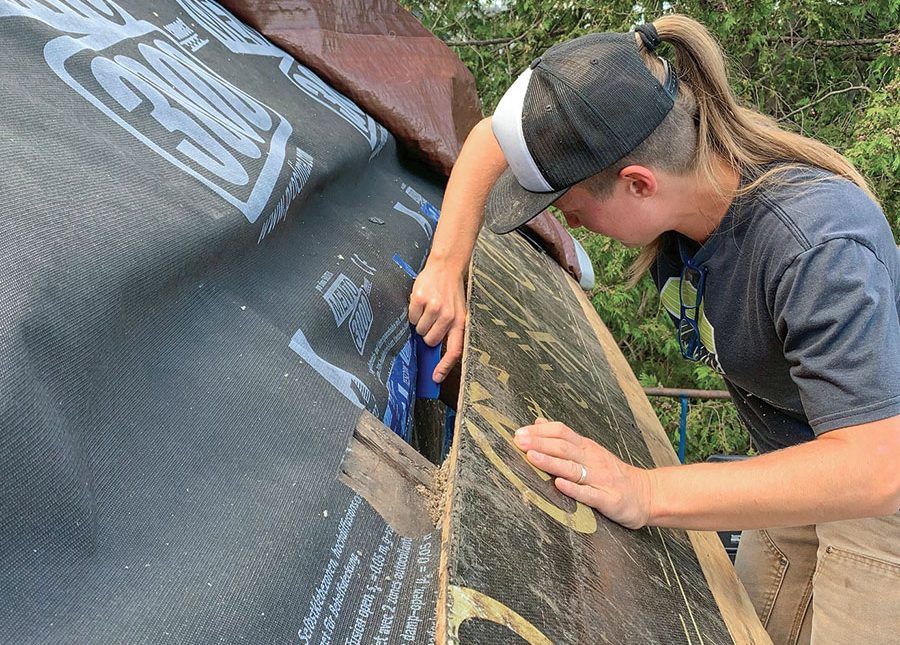
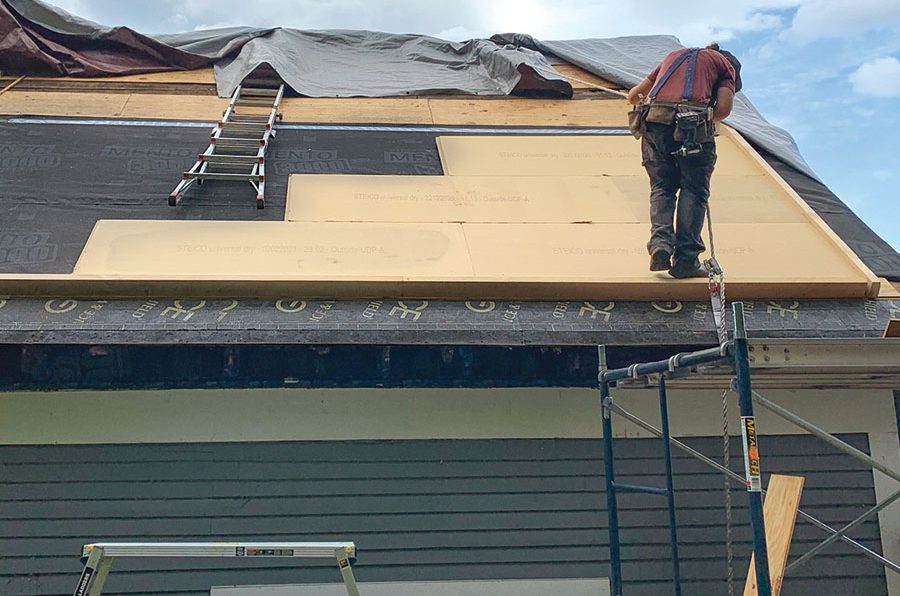
These areas are often fit and taped differently, but the strategy is the same: cut and seal pieces of air-impermeable materials to create a continuous air-control layer. On this project, we used Solitex Mento 3000 underlayment from Pro Clima to create the air barrier. We cut and fit the vapor-open membrane around the framing members and then taped it in place with Tescon Vana air-sealing tape. The vapor-open membrane and vapor-open wood-fiber insulation allow the assembly to dry should some seasonal wetting occur. Fitting the pieces of membrane is slow, fussy work, but the air barrier has to be continuous to be effective.
Rigid insulation from trees
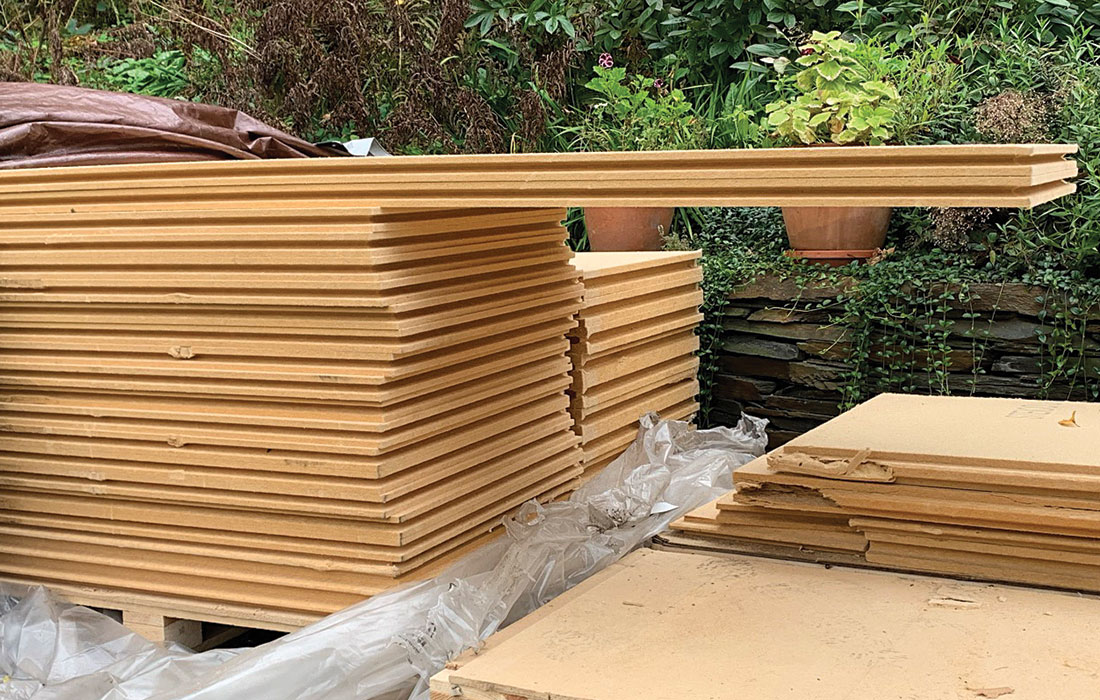
We use wood-fiber panels regularly, most often for upgrading existing walls and roofs, but we’ve also used it in new construction. Wood fiberboard is amazing; not only is it carbon storing and vapor open, it is also easy to work with, and it doesn’t make you itch or smell like chemicals. The edges are tongue and groove, and we usually make a wood block that fits over the tongue so we can tap the joints closed without destroying the tongue.
Minimizing traffic on the wood fiberboard is wise, but it certainly can handle some traffic. But keep in mind that the surface is slick, particularly on steep roofs, so we used ropes and harnesses to keep from falling. When we use it on roofs, we protect the fiberboard with tarps during construction, but when we install it on walls we don’t generally need to cover it, unless it’s exposed to regular wind-driven rain. Some wood fiberboard is water resistant enough to act as the water-resistive barrier (WRB), which can be a real time-saver.
Why wood fiber?
To fix the problem of my home’s too-common ice dams, I hired New Frameworks, a design-build firm located here in central northern Vermont. I was interested in trying to retrofit the roof without rigid-foam insulation, due to the upfront carbon emissions associated with its production. Many contractors would suggest spray foam, but I am concerned about its global warming potential, and I worry about trapping moisture in old homes, so I prefer a vapor-open assembly when possible. Also, spray foam is not easily reversible, and it is difficult to get a high-quality installation in cramped conditions, like this Cape’s attic. Given the existing conditions, exterior insulation made the most sense. I chose to use plant-based materials like cellulose and wood fiberboard because of their carbon-storing capacity, and I knew New Frameworks had experience working with such materials. We landed on an approach using Steico wood fiberboard as continuous exterior insulation. Choosing wood fiberboard over EPS or polyiso was effective in keeping the project’s embodied carbon low. Carbon-storing products help offset carbon-equivalent greenhouse gasses that are emitted during a product’s manufacturing, which results in lower embodied carbon in a project. The EPS doesn’t have the same offset, meaning the upfront emissions that come with its production are not counteracted with a carbon-storing capacity. The use of wood-fiber insulation instead of foam saved close to 1500 kg of embodied carbon. Using wood fiber also reduced the heat load of the house and its associated operational or energy use carbon emissions. Once all the trim was complete, we ran a blower-door test and learned the work had resulted in a 10% reduction in air leakage. And after the first winter with a nice thick roof, I can happily report that there were no icicles. —Kate Stephenson, homeowner and co-founder of Helm Construction Solutions |
Flattening a wonky roof
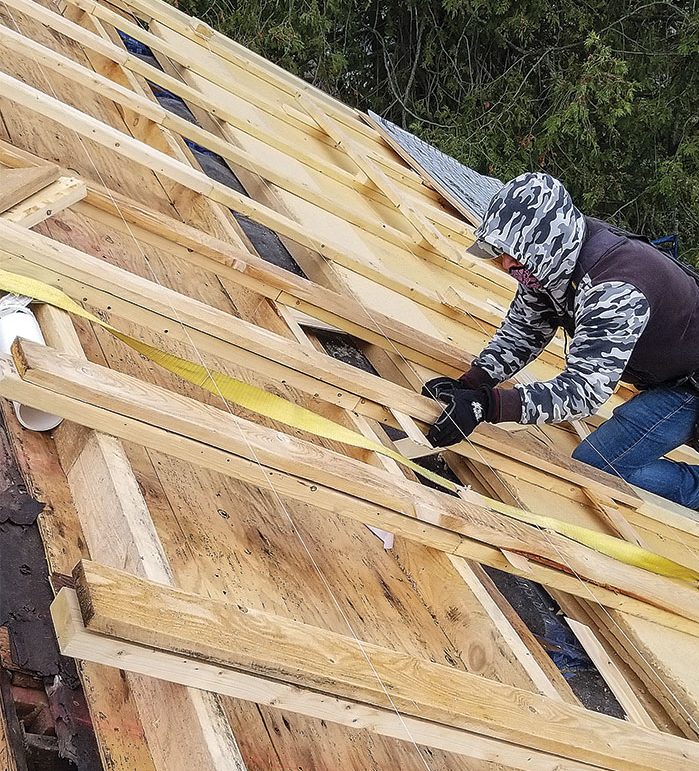
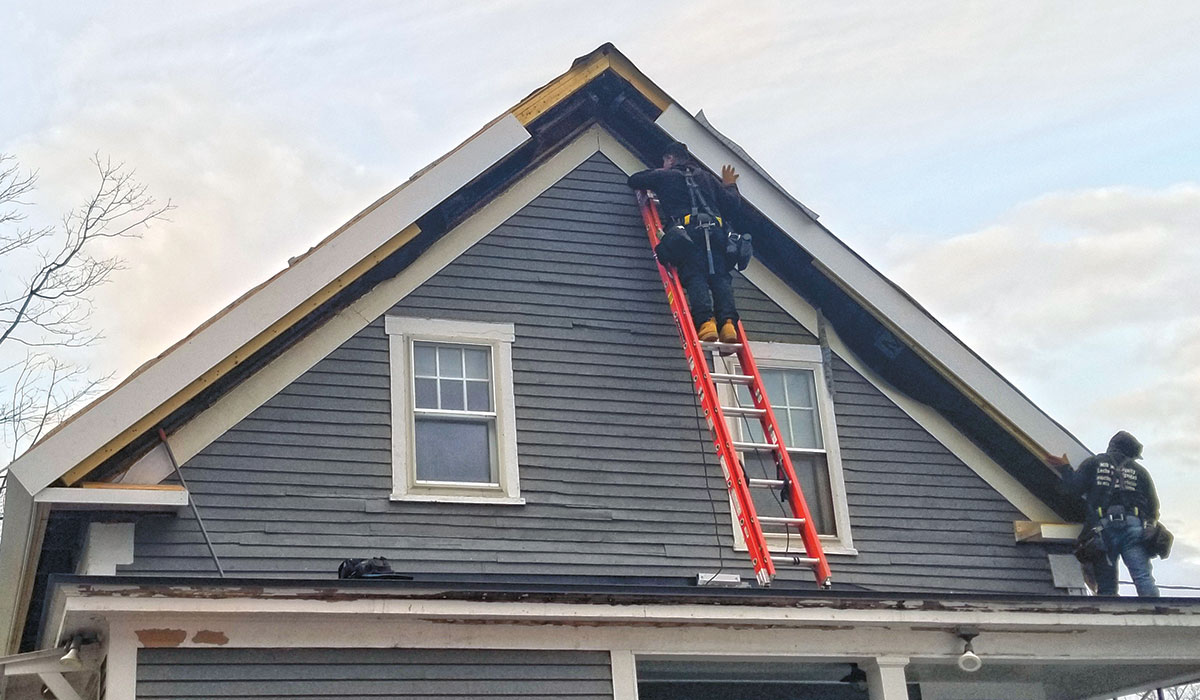
The framing on the back side of the house was pretty straight, but on the front we had to shim 2×4 battens for fastening the roof sheathing as much as 2 in. in some places. This work was further complicated by two new skylights, which have shafts that penetrate the roof assembly in two places.
We made all our plane adjustments with battens on top of the wood fiberboard and fastened the battens with screws driven into the existing wood framing. We began by stretching vertical stringlines near the roof edges over the gable rafters. Then we ran strings across the roof (from gable to gable) every 2 ft. going up toward the ridge.
By measuring down from the strings to the roof we could measure the amount of shimming required. We used a wide variety of shims depending on the thickness needed— cedar shims, 1 ⁄ 2-in. ply, 3 ⁄ 4-in. common pine, rough-sawn 1x, nominal 2x, rough 2x. Then, aided by an 8-ft. straightedge, we shimmed above the insulation so the 2x battens would be in the same plane and the standing-seam roof would look its best.
We found it helpful to use slightly thinner pieces of shim stock and then used tapered shims for the final adjustments. The skylights introduced another layer of complexity because it would be impossible to level the roof deck and have uniform skylight wells without also flattening the ceiling inside. We opted to let the difference between the roof-deck plane and interior ceiling plane resolve in the skylight shafts, which were narrow and deep, making the discrepancy less obvious. If we were dealing with larger skylights or if the roof assembly was not as deep, the variation in dimensions from one side of the skylight would be more noticeable and the client may have wanted us to level the ceiling too.
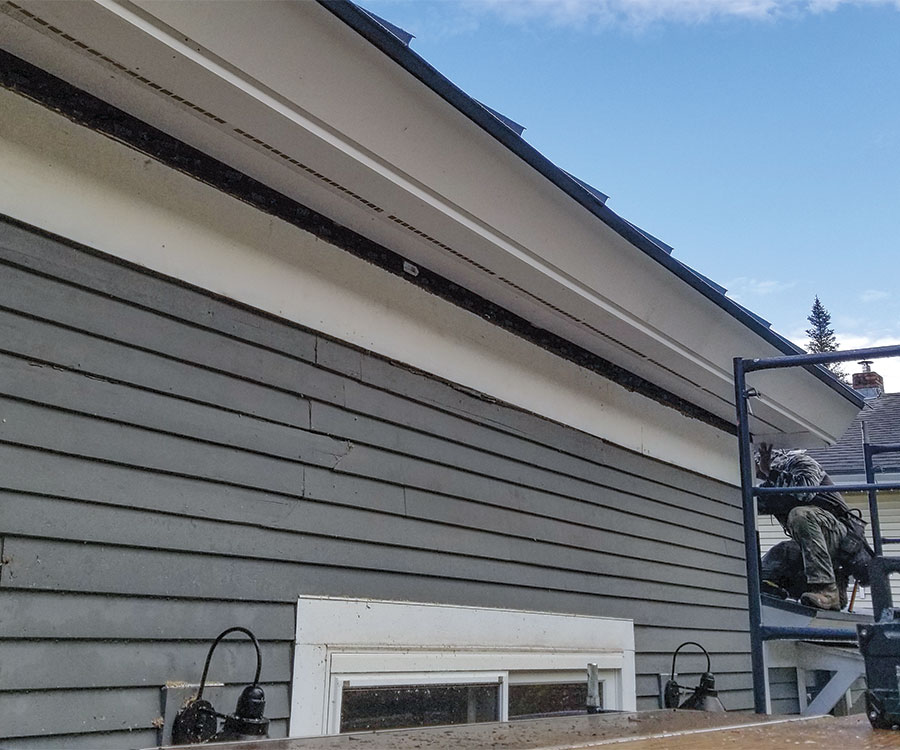
Overall, all the layers added about 6 in. to the overall thickness of the roof, which required all new fascia and soffits, including soffit vents. When adding exterior insulation to a roof or walls in our climate (zone 6), you should try to get at least one-third of the total R-value (in this case, about R-19) on the exterior for dewpoint control. This ratio keeps the sheathing warm enough to avoid wetting from condensation (see “Successful Vapor Control,” FHB #298). At R-3.7 per in., the 4 in. of wood fiber on this roof are closer to R-15, but we thought an additional layer would make the roof appear too thick, and that this was a reasonable risk because wood-fiber insulation is far more vapor permeable than rigid-foam insulation, and the assembly can dry to the exterior through the vented roof.
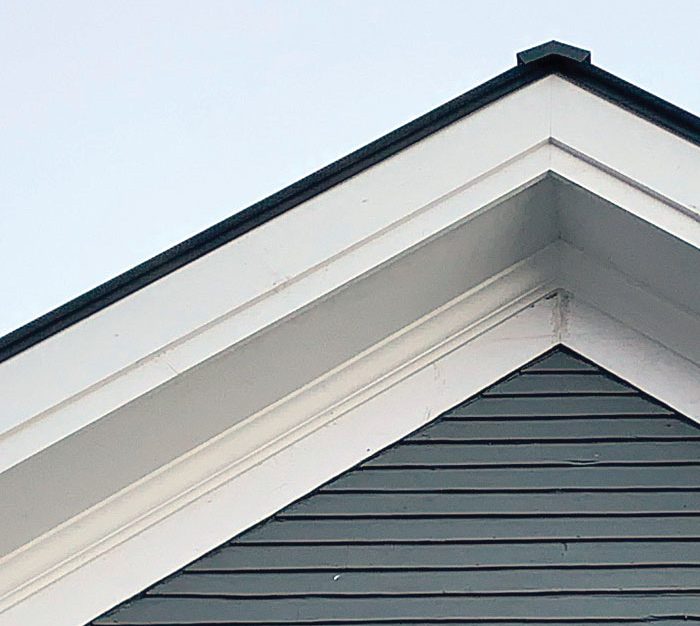
Hiding a thicker roof
Adding exterior insulation creates additional roof thickness, which can look out of scale on a historically correct home. To reach the roof plane, the eave overhangs are extended from battens, and a two-piece fascia creates a shadowline that makes the additional thickness less obvious while complementing the home’s simple Greek-revival details. Eave returns on the gables are sloped to shed water and are a faithful reproduction of the original returns. The new versions are made slightly larger than the originals to maintain the correct proportions for the new, taller fascia.

Site conditions require solutions
We built a wood frame over portions of the roof that were not receiving the wood-fiber panels. The frame helped us get the roof flat and straight and it provided additional structure for new overhangs that would conceal the additional roof thickness. To get the overhangs straight and flat on this generally wonky roof, we used strings and shims to straighten the stock as we nailed it up, which took us a little longer than expected. With the battens and overhangs complete, we installed a layer of 1 ⁄ 2-in. plywood on top for the standing-seam roof.
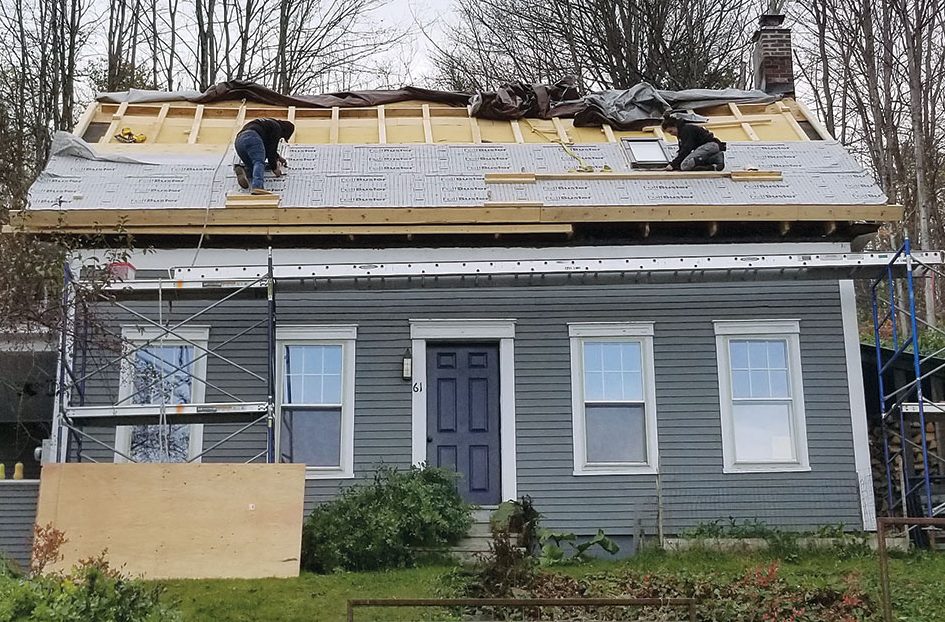
The clients were living in the house through the construction process, which went pretty well. We took care to make sure the tarps were well secured at the end of each day so they wouldn’t be rippling in the wind or allowing water into the building. Staging and access were also challenges on this steep, tight site. But perhaps the biggest challenge on a project like this is making sure the air barrier is continuous and secure. You usually only get one shot at doing this before it is covered and inaccessible. A continuous air barrier makes a huge difference for energy efficiency, occupant comfort, and building durability. Be thoughtful about the details and spend the time to get them right.
Don’t skimp on ventilation
At our company, balanced ventilation is part of every new-construction project and most retrofits. When we do a project like this, air leakage is brought low enough that ventilation is usually required. In the case of this house, good indoor-air quality was a priority. This house gets wet because of how it’s sited and its rubble-stone foundation. Work in the basement has lowered interior humidity levels, but the house has higher relative humidity than is good for indoor-air quality and building durability.
We installed an HRV (heat-recovery ventilator) as part of the project to reduce the moisture in the house and provide fresh air with efficient heat recovery. The clients have been monitoring the indoor-air quality, and it was exciting to see a measurable air-quality improvement. This was not an easy project, but it was rewarding to help a nice old house last at least another century and provide better comfort and safety for its occupants at the same time. In all, the work took a total of three months, but we managed to get the new standing-seam roof on by the end of November, just before this sort of job gets a lot harder in Vermont.
Mike Xenakis is a building-performance lead for New Frameworks in Burlington, Vt.
Photos by Kate Stephenson.
Drawings: George Retseck.
From Fine Homebuilding #312
RELATED STORIES


View Comments
I'm an architect and work on existing Cape-style homes regularly in the Northeast. I have also lived in one since 2005 that was built in 1935 in climate zone 5. I haven't experienced an ice dam yet on my home nor have I had a client that has mentioned an ice dam issue. I have the knee walls along the front of my home (facing north) but most of the homes that I see through work do not. Most have been built between 1920 and 1950. I'm going to be critical of the title of the article first. First, I'm not sure that Capes deserve to be singled out for ice dams based on my experience. It's often a roof-to-wall transition issue that can occur on any home. Second, that's a lot of work in the name of ice dams. This is clearly an envelope / indoor comfort / energy performance project and article. I'd like to see more comparing this solution to ice dams to other common solutions including a cost comparison. I'd also like to see a photo of the original home to see how much thicker the new assembly is compared to the original. Some of my clients purchased their Cape-style home for the scale and charm of the style and some may even live in a historic district. I can't imagine that the change in appearance with the thicker assembly would be acceptable in either of those scenarios. What I can appreciate most by the effort put into this project and article is that it communicates a big problem that we have with the performance of older homes and the exorbitant costs to implement meaningful retrofits. It's always good to see there are passionate professionals out there getting pretty creative to try and develop solutions.
I agree with your assessment and suggestions 100% I too live in a cape and have never had an ice dam in almost 30 years. And on capes where I've been called in to remedy ice dam problems - the solutions are usually much simpler (and cost effective) than going to the effort to remove the existing roofing / adding a continuous insulation layer with additional membranes and then trimming out the eaves, fascias and rakes to account for the greater roof thickness. While the upgrade profiled in this article has many benefits beyond solving an ice dam problem - they should be the focus and not the sidebar.