FHB Logo Facebook LinkedIn Email Pinterest Twitter X Instagram Tiktok YouTube Plus Icon Close Icon Navigation Search Icon Navigation Search Icon Arrow Down Icon Video Guide Icon Article Guide Icon Modal Close Icon Guide Search Icon Skip to content
Subscribe
Log In
  • How-To
  • Design
  • Tools & Materials
  • Restoration
  • Videos
  • Blogs
  • Forum
  • Magazine
  • Members
  • FHB House
  • Podcast
Log In
How-To

Dress Up a Ceiling With Reclaimed Beams

Old timbers get new life as a decorative element in a cottage renovation.

By Jim Wolffer Issue 313 - Feb/March 2023
  • X
  • facebook
  • linkedin
  • pinterest
  • email
  • add to favorites Log in or Sign up to save your favorite articles
Historical grid. Reclaimed beams installed on the great-room ceiling add warmth and historical character to this carriage-house remodel. Photo: Roe A. Osborne

Synopsis: To create historical character in this carriage-house remodel, decorative reclaimed beams were installed on the great-room ceiling. The heavy beams needed to be supported structurally, which involved anchoring the beams to the walls with nailing plates. In this article, custom builder Jim Wolffer describes the process of creating the mortises and tenons in the beams, lifting the “joists” and larger summer beams into place, and fastening the joists and beams to the walls and from the ceiling above.


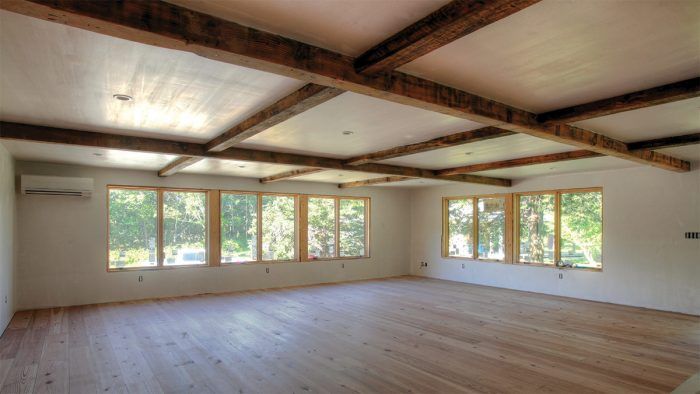
When this project of remodeling a 1200-sq.-ft. carriage house was still in the design phase, the homeowner invited the architect and myself to a lunch meeting. The restaurant was in a converted mill building from the 1760s with its original timber-frame structure and wide pine flooring. Surveying the interior of the building, the client said, “This is what I want the inside of the carriage house to feel like.”

The carriage house is a multifunctional structure with an large open living space. To create the historical character, we decided to install antique heart pine flooring and wood wainscot milled from reclaimed lumber. But the focal point of the cottage is a grid of reclaimed beams on the great-room ceiling.

A historical precedent

The history of reusing building materials goes back to colonial days. When buildings of that era outlived their original purpose, they were often dismantled and the timbers and building components salvaged and incorporated into new structures. Today as old buildings come to the end of their useful lives, there is a trend to dismantle them stick-by-stick and reuse the salvaged beams and timbers.

Introducing reclaimed building materials into contemporary projects is not only an eco-friendly approach, keeping materials out of the landfill—using reclaimed lumber can also provide a unique combination of history and character. The charm of a 150-year-old piece of wood can’t be replicated by a new piece of wood bought at a lumberyard today.

Finding reclaimed lumber

There are many mills around the country that specialize in reclaimed lumber. In this area I have been working with Nate ­Adams at ­Cataumet Sawmill in East Falmouth, Mass. Nate’s company purchases reclaimed materials from demolition companies that raze old buildings, and then processes those materials into usable timbers, beams, flooring, and interior millwork.

Nate worked with us on this project, poring through stacks of material to find the decorative, nonstructural beams we used in the photos shown here. First we chose a few 6×8 “summer beams” (the traditional name for heavy, supporting horizontal timbers) that would span the entire 27-ft. width of the great room. We also found a number of 4×6 beams at just under 10 ft. each to simulate joists. In the end, our careful planning and measuring paid off, and the installation of the beams went off without a hitch.

Prep the room

The carriage house has 2×6 wall framing and a truss roof, and the beams needed to attach to the underside of the ceiling or to the bottoms of the roof trusses. The summer beams weighed in at just over 200 lb. each, and the smaller joist beams at just under 50 lb. each. The roof-truss design was more than adequate to support the weight of the beams, but still I wanted the walls to take as much of the load as possible.

aligning ceiling beams on chalkline guides
Snap guide lines. Chalklines plot out the beam grid on the ceiling. The summer beams are laid out perpendicular to the roof trusses, and the joists run parallel.

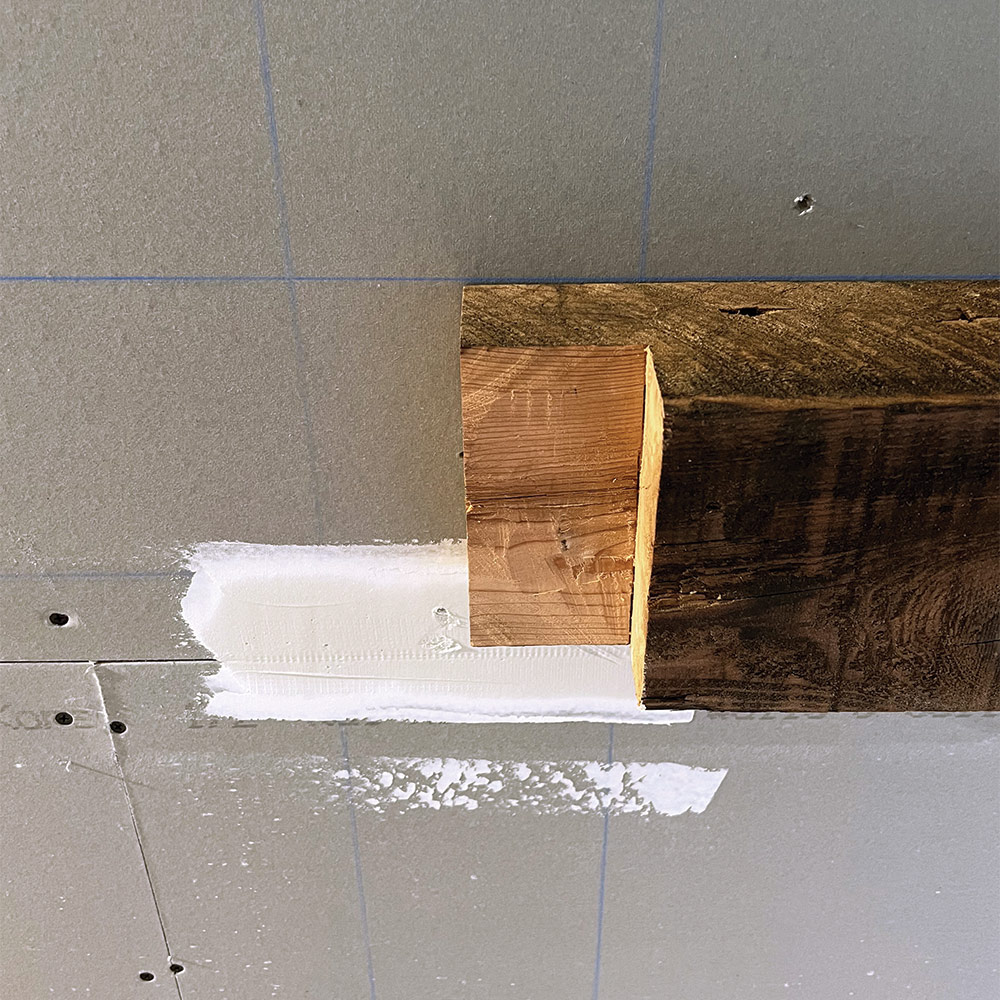
Before the installation began, I met with the crew to discuss and devise a process for installing the beams, and to stress the importance of avoiding mistakes with these unique and expensive pieces of reclaimed lumber. The first big decision was whether to install the beams before or after the blue board and plaster. After consulting with the plaster subcontractor, we opted to have him hang the ceiling and walls first. We then strategically removed sections of wallboard where the beams would attach to the wall’s double top plates. The plaster sub would come back in and skim-coat everything after the beams were installed.
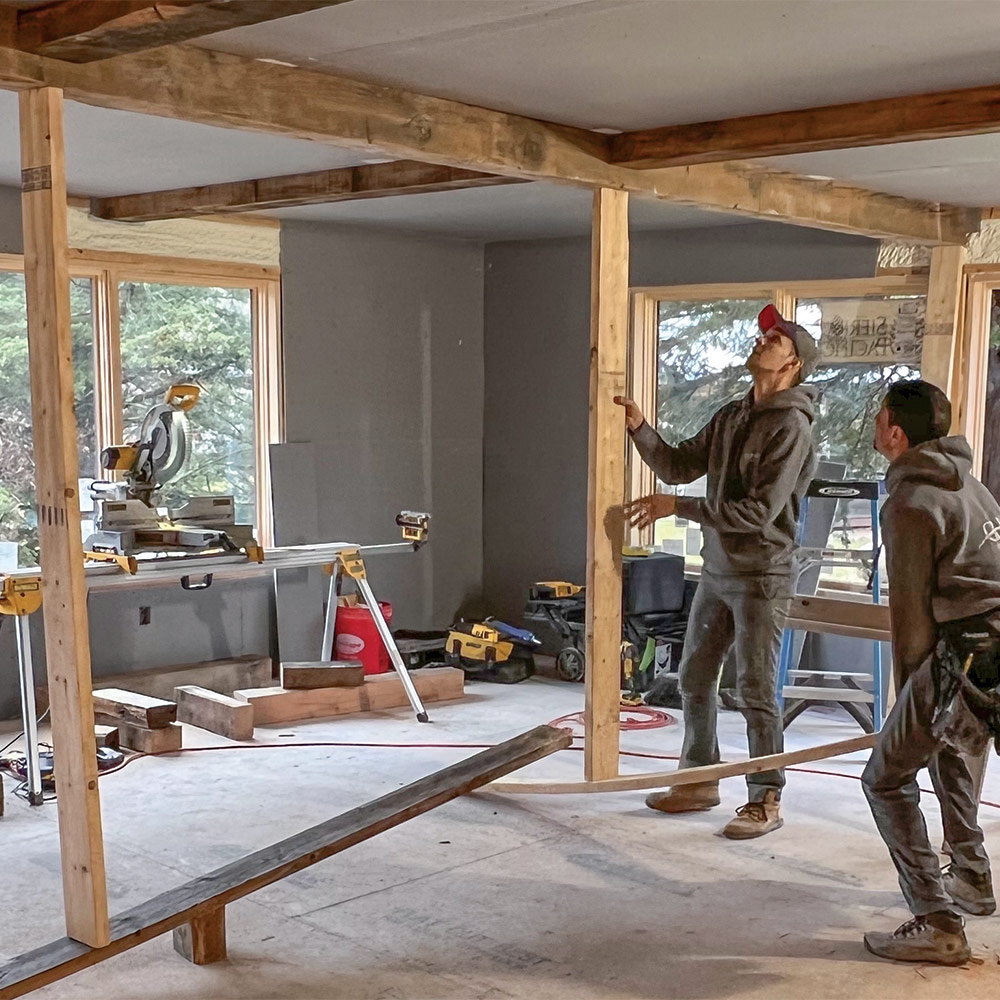
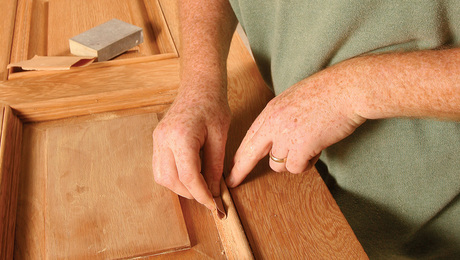
Simple joinery

cutting out shoulder of the tenon with hammer and chisel
Chop out the waste. The depth of the shoulder of the tenon is half the thickness of the joist stock. After the shoulder is cut with a circular saw, most of the waste is removed with a hammer and chisel.
oscillating multitool to clean out the corner
Clean out the corner. An oscillating multitool with a fine-toothed blade removes the last bit of waste, leaving a tenon that extends half the width of the summer beam.

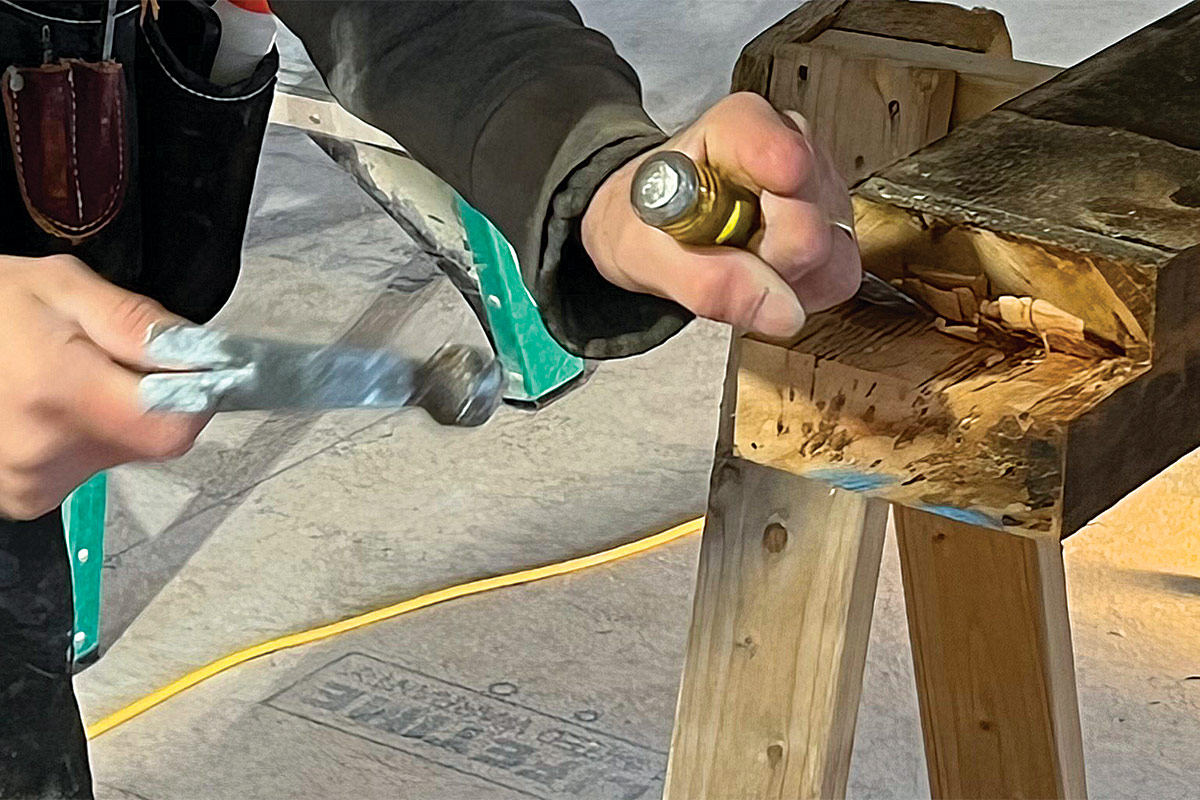
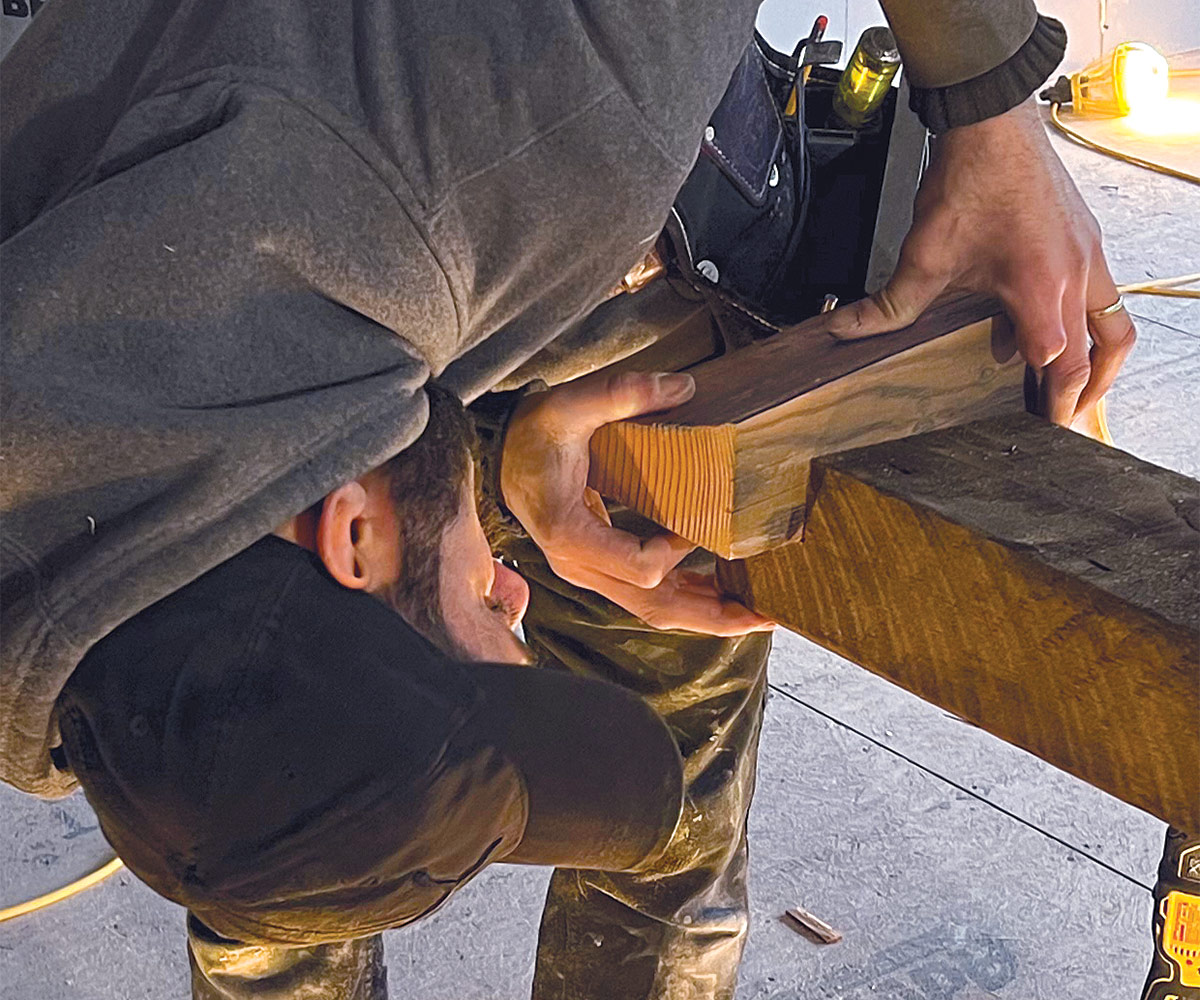
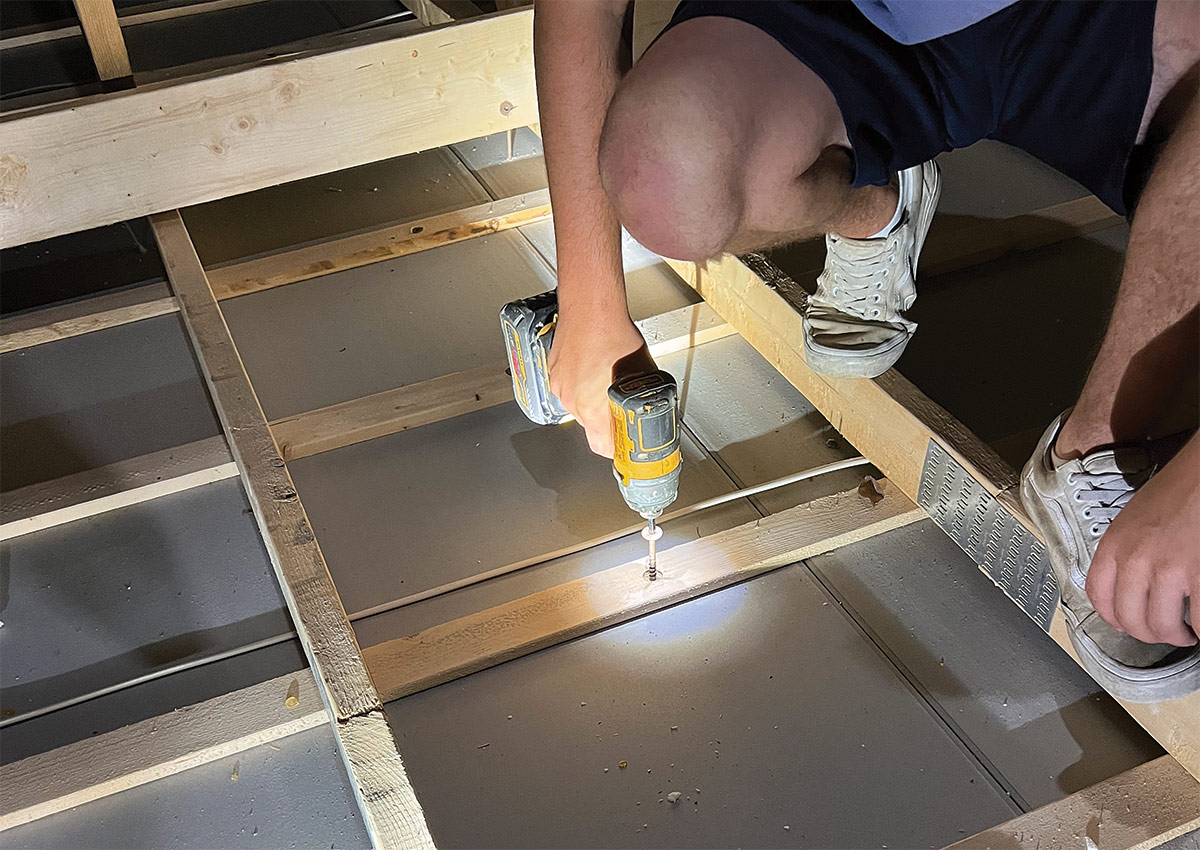
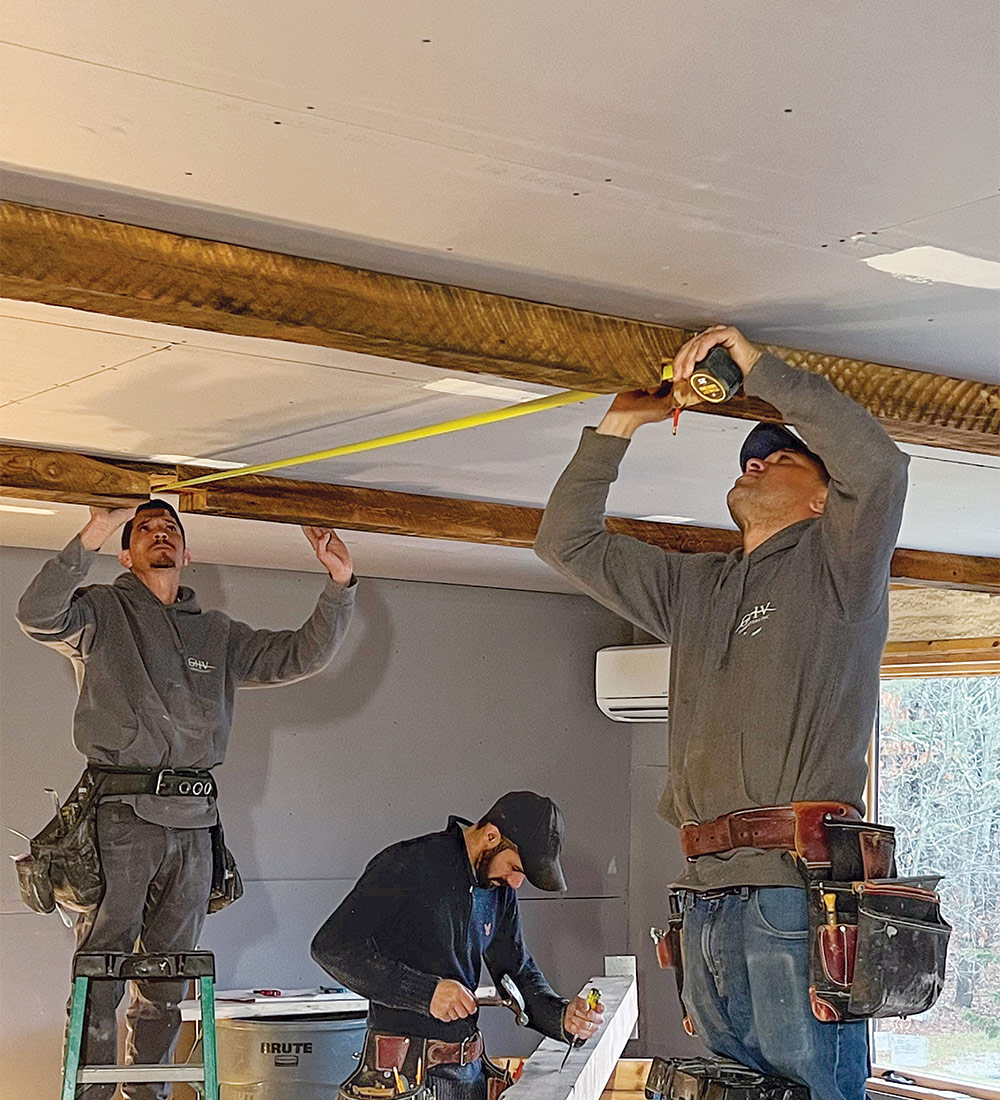
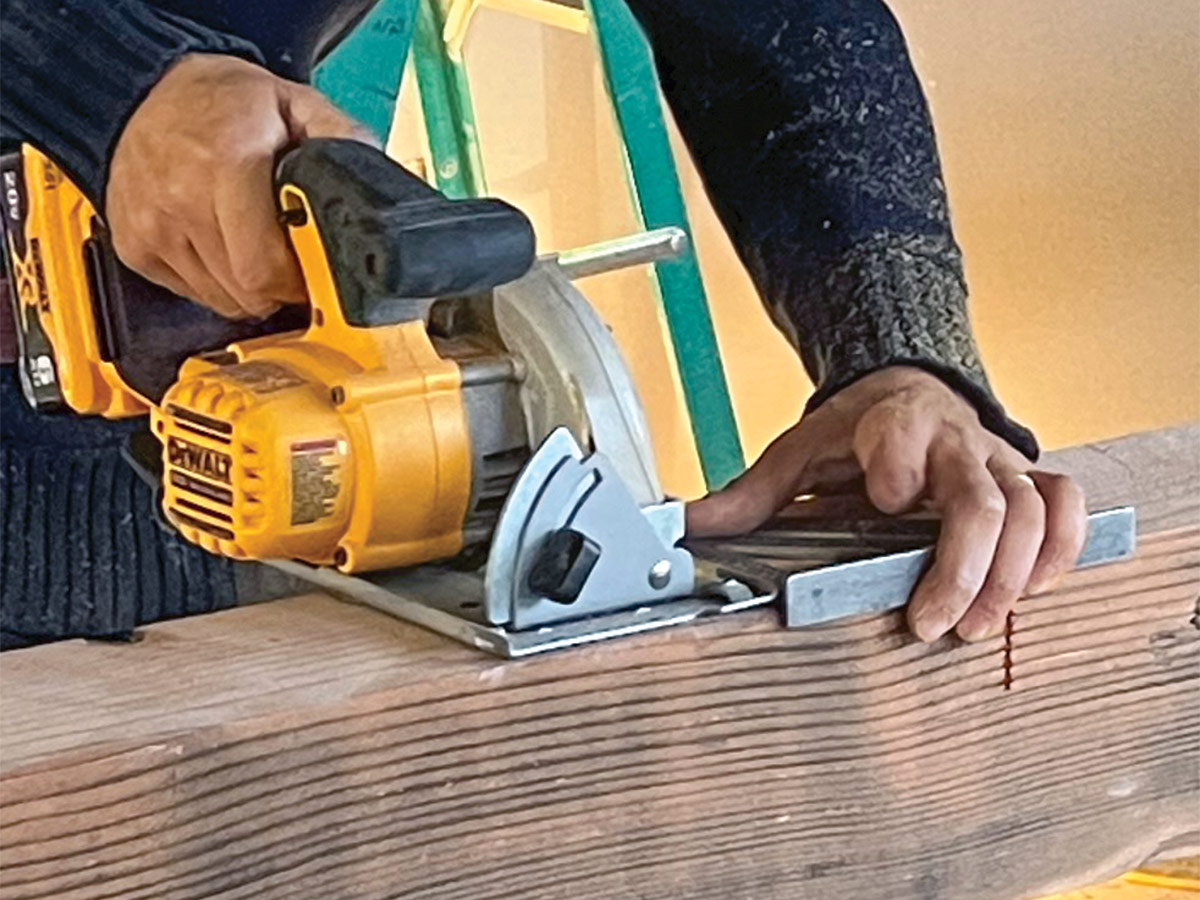
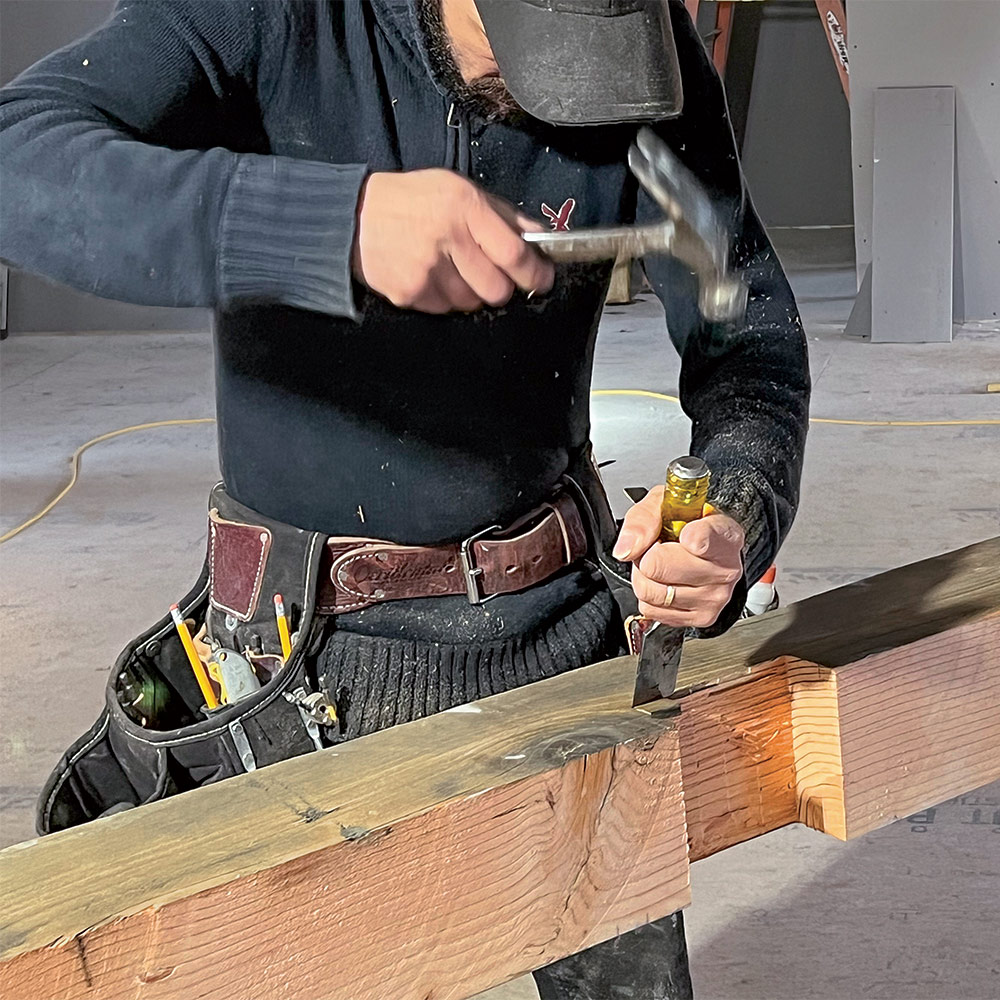
The process for installing the beams goes in the reverse order of typical framing, with the joists installed first and then the supporting summer beams. We measured directly off the lines on the ceiling, cutting the stock to length with a circular saw for each set of joists. With the exception of the first set of joists that begin at the wall, all the joists have half-lap tenons cut at both ends, which fit into mortises cut into the summer beams. Adjusting the tenon after the joists are installed is out of the question, so it’s important to test and refine the fit at this point.
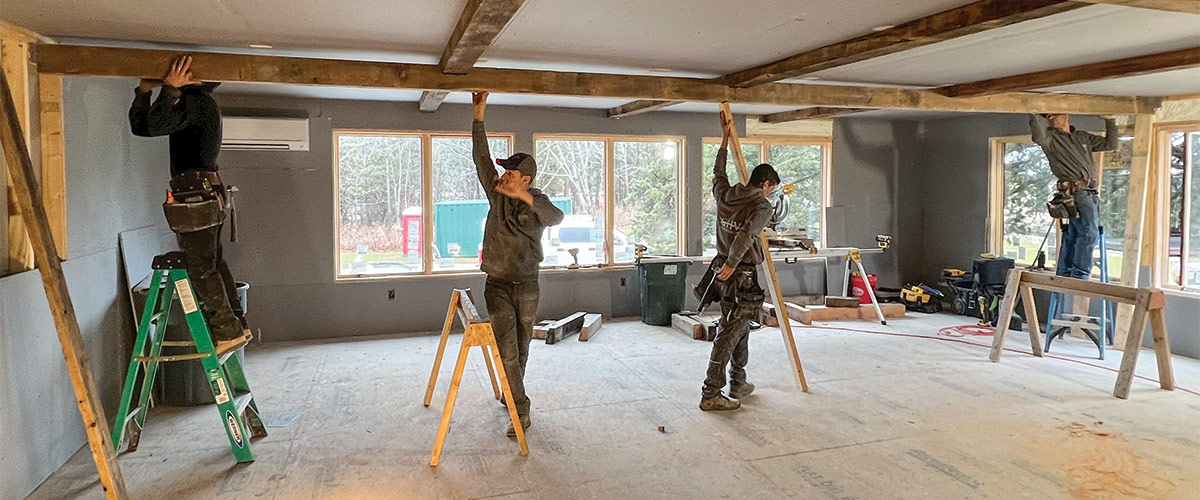
checking your beam joinery is square
Check for square. A beam cutoff placed against the shoulder of the tenon confirms that the tenon is cut perfectly square.

Secure the joists

attaching end of beams to wall
Anchoring beams to walls. The joists that terminate at the wall receive a 4-1/8-in. by 11-in. nailing plate, attached to the joists and then anchored to the double wall plates with 2-1/2-in. joist-hanger nails.

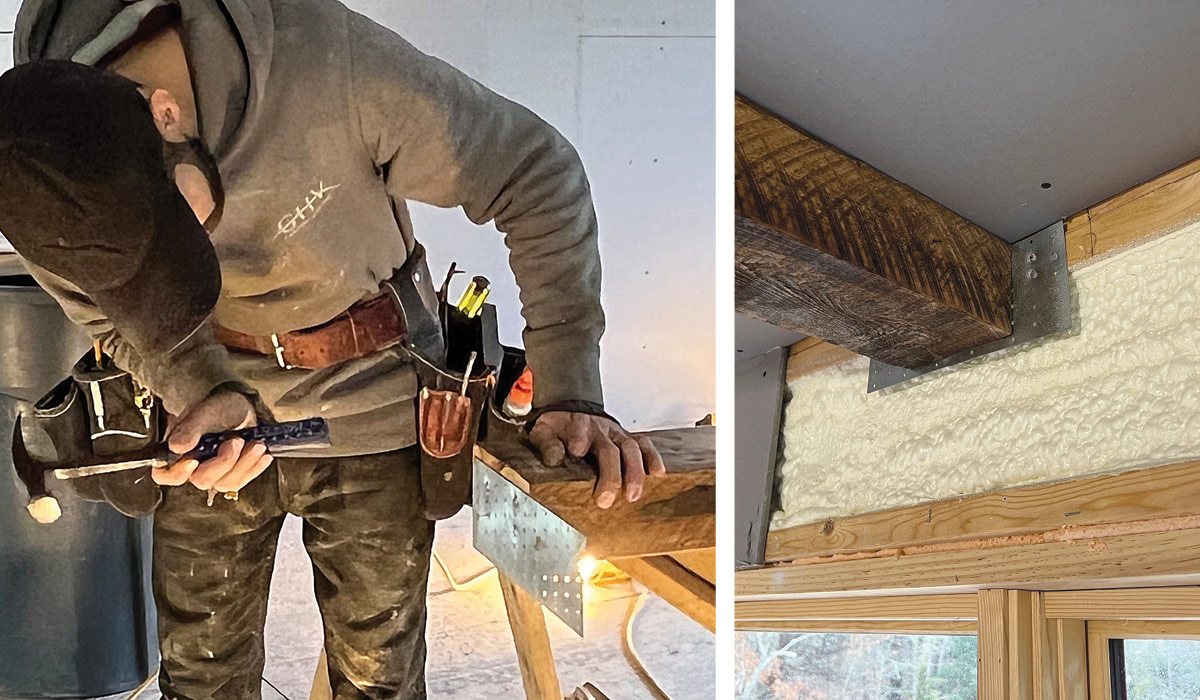
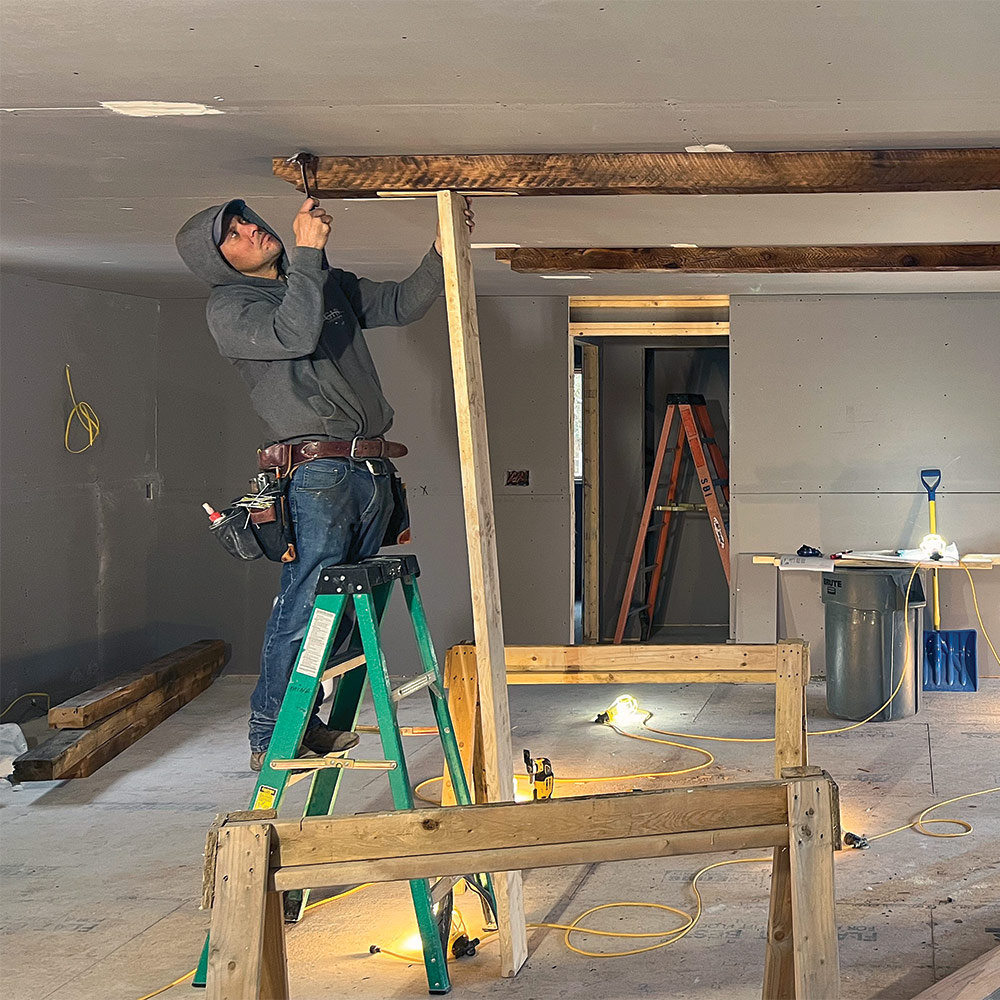
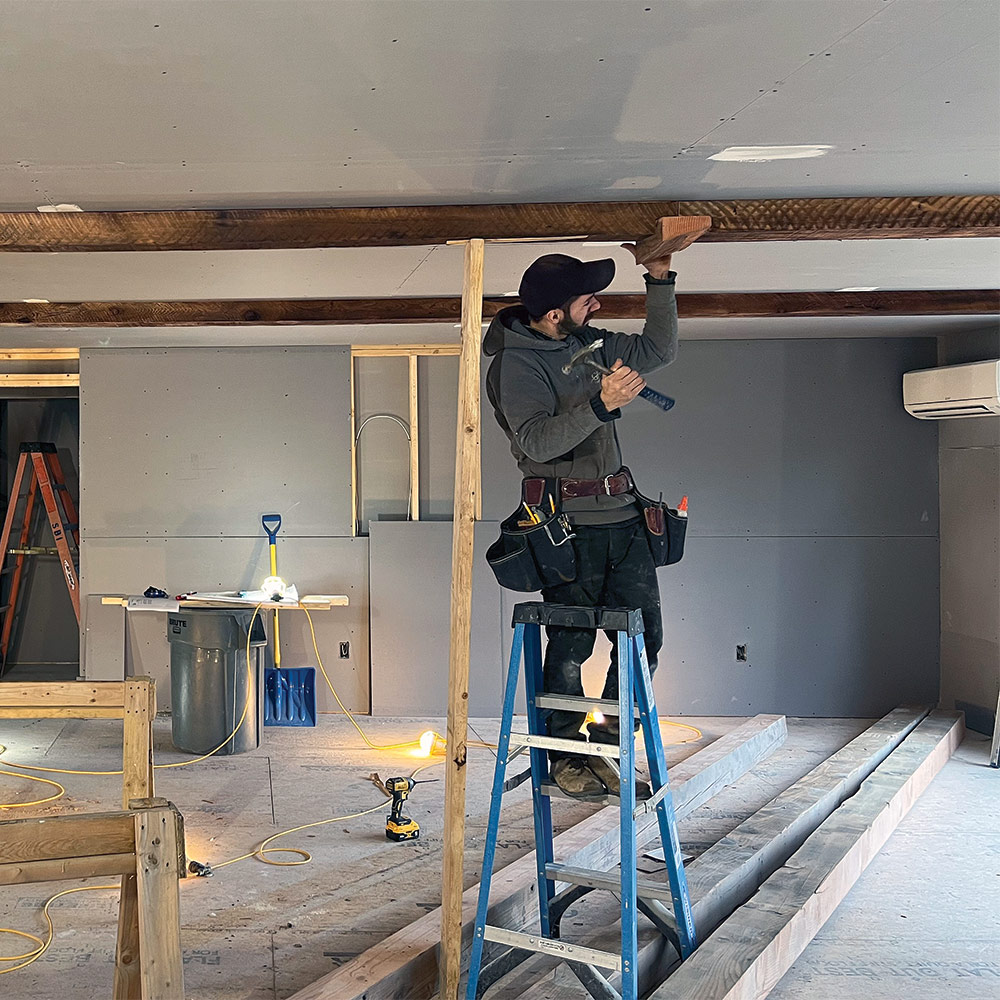
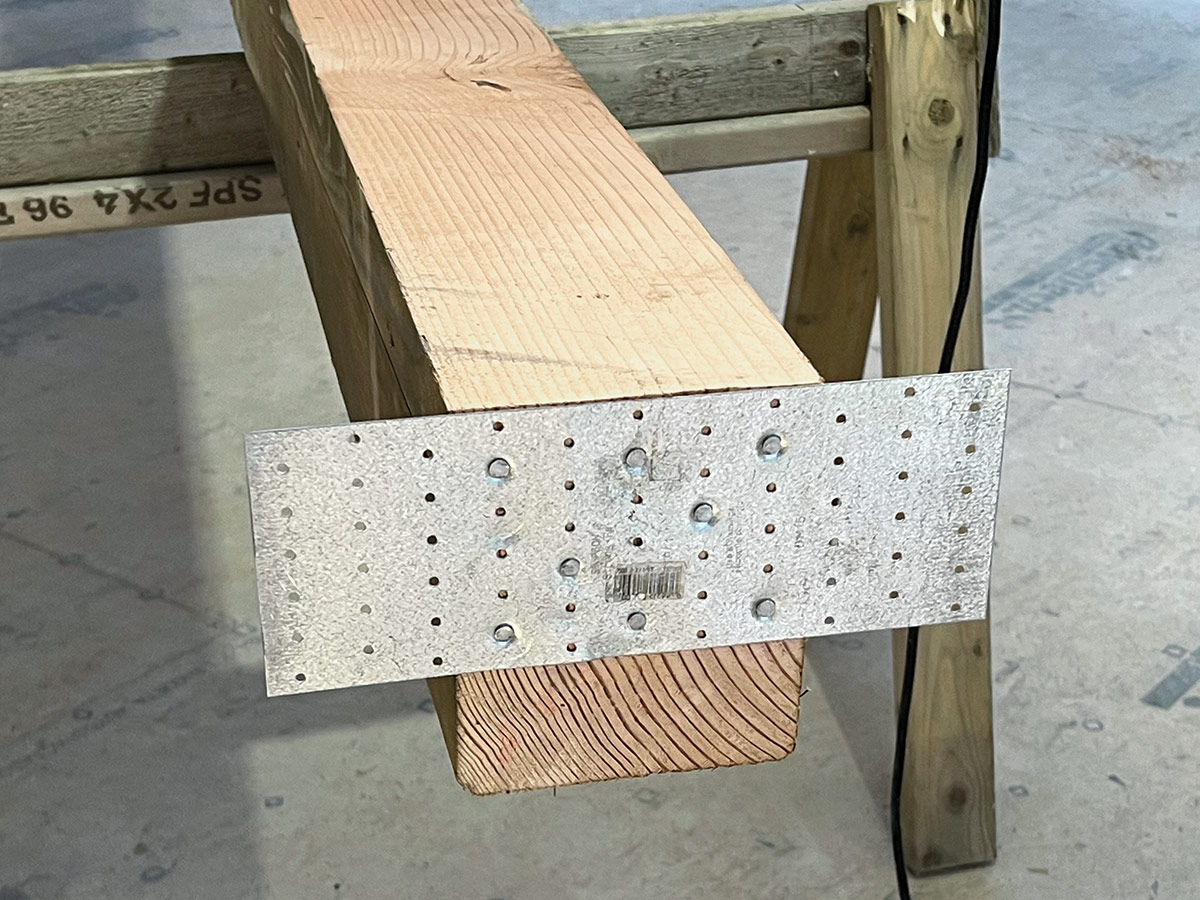
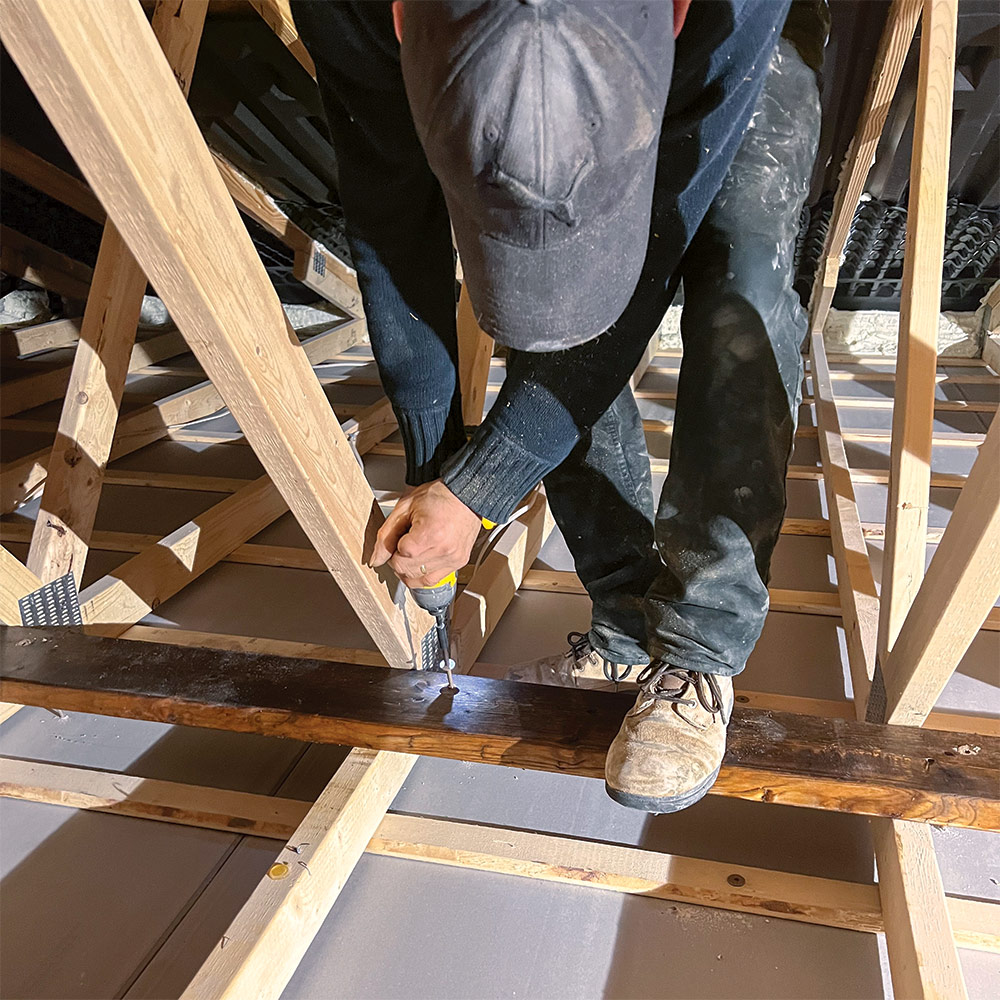
Originally we’d planned to frame pockets in the walls to support all the beams, but that would have taken a ton of extra work, and it would have caused a logistical nightmare—especially with the summer beams, whose lengths were the exact width of the room. To anchor the beams to the walls, we decided to use Simpson TP411 nailing plates attached to the ends of the beams. Before raising each joist, we drove a locator screw through the ceiling board centered in the field of the joist; then we positioned the joist against the ceiling and secured it from above. The process continued for all of the joists.

taping ceiling beam to align with chalkline guides
Tap to the line. With the joist wedged tight to the ceiling with 2x6s, the crew taps it over until it aligns perfectly with the chalklines.
checking fit of joinery on beams
Double-check the fit. For the joists with tenons cut into both ends, the crew inserts a piece of summer-beam stock between the tenon shoulders to ensure precise spacing.
fastening beams to the ceiling from above
Fasten from above. While the joists are wedged tight to the ceiling, a crew member up in the attic drives lag screws down through the ceiling strapping, through the ceiling board, and into the joists. To ensure that the screws are centered in each joist, he first finds the locator screw, measures over to the nearest truss, and transfers that measurement to the strapping along the length of the joist.

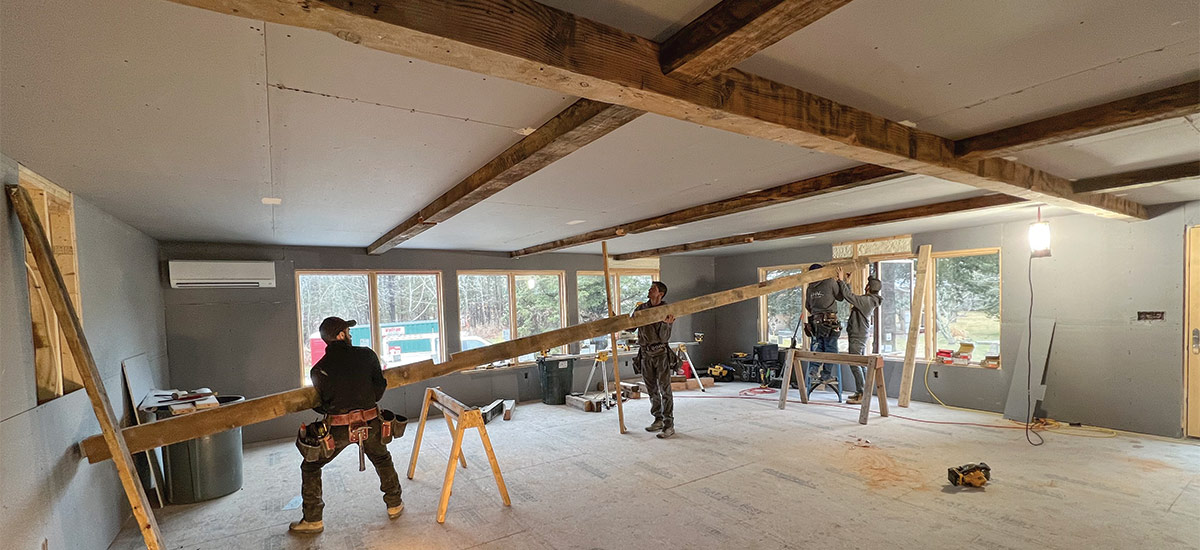
Lift and fit the big beams

Nail plate on end of beam
Nail plates for wall attachment. The summer beams terminate at the walls at both ends, so after cutting the beams to length, the crew attaches nailing plates to the ends of the beams to secure the beams to the wall framing.

The big summer beams are installed next, and each needed to be cut to its exact length to fit between the walls. Each beam also needed three half-lap mortises that fit into the spaces created by the joist tenons, so getting these measurements precise was extremely important—miscalculation would mean ruining an expensive, one-of-a-kind beam. With the mortises cut, the beams were lifted into position and braced in place. The beam mortises fully engage the spaces created by the half-lap tenons—we devised a lever system that closed these joints before the beams were anchored to the wall. With a beam tightly wedged to the ceiling, the crew again moved into the attic space to fasten them from above. First they placed 2×6 cleats across the bottom truss chords, then drove 10-in. screws through cleats and into the summer beams every 4 ft. A 2×6 strongback attached to the fastening plates stiffens the assembly and prevents the plates from deflecting.

measuring distance between joists
No room for error. The crew meticulously measures the distance from the walls to the joists and between the joists to ensure the summer beams will fit properly.
cutting mortises with circular saw
Square shoulders. Cutting the mortises begins with circular-saw cuts across the beam to the depth of the joist tenons. A rafter square guides the cut to ensure the shoulders of the mortise are perfectly square. Additional cuts between the shoulders help with waste removal.
using hammer and chisel to clean out mortise
Mortise cleanout. The beam is rotated onto its side and the waste is chiseled out from each side.
joist set in perfect mortise
Test the fit. A section of joist stock set in the mortise shows that it will fit perfectly.
listing up a ceiling beam
One end at a time. Each beam is positioned roughly below its ceiling placement, with one end raised to the ceiling at a time.
securing beam in place
Mortises meet tenons. With the beam roughly in position, the crew guides it up against the ceiling, engaging the mortises with the joist tenons. Temporary bracing is provided by 2×6 posts.
using level to fit beam tightly into place
Lever helps lift. After tacking a shorter 2×6 post to a lever board, the crew lifts the lever to fit the beam tight to the ceiling at each joint. A block slipped under the lever keeps the assembly steady.
attaching end of beam to the wall
Walls take a lot of the weight. Temporary posts hold the ends of the beams tight to the ceiling while the free ends of the nailing plates are attached to the wall framing.
attaching 2x6 cleat in attic to summer beam below
Attic attachment. After laying a 2×6 cleat on top of the truss chords, the crew drives 10-in. lag screws through the cleat, through the ceiling board, and into the summer beam, fastening it securely to the ceiling.
2x6 strongback board installed perpendicular to cleat
Add strength. To stiffen the assembly and keep the 2×6 cleat from deflecting, the crew lags in a 2×6 strongback board perpendicular to the cleat.

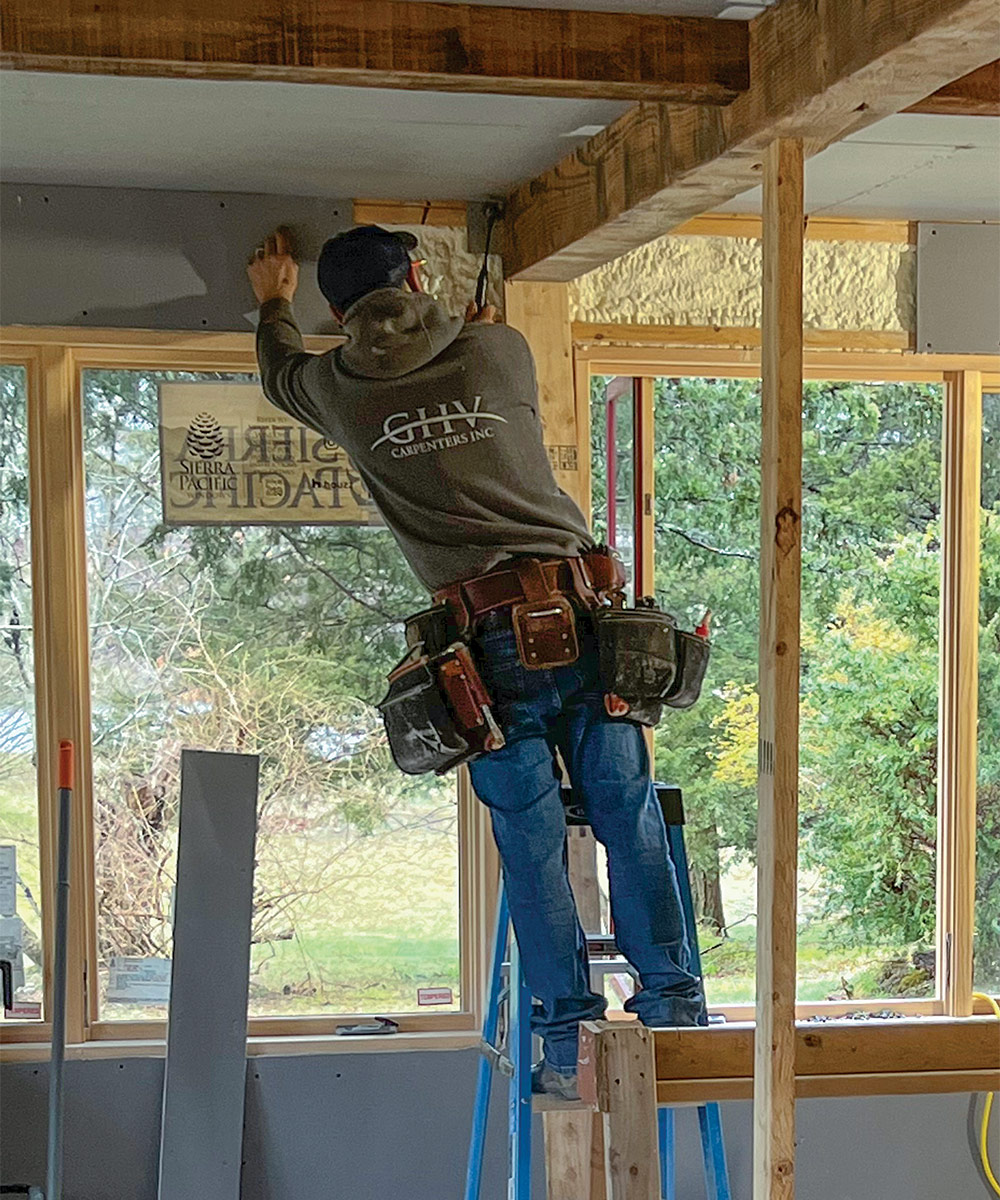
After all of the beams were in place, the crew reinstalled the blue board around the ends of the beam. The plaster subcontractors came back, taped off the beams, and skim-coated plaster on the walls and ceiling.


Jim Wolffer and his wife, Judith, own Shoreline Builders, Inc., a custom building and remodeling company based in Scituate, Mass. Photos by author, except where noted.

From Fine Homebuilding #313


RELATED STORIES

  • Hollow Reclaimed Pine
  • Celebrating Efficient Post-and-Beam Construction
  • Building Decorative Box Beams

Sign up for eletters today and get the latest how-to from Fine Homebuilding, plus special offers.

Signing you up...

This site is protected by reCAPTCHA and the Google Privacy Policy and Terms of Service apply.
See all newsletters
See all newsletters
×

Get home building tips, offers, and expert advice in your inbox

Signing you up...

This site is protected by reCAPTCHA and the Google Privacy Policy and Terms of Service apply.
See all newsletters
See all newsletters
View PDF

New Feature

Fine Homebuilding Forums

Ask questions, offer advice, and share your work

  • X
  • facebook
  • linkedin
  • pinterest
  • email
  • add to favorites Log in or Sign up to save your favorite articles

View Comments

  1. user-3233977 | Jan 16, 2023 01:03pm | #1

    Nice. Or use fake foam? Same look, a lot cheaper in time, material and installation!

Log in or create an account to post a comment.

Sign up Log in

Become a member and get full access to FineHomebuilding.com

Up Next

Video Shorts

Featured Story

The Trump Administration Wants to Eliminate the Energy Star Program

The end of this program will likely lead to higher energy bills and fewer business opportunities for the American people.

Featured Video

How to Install Cable Rail Around Wood-Post Corners

Use these tips to keep cables tight and straight for a professional-looking deck-railing job.

Related Stories

  • FHB Podcast Segment: Repairing an Old Home While Maintaining Its Integrity
  • Breathing New Life into Original Windows
  • Restoring Restmere
  • FHB Podcast Segment: A Cost-Effective Approach to Insulating and Air-Sealing Floor Trusses

Discussion Forum

Recent Posts and Replies

  • |
  • |
  • |
  • |
  • |
  • |
View More Create Post

Highlights

Fine Homebuilding All Access
Fine Homebuilding Podcast
Tool Tech
Plus, get an extra 20% off with code GIFT20

Video

View All Videos
  • FHB Podcast Segment: A Cost-Effective Approach to Insulating and Air-Sealing Floor Trusses
  • Podcast 503: Not Quite a Scrape-Off, Too Tight for Insulation, and Weather-Beaten Felt Paper
  • Taping Drywall Ceilings
  • Hang Drywall on the Ceiling the Right Way
View All

Restorations

View All Restorations Articles
  • Seven Ways to Remove Paint
  • Breathing New Life into Original Windows
  • Restoring Polychromed Light Fixtures
View All Restorations Articles

Fine Homebuilding Magazine

  • Issue 331 - June 2025
    • A More Resilient Roof
    • Tool Test: You Need a Drywall Sander
    • Ducted vs. Ductless Heat Pumps
  • Issue 330 - April/May 2025
    • Deck Details for Durability
    • FAQs on HPWHs
    • 10 Tips for a Long-Lasting Paint Job
  • Issue 329 - Feb/Mar 2025
    • Smart Foundation for a Small Addition
    • A Kominka Comes West
    • Making Small Kitchens Work
  • Issue 328 - Dec/Jan 2024
    • How a Pro Replaces Columns
    • Passive House 3.0
    • Tool Test: Compact Line Lasers
  • Issue 327 - November 2024
    • Repairing Damaged Walls and Ceilings
    • Plumbing Protection
    • Talking Shop

Fine Home Building

Newsletter Sign-up

  • Fine Homebuilding

    Home building tips, offers, and expert advice in your inbox.

  • Green Building Advisor

    Building science and energy efficiency advice, plus special offers, in your inbox.

  • Old House Journal

    Repair, renovation, and restoration tips, plus special offers, in your inbox.

Signing you up...

This site is protected by reCAPTCHA and the Google Privacy Policy and Terms of Service apply.
See all newsletters

Follow

  • Fine Homebuilding

    Dig into cutting-edge approaches and decades of proven solutions with total access to our experts and tradespeople.

    Start Free Trial Now
    • Facebook
    • Instagram
    • X
    • LinkedIn
  • GBA Prime

    Get instant access to the latest developments in green building, research, and reports from the field.

    Start Free Trial Now
    • Facebook
    • YouTube
  • Old House Journal

    Learn how to restore, repair, update, and decorate your home.

    Subscribe Now
    • Facebook
    • Instagram
    • X

Membership & Magazine

  • Online Archive
  • Start Free Trial
  • Magazine Subscription
  • Magazine Renewal
  • Gift a Subscription
  • Customer Support
  • Privacy Preferences
  • About
  • Contact
  • Advertise
  • Careers
  • Terms of Use
  • Site Map
  • Do not sell or share my information
  • Privacy Policy
  • Accessibility
  • California Privacy Rights

© 2025 Active Interest Media. All rights reserved.

Fine Homebuilding receives a commission for items purchased through links on this site, including Amazon Associates and other affiliate advertising programs.

  • Home Group
  • Antique Trader
  • Arts & Crafts Homes
  • Bank Note Reporter
  • Cabin Life
  • Cuisine at Home
  • Fine Gardening
  • Fine Woodworking
  • Green Building Advisor
  • Garden Gate
  • Horticulture
  • Keep Craft Alive
  • Log Home Living
  • Military Trader/Vehicles
  • Numismatic News
  • Numismaster
  • Old Cars Weekly
  • Old House Journal
  • Period Homes
  • Popular Woodworking
  • Script
  • ShopNotes
  • Sports Collectors Digest
  • Threads
  • Timber Home Living
  • Traditional Building
  • Woodsmith
  • World Coin News
  • Writer's Digest
Active Interest Media logo
X
X
This is a dialog window which overlays the main content of the page. The modal window is a 'site map' of the most critical areas of the site. Pressing the Escape (ESC) button will close the modal and bring you back to where you were on the page.

Main Menu

  • How-To
  • Design
  • Tools & Materials
  • Video
  • Blogs
  • Forum
  • Project Guides
  • Reader Projects
  • Magazine
  • Members
  • FHB House

Podcasts

  • FHB Podcast
  • ProTalk

Webinars

  • Upcoming and On-Demand

Podcasts

  • FHB Podcast
  • ProTalk

Webinars

  • Upcoming and On-Demand

Popular Topics

  • Kitchens
  • Business
  • Bedrooms
  • Roofs
  • Architecture and Design
  • Green Building
  • Decks
  • Framing
  • Safety
  • Remodeling
  • Bathrooms
  • Windows
  • Tilework
  • Ceilings
  • HVAC

Magazine

  • Current Issue
  • Past Issues
  • Magazine Index
  • Subscribe
  • Online Archive
  • Author Guidelines

All Access

  • Member Home
  • Start Free Trial
  • Gift Membership

Online Learning

  • Courses
  • Project Guides
  • Reader Projects
  • Podcast

More

  • FHB Ambassadors
  • FHB House
  • Customer Support

Account

  • Log In
  • Join

Newsletter

Get home building tips, offers, and expert advice in your inbox

Signing you up...

This site is protected by reCAPTCHA and the Google Privacy Policy and Terms of Service apply.
See all newsletters
See all newsletters

Follow

  • X
  • YouTube
  • instagram
  • facebook
  • pinterest
  • Tiktok

Join All Access

Become a member and get instant access to thousands of videos, how-tos, tool reviews, and design features.

Start Your Free Trial

Subscribe

FHB Magazine

Start your subscription today and save up to 70%

Subscribe

We hope you’ve enjoyed your free articles. To keep reading, become a member today.

Get complete site access to expert advice, how-to videos, Code Check, and more, plus the print magazine.

Start your FREE trial

Already a member? Log in

Privacy Policy Update

We use cookies, pixels, script and other tracking technologies to analyze and improve our service, to improve and personalize content, and for advertising to you. We also share information about your use of our site with third-party social media, advertising and analytics partners. You can view our Privacy Policy here and our Terms of Use here.

Cookies

Analytics

These cookies help us track site metrics to improve our sites and provide a better user experience.

Advertising/Social Media

These cookies are used to serve advertisements aligned with your interests.

Essential

These cookies are required to provide basic functions like page navigation and access to secure areas of the website.

Delete My Data

Delete all cookies and associated data