FHB Logo Facebook LinkedIn Email Pinterest Twitter X Instagram Tiktok YouTube Plus Icon Close Icon Navigation Search Icon Navigation Search Icon Arrow Down Icon Video Guide Icon Article Guide Icon Modal Close Icon Guide Search Icon Skip to content
Subscribe
Log In
  • How-To
  • Design
  • Tools & Materials
  • Restoration
  • Videos
  • Blogs
  • Forum
  • Magazine
  • Members
  • FHB House
  • Podcast
Log In
How-To

Exterior PVC Trim: Weathertight Outside Corner

Lead carpenter Dan Booth details how to measure, fit, and glue up PVC trimboards for outside corners.

By Dan Booth

Sponsored by VERSATEX

  • X
  • facebook
  • linkedin
  • pinterest
  • email
  • add to favorites Log in or Sign up to save your favorite articles
Video Player is loading.
Current Time 0:00
/
Duration 0:00
Loaded: 0%
Stream Type LIVE
Remaining Time -0:00
 
1x
    • Chapters
    • descriptions off, selected
    • captions settings, opens captions settings dialog
    • captions off, selected

      This is a modal window.

      Beginning of dialog window. Escape will cancel and close the window.

      Text
      Background
      Window
      Font Size
      Text Edge Style
      Font Family

      End of dialog window.

      This is a modal window. This modal can be closed by pressing the Escape key or activating the close button.

      This is a modal window. This modal can be closed by pressing the Escape key or activating the close button.

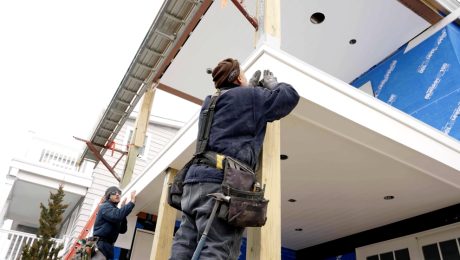
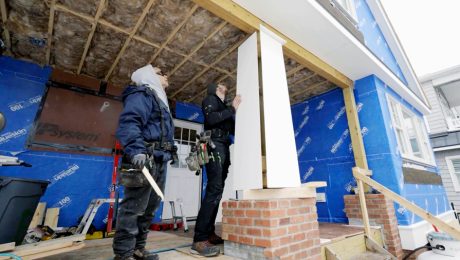
      On this restoration, the entryway recedes into the building, creating an outside corner to either side. With such a close-up view, crafting a weathertight outside corner with a joint that won’t open is especially important. This can be a challenge when restoring an old building, since things aren’t always plumb and square, forcing a fair amount of cutting and fitting prior to any glue.

      In this video, lead carpenter Dan Booth walks us through the process of measuring and fitting VERSATEX PVC trimboards before using the “tape method” to glue up weathertight outside corners.

      Here’s the Transcript:

      Today we’re in the Annapolis Valley in Nova Scotia, Canada, which is where I live. Behind me is a building that used to be a general store; however, I’m bringing it back to life for my own residential use. We’ve just finished our first outside corner here. As you can see, we’ve carried our top line across all of our windows. This is our benchmark that we’re working off. I’ve also kept a 1/8-in. reveal between the window and the trim for sealant, and then we’re going to cap this off with a historic sill that’s going to run the perimeter of the bottom of the windows. Before we get started installing any trim, I want to let you know what we’ve got going on here.

      We’ve got our housewrap, that’s our WRB, and we’ve flashed all of our windows prior to installing our 1×4 strapping that’s going to act as a rainscreen. I packed these corners out solid so that we ensure we have solid backing in behind our trim. Next up, we’re going to do the other outside corner behind me, and I’m going to walk you through how I got this outside corner so tight so that it doesn’t open up. This is super important because not only do we deal with warm sunny days, but we also deal with some extreme harsh cold conditions. Let’s get going.

      When you’re dealing with a corner that has a taper on it, due to this corner not being plumb, I take my measurements at my top and my bottom. This piece of trim is going to end at the bottom of the window for a sill to wrap around. I just take my measurement here and at the top and then I lay that out on my piece, line it up with my track saw, and make the cut.

      When dealing with irregular outside corner angles, I overcut it by half a degree. This ensures that I’m going to have contact on this leading edge, which is going to be the most exposed, maintaining that weatherproof joint. I want to make sure I’m maintaining my 1/8-in. gap along the window and the trim. Here I have to make a minor adjustment and recut this top so that I get a nice tight fit here. As you can see, this joint is a little open on this end and I’m tight here. The main thing is just to ensure that you get your pieces fitting correctly. I always like to leave my piece long. That way I can make a couple of adjustments without sacrificing the piece potentially. That looks great to me, so we can mark it and cut it to length. Here I’m just marking the bottom. I want to make sure I leave my pencil mark there so I can maintain our 1/8-in. gap below our window.

      Now that I’m happy with the fit of this piece, sometimes it can get confusing, which is the top and the bottom of the piece, especially when you’re dealing with pieces that are tapered. I’m just going to mark my left side and mark my top and my bottom. That way when I glue it up, I know it’s the right direction. We lucked out here. This piece is consistent with the entire length of the piece. I’m just going to repeat the same process as the other side, ensuring that I have a nice tight fit across the top, which it looks like I do already. That means I can just mark the bottom and cut this piece to length. Now that I’m happy with how this is fitting, I can take it over to our assembly table, glue it up, and install it.

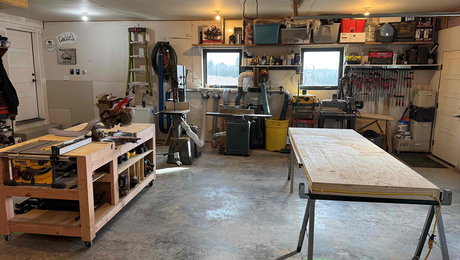
      Anytime you’re getting ready to do any sort of glue up or assembly, it’s nice to have a good clean workspace, making sure that none of that ends up in my glue joint. This is when labeling your pieces is very important. As you can see here, I’ve got my left piece on my left side. This just ensures when you go to glue it up, you’re not going to have any issues when you go to install. I’m just lining up the ends of my piece before I start taping this off. This is going to ensure when I glue it that everything is where it needs to be. Once I’ve got these lined up, I just place a couple of pieces along the joint to start ensuring that these are lining up together. I can bring them together if there’s a small gap and work my way to the end of the piece.

      This is another benefit to this protective film on VERSATEX. It not only ensures that you’re going to get good contact on your tape, but it makes sure that if there was any residue from this tape, it’s going to come off on the film and not be stuck to your finished piece. Now that I’ve got these small pieces holding it in place, I’m going to come back over top with a full strip from top to bottom. This is just going to hold my miter or my corner exactly where I need it to be when I go to do the glue-up. It’s important to be careful when you’re flipping these not to have the tape pull away, and you can just double-check that you’ve got a nice consistent gap between your two pieces and then you’re ready for glue. Here we’re just using a PVC glue, and this is a glue that’s recommended by VERSATEX for this application. You want to make sure you have a good even coverage, so I like to come back with a paintbrush and make sure I’m just getting all the edges.

      I’m going to start with the back end of our joint, and then I’m going to work my way toward the tip. You can reapply glue as needed. This is definitely a place you do not want to skimp out on. We’re going to be relying solely on this glue to maintain our weathertight joint throughout the seasonal changes. So ensuring you have adequate glue coverage here is key. I’m just going to come back and do one last pass to make sure I’ve got adequate glue on this joint. You want to make sure you get glue right out to the tip of this—the long point of this miter—as that’s what you’re going to see when this is installed. Once you’re happy with the glue coverage, you can start to clamp this together using tape. I’m just going to start a few pieces on the backside here. Now once I’ve got my tape in place, I’m going to fold this up and close this joint.

      You want to ensure that when you rip your tape, you’ve got enough material that you can reach across these two pieces to hold them in place. You’ve got a little bit of time to finesse this joint and move it where you want it to be before the glue starts to set up. Now I’m just checking on the backside and making sure that I’m getting this—the backside of my miter—as tight as I can and that I don’t have one piece above or below the other. Now if I do, like you can see here at the end, the piece that’s closer to me is just a little bit lower than the piece that’s resting on the table. All I’m going to do is use a little CA glue in the backside of this joint. Then I’m going to hit it with the activator and hold my two pieces exactly where I want them to be. This sets up in about 10 or 15 seconds, and that’ll hold it in place until the PVC glue dries.

      Another thing I like to do is just periodically put a little bit more CA glue on the back of this joint and hit it with the activator. This is just going to keep the pieces in place until the PVC glue sets up. Now that we’ve waited 30 minutes for the glue to set up, we can take our tape off and see how we did. Now that the glue is set up, this should be a very strong bond, so we don’t have to be too gentle with it. But if you’re going to handle it any earlier than 30 minutes after applying the glue, definitely handle it with some care. Now here’s where you want to be a little careful just taking the tape off. One of the great benefits to having this tape run down the seam is that it helps reduce the amount of squeeze out from the glue. And again, the VERSATEX protective film protects the piece from getting any extra glue on the surface of the workpiece. It looks like we’ve got a great, nice weathertight joint and that everything went well.

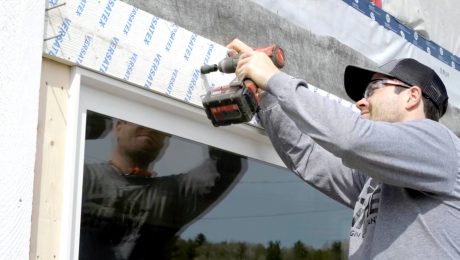
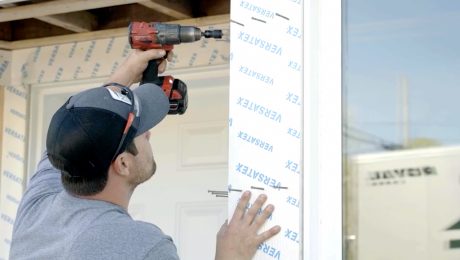
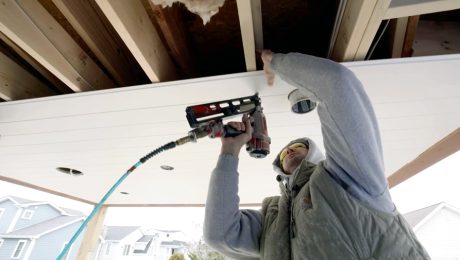
      Now I’m just going to take it over and test-fit our piece. Before installing the fasteners. I like to get the screws started so that way when I put the board up in place, I can just send the screws right in. The next step is I’m going to apply some PVC glue on the top edge of the piece here. This is going to help it bond to our header piece above. You want to only apply the glue to one piece, not both pieces like you might think. Rather than being a traditional glue, this chemically bonds the two pieces of PVC together. In order to maintain the 1/8-in. gap between window and trim, I can manipulate the corner board with the screws. If I need to get my board closer to this window on my left side, I simply screw one of the screws on my right board. The same goes for the other direction.

      I’m checking to see which side has a larger gap. Since I have a larger gap on this side, I’m going to install one of these screws on the left-hand side. This is going to draw my piece over tighter to my window, closing this gap ever so slightly.


      RELATED STORIES

      • Exterior PVC Trim: Joining Long Runs
      • Exterior PVC Trim: Historical Window Sill
      • How to Install Wood Corner Boards

      Sign up for eletters today and get the latest how-to from Fine Homebuilding, plus special offers.

      Signing you up...

      This site is protected by reCAPTCHA and the Google Privacy Policy and Terms of Service apply.
      See all newsletters
      See all newsletters
      ×

      Get home building tips, offers, and expert advice in your inbox

      Signing you up...

      This site is protected by reCAPTCHA and the Google Privacy Policy and Terms of Service apply.
      See all newsletters
      See all newsletters

      Videos in the Series

      • Exterior PVC Trim: Joining Long Runs

        Lead carpenter Dan Booth demonstrates his favored approach for installing and joining an extended section of PVC trim using shiplap joints.

      • Exterior PVC Trim: Weathertight Outside Corner

        Lead carpenter Dan Booth details how to measure, fit, and glue up PVC trimboards for outside corners.

      • Exterior PVC Trim: Historical PVC Window Sill

        Dan Booth demonstrates how to properly cut, fit, and install a PVC sill to stay true to the nature of this renovation project.

      New Feature

      Fine Homebuilding Forums

      Ask questions, offer advice, and share your work

      • X
      • facebook
      • linkedin
      • pinterest
      • email
      • add to favorites Log in or Sign up to save your favorite articles

      About This Video Series

      Lead carpenter Dan Booth has been renovating an old general store outbuilding that sits on the back of his property located in Nova Scotia, Canada. The project has centered around upgrading the space with modern materials for a low maintenance, good looking exterior. Part of these upgrades includes a new trim package. Because Nova Scotia is an area with a variety of extreme weather and is located on the coast experiencing low to high temperatures,… More about this Video Series

      Log in or create an account to post a comment.

      Sign up Log in

      Become a member and get full access to FineHomebuilding.com

      Up Next

      Video Shorts

      Featured Story

      Podcast Episode 685: Patching Drywall, Adding Air Barriers, and Rotted Walls

      Listeners write in about running a profitable contracting business and ask questions about patching drywall, adding air barriers, and fixing a patio poured against the house.

      Featured Video

      Micro-Adjust Deck-Baluster Spacing for an Eye-Deceiving Layout

      No math, no measuring—just a simple jig made from an elastic band is all you need to lay out a good-looking deck railing.

      Related Stories

      • Shim Trim With Screws
      • Template for Bullnose Base Corners
      • Simple Miter Measurements
      • Conceal Cut Ends

      Discussion Forum

      Recent Posts and Replies

      • |
      • |
      • |
      • |
      • |
      • |
      View More Create Post

      Highlights

      Fine Homebuilding All Access
      Fine Homebuilding Podcast
      Tool Tech
      Plus, get an extra 20% off with code GIFT20

      "I have learned so much thanks to the searchable articles on the FHB website. I can confidently say that I expect to be a life-long subscriber." - M.K.

      Get home building tips, offers, and expert advice in your inbox

      Signing you up...

      This site is protected by reCAPTCHA and the Google Privacy Policy and Terms of Service apply.
      See all newsletters
      See all newsletters

      Video

      View All Videos
      • Wrapping PVC Box Beams
      • Installing a PVC Porch Ceiling
      • Creating and Installing PVC Tapered Columns
      • Exterior PVC Trim: Joining Long Runs
      View All

      Trimwork

      View All Trimwork Articles
      • Shim Trim With Screws
      • Template for Bullnose Base Corners
      • Simple Miter Measurements
      View All Trimwork Articles

      Fine Homebuilding Magazine

      • Issue 331 - June 2025
        • A More Resilient Roof
        • Tool Test: You Need a Drywall Sander
        • Ducted vs. Ductless Heat Pumps
      • Issue 330 - April/May 2025
        • Deck Details for Durability
        • FAQs on HPWHs
        • 10 Tips for a Long-Lasting Paint Job
      • Issue 329 - Feb/Mar 2025
        • Smart Foundation for a Small Addition
        • A Kominka Comes West
        • Making Small Kitchens Work
      • Issue 328 - Dec/Jan 2024
        • How a Pro Replaces Columns
        • Passive House 3.0
        • Tool Test: Compact Line Lasers
      • Issue 327 - November 2024
        • Repairing Damaged Walls and Ceilings
        • Plumbing Protection
        • Talking Shop

      Fine Home Building

      Newsletter Sign-up

      • Fine Homebuilding

        Home building tips, offers, and expert advice in your inbox.

      • Green Building Advisor

        Building science and energy efficiency advice, plus special offers, in your inbox.

      • Old House Journal

        Repair, renovation, and restoration tips, plus special offers, in your inbox.

      Signing you up...

      This site is protected by reCAPTCHA and the Google Privacy Policy and Terms of Service apply.
      See all newsletters

      Follow

      • Fine Homebuilding

        Dig into cutting-edge approaches and decades of proven solutions with total access to our experts and tradespeople.

        Start Free Trial Now
        • Facebook
        • Instagram
        • X
        • LinkedIn
      • GBA Prime

        Get instant access to the latest developments in green building, research, and reports from the field.

        Start Free Trial Now
        • Facebook
        • YouTube
      • Old House Journal

        Learn how to restore, repair, update, and decorate your home.

        Subscribe Now
        • Facebook
        • Instagram
        • X

      Membership & Magazine

      • Online Archive
      • Start Free Trial
      • Magazine Subscription
      • Magazine Renewal
      • Gift a Subscription
      • Customer Support
      • Privacy Preferences
      • About
      • Contact
      • Advertise
      • Careers
      • Terms of Use
      • Site Map
      • Do not sell or share my information
      • Privacy Policy
      • Accessibility
      • California Privacy Rights

      © 2025 Active Interest Media. All rights reserved.

      Fine Homebuilding receives a commission for items purchased through links on this site, including Amazon Associates and other affiliate advertising programs.

      • Home Group
      • Antique Trader
      • Arts & Crafts Homes
      • Bank Note Reporter
      • Cabin Life
      • Cuisine at Home
      • Fine Gardening
      • Fine Woodworking
      • Green Building Advisor
      • Garden Gate
      • Horticulture
      • Keep Craft Alive
      • Log Home Living
      • Military Trader/Vehicles
      • Numismatic News
      • Numismaster
      • Old Cars Weekly
      • Old House Journal
      • Period Homes
      • Popular Woodworking
      • Script
      • ShopNotes
      • Sports Collectors Digest
      • Threads
      • Timber Home Living
      • Traditional Building
      • Woodsmith
      • World Coin News
      • Writer's Digest
      Active Interest Media logo
      X
      X
      This is a dialog window which overlays the main content of the page. The modal window is a 'site map' of the most critical areas of the site. Pressing the Escape (ESC) button will close the modal and bring you back to where you were on the page.

      Main Menu

      • How-To
      • Design
      • Tools & Materials
      • Video
      • Blogs
      • Forum
      • Project Guides
      • Reader Projects
      • Magazine
      • Members
      • FHB House

      Podcasts

      • FHB Podcast
      • ProTalk

      Webinars

      • Upcoming and On-Demand

      Podcasts

      • FHB Podcast
      • ProTalk

      Webinars

      • Upcoming and On-Demand

      Popular Topics

      • Kitchens
      • Business
      • Bedrooms
      • Roofs
      • Architecture and Design
      • Green Building
      • Decks
      • Framing
      • Safety
      • Remodeling
      • Bathrooms
      • Windows
      • Tilework
      • Ceilings
      • HVAC

      Magazine

      • Current Issue
      • Past Issues
      • Magazine Index
      • Subscribe
      • Online Archive
      • Author Guidelines

      All Access

      • Member Home
      • Start Free Trial
      • Gift Membership

      Online Learning

      • Courses
      • Project Guides
      • Reader Projects
      • Podcast

      More

      • FHB Ambassadors
      • FHB House
      • Customer Support

      Account

      • Log In
      • Join

      Newsletter

      Get home building tips, offers, and expert advice in your inbox

      Signing you up...

      This site is protected by reCAPTCHA and the Google Privacy Policy and Terms of Service apply.
      See all newsletters
      See all newsletters

      Follow

      • X
      • YouTube
      • instagram
      • facebook
      • pinterest
      • Tiktok

      Join All Access

      Become a member and get instant access to thousands of videos, how-tos, tool reviews, and design features.

      Start Your Free Trial

      Subscribe

      FHB Magazine

      Start your subscription today and save up to 70%

      Subscribe

      Enjoy unlimited access to Fine Homebuilding. Join Now

      Already a member? Log in

      We hope you’ve enjoyed your free articles. To keep reading, become a member today.

      Get complete site access to expert advice, how-to videos, Code Check, and more, plus the print magazine.

      Start your FREE trial

      Already a member? Log in

      Privacy Policy Update

      We use cookies, pixels, script and other tracking technologies to analyze and improve our service, to improve and personalize content, and for advertising to you. We also share information about your use of our site with third-party social media, advertising and analytics partners. You can view our Privacy Policy here and our Terms of Use here.

      Cookies

      Analytics

      These cookies help us track site metrics to improve our sites and provide a better user experience.

      Advertising/Social Media

      These cookies are used to serve advertisements aligned with your interests.

      Essential

      These cookies are required to provide basic functions like page navigation and access to secure areas of the website.

      Delete My Data

      Delete all cookies and associated data