
How to Install a New Door Jamb in an Old Doorway
Preinstall the trim and get the flashing details right to create a long-lasting, welcoming entrance to your home.
Synopsis: The entry door on your house welcomes guests and faces the world. When installed properly, it should last a long time. Builder Emanuel Silva describes his technique for installing an entry door so that it will last a long time and avoid rot. Silva begins by building the door’s trim on the worktable, which gives him more control over the trim assembly. Next, he flashes the rough opening, a line of defense against water infiltration and decay. After preparing the door for installation, he hangs it, making sure to finish by adding a bit of spray-foam insulation between the door frame and the rough opening.
I’ve replaced dozens of rotten entry doors in my time as a carpenter. Unfortunately, most of those rotten doors never had a chance in the first place. In my opinion, the single largest cause of failing doors is improper installation and flashing.
Installing a door so that it’s airtight and sheds water is imperative. Over the years, I’ve adopted a system that makes door installation easier, more accurate, and extremely weathertight. On this particular project, rot was less of an issue than aesthetics. The homeowners simply wanted a better-looking door. However, it’s important to replace any material that shows even the slightest bit of rot before starting any of the sequences shown here. A solid substrate yields a flawless finished product.
Trim Out The New Door The Easy Way
Perhaps the greatest advantage to this approach is that you can trim the new door before you remove the old door. I find it easier and faster to attach trim — especially intricate dentil-molding details — when the door is flat on a worktable. I use PVC when trimming out exterior doors. PVC won’t split, crack, or rot over time, and it never has to be painted. I’ve tried several brands of PVC trim and have found Kleer (www.kleerlumber.com) to be the most pleasing to work with.
 |
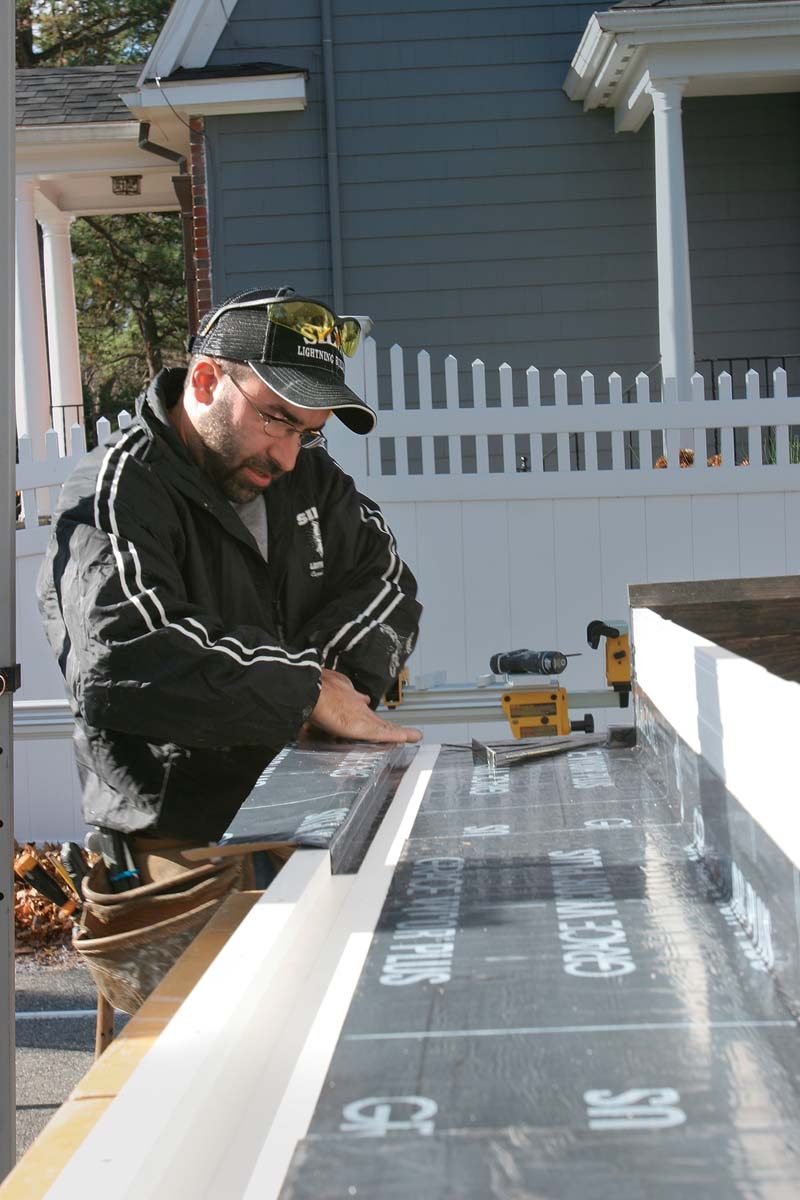 |
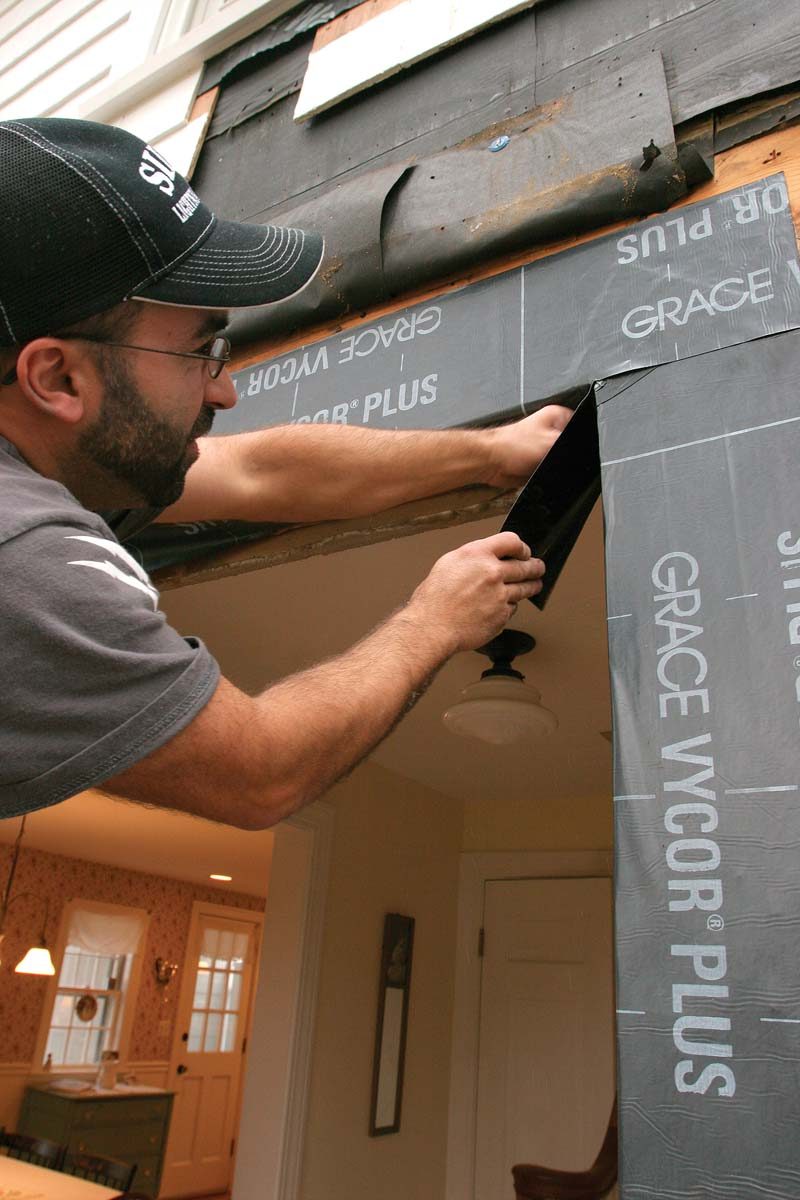
| 1. Attach the trim. The jamb is pocket-screwed to the PVC door casing, after which trim elements, such as fluted pilasters, can be attached. | 2. Back-flash the casing. Flexible flashing seals the joint between the jamb and the trim. A strip of flashing with the paper left on the exposed adhesive side should extend 4 in. beyond the trim. The flashing will be woven into the housewrap once the door is installed. A single strip of flashing can accomplish both tasks on narrower trim. |
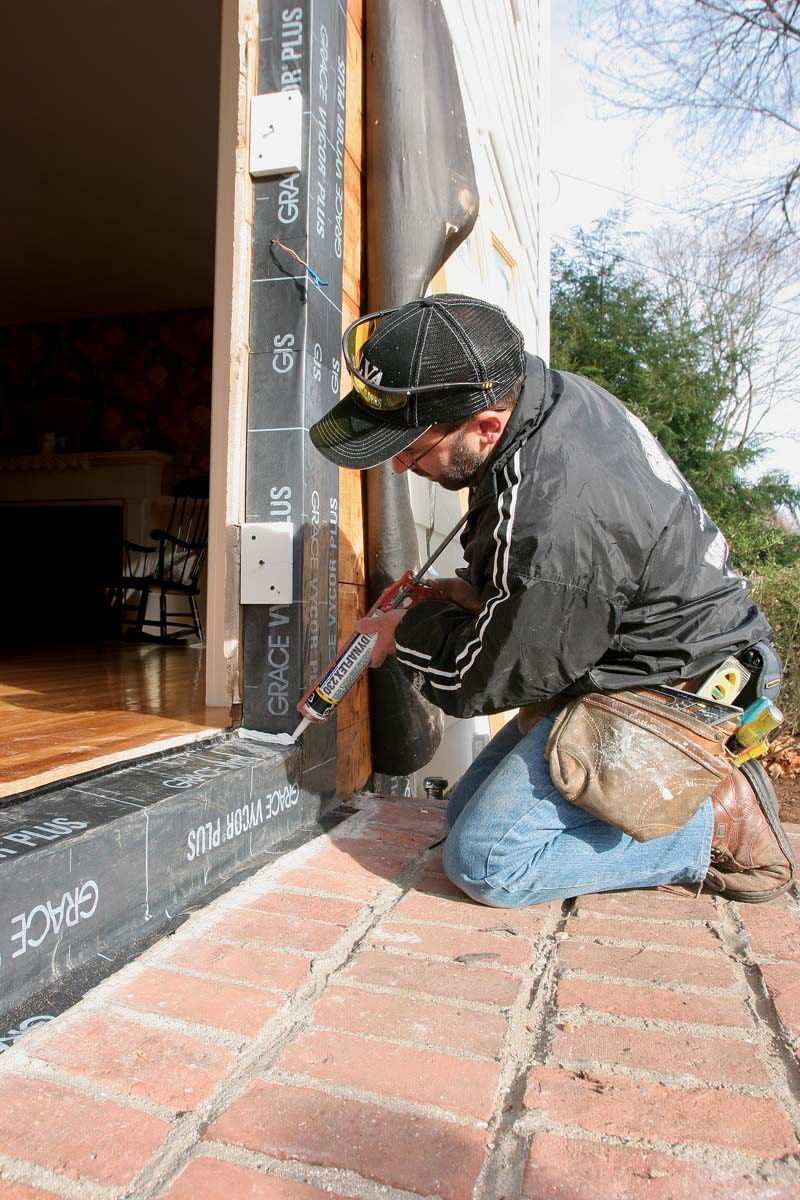
Flash The Rough Opening
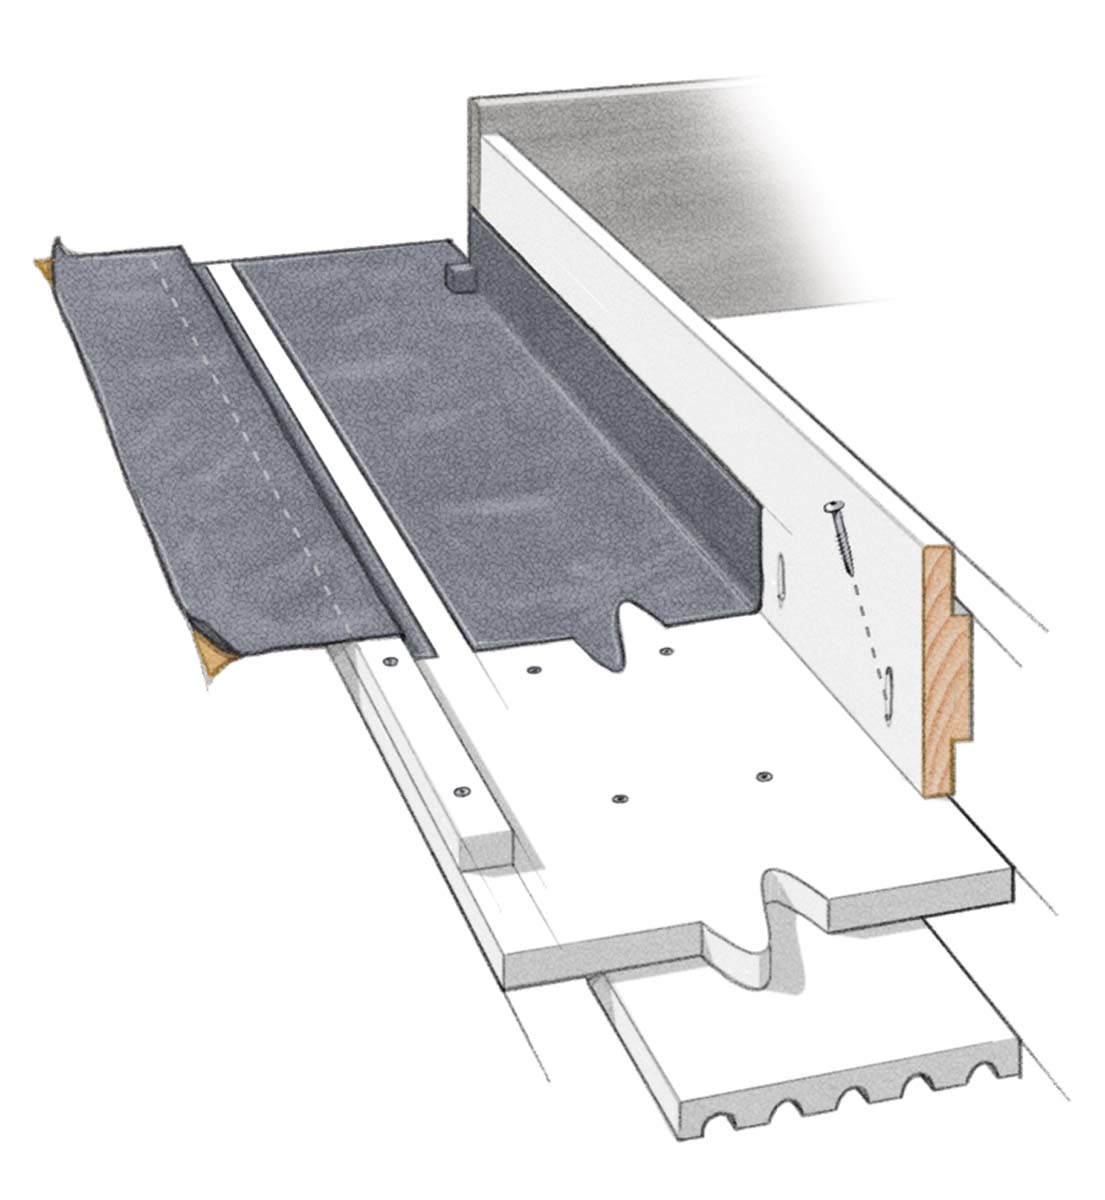
Flashing the rough opening is the third line of defense against water infiltration. (Trim is the first, and back-flashing is the second.) Done correctly, the flashing protects the house’s framing from water and rot. Failing to flash the rough opening correctly can trap water in the assembly and damage framing members and door parts.
 |
 |
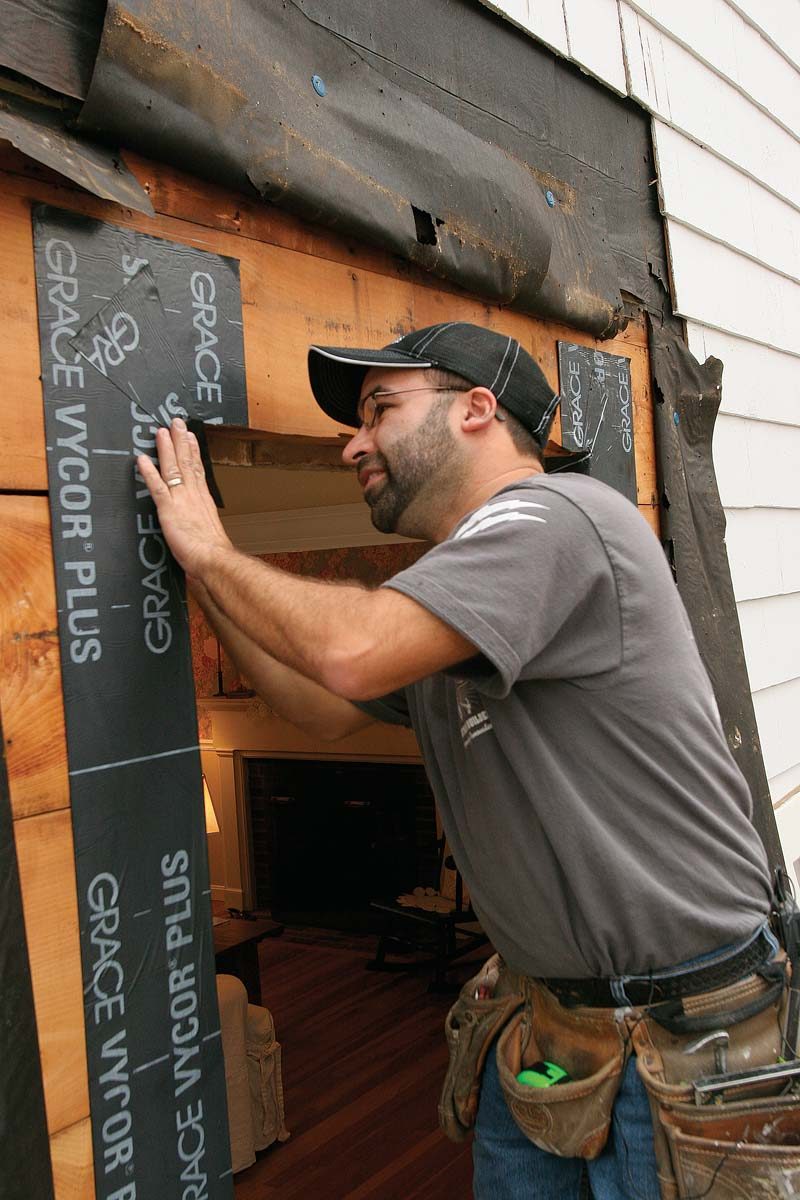
| 1. Build a sill that sheds water. Secure a piece of factory-primed beveled siding to the sill with spray-foam adhesive and screws to direct water out of the assembly. | 2. Create a seamless base. Held to a plumb line on the sheathing, the first piece of flashing extends across the bottom of the opening. A slit on each end allows the flashing to wrap over the sill and extend up the face of the wall. |
 |
 |
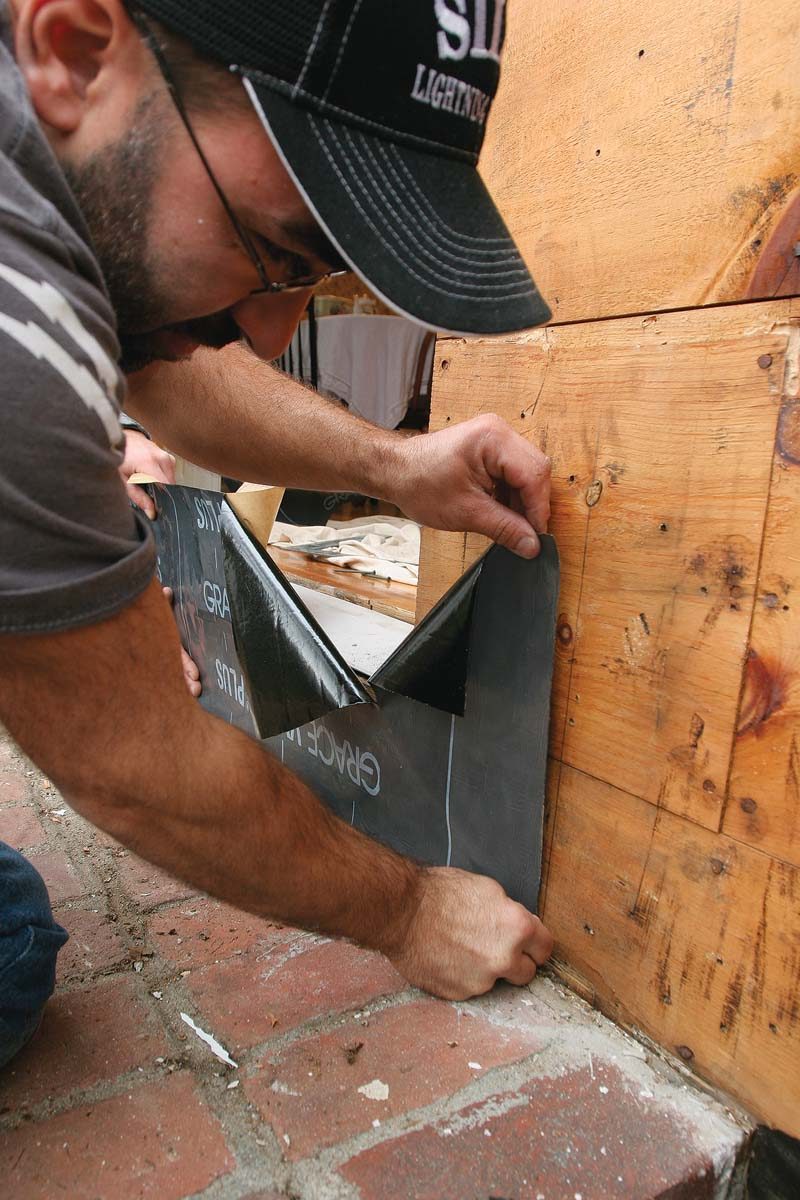
| 3. Add bow ties to seal the corners. Use a bow-tie-shaped piece of flashing, made by doubling the flashing on itself and cutting it into a triangle, to cover the critical area where the outer edge of the bottom plate meets the sill. | 4. Wrap the sides. Cover each side of the rough opening with flexible flashing. Extend the flashing down over previously applied layers as far as possible. A single slit allows the flashing to be wrapped inside the opening and integrated into the beveled sill. |
 |
 |
| 5. Flip the sequence at the top. Wrap the sides of the rough opening before applying bow ties to the corners. | 6. Lap the flashing so that water sheds. The last piece of flashing extends across the top of the opening, wraps under the bottom of the header, and extends down the side of the rough opening, along the face of the jack studs. |
Prep For Installation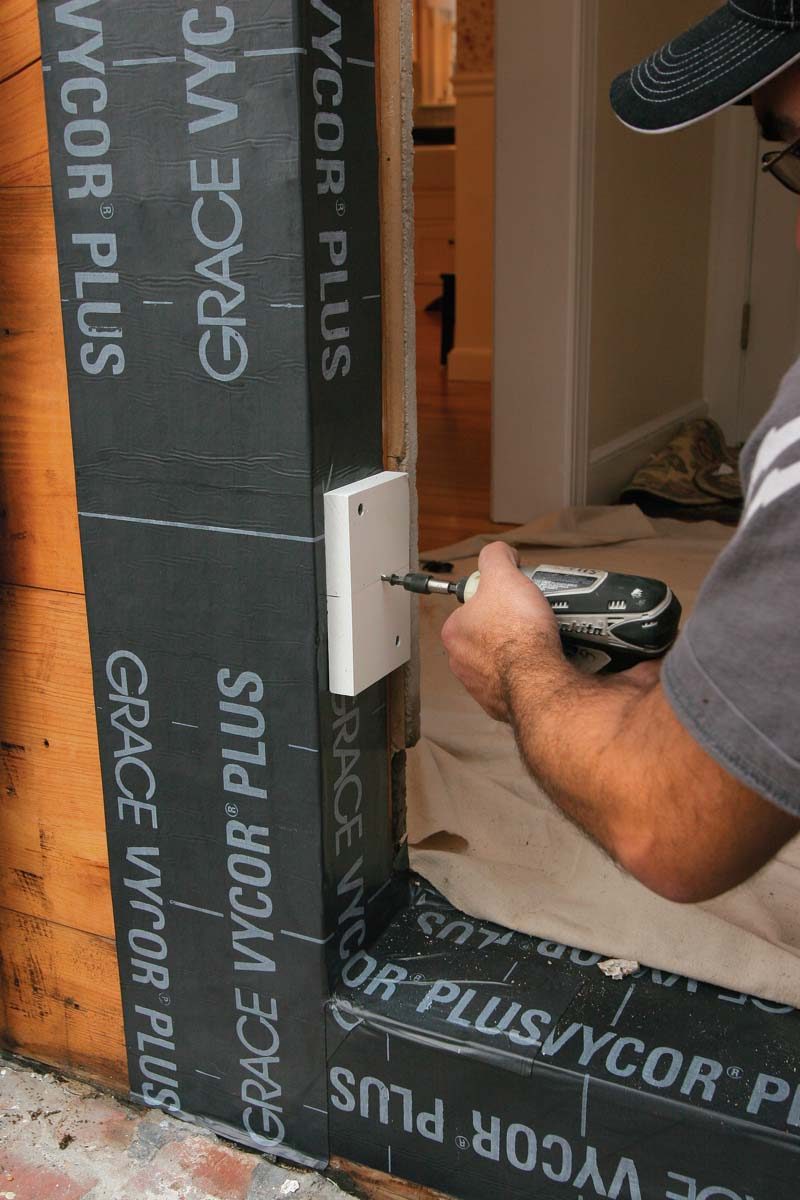
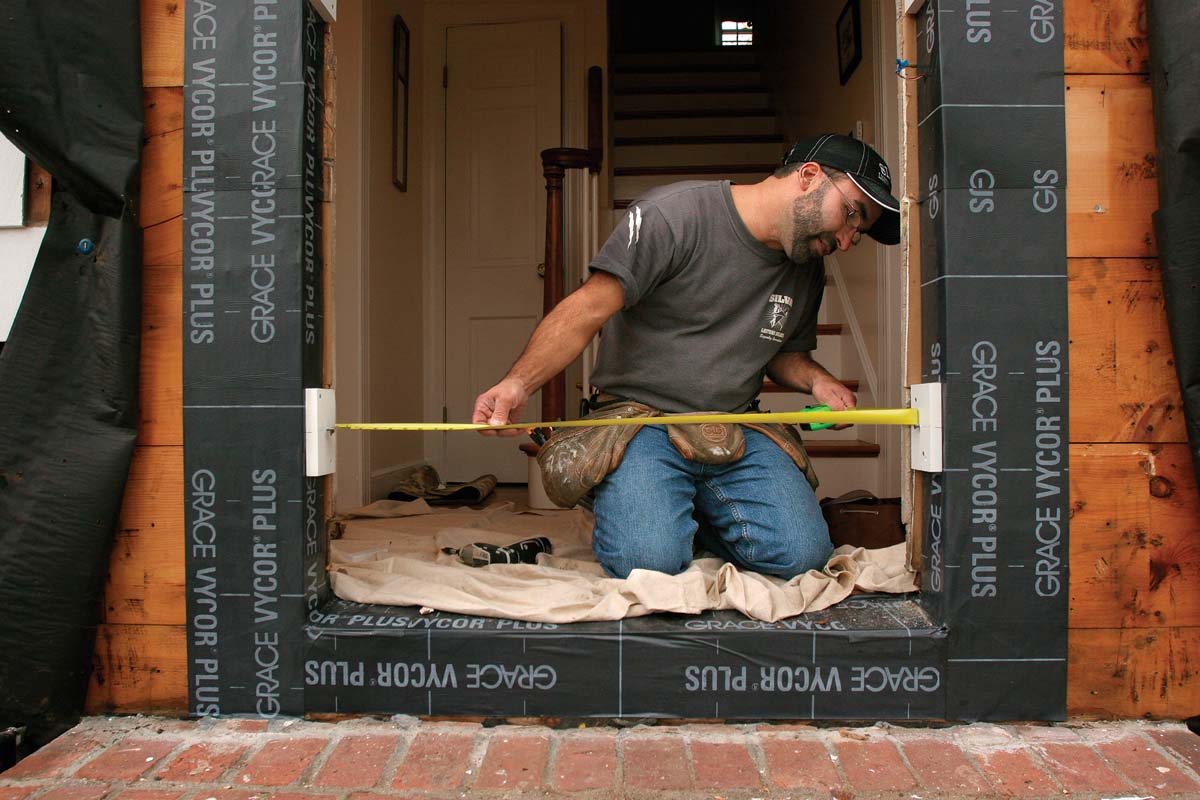
Typically, a door is put in place before wood shims are added between the door frame and the framing. Because the trim is already applied to the door frame on this project, I can’t add shims from the front. Instead, I use screws as standoffs to plumb the jambs. There are a few benefits to this approach. First, plumbing screws before the door is installed ensures that the frame will be dead plumb. Second, it’s faster to plumb screws than to fuss over wood shims. Finally, screws allow water to drain should it find its way into the rough opening. On this project, the rough opening was much wider than the door frame, so I padded with PVC blocking. If your opening is narrower, simply sink the screws into the jack stud.
 |
 |
| 1. Screws replace shims. Drive galvanized screws into the center of each block or into the framing just above each hinge location. The distance between opposing screws should match the exact width of the door frame. | 2. Plumb up. With the distance between the lower screws set, plumb up the side of the opening. Adjust the upper screws so that they are plumb with the bottom screws. |
 |
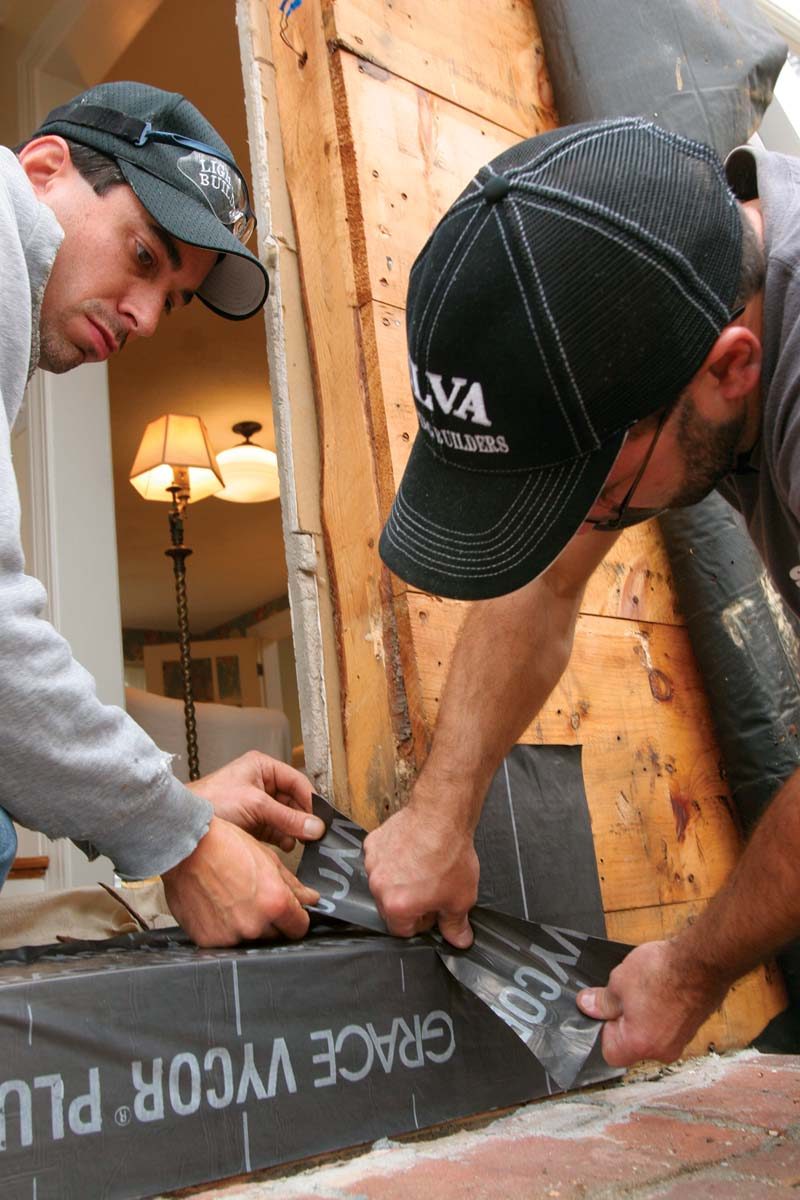
3. Add a site-made gasket. A rolled-up piece of flexible flashing keeps water and air from seeping between the bottom of the threshold and the sill. A few beads of caulk across the width of the sill aid in sealing and keep the threshold from squeaking. |
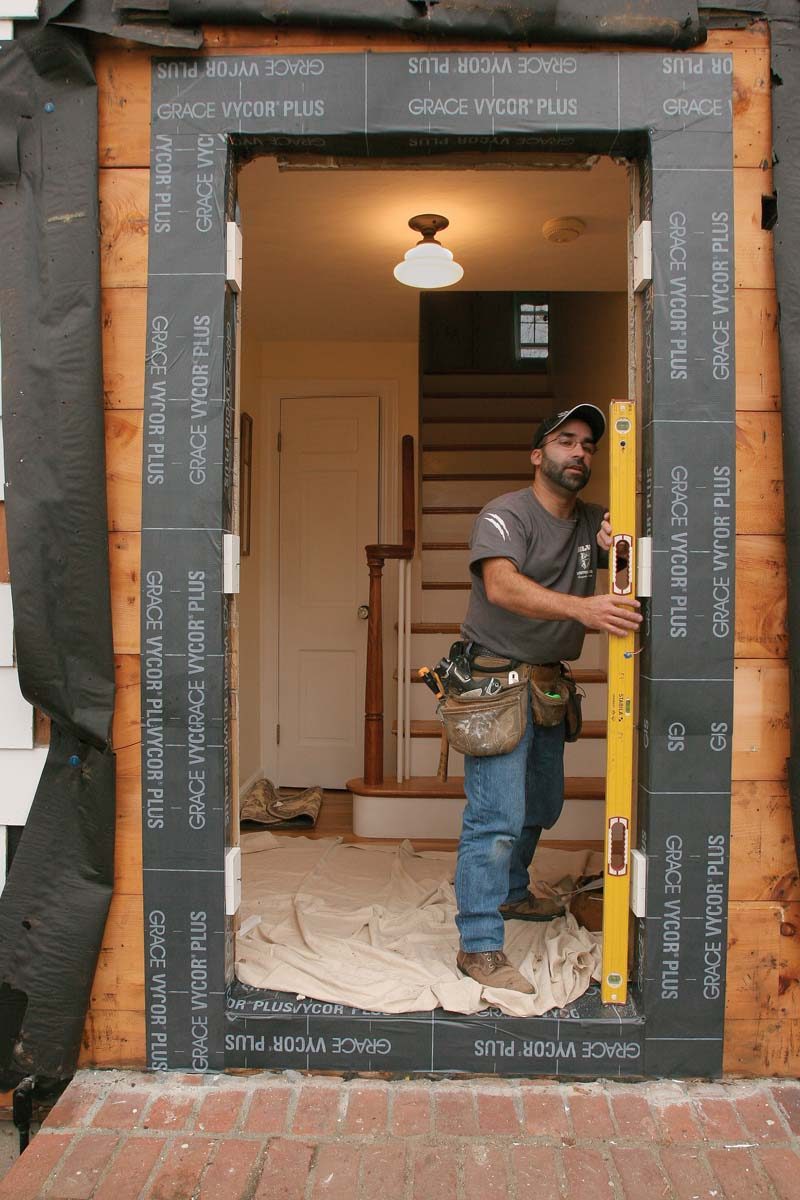
Install The Door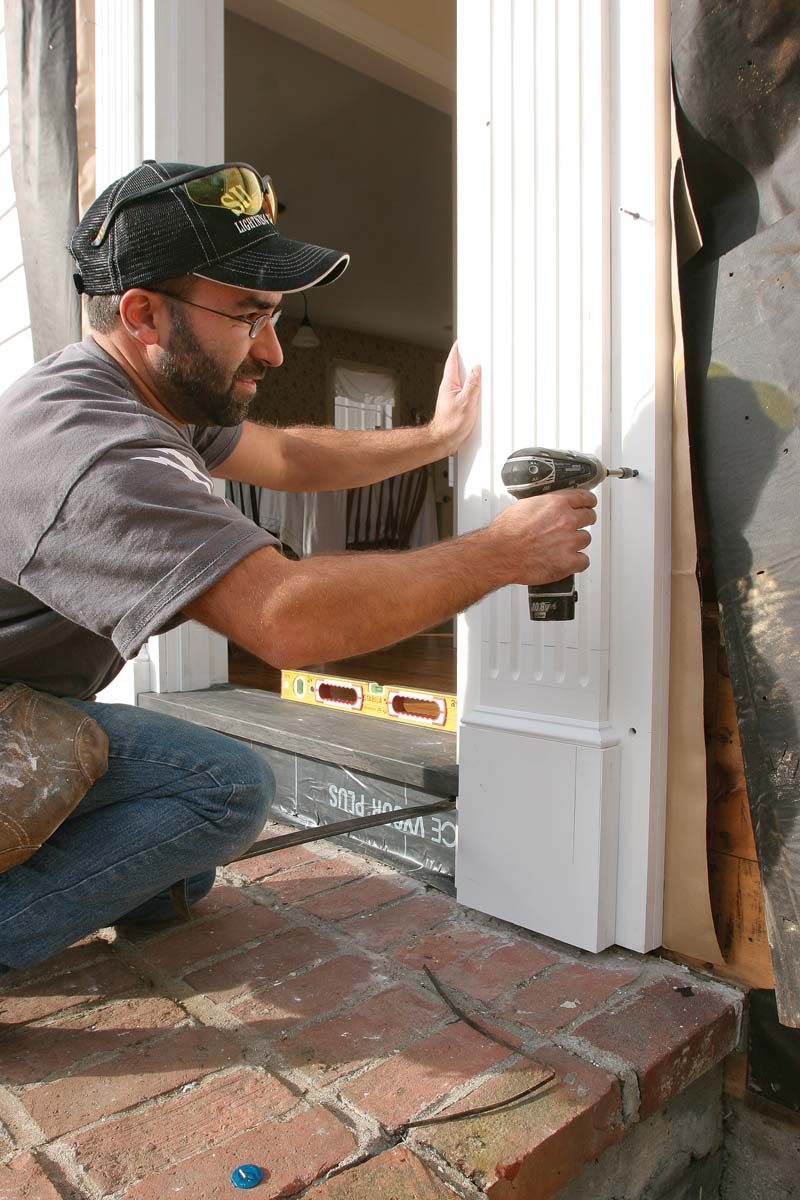
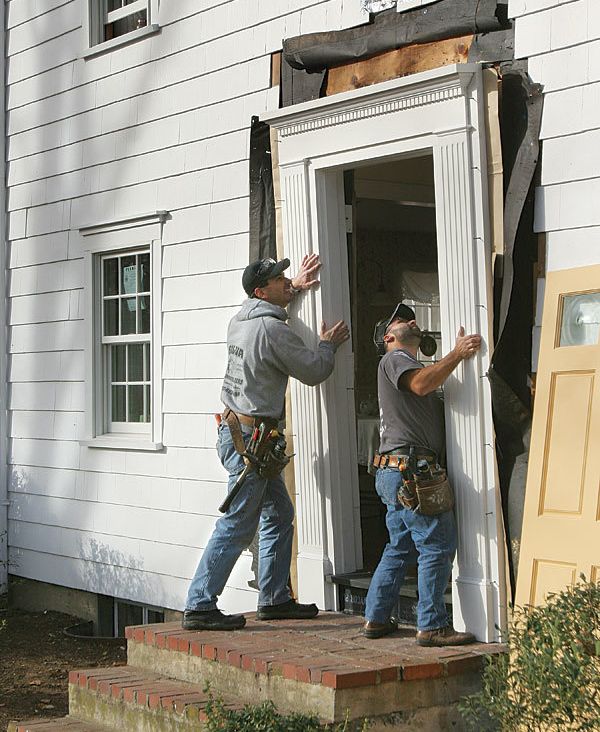
The scale of this project shows the applicability of this approach. No door is too big. However, no matter what size the door is, get assistance moving it into place. This will ensure that the unit seats into the sill gasket evenly. Also, a second set of hands will prove useful once you begin making minor adjustments to the fit of the door frame. Although it’s not shown here, be sure to mount the door in its frame temporarily and to test the fit before you fully secure and flash the assembly. The final step in any door installation is to add low-expansion spray-foam insulation between the door frame and the rough opening. Your goal here is only to air-seal. Leave the bulk of the cavity empty to allow water to drain in the unlikely event that a flashing detail fails.
 |
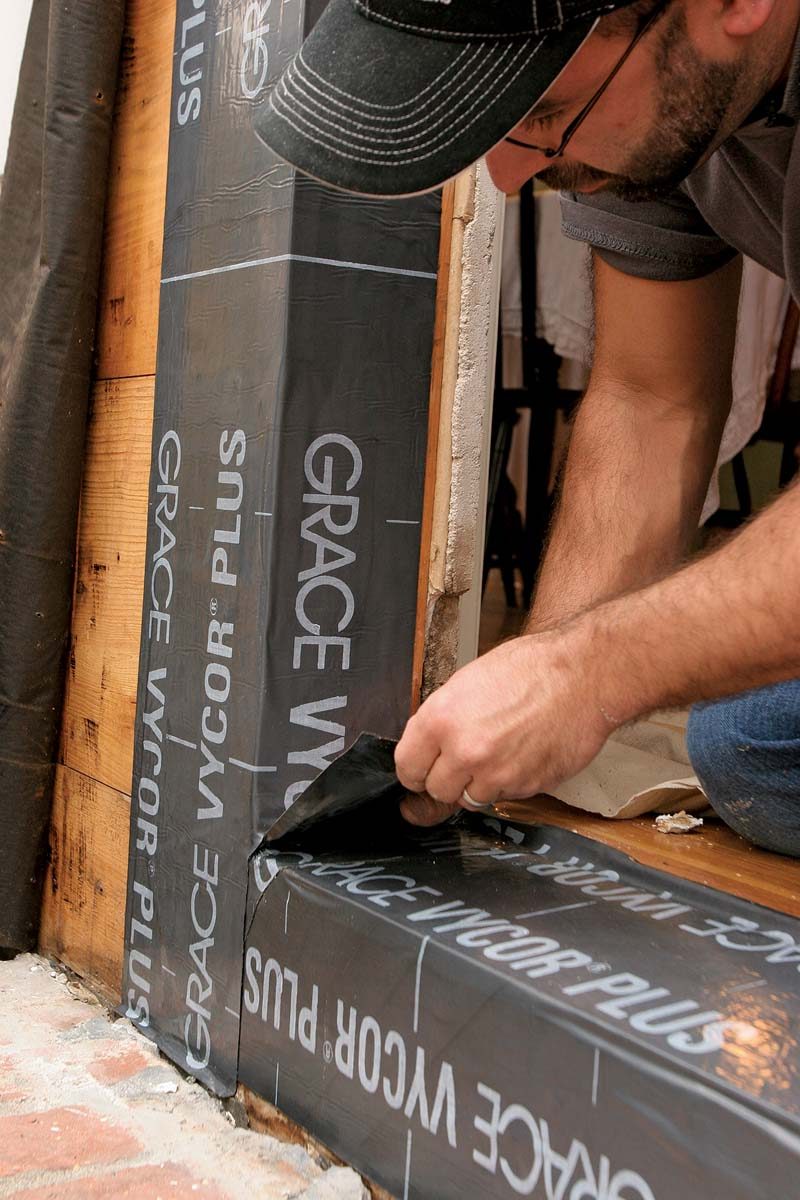
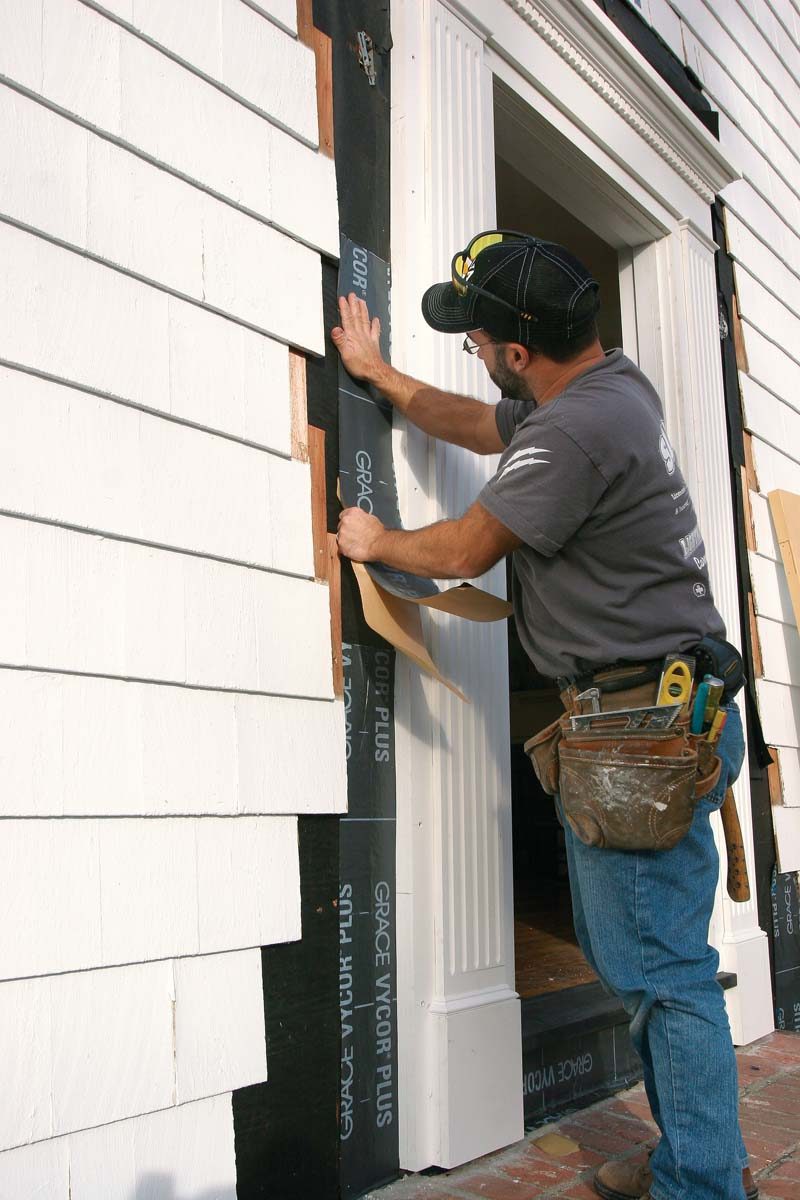 |
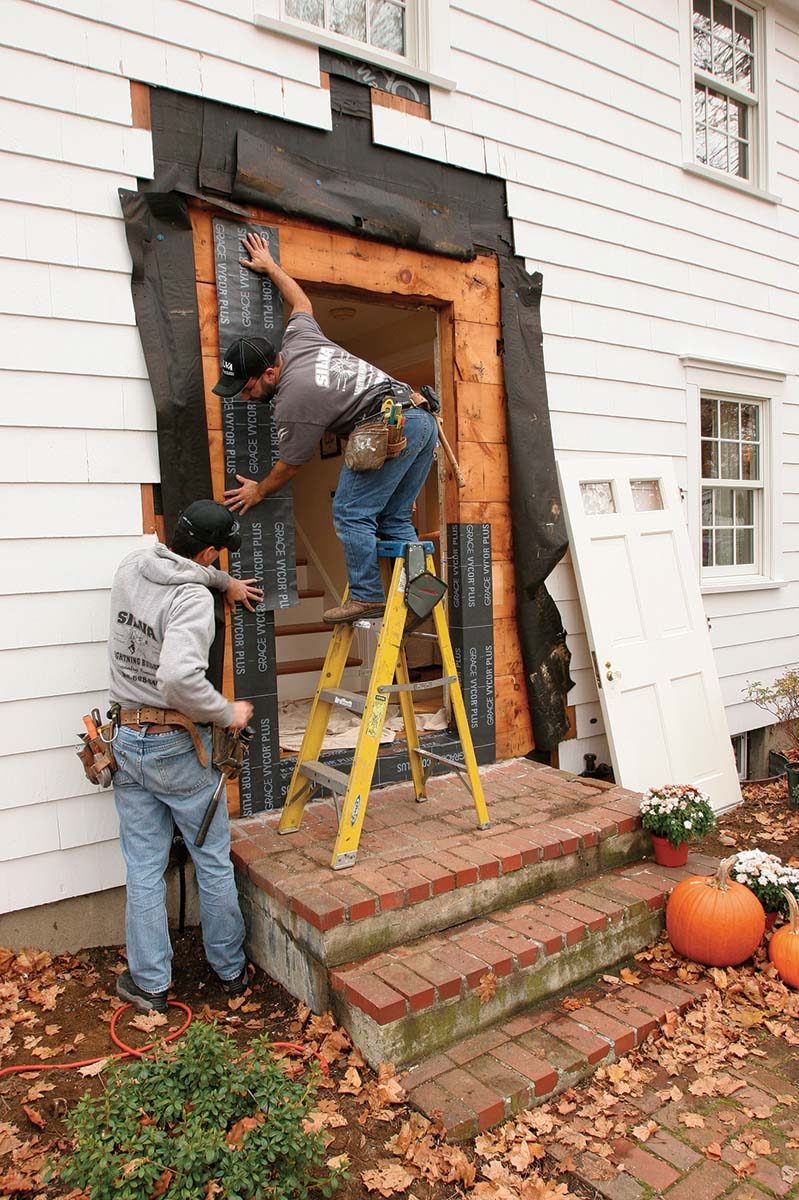
| 1. Restore the drainage plane. Starting at the bottom of the door and working toward the top, peel away the paper backing on the back-flashing, and stick the housewrap to it, making sure that each piece is lapped over the piece below it. The back-flashing, which is sealed to the beveled PVC head casing and is woven into the housewrap, eliminates the need for metal cap-flashing. | 2. Final flashing. Flexible flashing lapped up and around the door seals the joint between the housewrap and the back-flashing. It’s completely overkill—and necessary. Apply housewrap tape to any seams or tears not covered by the flexible flashing before adding the kick board and bringing the siding tight to the trim. |
Sill Alternatives
Beveled siding has long been the go-to material to create drainage at the door sill, but some argue that it doesn’t provide enough support for the threshold and that the threshold can deflect and eventually separate from the jamb legs over time. In all my years as a carpenter, I’ve never had such a problem, and I believe the kick board offers enough support for the threshold at its outer edge. If you’re unconvinced, though, or if your door manufacturer demands an alternative, here are two products worth looking into.
 |
 |
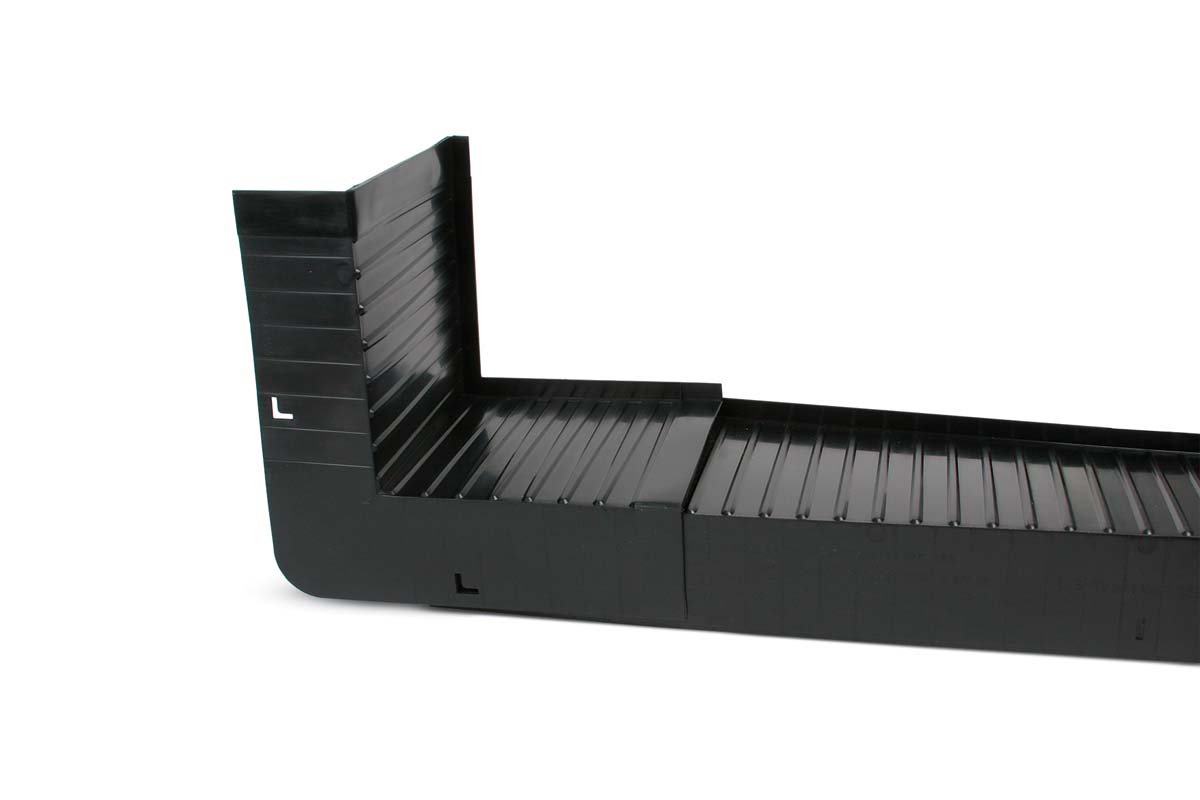
| Weather Out Flashing
A three-part sill pan has tapered ribs to offer full support for the threshold. The drain channels and back dam facilitate drainage. Source: www.weatheroutflashing.com Cost: $24 per 69⁄16-in. by 44-in. pan |
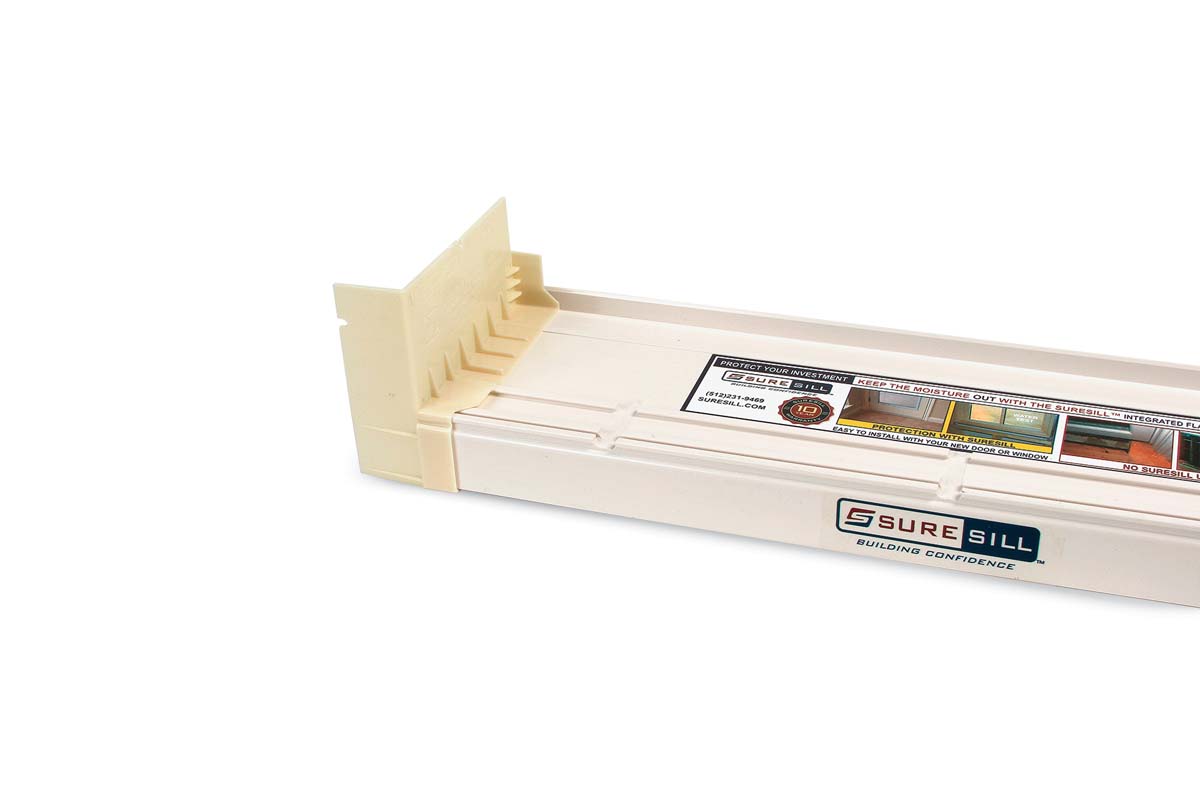
Suresill
A single, sloped sill pan (end caps optional) has front and rear support ribs. This sill pan also has a back dam to keep water out. Source: www.suresill.com Cost: $20 per 49⁄16-in. by 39-in. pan |
This article originally appeared in Fine Homebuilding magazine titled “Replace an Old Entry Door”
RELATED STORIES
- Video Series: How to Replace an Old Entry Door
- How to Install a Prehung Exterior Door
- 6 Steps to Install an Exterior Door
For more photos and details, click the View PDF button below:
