
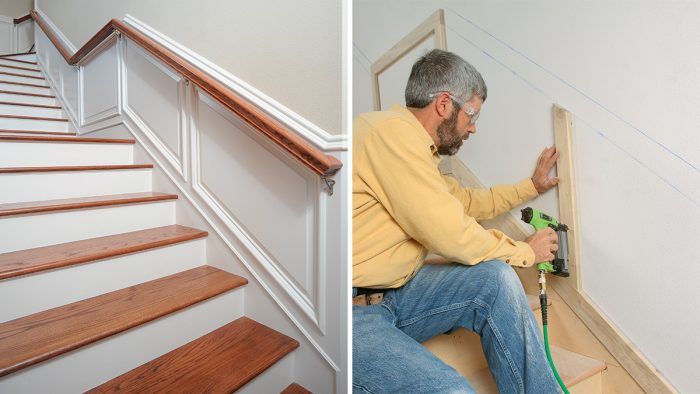
Taking Wainscot Up Stairs
Learn how to use MDF panels and stock moldings to create this elegant trim detail on your staircase walls.
Synopsis: In 2004, FHB published Gary Striegler’s cover story about a simple approach to installing raised-panel wainscot. Since that article first appeared, Striegler has had the good fortune to address many questions about his process. In this years-later follow-up article, Striegler describes his process for continuing a run of wainscot up a stairway. As with other wainscot projects, he draws a full-size layout on the wall, and starts by establishing the height of the landing panel. From there, Striegler can determine the angles for the top- and bottom-rail miters; then he has the measurements to cut the pieces. He also notes that it’s important to know and heed local codes regarding handrail height and placement. Next, he assembles the frames, which are connected with biscuits and glue. To make the raised panels, Striegler builds a jig, which helps him to cut the pieces properly. Finally, he trims out the frame and panels.
I credit a lot of the success of my business to the trimwork we do in our houses. In fact, I have been told more than once that we got a job solely because of our woodwork. Perhaps that’s why I shouldn’t be so surprised that my article “A Simple Approach to Raised-Panel Wainscot” was received so well. It has been more than seven years since that article was published, but I still get a call or an email at least once a month from a reader who wants to know more. Many times, they want to know how wainscot should run up a stairway.
Here, I’ll show how to continue raised-panel wainscot up a set of stairs. Many of the techniques in the original article apply here, but with a few subtle differences. You’ll learn how to achieve an accurate layout on the wall, how to assemble and apply the frames and trim pieces in proper sequence, and how to create a simple jig that makes cutting angled, raised MDF panels a cinch.
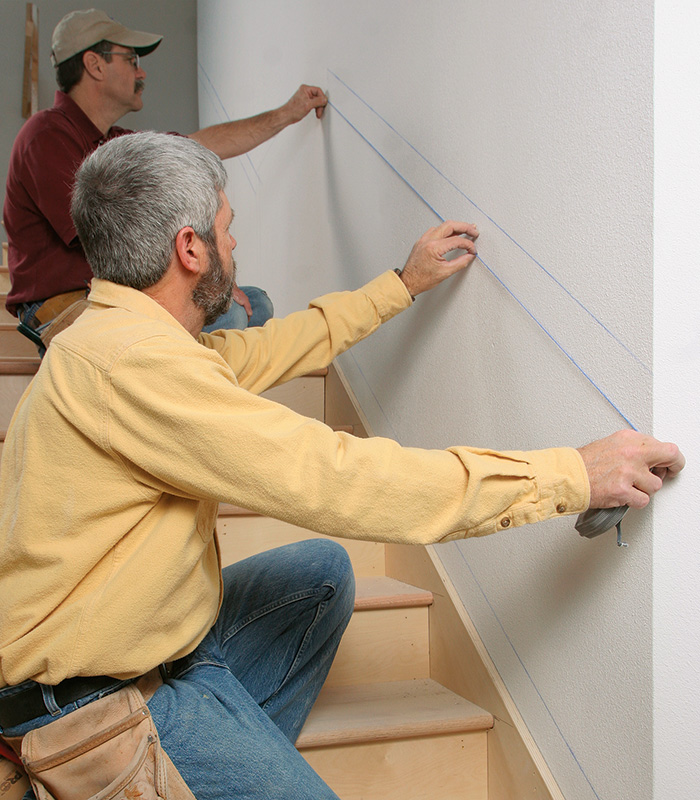
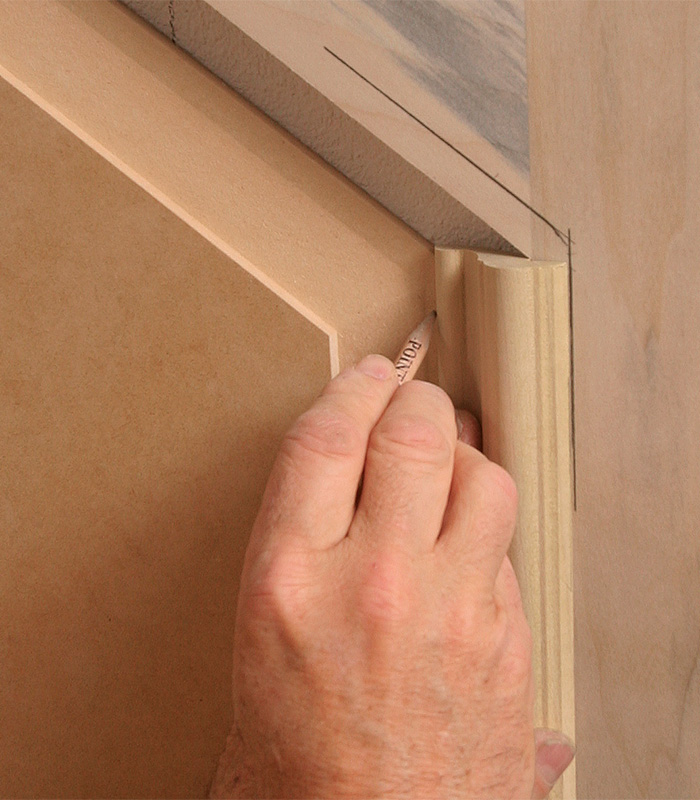
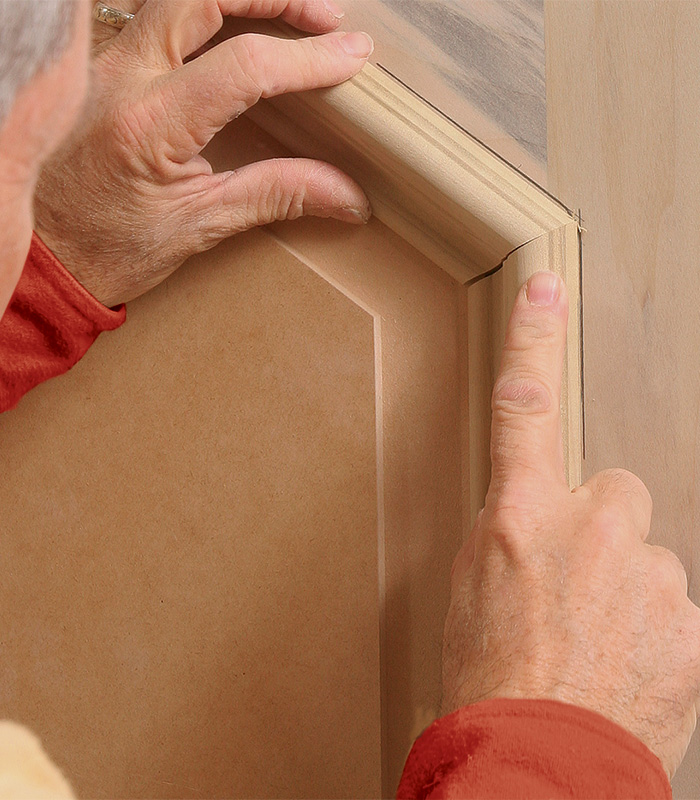
Lay out frame on the wall
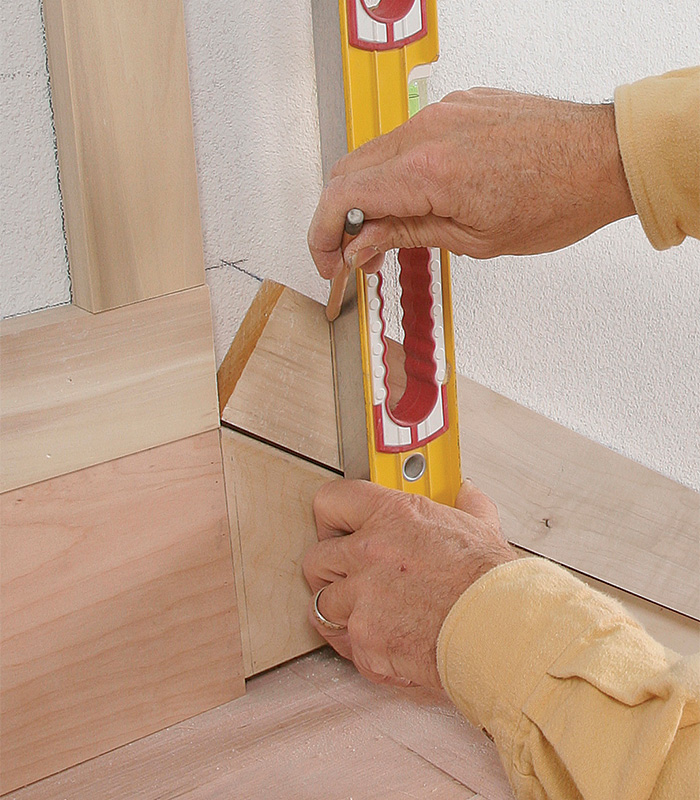
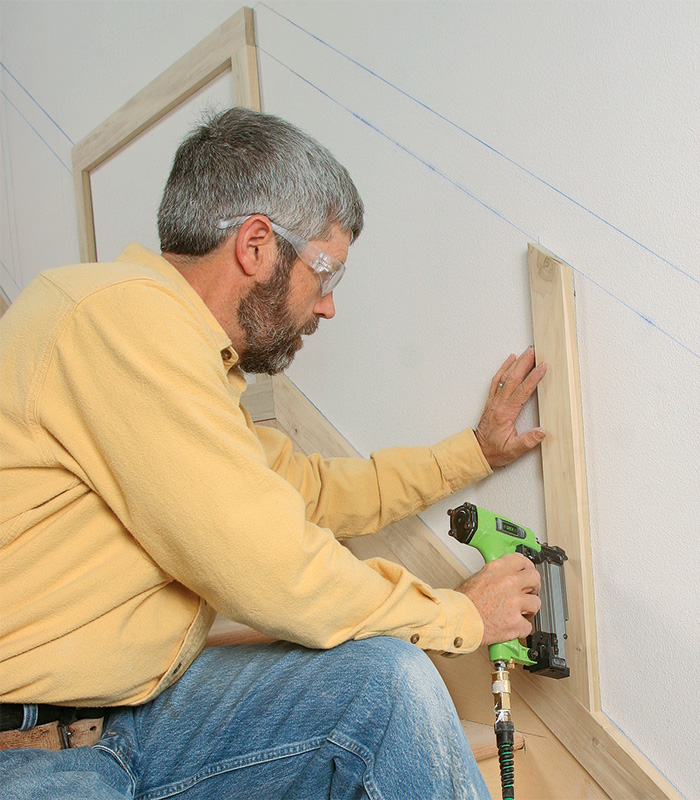
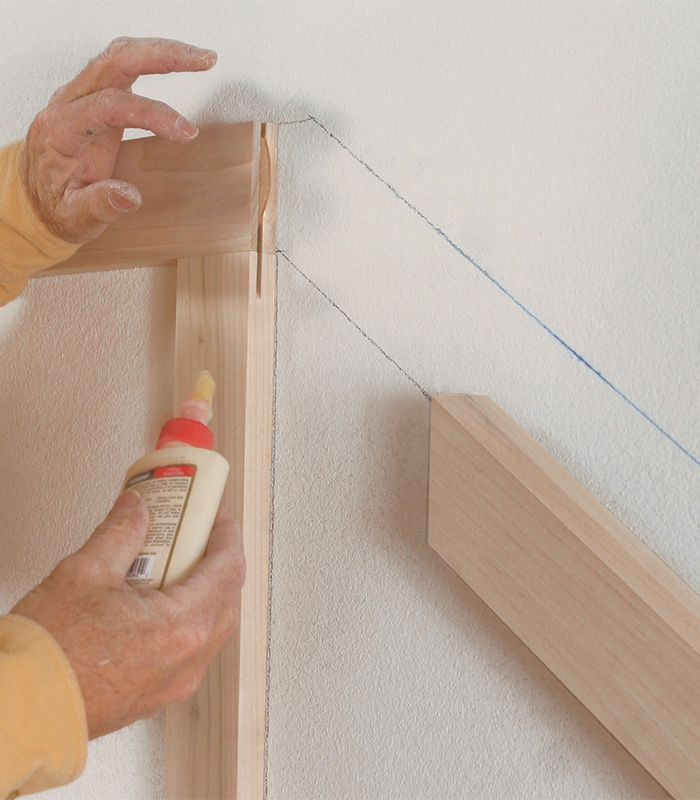
Tack frame components against layout linesCreate a full-scale layout on the wall by marking rail and stile locations. install the landing panel against the layout, and find the angles for the top- and bottom-rail miters by making a plumb mark with a pencil and level. Then, with the bottom rail tacked to the wall with 23-ga. headless pins, lay out and cut the stiles that separate the panels. Tack all the parts in place, and mark their location within the layout before pulling the pieces to assemble. |
 |
 |
Assemble the frames, and test the fit
Connect the frames with biscuits and gluePocket-screw the rails and stiles together to make individual frames for each run of stairs and each landing. join the frames together with biscuits and glue. The slots on the landing frame can be cut with a biscuit joiner while the frame is in place.
|

Establish the landing, then work up and down
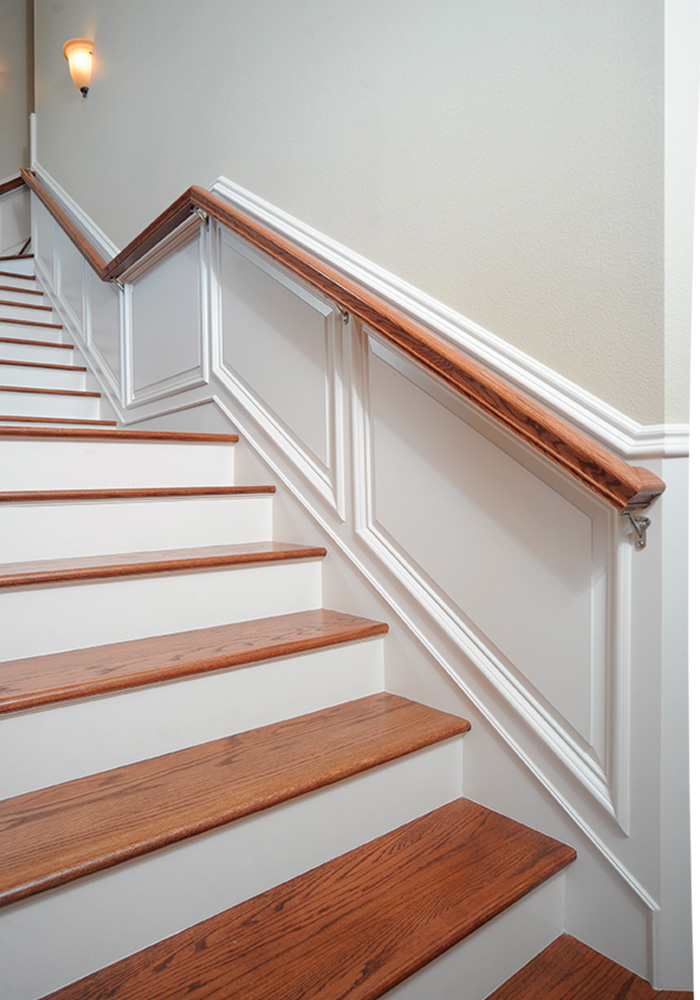
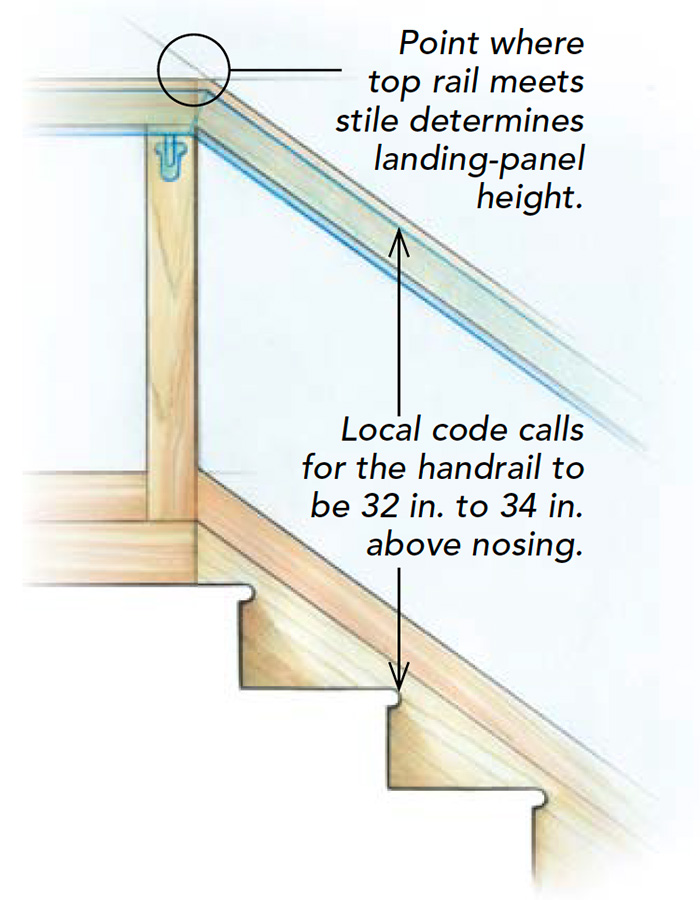
I start a wainscot project for a stairway just as I would for an ordinary room — with a full-size layout on the wall. Although you typically don’t have to worry about trimming around windows and electrical boxes in a stairway, you have to plan for handrail details. The code in my area demands that the handrail be between 32 in. and 34 in. above the front edge of each stair tread. On this project, the top rail of the wainscot runs about 3 ⁄4 in. above the top of the handrail.
I start the layout by marking plumb lines for the end stiles of each run of wainscot. I then snap lines for the top and bottom rails. The point where the top rail intersects the landing panel’s plumb line determines the height of the landing panel. I could forgo the bottom rail and integrate the skirtboard into the wainscot, but that would make it much harder to let the stair treads into the skirtboard, and a lot tougher to fit the skirtboards behind the rough staircase.
I draw layout lines for the stiles after the landing panel is assembled. It’s more accurate to butt your tape up to a landing stile when marking stile locations along the stair.
Odd numbers of panels are more pleasing to the eye, but the proportions of the panels are more important than the amount. I always want a panel to be at least 4 in. longer than its height, but the length should be no more than 1.75 times the height. The height of all the panels is constant. The length of each panel within a run of stairs will be the same, but it may differ from run to run based on the number of panels. Slight variations in panel length are OK.
Finally, when laying out a stair-wainscot project, you’ll encounter some difficult transitions, and you’ll have to decide what’s acceptable and what’s not. On this project, the bottom corner of the last panel in the first run of wainscot doesn’t exactly match up with the bottom right corner of the landing panel. While not ideal, I can live with the slight misalignment.
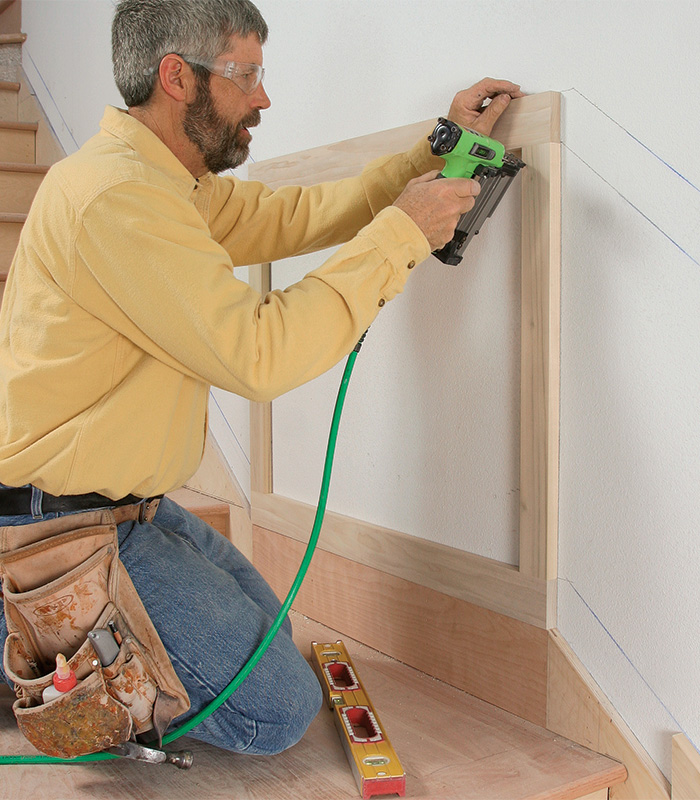
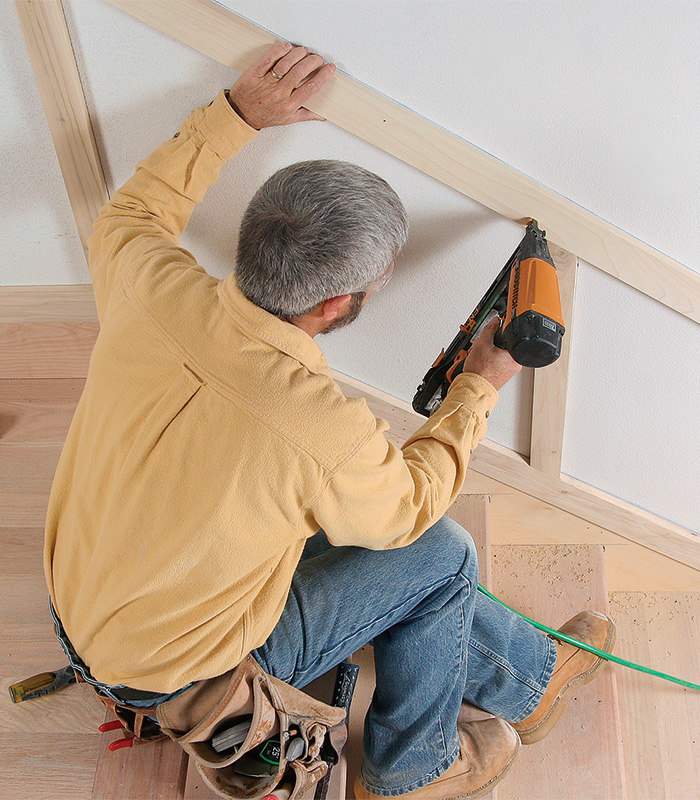
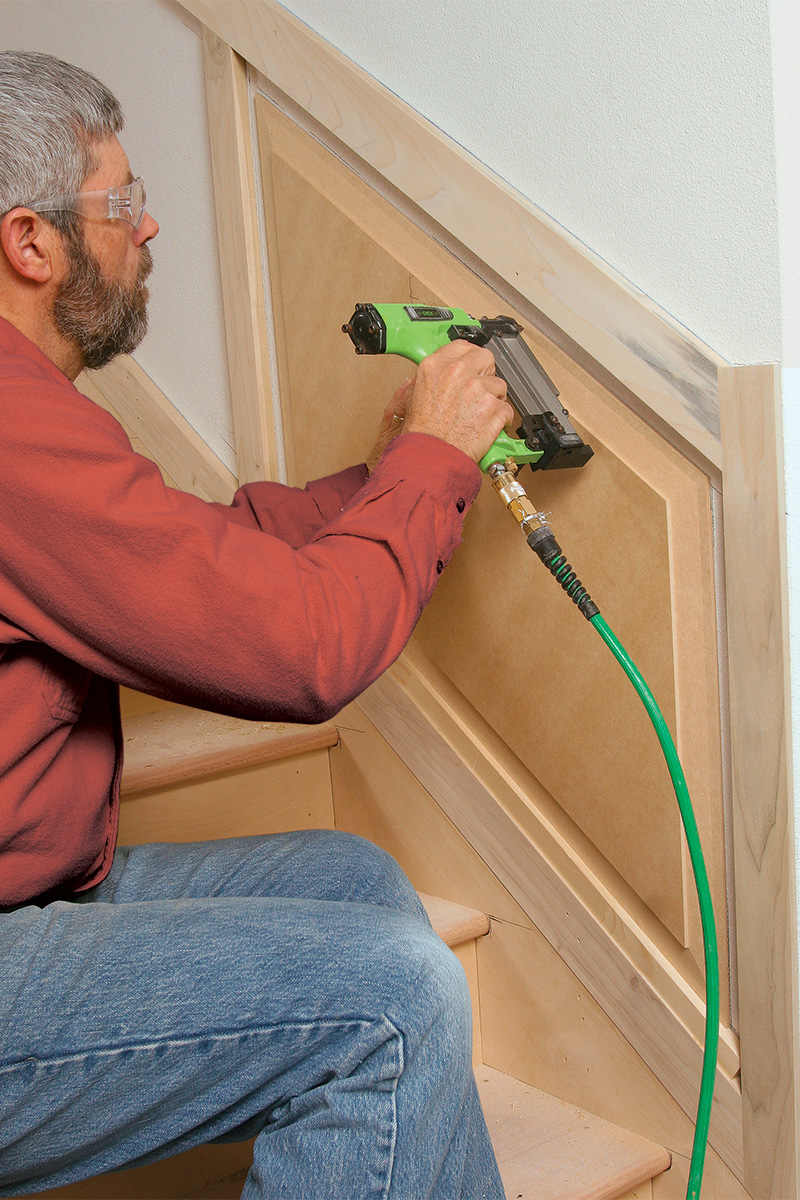
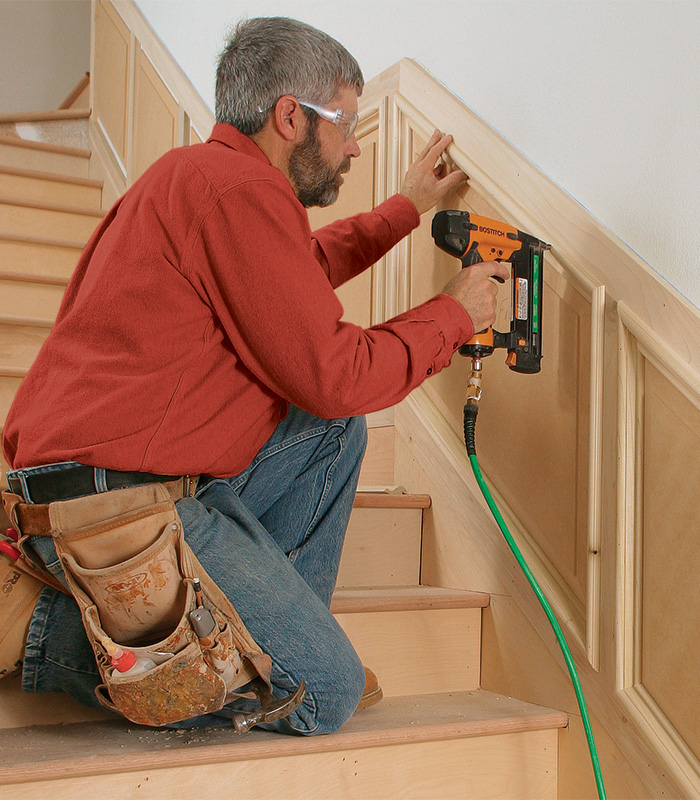
Tack the frame in place
Small errors in frame miters can yield large errors when trying to fit parts at the end of a long run of wainscot. To keep everything lined up with the layout on the wall, I test-fit all the pieces by temporarily tacking them in place with headless pins. This process is a little like the way a furniture maker assembles a chair before breaking out glue and clamps.
I start at the landing panel and work my way up or down the staircase. The landing’s frame is the easiest to assemble, so I install it first and fit the other frames to it. I determine the angle of the top- and bottom-rail miters by placing them on the skirtboard, plumbing a level up against them, and marking the angle with a pencil. No math is involved. I mark the opposite ends of the rails the same way. Finally, I find the miters for the middle stiles by holding the stock against the layout, marking and cutting the bottom miters first.
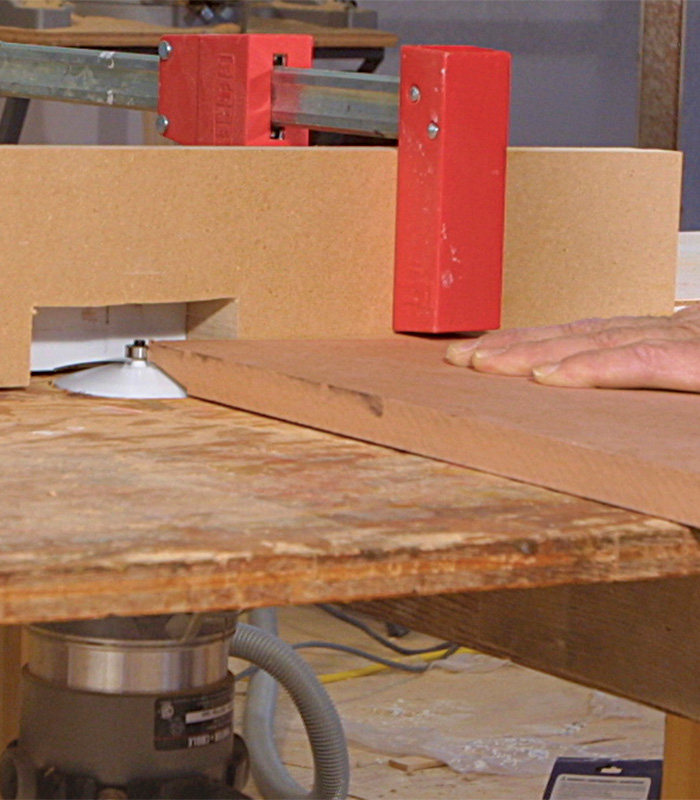
Make a jig for the raised panels
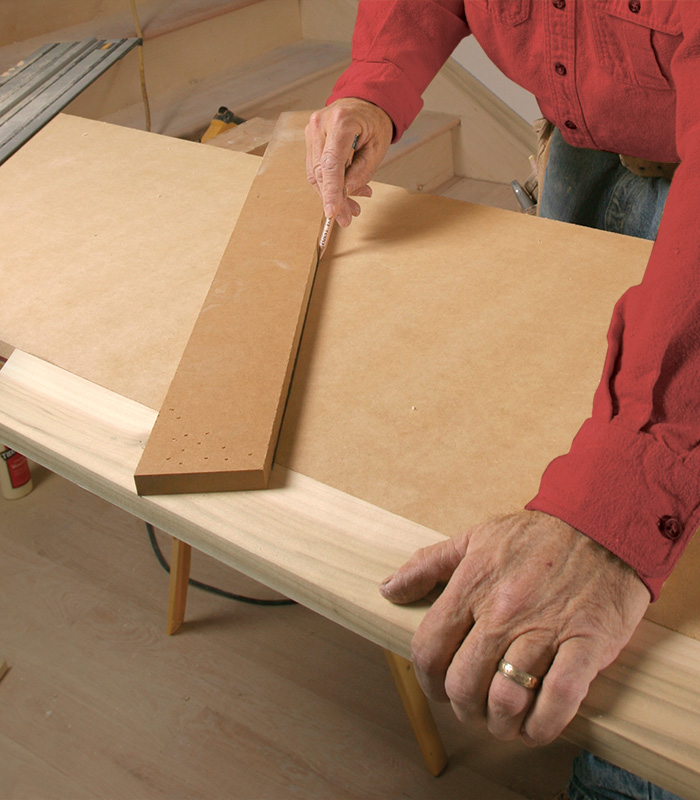
Use scraps to find the angleTo find the correct angle of a panel, place one piece of scrap on the top edge of the top rail. Place another piece of scrap perpendicular to the first, and plumb it with a level. Once plumb, tack the pieces together with finish nails. Use the jig to lay out the cutlines on the strips of MDF, and make the cuts with a straightedge and a circular saw. With a raised-panel bit mounted in a router table, profile the edges of the panel. Don’t cut the profile in one pass. Make three to four successively deeper cuts for crisp, clean edges. Set the panel on a gauge block when fastening. |

Attach the frame
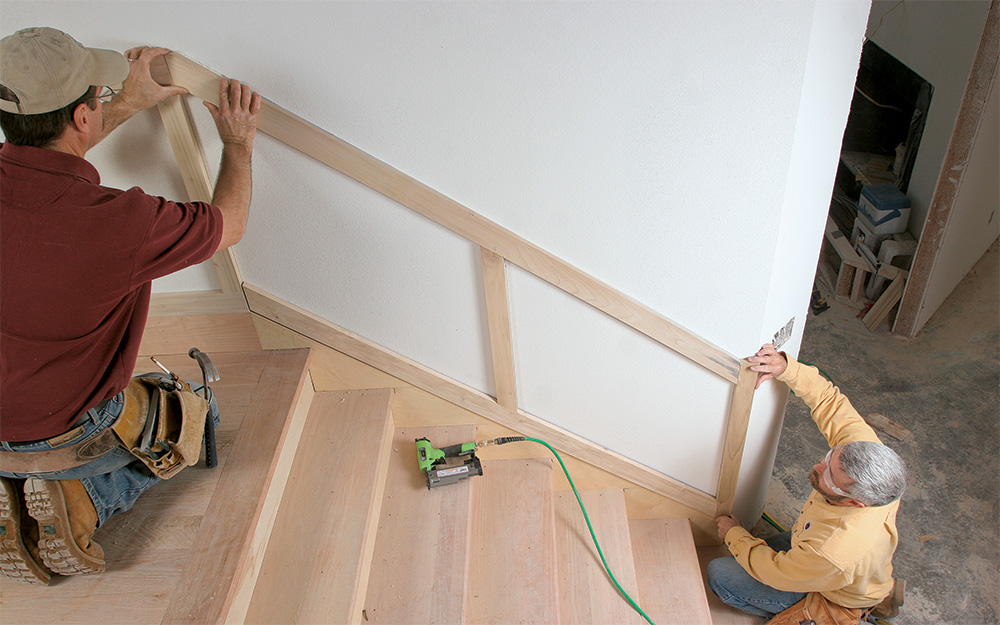
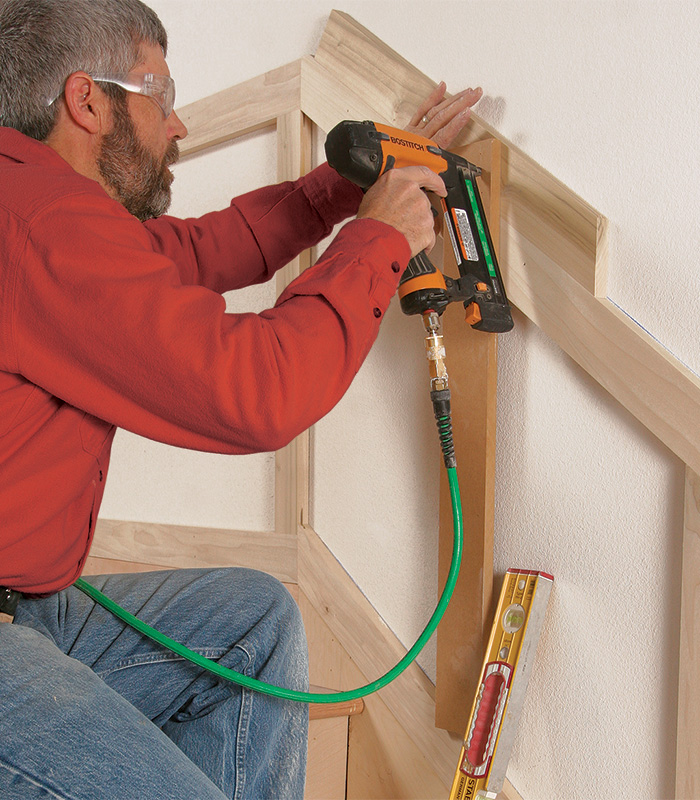
Before removing all the frame parts from the wall, I mark their orientation. I then pocketscrew them together. On this staircase, which has a landing in its middle, I broke the wainscot frames into three parts. Pocket-screwing three sections together and applying them to the wall as one unit is an option, but not one that I’d recommend. Instead, I nail the landing’s frame to the wall with 21⁄2-in. finish nails. Then I join the upper and lower frames to the landing’s frame with biscuits. I can cut slots for the biscuits with the landing’s frame in place. It’s more manageable to work this way, and the biscuits help to align the faces of the frames so that they’re dead flush. With the frames positioned properly, I nail them to the wall’s studs with finish nails.
Make and install the raised panels
I determine the size of each panel by marking its location within the frame using a gauge block, taking into account the way the other trim pieces will lap over the edge of the panel. I want the panel to be spaced 11⁄8 in. from the frame on all sides. This ensures that the bolection molding will cover the thin, flat edge of the panel and won’t butt against the raised profile of the panel.
Making the 3 ⁄ 4-in.-thick MD F raised panels takes little time with a proper setup. Essentially, I make a big, site-built bevel gauge to lay out the angled cutlines on the MDF stock, which I have cut to the correct panel width. Then I profile the panel edges with a raised-panel bit in a router table.
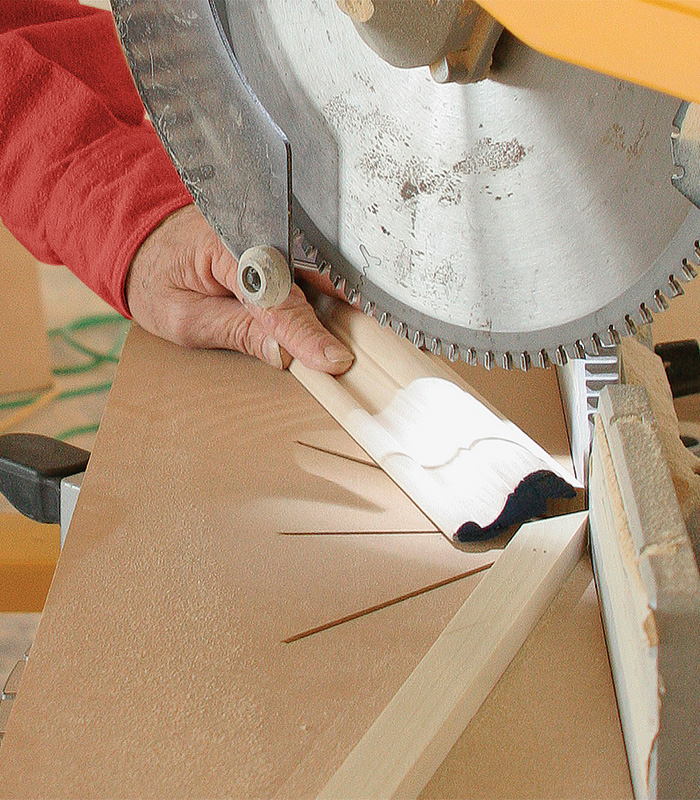
Trim the frame and panels
Find miter angles the old-fashioned way: trial and errorFind the angles to make miters in the cap-, astragal-, and bolection-molding pieces with the same technique. Hold a scrap piece of trim material in place, and make a pencil mark along both its edges, being sure to make marks for both pieces of trim that make up the miter. The intersection of the top and bottom layout lines marks the long and short point of each miter. Hold the stock in position, and make tick marks on the trim at each intersection. Connect the points and cut. The high-angle miters on the bolection molding are tough. Because the author does not have a saw that can cut beyond a 50° miter, he makes a jig that lets him safely cut the extreme, long miters. |
Dress up the frames and panels
The final steps are applying the bolectionmolding cap, the bolection molding that bridges the gap between frame and panel, and an astragal that covers the transition between the bottom rail and the skirtboard (White River Hardwoods; www.whiteriver.com). I’ve got a relatively easy way of marking the angles, but I still have to sneak up on making an accurate miter, which is just a carpenter’s way of describing a healthy amount of trial and error.
Gary Striegler is a trim carpenter in Fayetteville, Ark.
Photos by Rob Yagid, except where noted.
From FineHomebuilding #224
To view the entire article, please click the View PDF button below.

View Comments
Do you have videos on how to install newels; post to post, starting newels, intermediate landing newels and balcony landing newels. Also curved rails . I would be very interested in those videos if you have them available. If you don't can you tell me where can i find videos on that subject (other than youtube). Thanks
Jose Rodriguez
(210) 8656378
[email protected]