
Framing Tricky Truss Roofs
When building houses with trusses made for hips and valleys, careful planning and job-site organization are key to an efficient installation.
Synopsis: Over three-quarters of the roofs on new homes in the United States are built with trusses. For gable roofs, you simply need lots of the same kind of truss. For roofs that include hips and valleys, however, you may need trusses in dozens of different configurations. Paul Johnson and Nathan Young, building contractors in Portland, Ore., explain in this article their process of installing trusses for a house with a complex roof. They stress that before the trusses even arrive at the job site, it’s important to make a plan for delivery that ensures that there is adequate space for the delivery truck and that identifies the spot where the trusses will be unloaded. The truss company includes a plan with the truss package that should be followed carefully. The builder, however, will need to decide where to start. Johnson and Young usually begin with a girder truss, then proceed with the installation in sections. They provide guidance for installing blocking, stick-framing certain areas, shopping for a truss supplier, and modifying a truss. A color-coded photo illustrates the types of trusses Johnson and Young used on one project: hip, girder, jack, and valley.
It’s estimated that nearly 80% of the roofs on new houses are framed with trusses rather than conventional rafters. The reason for this is simple: roof trusses are faster to install, which lowers labor costs and results in quicker occupancy. In seismically active areas, such as the Pacific Northwest region where we build, using trusses is generally the simplest way to build a complex roof that satisfies code and local inspectors. It has also been our experience that perhaps one framing crew in a dozen could efficiently stick-frame the complicated roof of a custom home like the one shown here.
On this job, the architect sent his detailed roof plan to the truss company, which used computer software to design the individual trusses and to plan the layout. Once the foundation was in place, a representative from the truss company checked the site for factors that would complicate delivery and took final measurements of the foundation. The truss package was delivered 10 days later.
Make a plan for delivery
Depending on their length, trusses may arrive on a flatbed truck that has an on-board crane, or they may be delivered on a semi and unloaded with a separate crane.
On this project, they came on a 60-plus-ft. flatbed with an on-board crane. Even with this big truck, the trusses still stuck out the back by 10 ft., which meant that the truck was blocking a lane in the street. Further complicating matters, the truck driver, who was also the crane operator, had to navigate around trees to get the trusses off the truck, which prolonged the delivery process.
It wasn’t a problem on this job, but the parking area for the truck needs to be wide enough to accommodate the stabilizers for the crane. Because the truck is heavy, the truss company may require a damage waiver to protect it from lawsuits if the truck breaks a paved driveway. We often use scraps of LVLs under the stabilizers to help spread the load when the truck is on concrete or asphalt.
The truss company is responsible for getting the trusses to the job and will set the bundled trusses on the ground, or on the wall plates if they can reach, but they won’t spend the time to set individual trusses. On most residential projects, this isn’t a problem, but on commercial and large residential jobs with especially long or tall spans, it’s worth the cost of hiring a crane to set individual trusses while the framers brace them. We’ve also been on jobs where the delivery truck can’t get the trusses on the roof because of their size or because of poor access. In these situations, we bring in a smaller crane or an all-terrain forklift to lift trusses individually or in bundles.
Precise layout and understanding of the truss plan is the key to making a truss roof with hips and valleys that come together. A good truss manufacturer provides a detailed layout, bracing instructions, and all the necessary hardware. However, you’ll need a basic understanding of roof framing for the plan to make sense. Fortunately, truss and stick-frame roofs share much of the same terminology.
Where do you start?
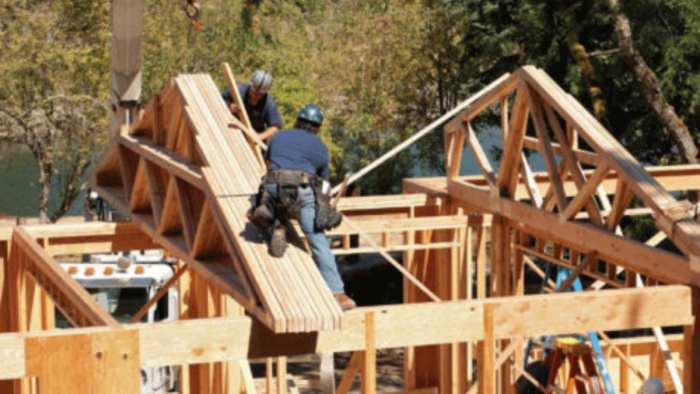
The first step is to look critically at the plan and decide which truss to place first. It usually makes sense to start with a girder truss in one of the hip or valley sections of the roof. As their name suggests, girder trusses support other trusses, and they’re common on complex truss roofs. We start with a girder truss because once the girder truss is fastened to the other trusses that it helps to support, these assemblies are sturdy and largely self-bracing. We also find it easier to compensate for irregularities in the layout by adjusting common trusses rather than girder trusses and the hip and valley trusses that attach to them.
Once we decide where to start, we transfer the layout from the plan to the top plates. We don’t do the entire layout at once; instead, we do it in sections. With a three-person crew, we find it’s most efficient to have our lead carpenter start the other two crew members setting trusses in one section. Once things are under way, he continues on the next section of roof. Any of the crew members can direct the crane operator when he’s setting the individual or bundled trusses that they’re currently working on, but the lead guy is responsible for deciding where to place the bundled trusses that will be installed after the crane leaves.
Given the high loads imposed on them, girder trusses are often made from multiple truss layers called plies. Many times, the truss company assembles multi-ply trusses, which generally saves time and effort, but it makes sense to leave the plies separate when a multi-ply truss would be too heavy or awkward to set. If you field-assemble multi-ply trusses, follow the manufacturer’s fastening schedule. Once a girder section is set and braced, we move on to a neighboring section of roof, then set those trusses and brace them to the girder section.
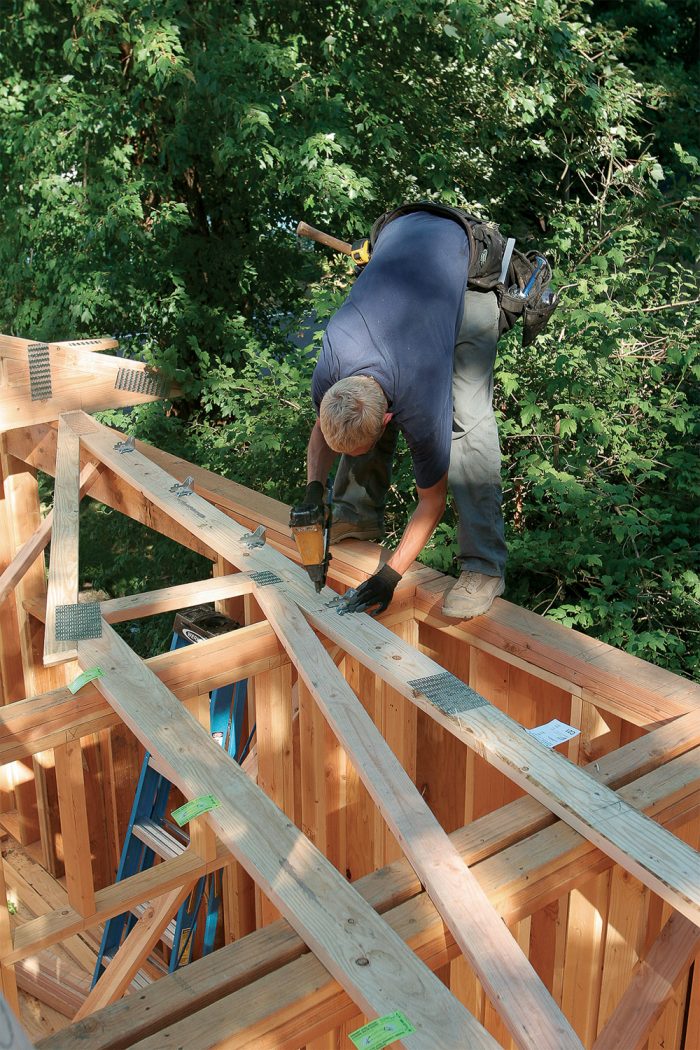
Go with the recommended bracing
Even though the bracing specified on the truss manufacturer’s installation guide can seem like overkill, it’s always best to go with it in case something goes wrong. High winds and mishaps can cause trusses to fall like dominoes, and there’s seldom anything left to salvage afterward.
That said, on residential projects where smaller trusses have greater structural integrity, the most important thing is solid bracing to keep the first truss upright. The rest of the trusses then can be braced to this truss and braced laterally to each other. We also install diagonal bracing every 12 ft. to 16 ft. to add vertical stability. For this project, we set a major girder truss, braced it, and then installed the perpendicular mono (single-slope) trusses that hang from it. This created a strong, self-bracing assembly that subsequent trusses could be safely braced against.
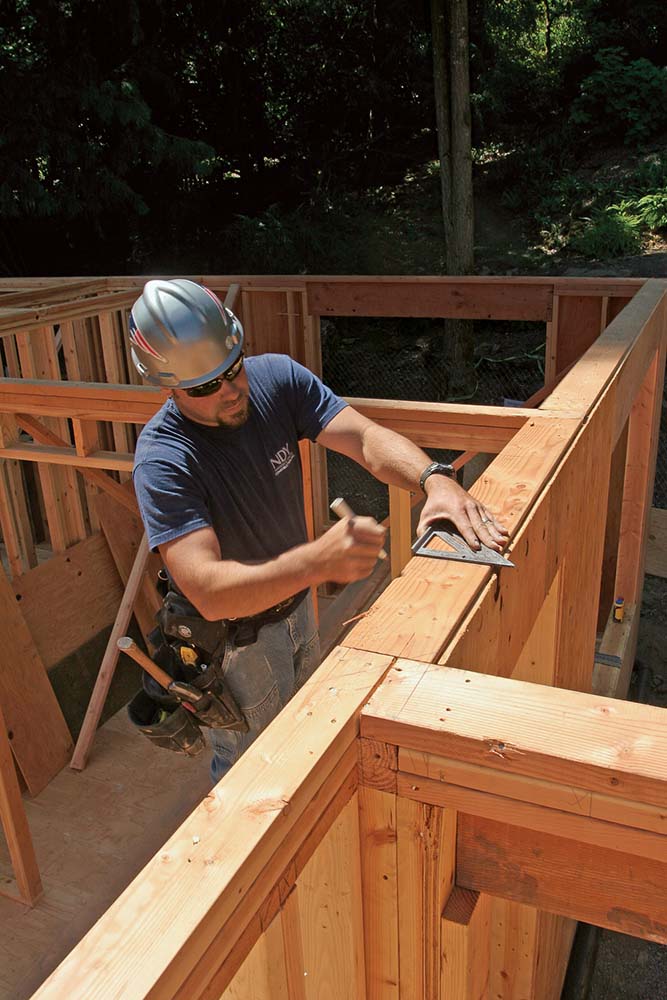
Once the trusses have been set, we often have additional framing to do in the valleys and blocking to install. Our truss supplier provides blocking as part of the package and even cuts holes and covers them with screening for eave blocking on vented roofs. We usually install the blocking as part of the sheathing process. Truss suppliers can make what are called valley sets, which are trusses that decrease in size to match the roof pitch as they ascend the valley, but we generally find that it’s easier to stick-frame these small areas rather than to use trusses.
The biggest problem occurs in sections with California valleys, where the valley trusses are nailed on top of the sheathing. Manufacturers never seem to compensate for the underlying sheathing, which throws off the layout, so after several attempts, we’ve decided it’s easier to stick-frame these sections ourselves.
We generally use a stringline to locate the ridge board that will receive the rafters. Then, using a construction calculator to find the rafter lengths, we fill in the valley sections with 2×4 or 2×6 rafters nailed to a 2×8 bottom plate that we call a lay board. The calculated rafters are generally close enough that we can scribe them to deal with any inconsistencies. On this complex roof, filling in the valleys took about a day for a skilled framer and one helper.
We start sheathing at the eaves, and then we work up toward the ridge. It’s easier to start on large, uninterrupted parts of the roof and then use offcuts for smaller sections. We generally use an all-terrain forklift to get the plywood up to the roof, which is a huge time- and muscle-saver.
Shopping for a truss supplier
The truss package for this 1950-sq.-ft. house with 2-ft. overhangs cost about $6500. This included the hip roof for the 450-sq.-ft. garage.
When you’re shopping for a truss supplier, ask about the moisture content of the lumber and the truss company’s tolerance for wane and crooked stock. When some of the trusses on this job arrived warped and required additional framing to correct, the truss company claimed that 1 in. of deflection is within their standards. We don’t think we’ll be using them again.
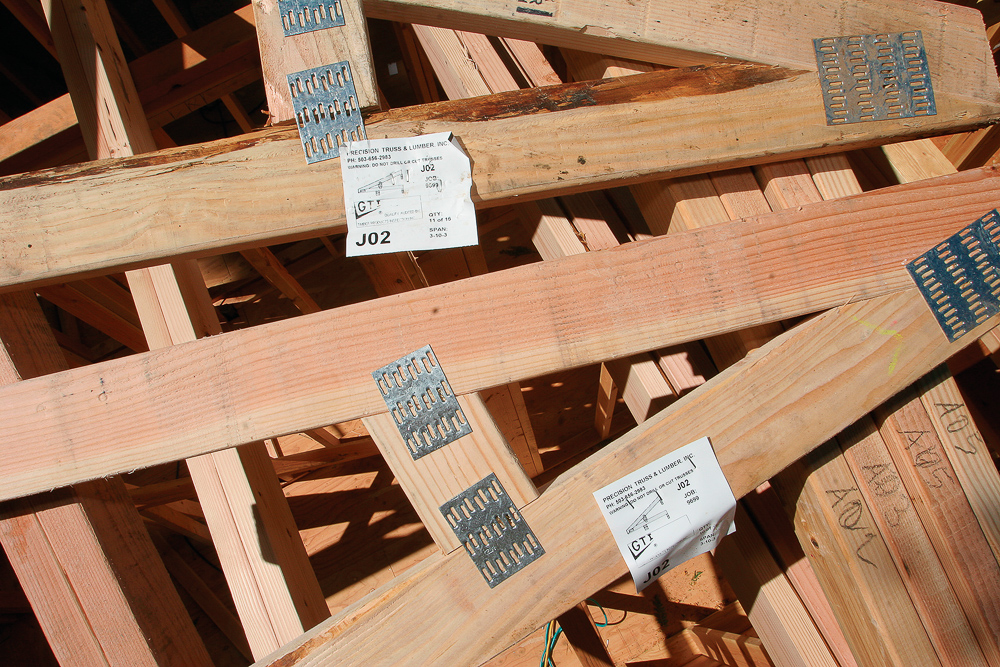
Stick with the plan
Perhaps the most important element in framing a truss roof is the plan provided by the truss manufacturer. It identifies every truss and truss location with a three- or four-digit code. A paper label attached to the truss corresponds with the coding on the plan. The plan is so important that Portland-area truss manufacturers laminate the drawing so that it can stand up to the area’s notoriously wet weather. Plan in hand, the framer decides where to start and in what order he’ll lift and set the trusses.
Hip trusses
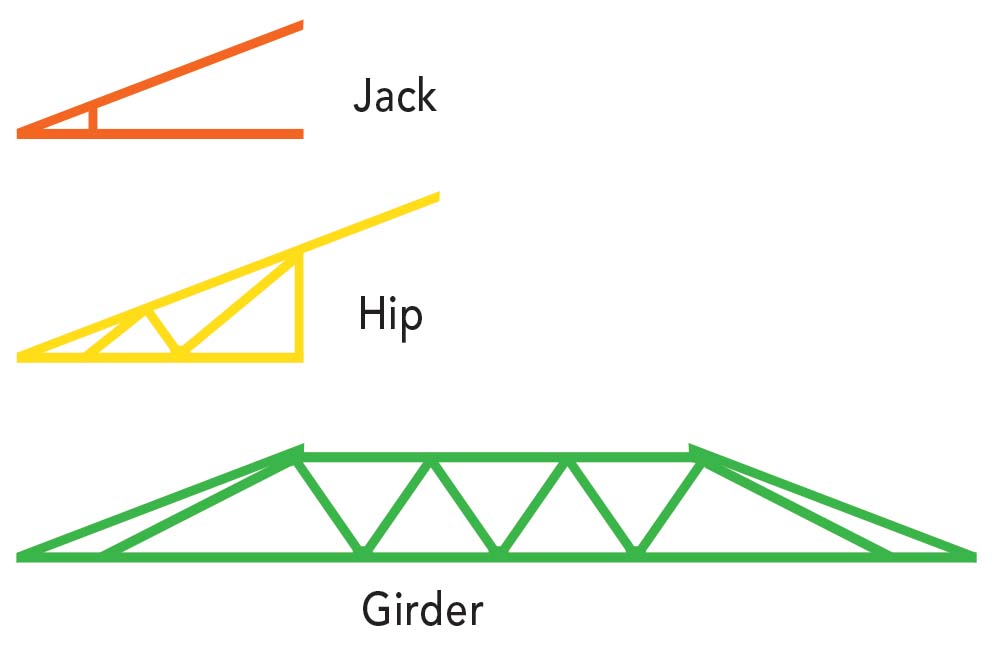
Hip trusses can take several regional forms. In their area, the authors most often see California hips (shown in yellow), which have sloping top chords that extend toward the ridge. In other areas, step-down or Midwest hips may be more common. Hip trusses are often combined with girder trusses (shown in green). Girders equipped with hangers help to support jack trusses (shown in orange).
Valley trusses
Valleys are usually built with increasingly smaller trusses as they go up the intersecting slope. The authors often find it
easier and less expensive to stick-frame these areas after all the trusses are set and the roof is mostly sheathed. The 2×6 site-cut rafters (shown above) bear on a 2×8 site-cut “lay board” that runs parallel to the valley center.
Modifying trusses?
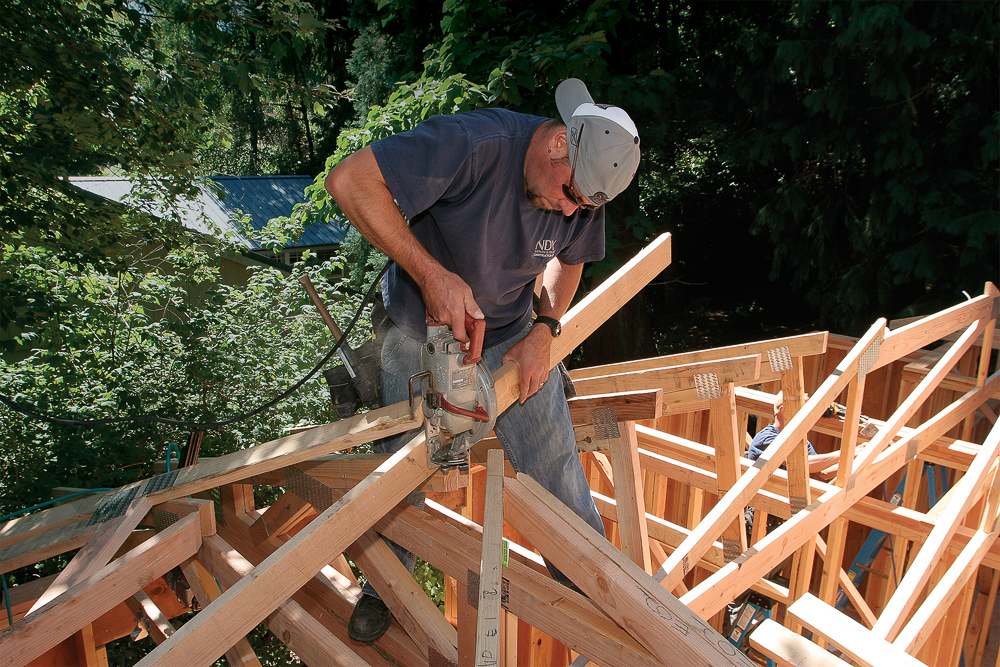
Everything you read says not to modify trusses in any way, and for good reason. The truth is, though, that truss companies make mistakes. When this hip truss simply wouldn’t fit, it became clear that a worker at the truss company forgot to trim the top chord. After the authors triple-checked that they had the right truss, they decided to cut it themselves. Always inspect carefully what’s going on, and discuss anything you’re not totally sure about with the truss designer. When a truss is damaged, ask for a repair solution from the truss company. Most things can be fixed with lumber splices or plywood gussets.
Photos by Patrick McCombe and Nina Johnson
Related stories:
For more photos and information on framing tricky truss roofs, click the View PDF button below.
From Fine Homebuilding #225
Fine Homebuilding Recommended Products
Fine Homebuilding receives a commission for items purchased through links on this site, including Amazon Associates and other affiliate advertising programs.

Hook Blade Roofing Knife

Peel & Stick Underlayment
Shingle Ripper

