Synopsis: What do you do with the space above the cabinets when a kitchen ceiling is 10 ft. tall? You can leave the space open as display space, you can add a set of short cabinets with glass doors, or you can do what trim carpenter Gary Striegler describes in this article: add a decorative frieze. This solution looks great, requires little cleaning, and is inexpensive. In a sidebar, Striegler shares a pro tip: gluing a 2x nailer for the crown when the ceiling joists aren’t perpendicular to the crown. In a second sidebar, he explains how to cut crown miters on the flat for both outside and inside corners.
When I started building, ceilings were 8 ft. tall. In the kitchen, a clunky soffit dropped down a foot above the cabinets, limiting them to 7 ft. in height. When ceiling heights grew to 9 ft., kitchen cabinets grew another foot or so to about 8 ft. Who couldn’t use the extra storage? But that was the limit for kitchen cabinets, because close to no one can reach higher than that without a ladder. Still, in my market, ceiling height continued to grow to about 10 ft. What do you do with the space above the cabinets? One solution is to leave it open as display space. Of course, that adds costs for lighting and display items, never mind the extra dusting.
Photo: Bryan Striegler
Drawing: Bob La Pointe.
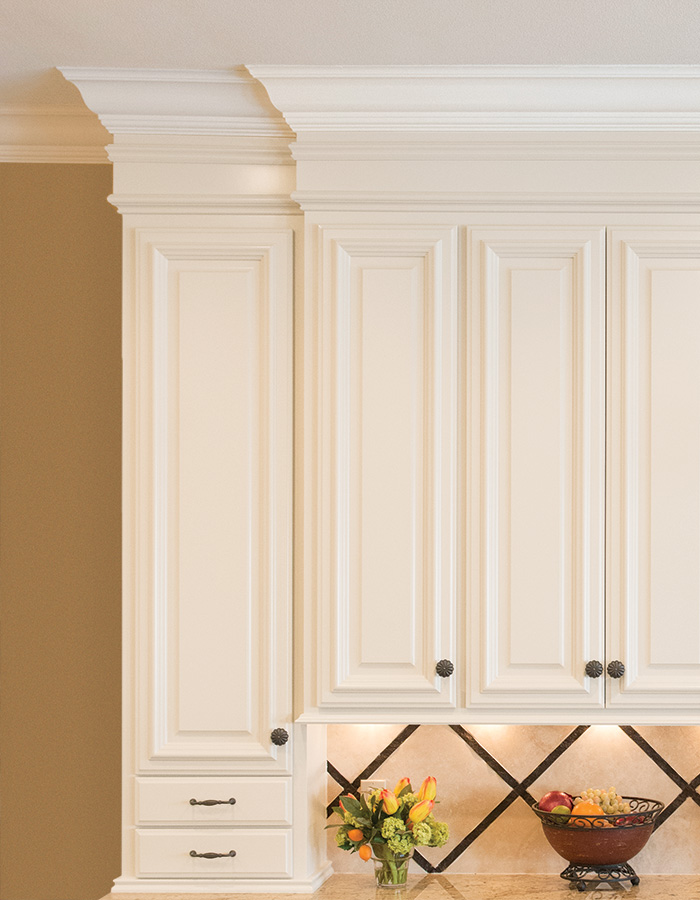
In response, some of my clients asked about taking their upper cabinets all the way to the ceiling, which at least minimizes the dusting. But just growing the upper cabinets by 2 ft. would put the proportions way out of balance. Plus, manufacturers don’t want to warrant a door that tall. One solution was to add a set of short cabinets with glass doors. That cuts way back on the dusting, and the extra row of cabinets looks great. However, it can add several thousand dollars to the cabinet budget. I needed a third option that would be less expensive than adding cabinets and involve less maintenance than open tops. The solution turned out to be adding a decorative frieze above standard wall cabinets.
The whole assembly is relatively inexpensive to build, consisting merely of a flat frieze board that supports crown, panel, and bolection molding. It looks great, ties into the kitchen crown molding, and needs little dusting. It took my lead carpenter and me a bit over a day to build the frieze for the kitchen shown here. Kitchens vary, of course: Ceiling height, cabinet height, style, and finishes will affect your final design. Because this custom kitchen was later painted on site, the frieze ended up blending seamlessly with both the room and the cabinets. If you use prefinished cabinets, you can get from most manufacturers finished plywood and moldings that can be used in the same way.
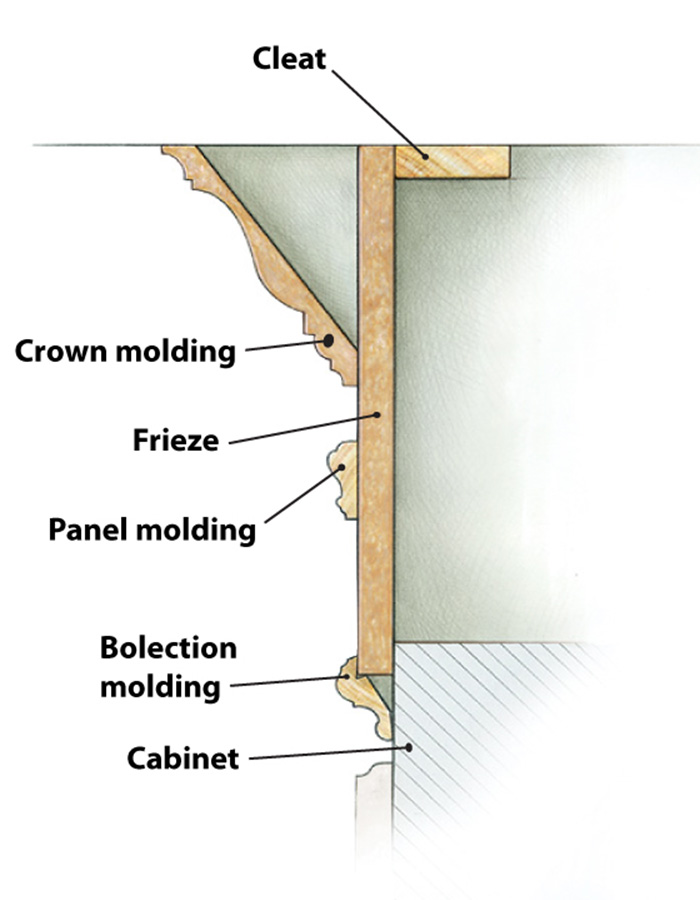
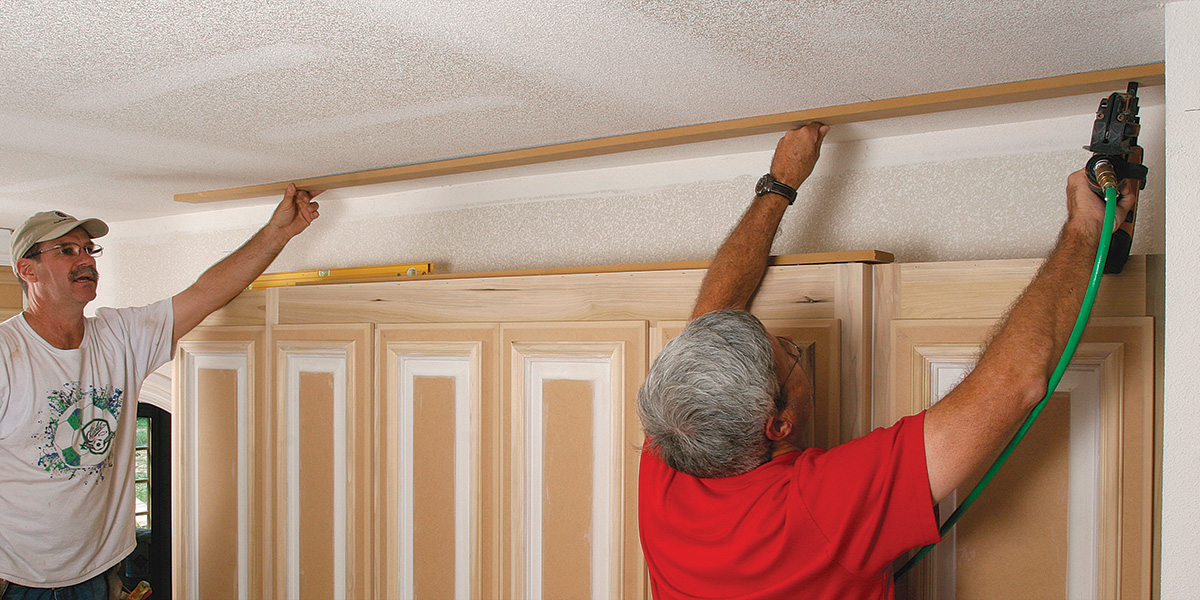
Cleats outline the frieze
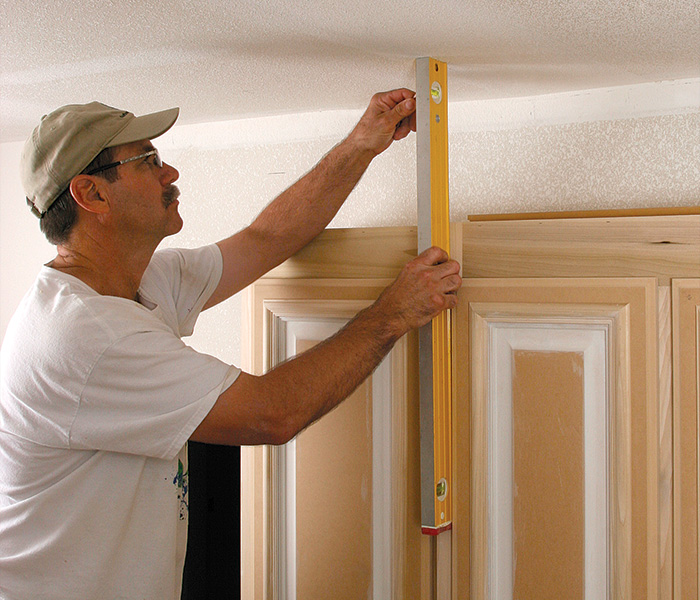
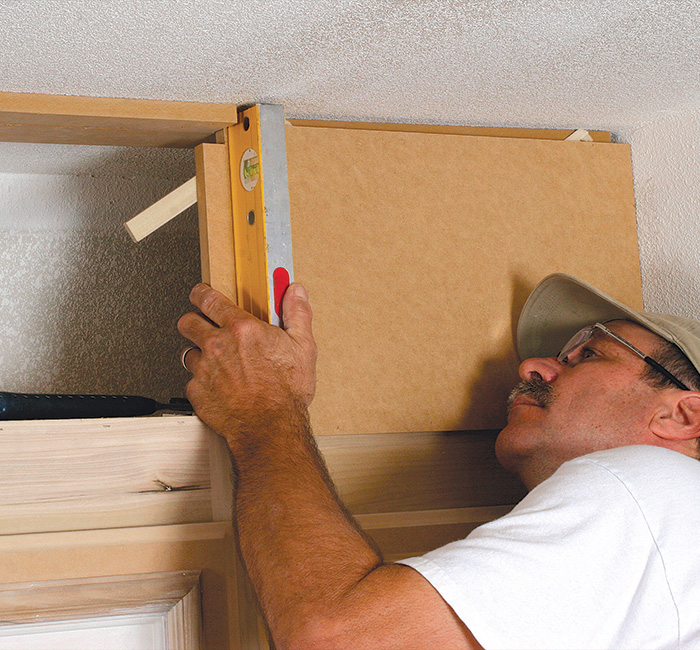
Fasten the top of the frieze to cleats nailed to the ceiling and plumb with the face of the cabinets. To ensure that the top of long runs of frieze will be straight, I establish two endpoints and snap a chalkline on the ceiling. I make the cleats from scraps of whatever the frieze-board material is—in this case, 3 ⁄ 4-in. MDF. The material doesn’t matter as much as making sure it’s straight so that any irregularities don’t telegraph to the face of the frieze.
Two points make a line. Use a level to plumb up from the face of the cabinet and to establish the endpoints of the cleat.
Nail the cleat to the ceiling. If the cleat crosses joists, nail to them. If not, spread glue on the back of the cleat, and secure it while the glue sets by driving nails at opposing angles into the drywall.
Reinforcing a corner. When there are no joists at a corner, reinforce the cleats by adding a second layer.
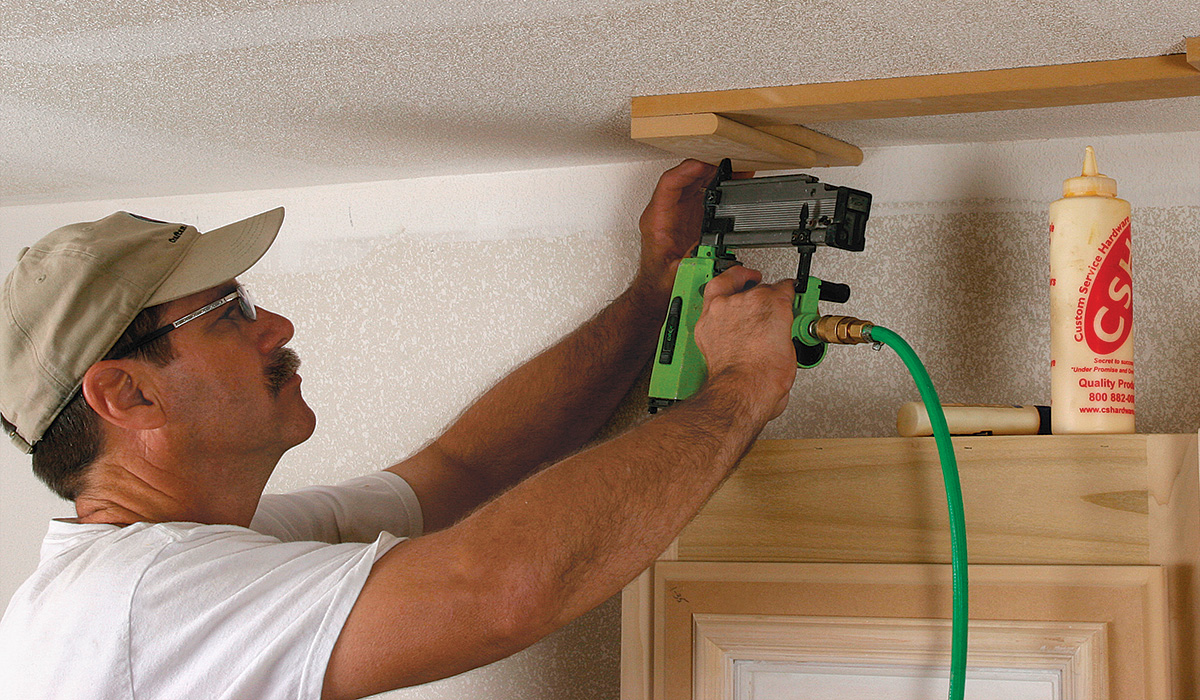
Frieze board is the foundation
Because this kitchen was going to be painted, my lead carpenter and I ripped the frieze board from 3 ⁄ 4-in. MDF shelf board. MDF is stable and holds paint well, and shelf board is a convenient way to buy it. We mitered the outside corners and butted the insides. The inside and outside corners had to look good, but the fit against the ceiling and the tops of the cabinets didn’t matter much since we were adding moldings in both places.
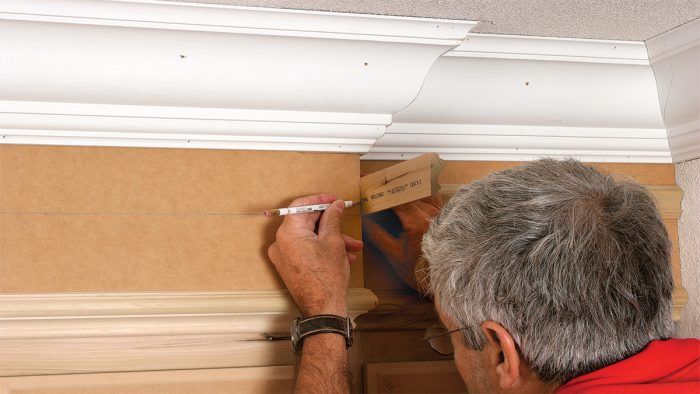
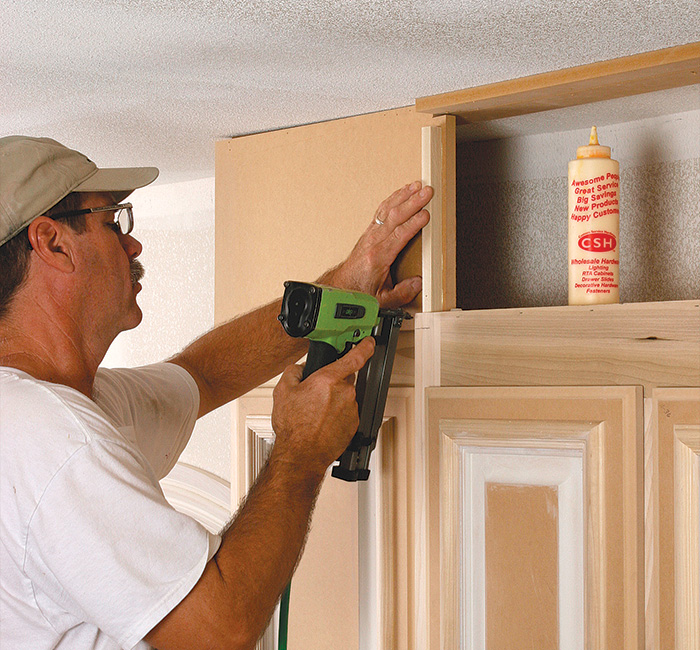
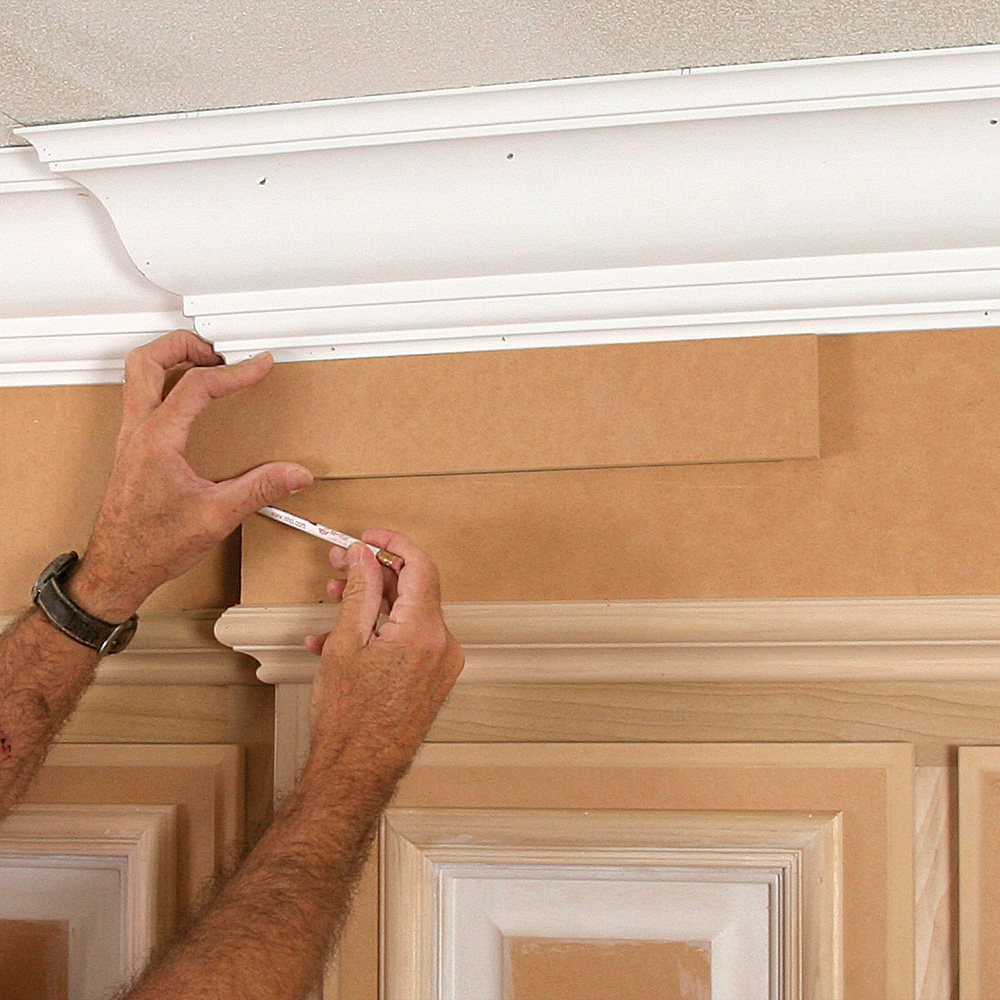
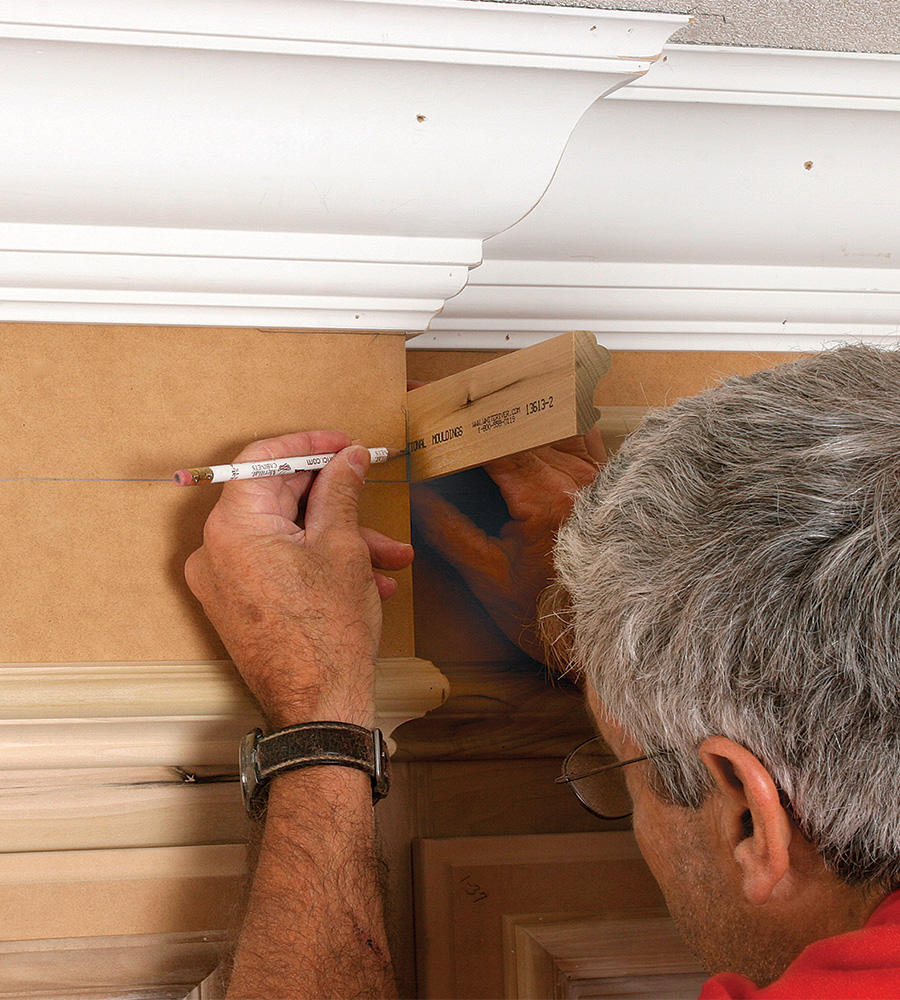
Mark the cabinet. Because they’re so close, any variation in spacing between the frieze board and the tops of the doors would be obvious. Mark the frieze location carefully.
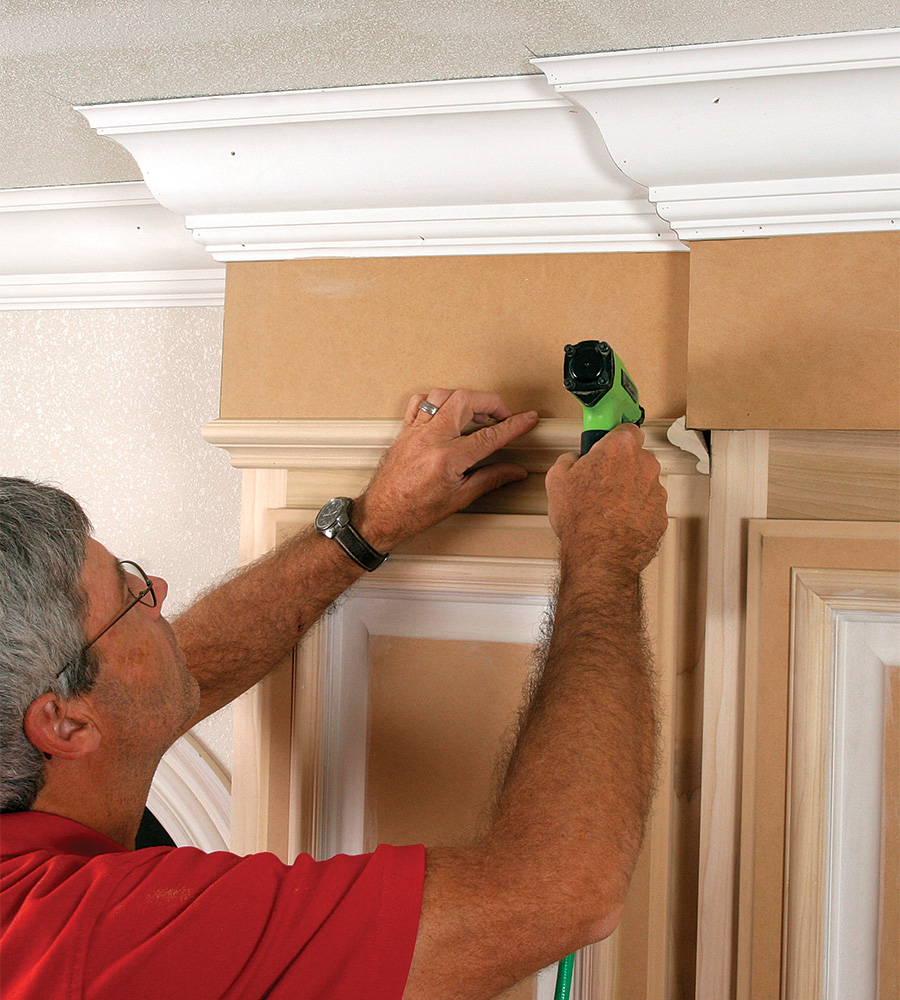
Nail the frieze board. Be sure to hit both the tops of the cabinets and the cleats on the ceiling.
Check for plumb. To ensure tight joints, it’s crucial that the frieze be plumb. Sometimes a shim or two is required.
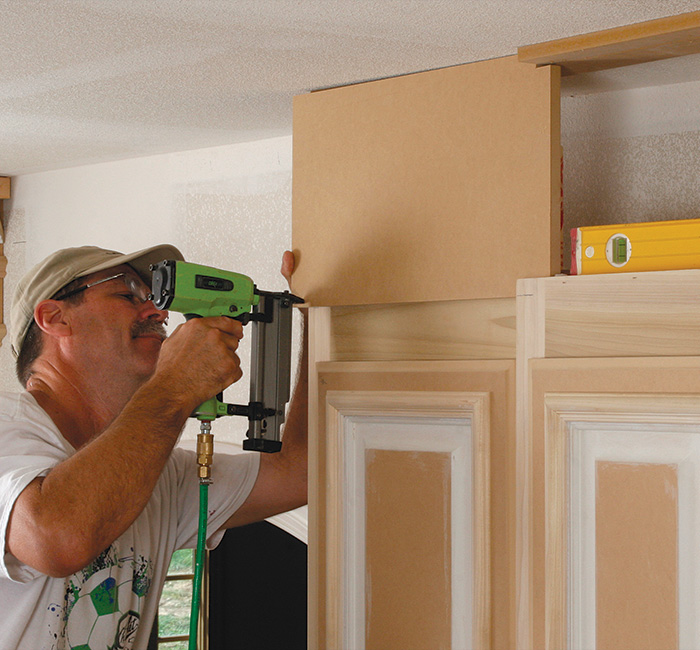
Notch, and add nailers as needed. Some pieces of frieze board will extend behind others. Notches allow them to clear the cabinets and the cleats. Nailers provide attachment for the abutting frieze board.
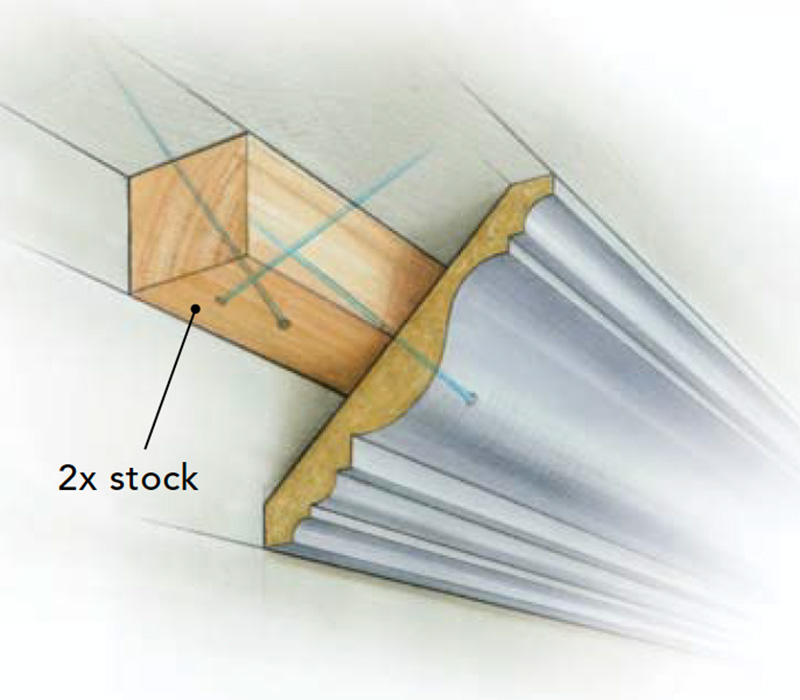
Pro Tip: Add a nailer for the crown
Drawing: Bob La Pointe.
When the joists run perpendicular to the cabinets, they provide nailing every 16 in. When they don’t, a piece of 2x stock glued to the drywall offers a solid attachment for crown. Once it dries, carpenter’s glue does a surprisingly good job of holding the nailer in place. The trick is securing the piece until the glue dries. For that, drive in long finish nails at opposing angles.
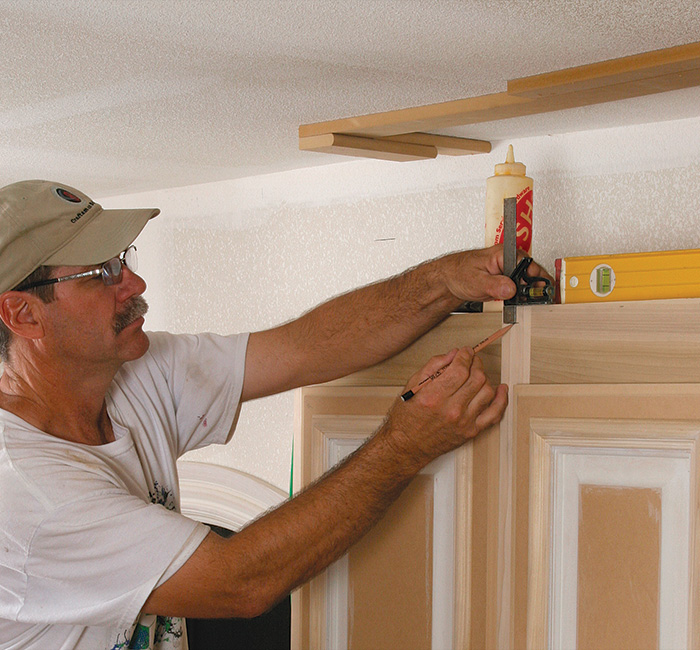
Mark the crown’s location
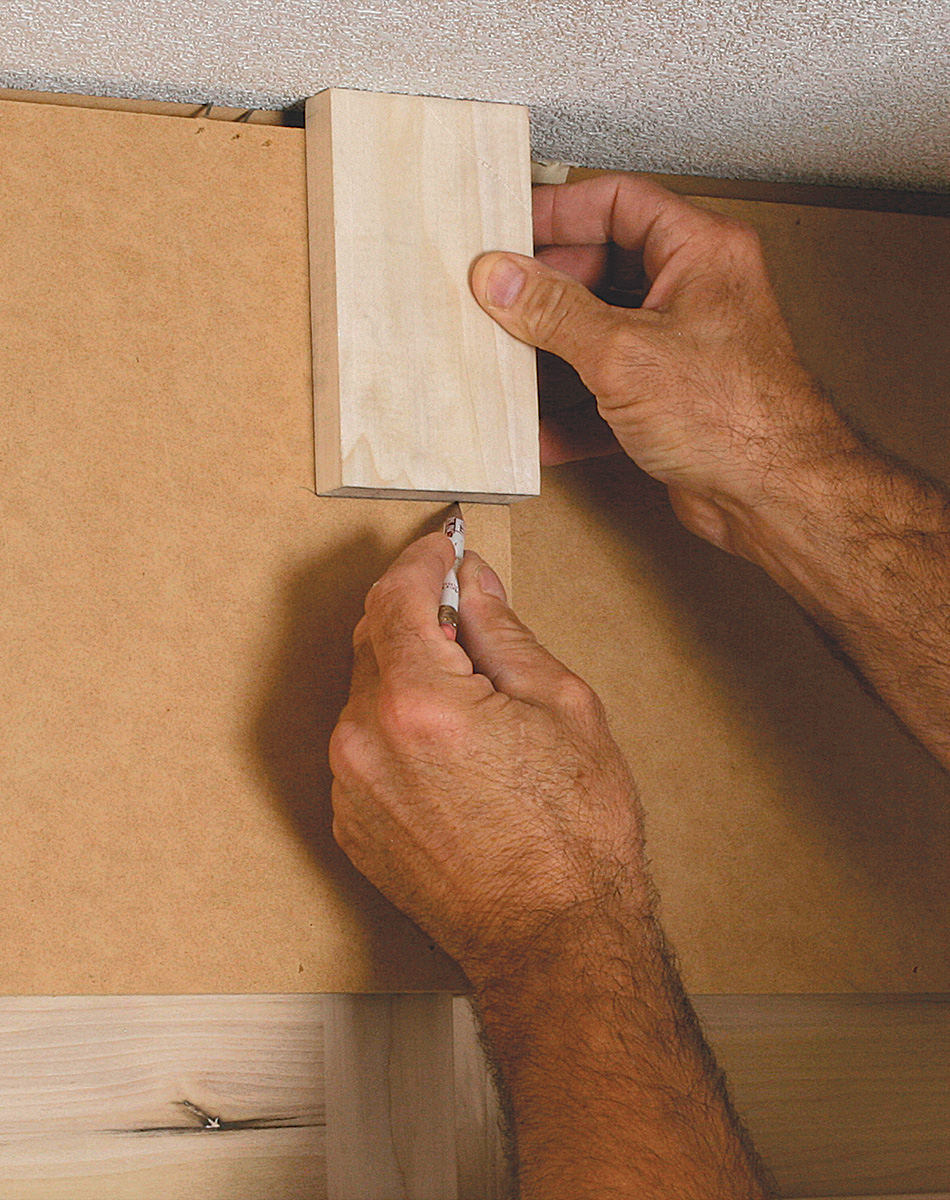
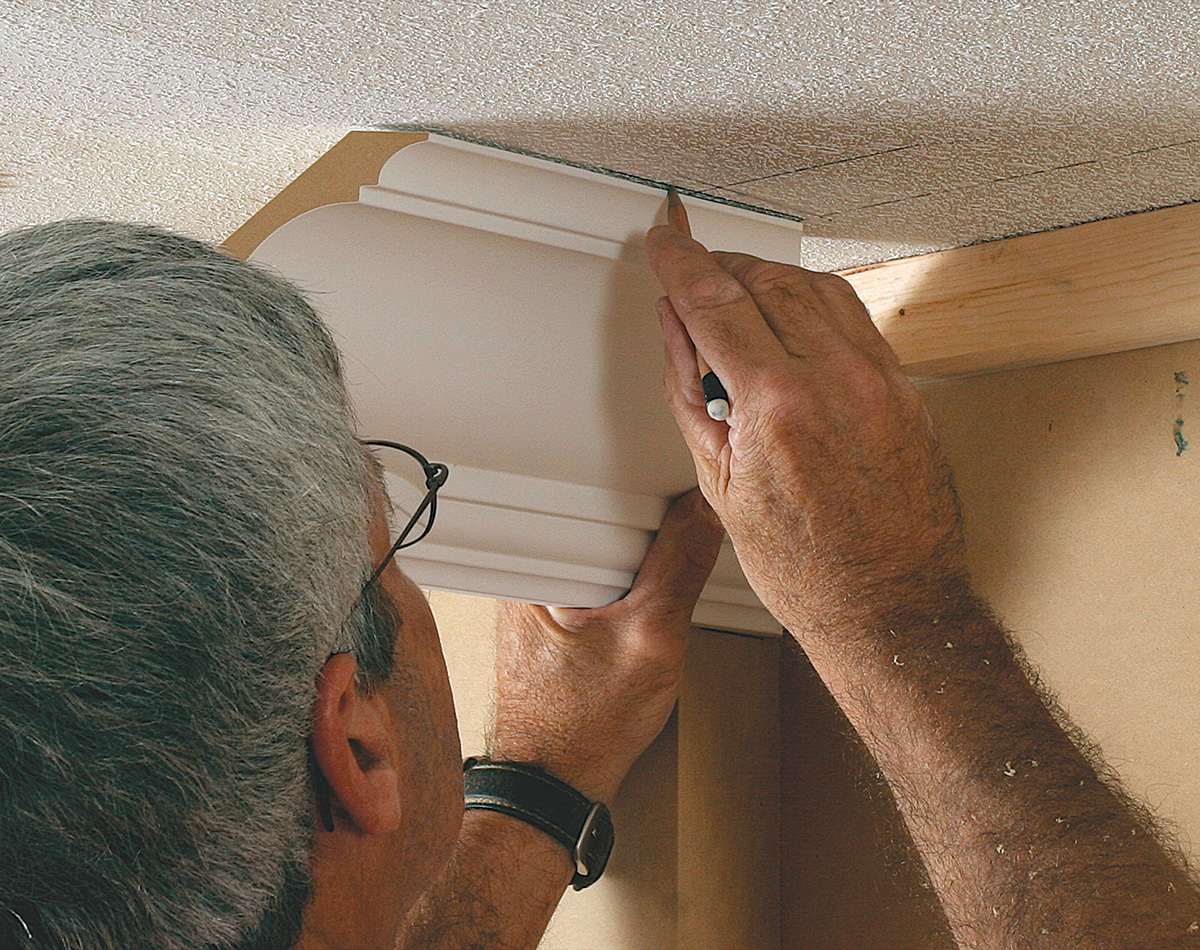
When installing crown molding for cabinets, the lengths are typically short, so I like to mark the crown for cutting by holding it in place. To ensure I’m holding it at a consistent angle, I mark the location of the crown’s top on the ceiling and its bottom on the frieze board. I determine the crown’s drop from the ceiling by holding a scrap inside a square and noting the measurement, which I use to make a gauge block.
Mark the crown’s bottom. Use a block cut to the length of the crown’s drop to mark the location of the crown’s bottom on the frieze.
Mark the crown’s top. To locate the top, hold a scrap of crown to the bottom line.
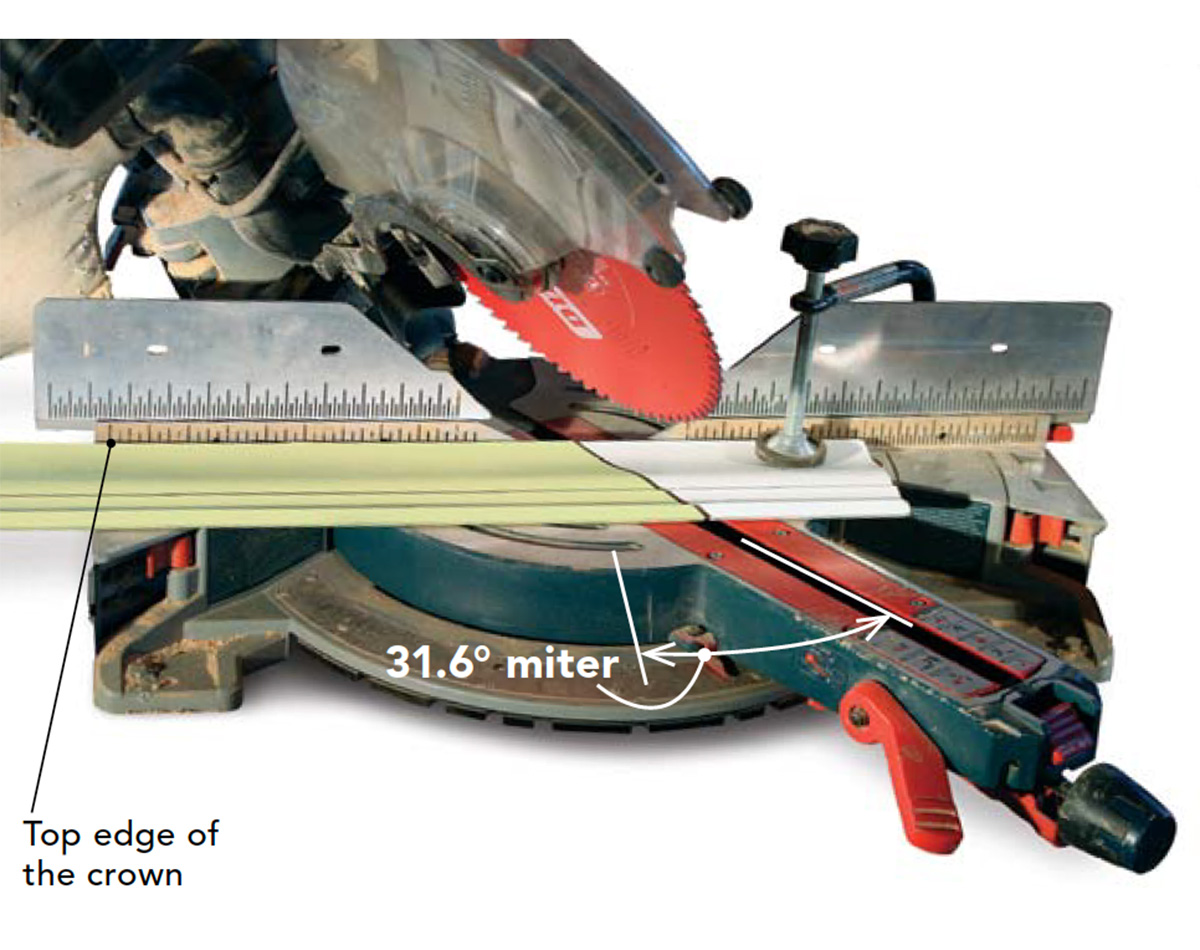
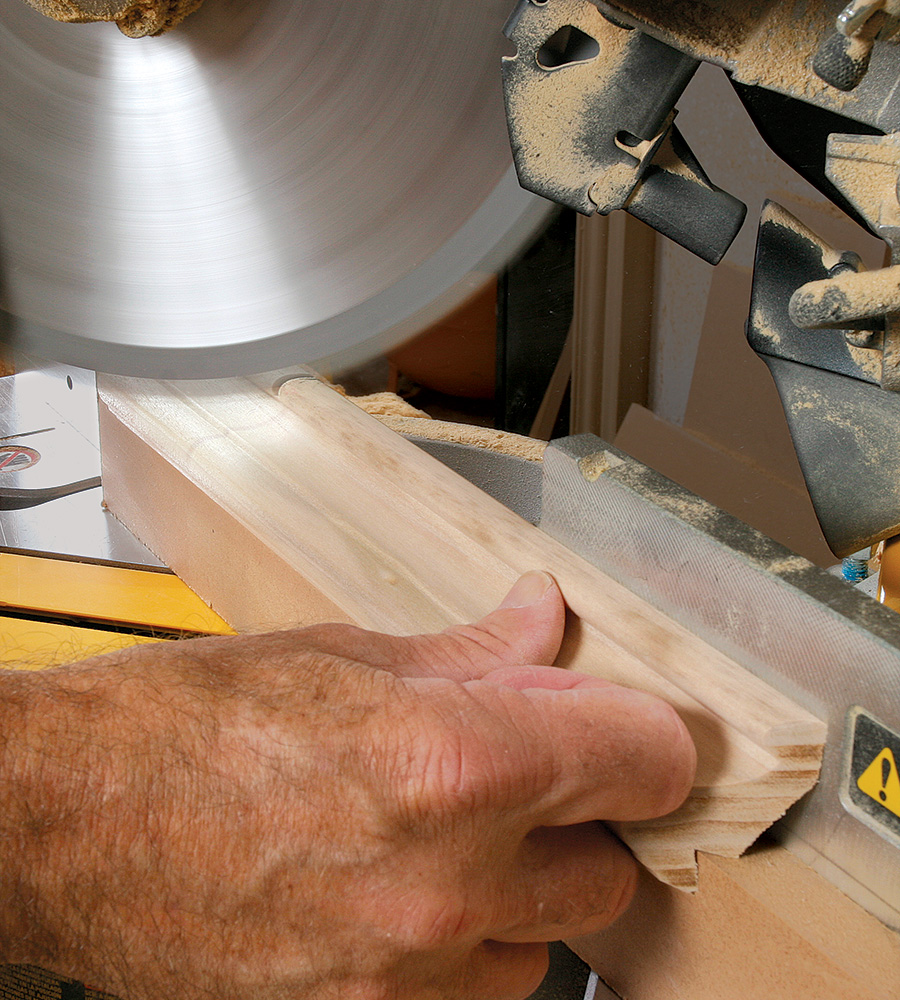
Cutting crown miters on the flat
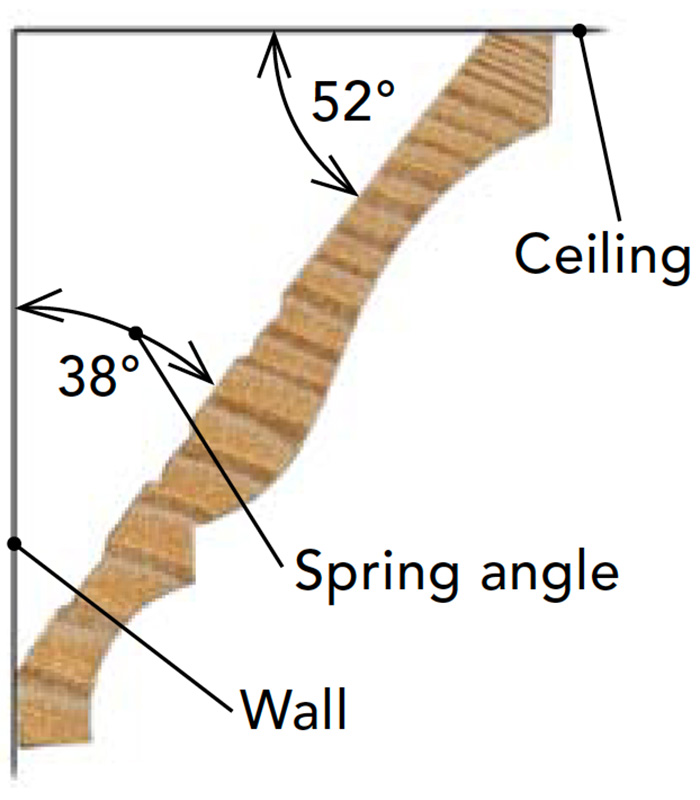
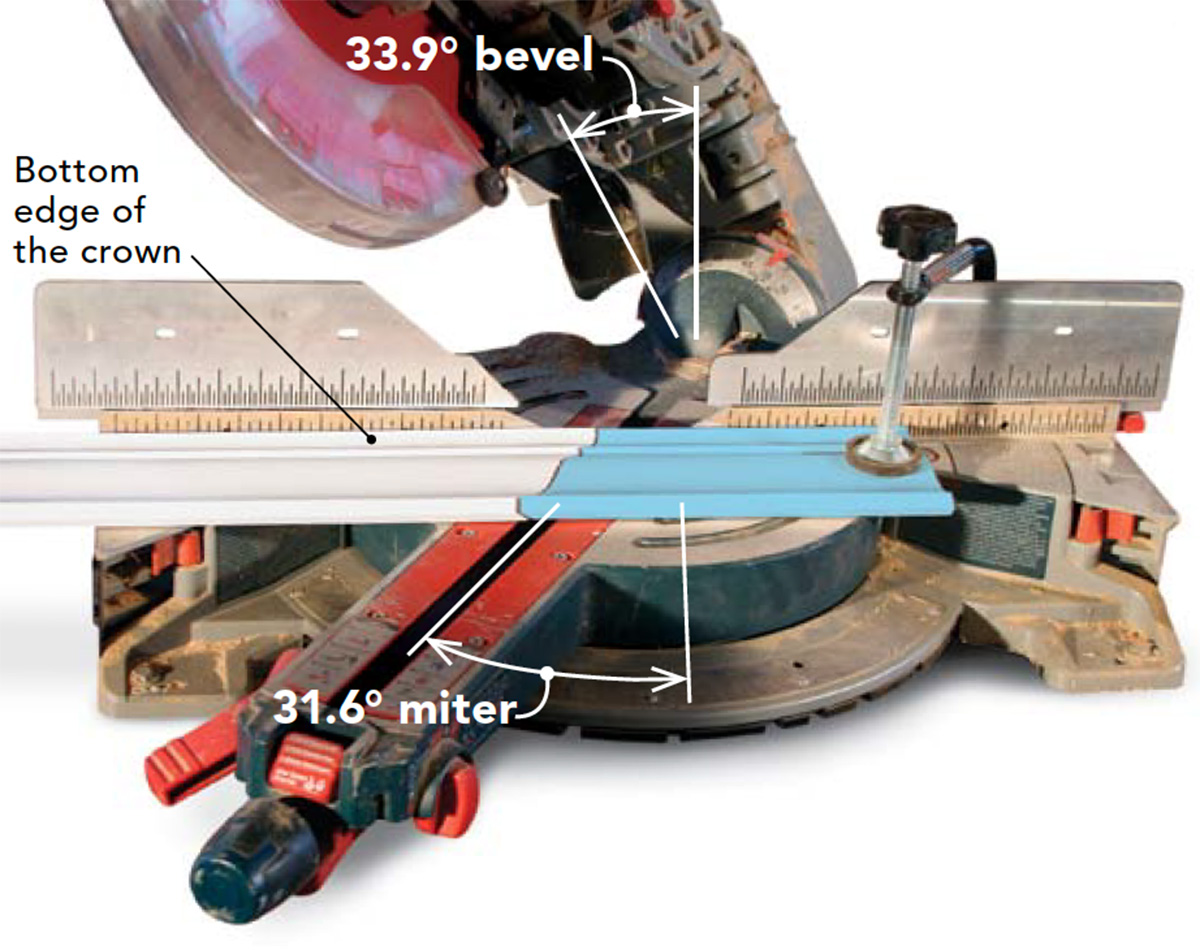
Wider crown, such as the 7-in. material used here, can’t be cut standing up on most miter saws, so it has to be cut lying flat. if the crown is the most common configuration, which springs off the wall at 38° and meets the ceiling at 52°, set the saw at a 33.9° bevel and a 31.6° miter. most compound-miter saws have marks or detents at these locations. many newer saws bevel to the left and the right, but older saws as well as some new ones bevel to one side only, usually with the saw tilting to the left, as shown here.
Drawing: Bob La Pointe.
Set the miter angle to the left
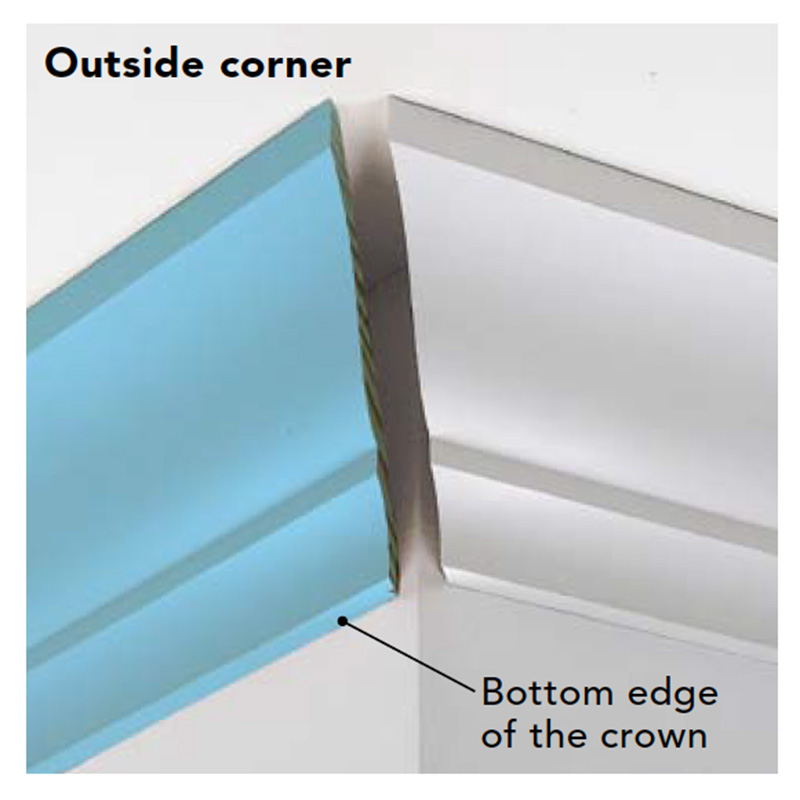
To cut the left half of an outside corner or the right half of an inside corner, set the miter 31.6° to the left, and position the bottom of the crown against the fence.
Drawing: Bob La Pointe.
Set the miter angle to the right
To cut the left half of an inside corner or the right half of an outside corner, set the miter 31.6° to the right, and position the top of the crown against the fence.
Drawing: Bob La Pointe.
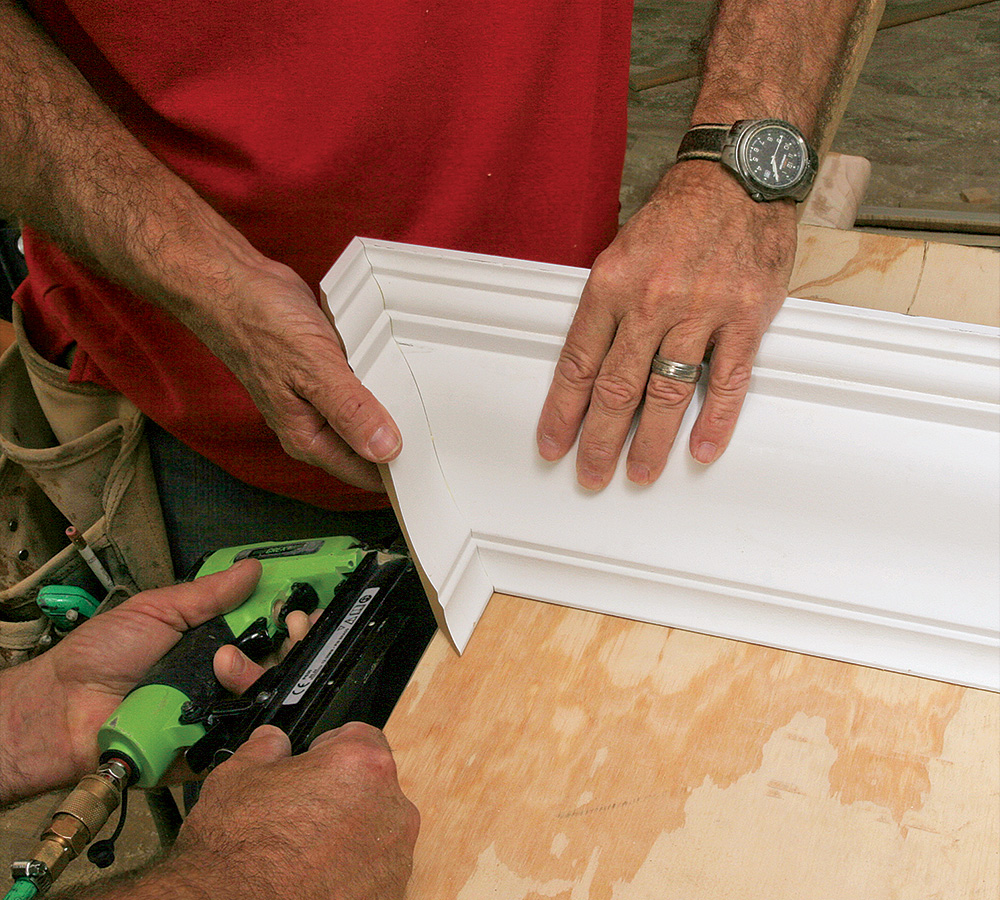
Tackle tough pieces first
I start with the most difficult sections, which are typically the short ones, or where there’s a piece with two inside corners. Sections with short runs are easier to assemble on a bench; that way, you’re sure to get a tight fit. I cut one end of the longer sections, then hold the pieces in place to check the fit before marking the other end for cutting.
Assemble short sections. Use glue and brad nails to join short sections to longer pieces prior to installation.
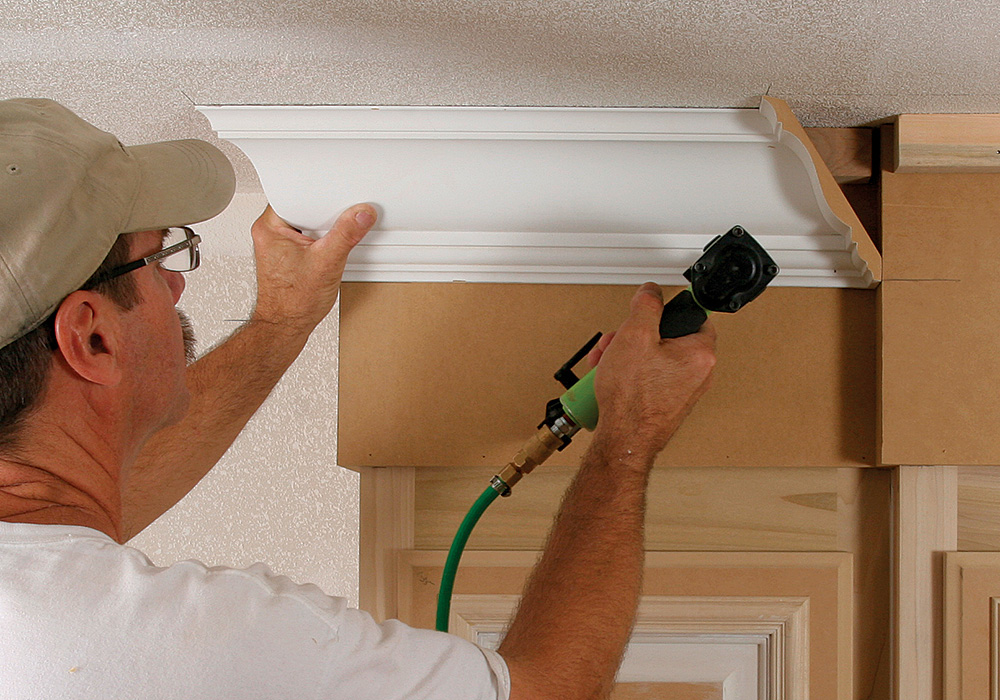
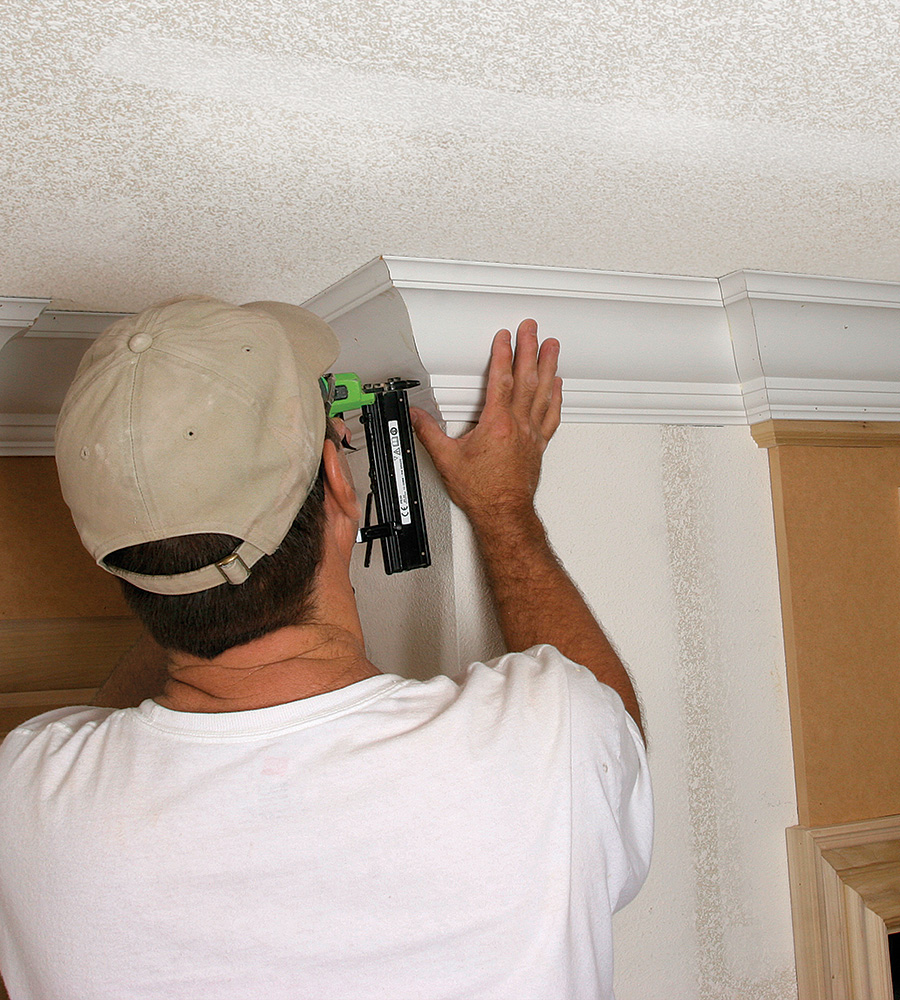
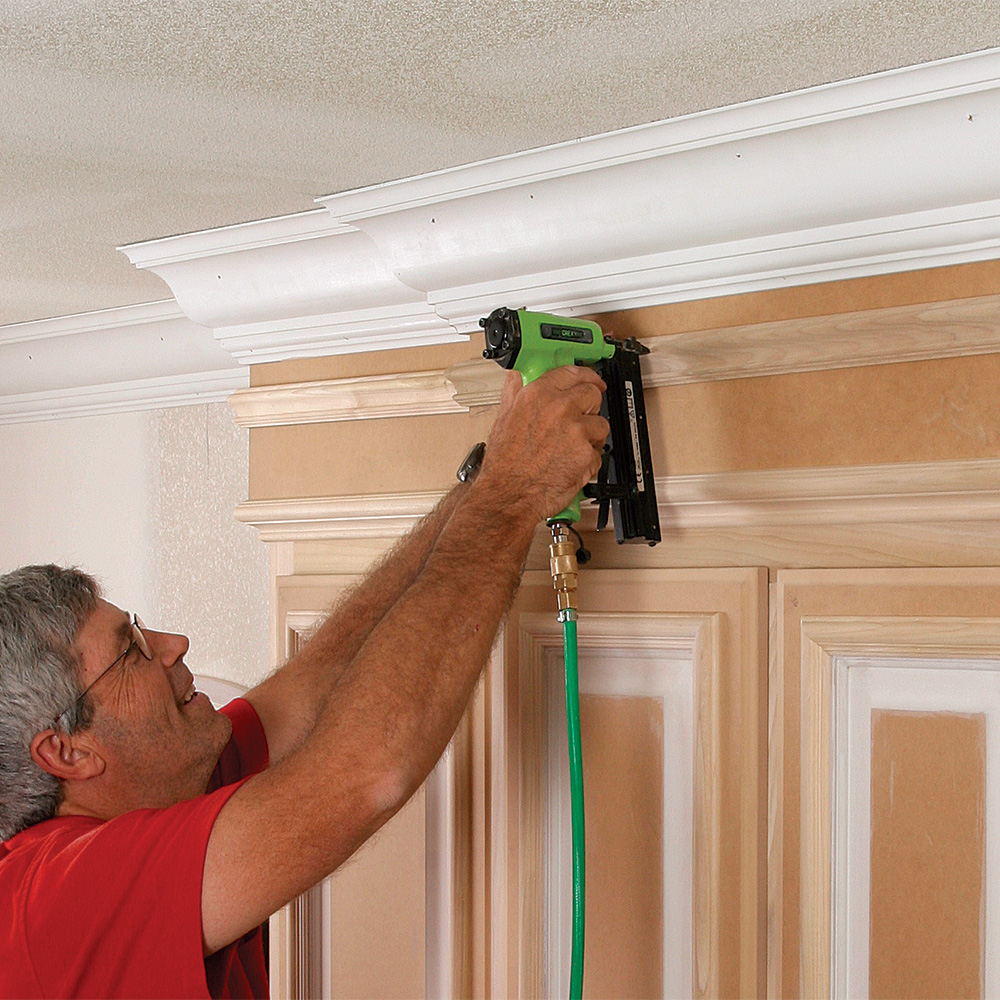
Nailing in place. Holding the crown on the lines, fasten it to the frieze and ceiling.
Fasten the joint. Spread some glue inside the joint, and reinforce it with brads.
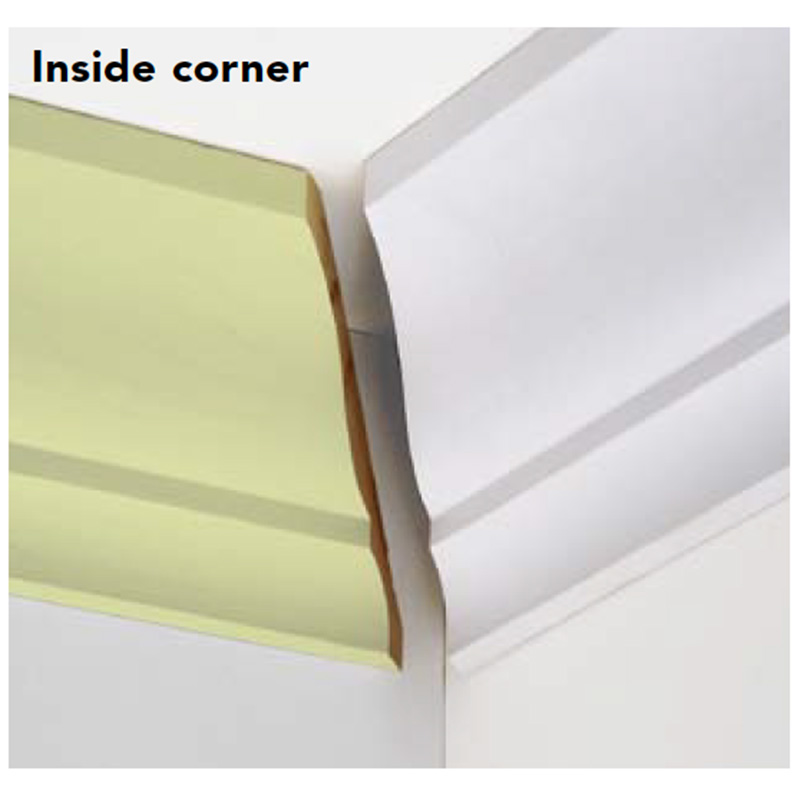
Bolection molding adds interest
I had options for the panel molding below the frieze board, but I selected a bolection molding. Most panel moldings (also known as base cap) are 3 ⁄ 4 in. thick and would just butt up to the frieze. Bolection molding is milled so that the top edge of the molding lips over the piece above, hiding the joint as well as adding depth and interest. When being cut, bolection molding has to be held at the angle it will be installed.
Add a sacrificial shim under the bolection when cutting. To get the correct angle, make the shim the same thickness as the piece the molding lips over.
Nail the bolection home. Hold the lip of the bolection molding tight to the edge of the frieze when nailing.
Panel molding breaks up a wide board
Adding a panel mold below the crown breaks up the wide frieze and adds interest. I find that placing the band of panel molding about twothirds of the way between the crown and the bolection is about the right proportion. Unlike the crown and the bolection, panel molding is simply cut flat against the fence.
Locate the bottom of the panel mold. Holding a block against the crown ensures a consistent line.
Marking in place makes for accurate cuts. Make sure the first end of the piece fits well, then mark the second end with a sharp pencil.
Nail the panel molding along the layout lines. Particularly with longer pieces, installing along the lines straightens any warped molding.
Gary Striegler is a master trim carpenter from Fayetteville, Ark.
Photos by Andy Engel, except where noted.
From Fine Homebuilding #244
To view the entire article, please click the View PDF button below.
It would have looked a lot better if you had painted the crown the same color as the cabinets. That way the frieze looks like part of the cabinets, not an add-on.
I would also look like a quality job and not a production builder mistake. Though this is just my opinion.
People build McMansions so they can store all of their massive accumulations of stuff. And there is a lot of kitchen stuff to store. Like the Bundt pans that will be sold unused at your estate sale and such. The kitchens are huge so they need high ceilings to retain a sense of proportion. So instead of kludging in a frieze, you might as well run the cabinets all the way up and install library ladders on rollers so they can store even more stuff up there in the sky.
Or maybe you could put the cabinets on tracks that lower them down so you can reach the high stuff. You could build a hamburger press into the bottom of the one near the stove, too.
This is a dialog window which overlays the main content of the page. The modal window is a 'site map' of the most critical areas of the site. Pressing the Escape (ESC) button will close the modal and bring you back to where you were on the page.
We use cookies, pixels, script and other tracking technologies to analyze and improve our service, to improve and personalize content, and for advertising to you.
We also share information about your use of our site with third-party social media, advertising and analytics partners.
You can view our Privacy Policy
here and our Terms of Use here.


View Comments
It would have looked a lot better if you had painted the crown the same color as the cabinets. That way the frieze looks like part of the cabinets, not an add-on.
I would also look like a quality job and not a production builder mistake. Though this is just my opinion.
People build McMansions so they can store all of their massive accumulations of stuff. And there is a lot of kitchen stuff to store. Like the Bundt pans that will be sold unused at your estate sale and such. The kitchens are huge so they need high ceilings to retain a sense of proportion. So instead of kludging in a frieze, you might as well run the cabinets all the way up and install library ladders on rollers so they can store even more stuff up there in the sky.
Or maybe you could put the cabinets on tracks that lower them down so you can reach the high stuff. You could build a hamburger press into the bottom of the one near the stove, too.