
How to Install a Tile Kitchen Backsplash
A veteran installer shares his priorities and process for tiling a backsplash.
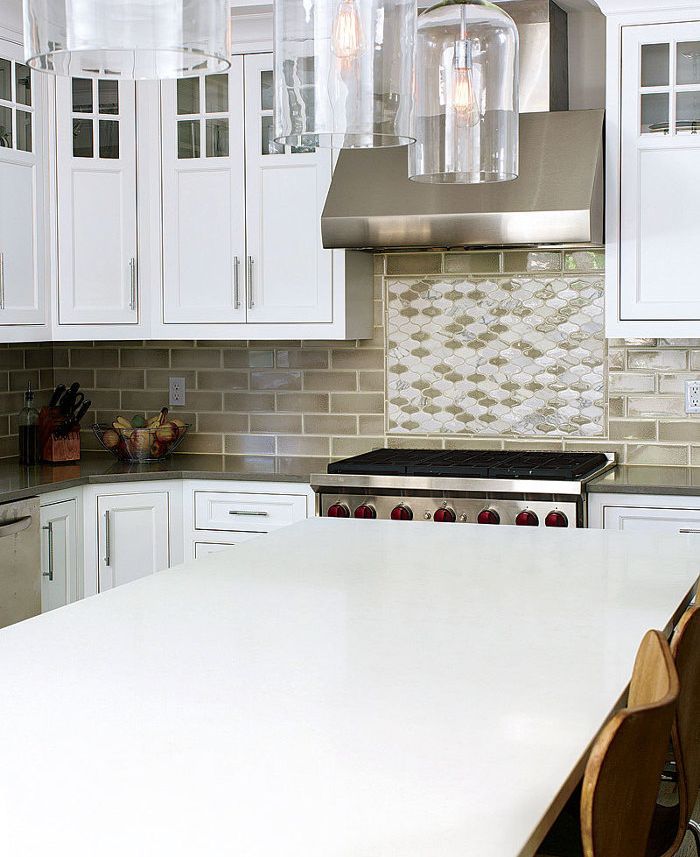
Photo: Michael Piazza
Synopsis: Although more modern varieties of tile are also common, the classic look of 3×6 subway tile never seems to go out of style. In this article, veteran tile installer Tim Keefe shares his methods for tiling a backsplash so that it looks right and lasts a long time. The process starts with setting up the work area, sealing the tile, and laying out the running-bond pattern for the backsplash. Keefe identifies his favorite thinset, grout, and caulk, and he shares advice on how to mix and/or apply each. Accent tile is also part of this job, so Keefe offers tips for working with mosaic tiles and sheds some light on how to avoid common layout problems.
Web extra: Preparing for a tile backsplash
Kitchen backsplashes are among my most frequently requested tile jobs. Whether a backsplash is part of a new construction project, a full kitchen remodel, or a quick update of an existing kitchen, few other tile projects can bring such a huge transformation to such a contained area.
Although more-modern varieties of tile are common, the classic look of 3×6 subway tile never seems to go out of style, and I’m asked to install it often. In this particular kitchen, the homeowners decided to boost the look of their subway backsplash by choosing crackle-glazed tiles and including a section of mosaic tile above the range. This particular type of tile and the use of a mosaic accent are options that are growing in popularity, and each holds its own challenges in terms of layout and installation.
Done right, this combination of a subway-tile field and a mosaic-tile accent becomes a beautiful background for the kitchen. Done poorly, either in terms of layout or installation, the backsplash becomes a daily eyesore. The good news is that a pleasing layout isn’t hard to achieve, and the process of laying up and grouting tile isn’t complicated, as long as you plan carefully and work through each step slowly.
Before all else, set up and prep
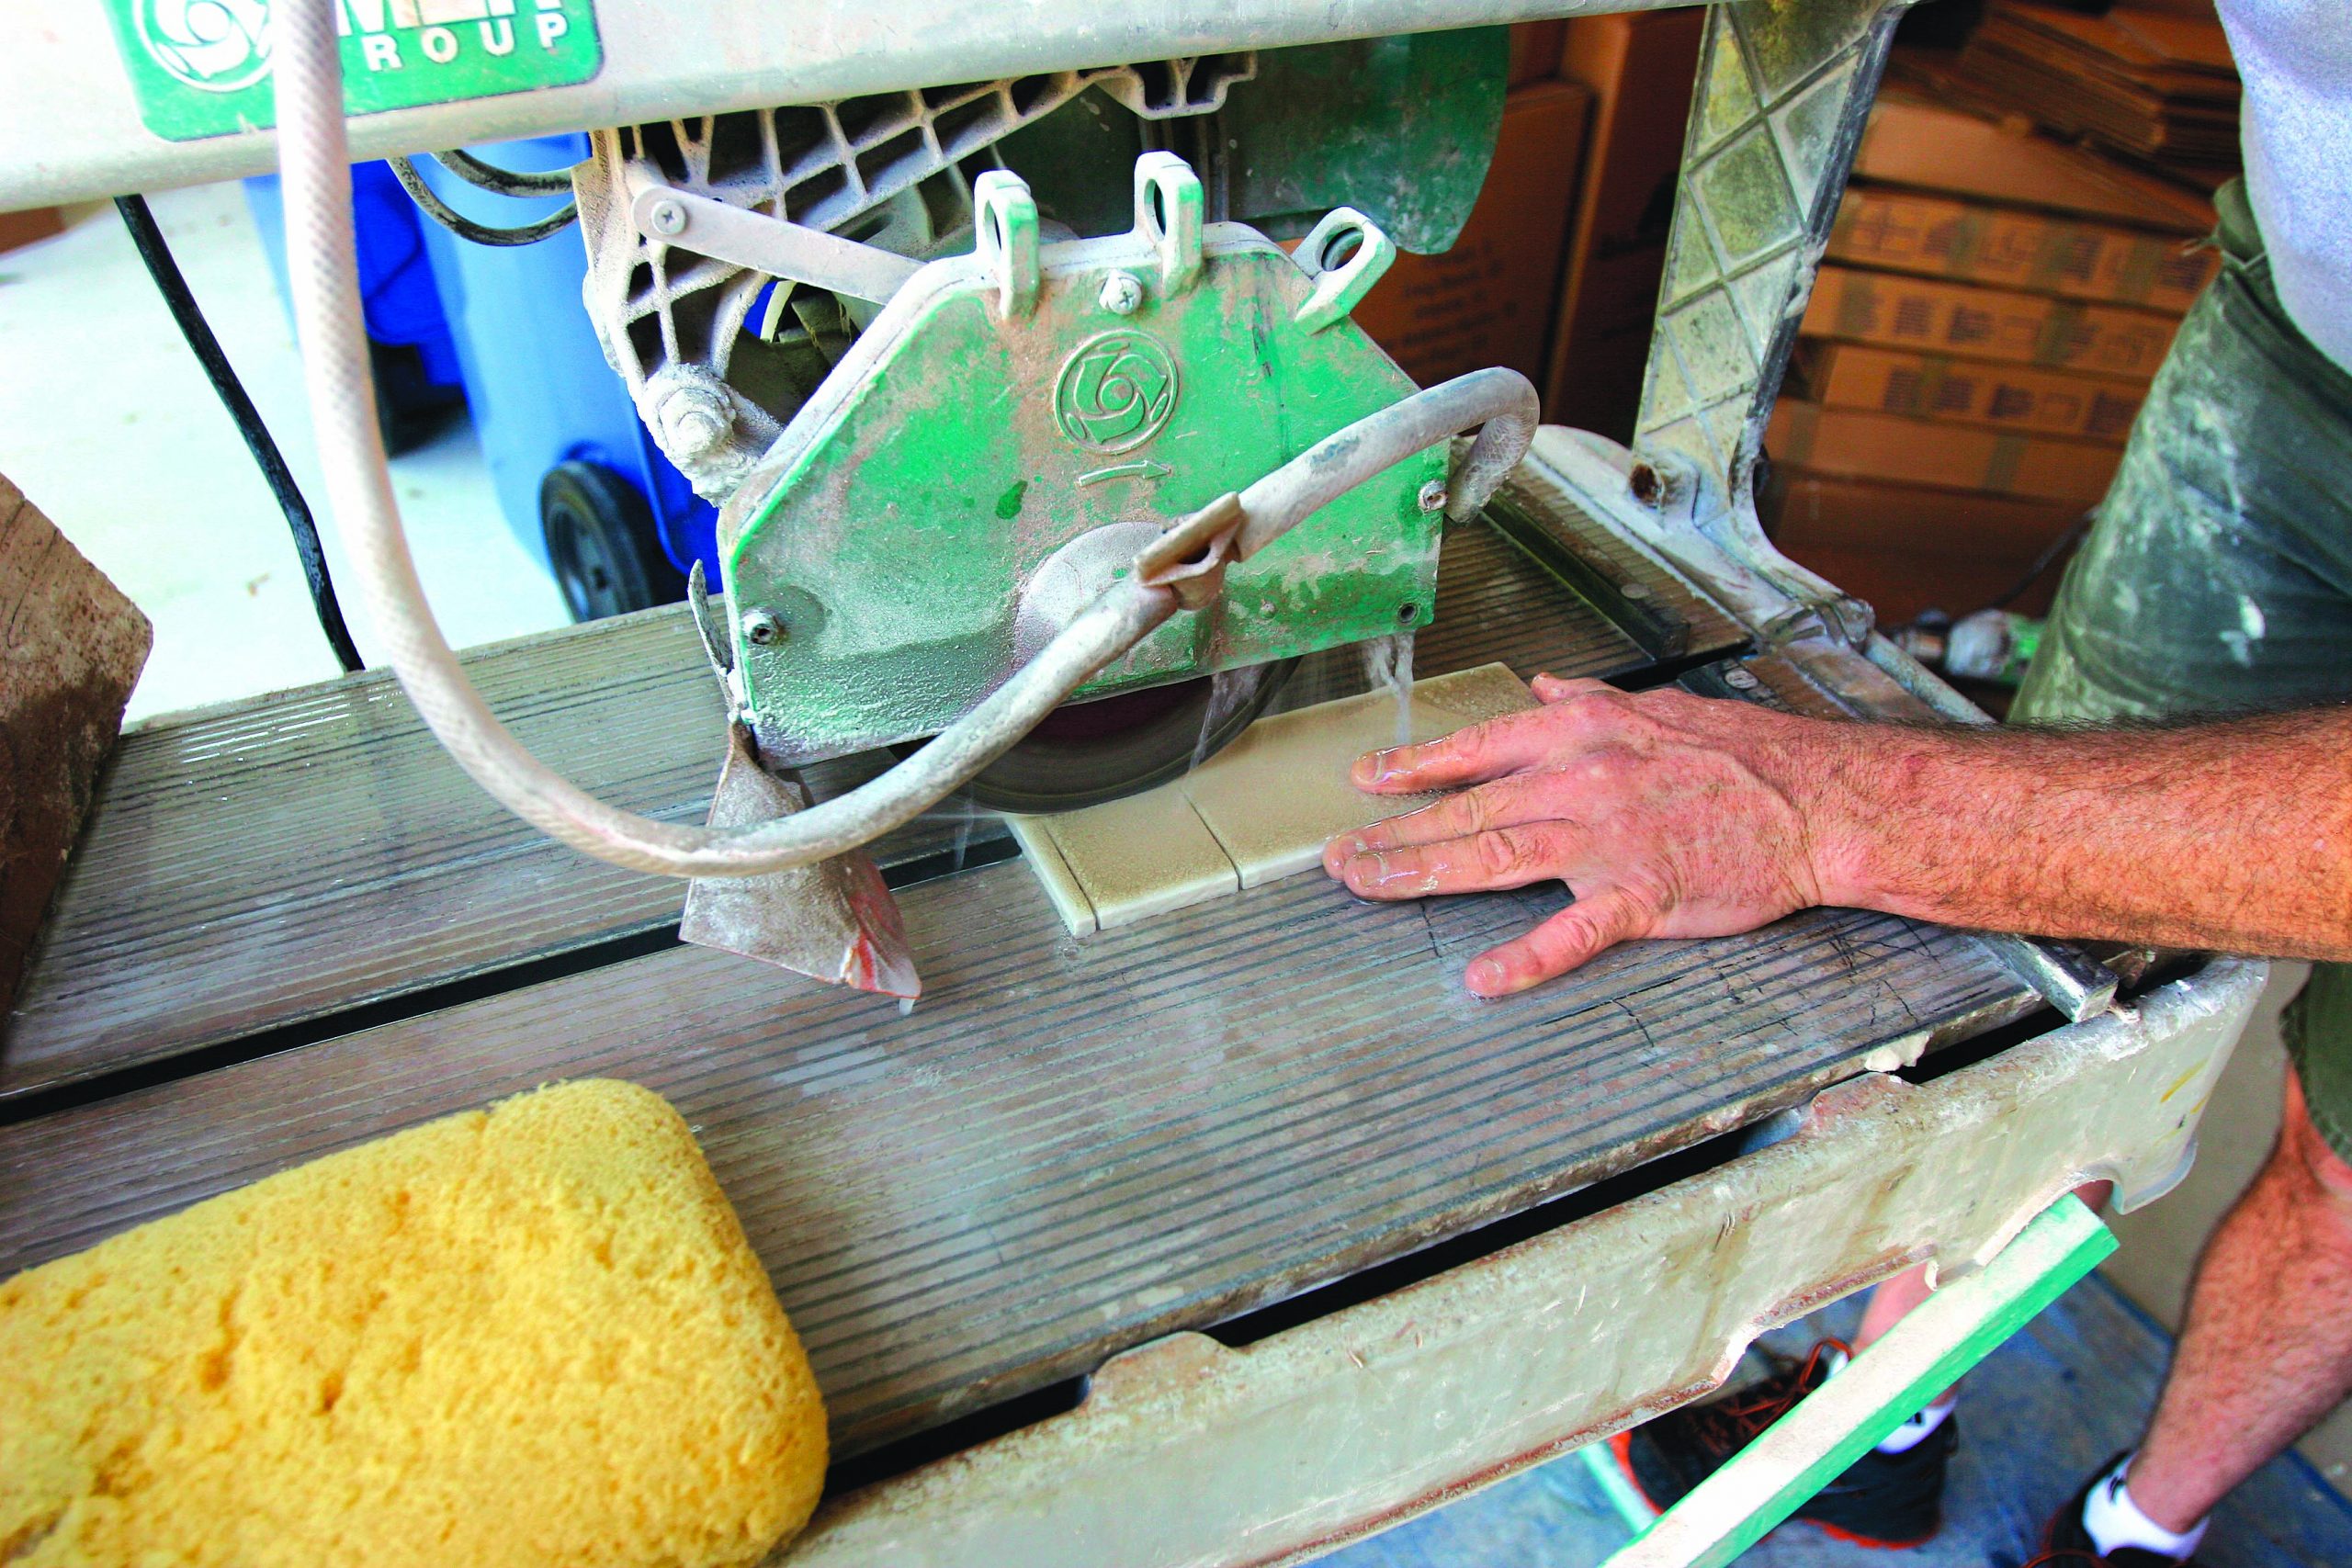
When I’m installing a backsplash in a finished house, I typically don’t set up the wet saw inside. Putting the saw outside or in the garage eliminates the risk of water damage to the floor. I cover the countertops and the floor—EconoRunner (protective products.com) is an excellent choice —and if the kitchen has a freestanding or slide-in range, I pull it away from the wall and cover it with a drop cloth so that I can tile behind it. After cutting the power to any electrical boxes in the backsplash area, I loosen the screws on the fixtures and pull them out of their boxes slightly so that the tile can fit tightly around them. If tile is to go around a window, I remove the apron molding below the stool. That means less-complicated cuts, and the finished look is cleaner.
The next step, and one that far too many installers brazenly skip, is to get to know the tile. Tiles and their recommended installation practices vary widely from brand to brand and from tile to tile. If the tile comes with instructions, it’s important to read them. They might mean the difference between an easy job and a nightmare installation.
The maker of the field and mosaic tile installed on this job, Encore Ceramics, recommends that these tiles be coated with sealer before installation to prevent thinset from getting trapped in the hairline cracks of the glazed finish. It also makes it easier to remove dried globs of thinset from the face of the tiles after installation. I’ve had great success with products from Miracle Sealants Company.
Not rules, but priorities
No two backsplashes will be the same. Aside from the fact that tiles vary widely in size and shape, you also have to consider the height of the backsplash, the placement of electrical outlets, whether there is a window or not, and how the tile will terminate at the ends of a run. There are always trade-offs, which is why I approach each job with a list of priorities and work from there.
For a subway-tile backsplash like this one, my first priority is to maintain the running-bond pattern. I also always begin with a full tile at the countertop (and let the uppermost row of tiles fall as it will). From there, the layout is a bit more trial and error.
I plan horizontal and vertical layouts around focal points, such as a range hood, an inside corner, or any other highly visible area. If the kitchen layout includes inside corners, I prefer to carry the layout from one wall to the other without deviating from the running-bond pattern. The most important thing is to do your best to avoid narrow slivers of tile butting up against cabinetry or trim. nevertheless, they may be unavoidable in certain situations.
Finally, for mosaic tiles, such as in the accent area above the range in this kitchen, it’s more about symmetry than anything else. Don’t let the size of the accent area be dictated just by the space it’s going into; consider also the size of the mosaic tile itself. I prefer the accent area to be centered over the range, with a strict combination of half or whole tiles at the edges, and surrounded by pencil tiles and an even border of field tile.
Tackling the tricky spots
 |
 |
 |
 |
|
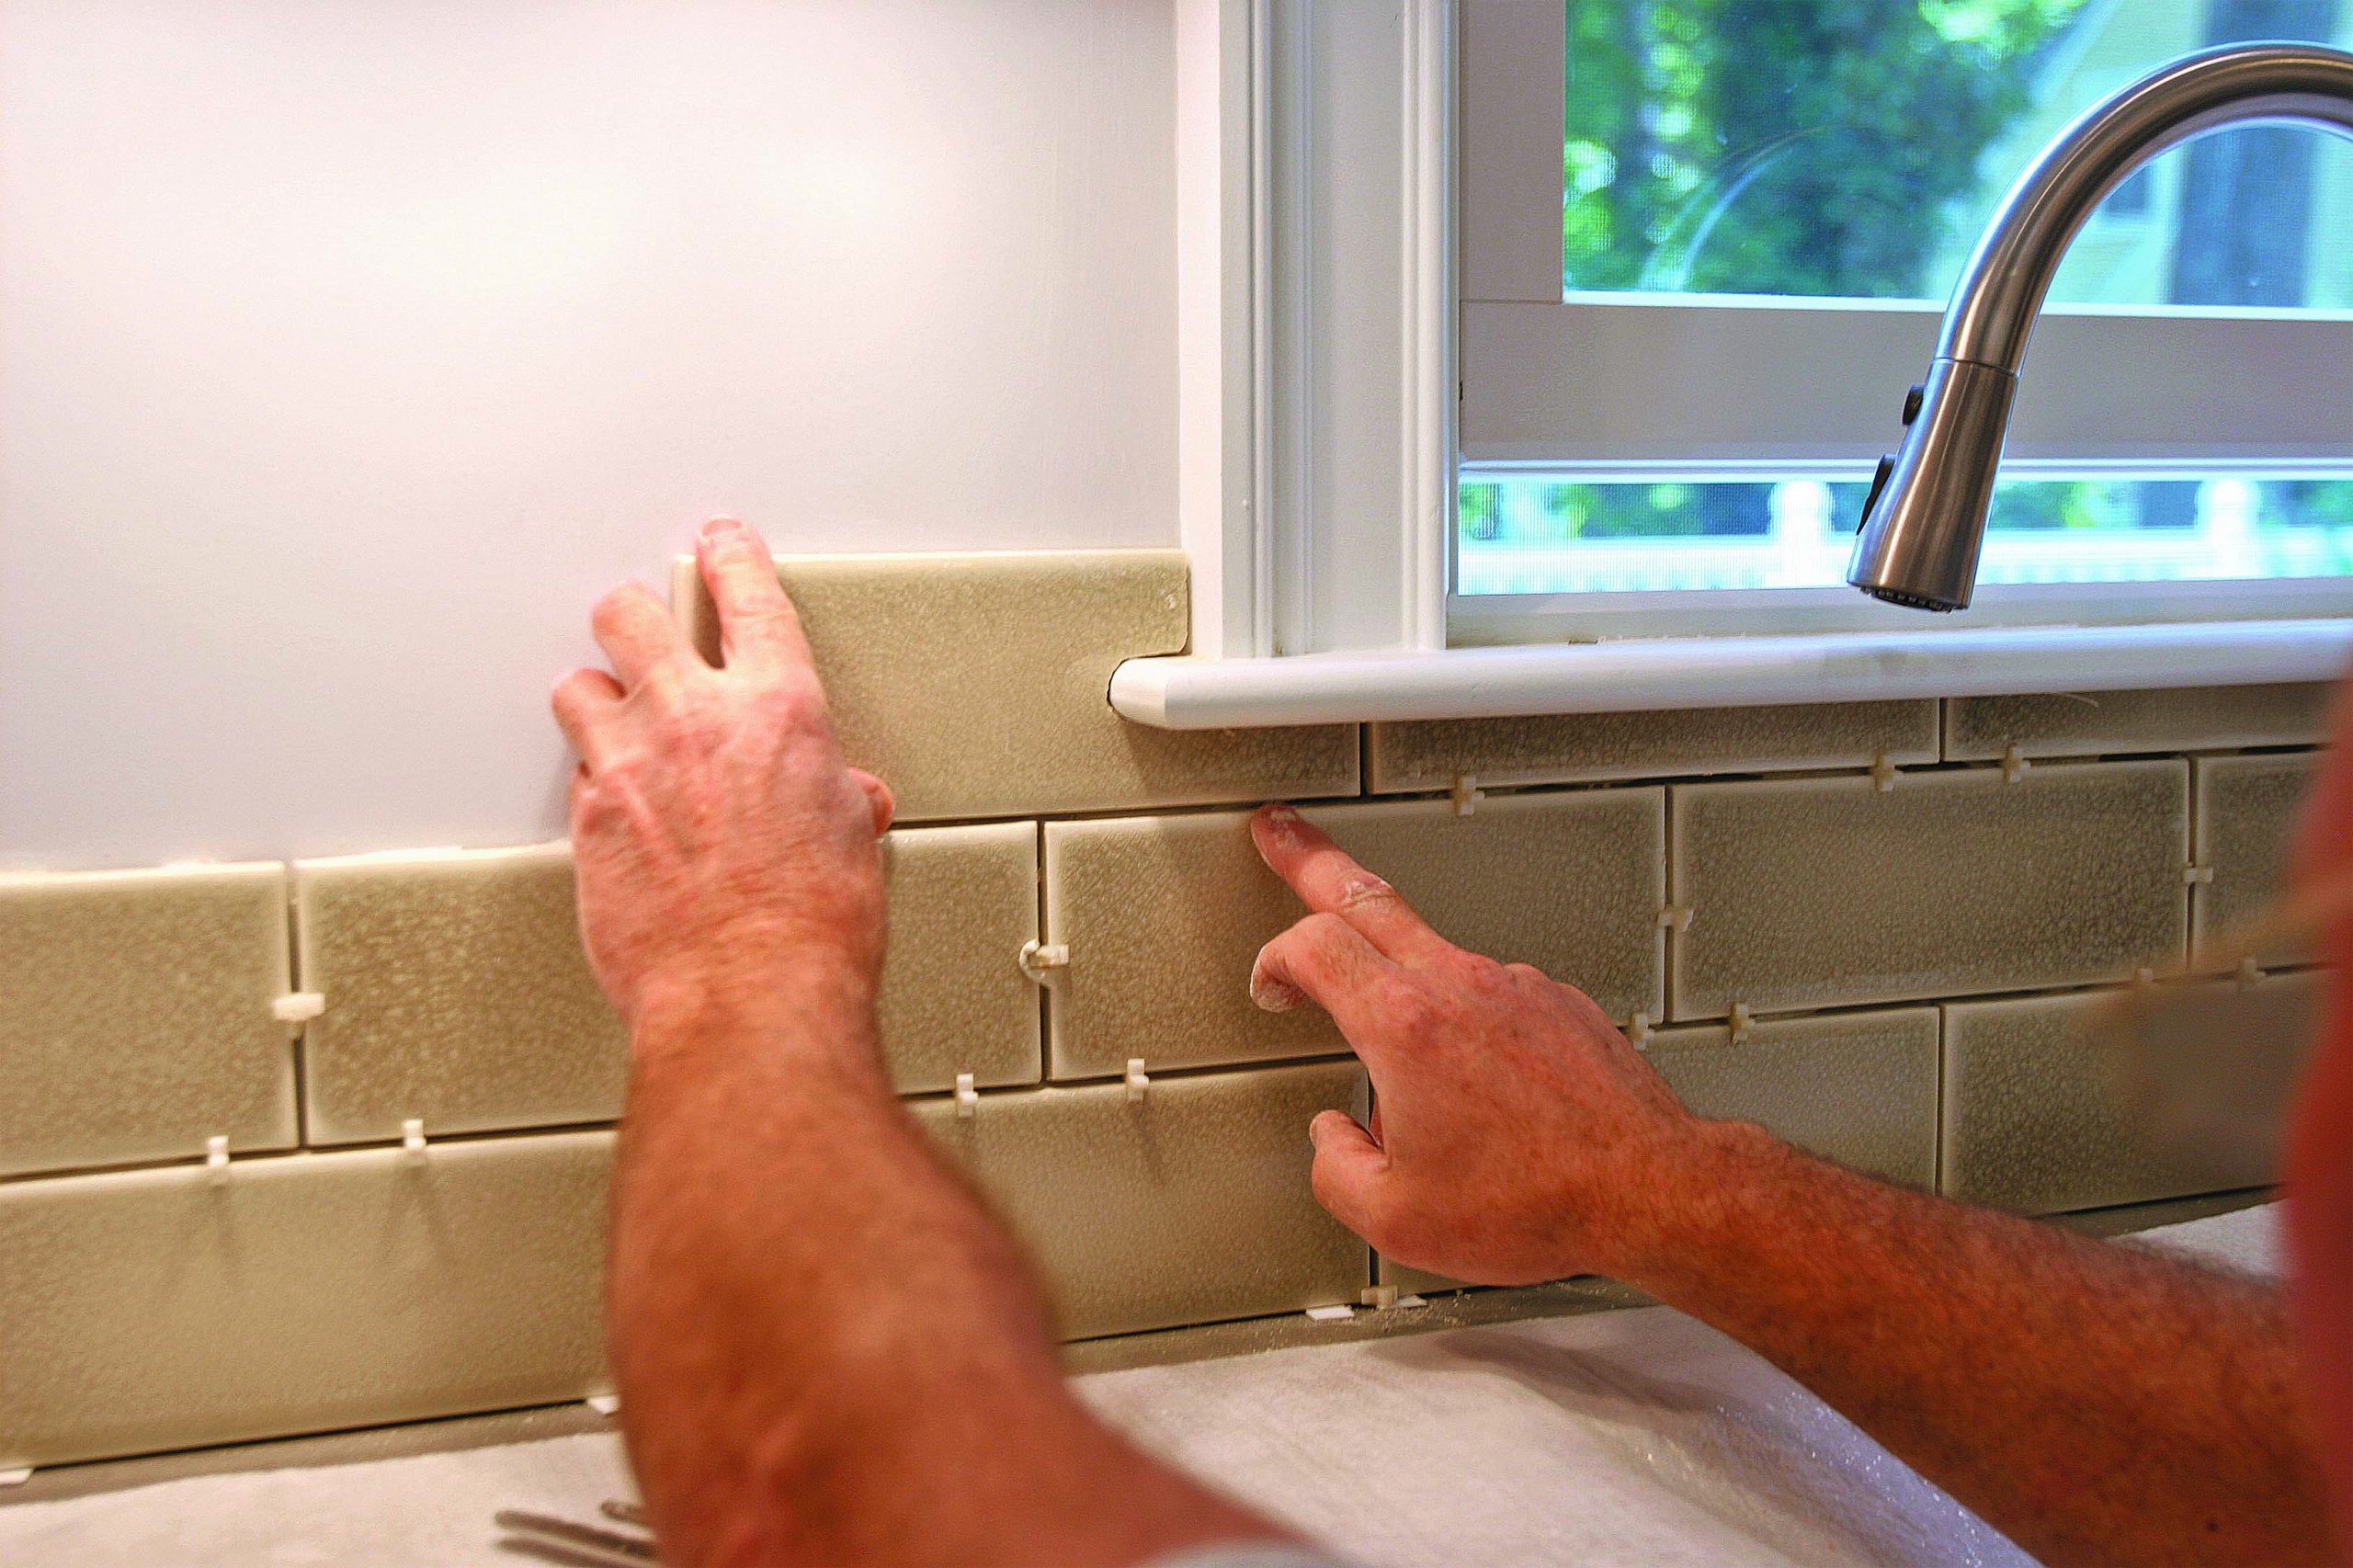
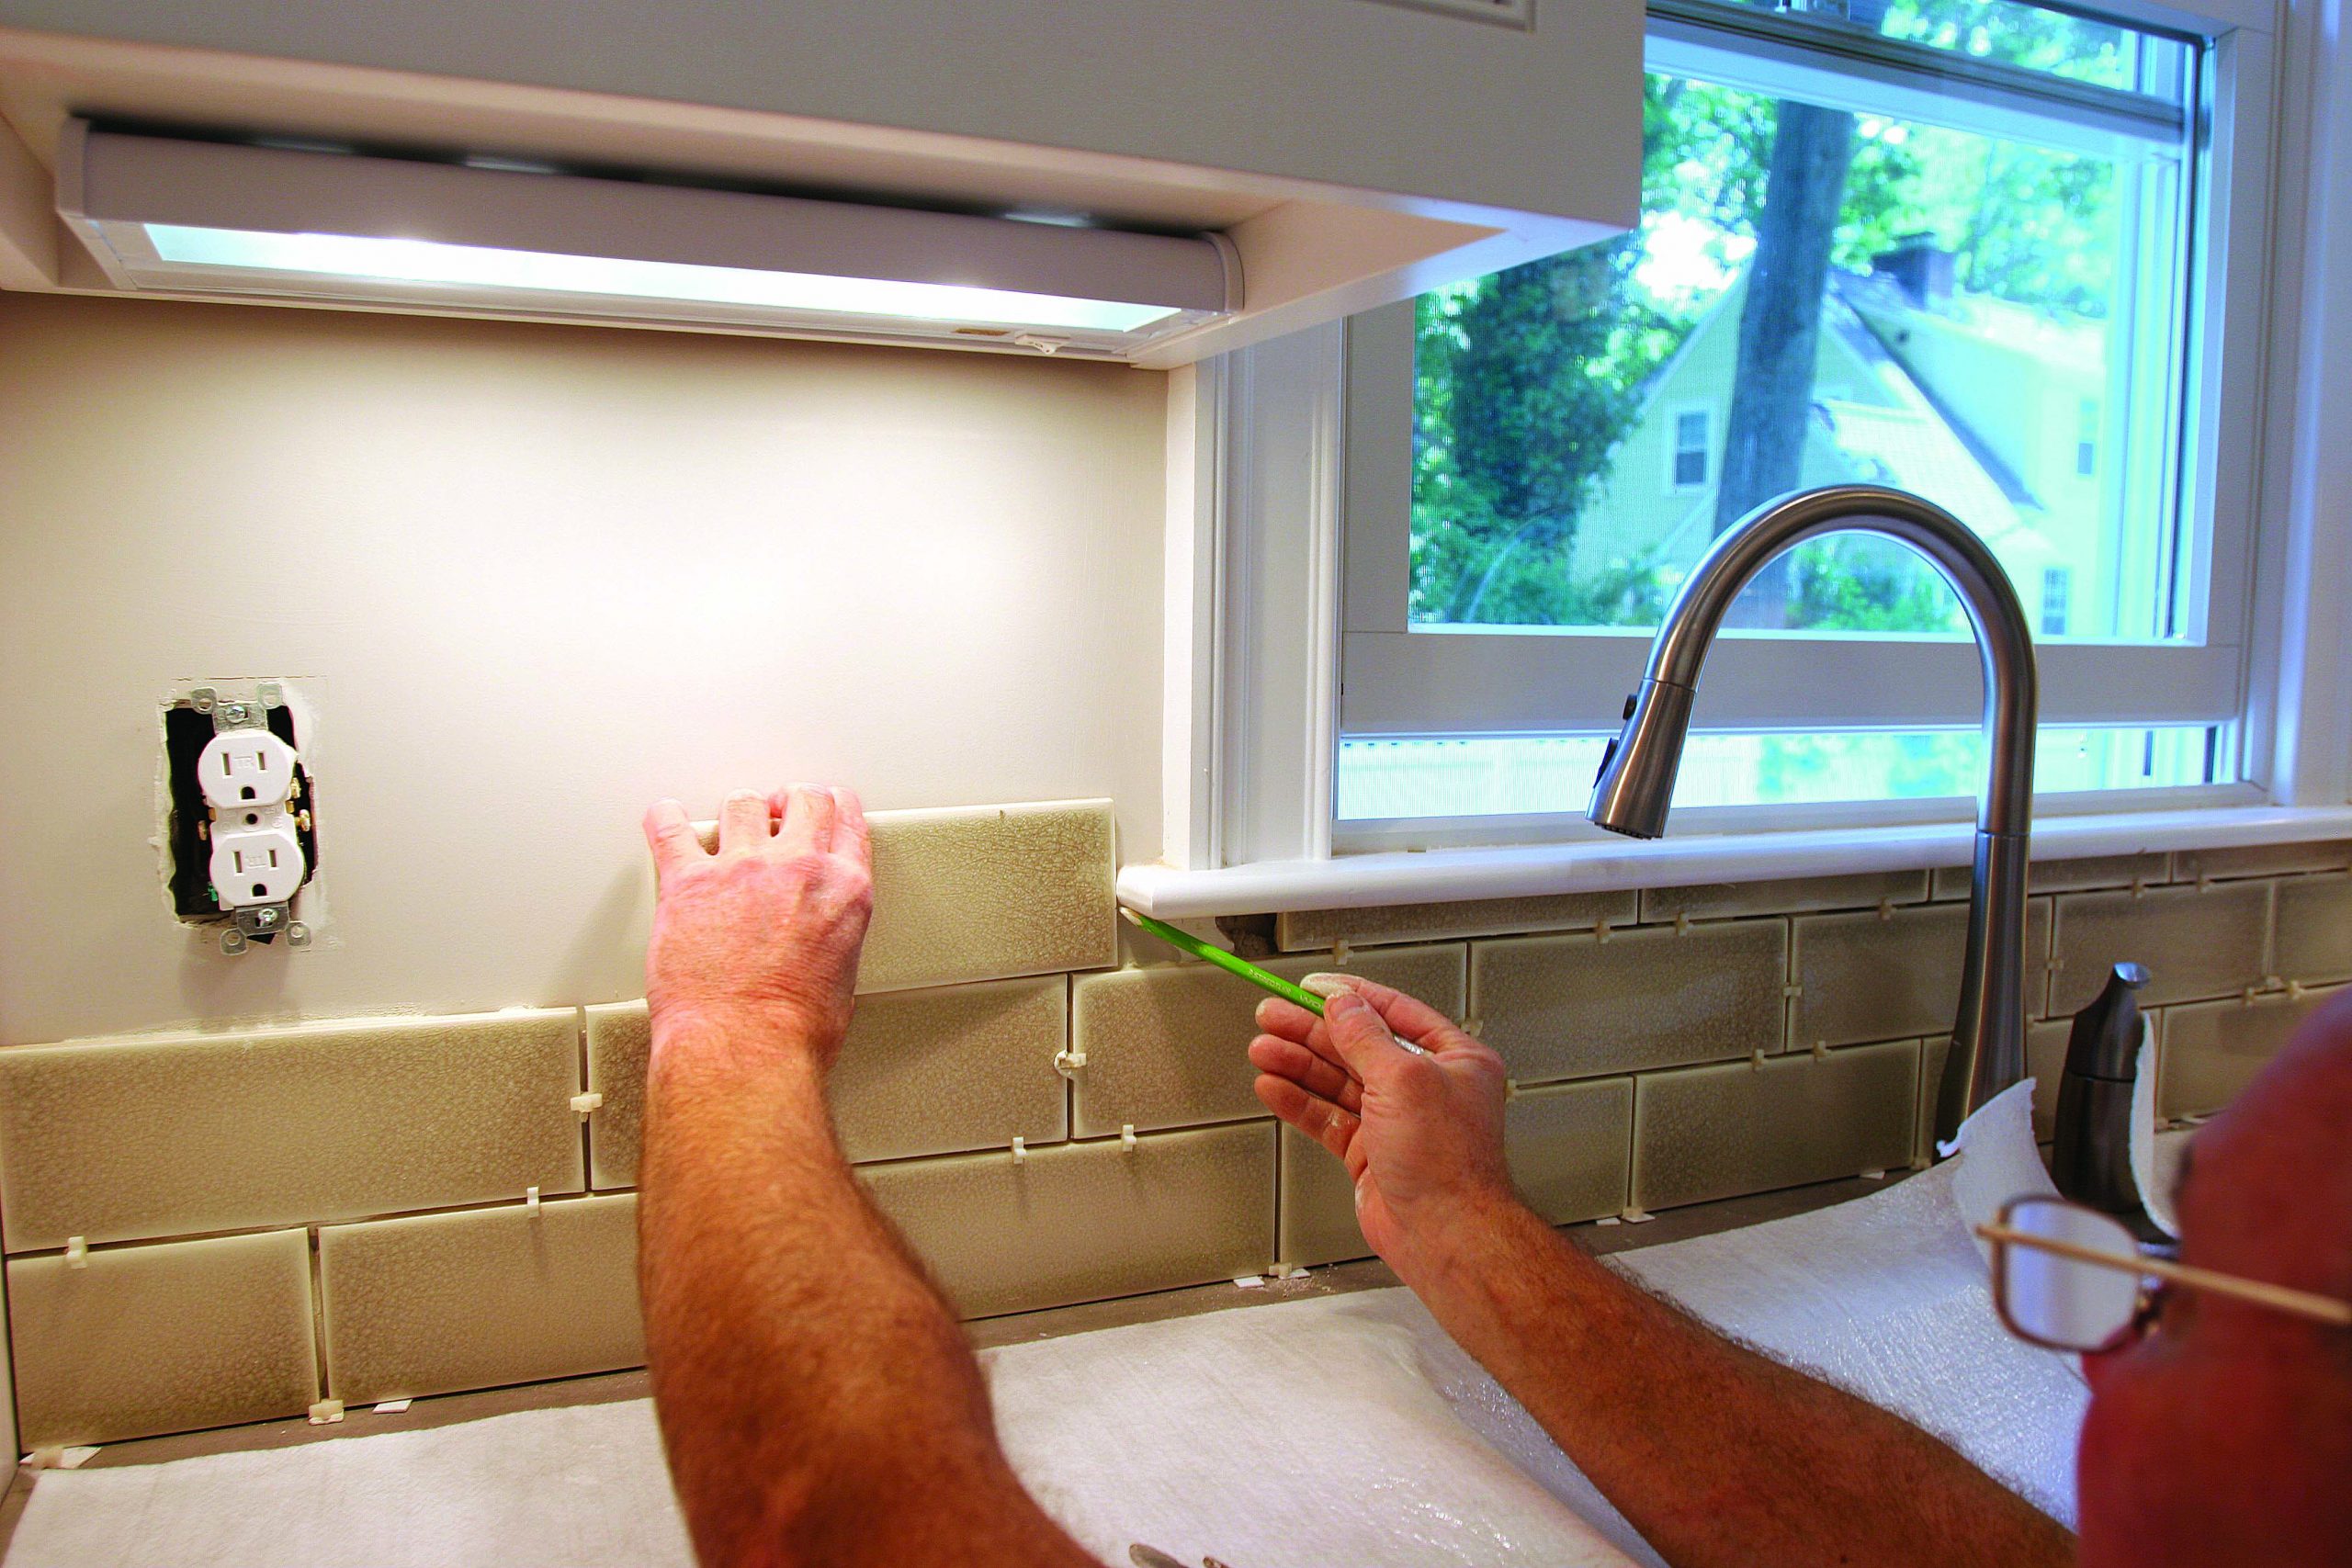
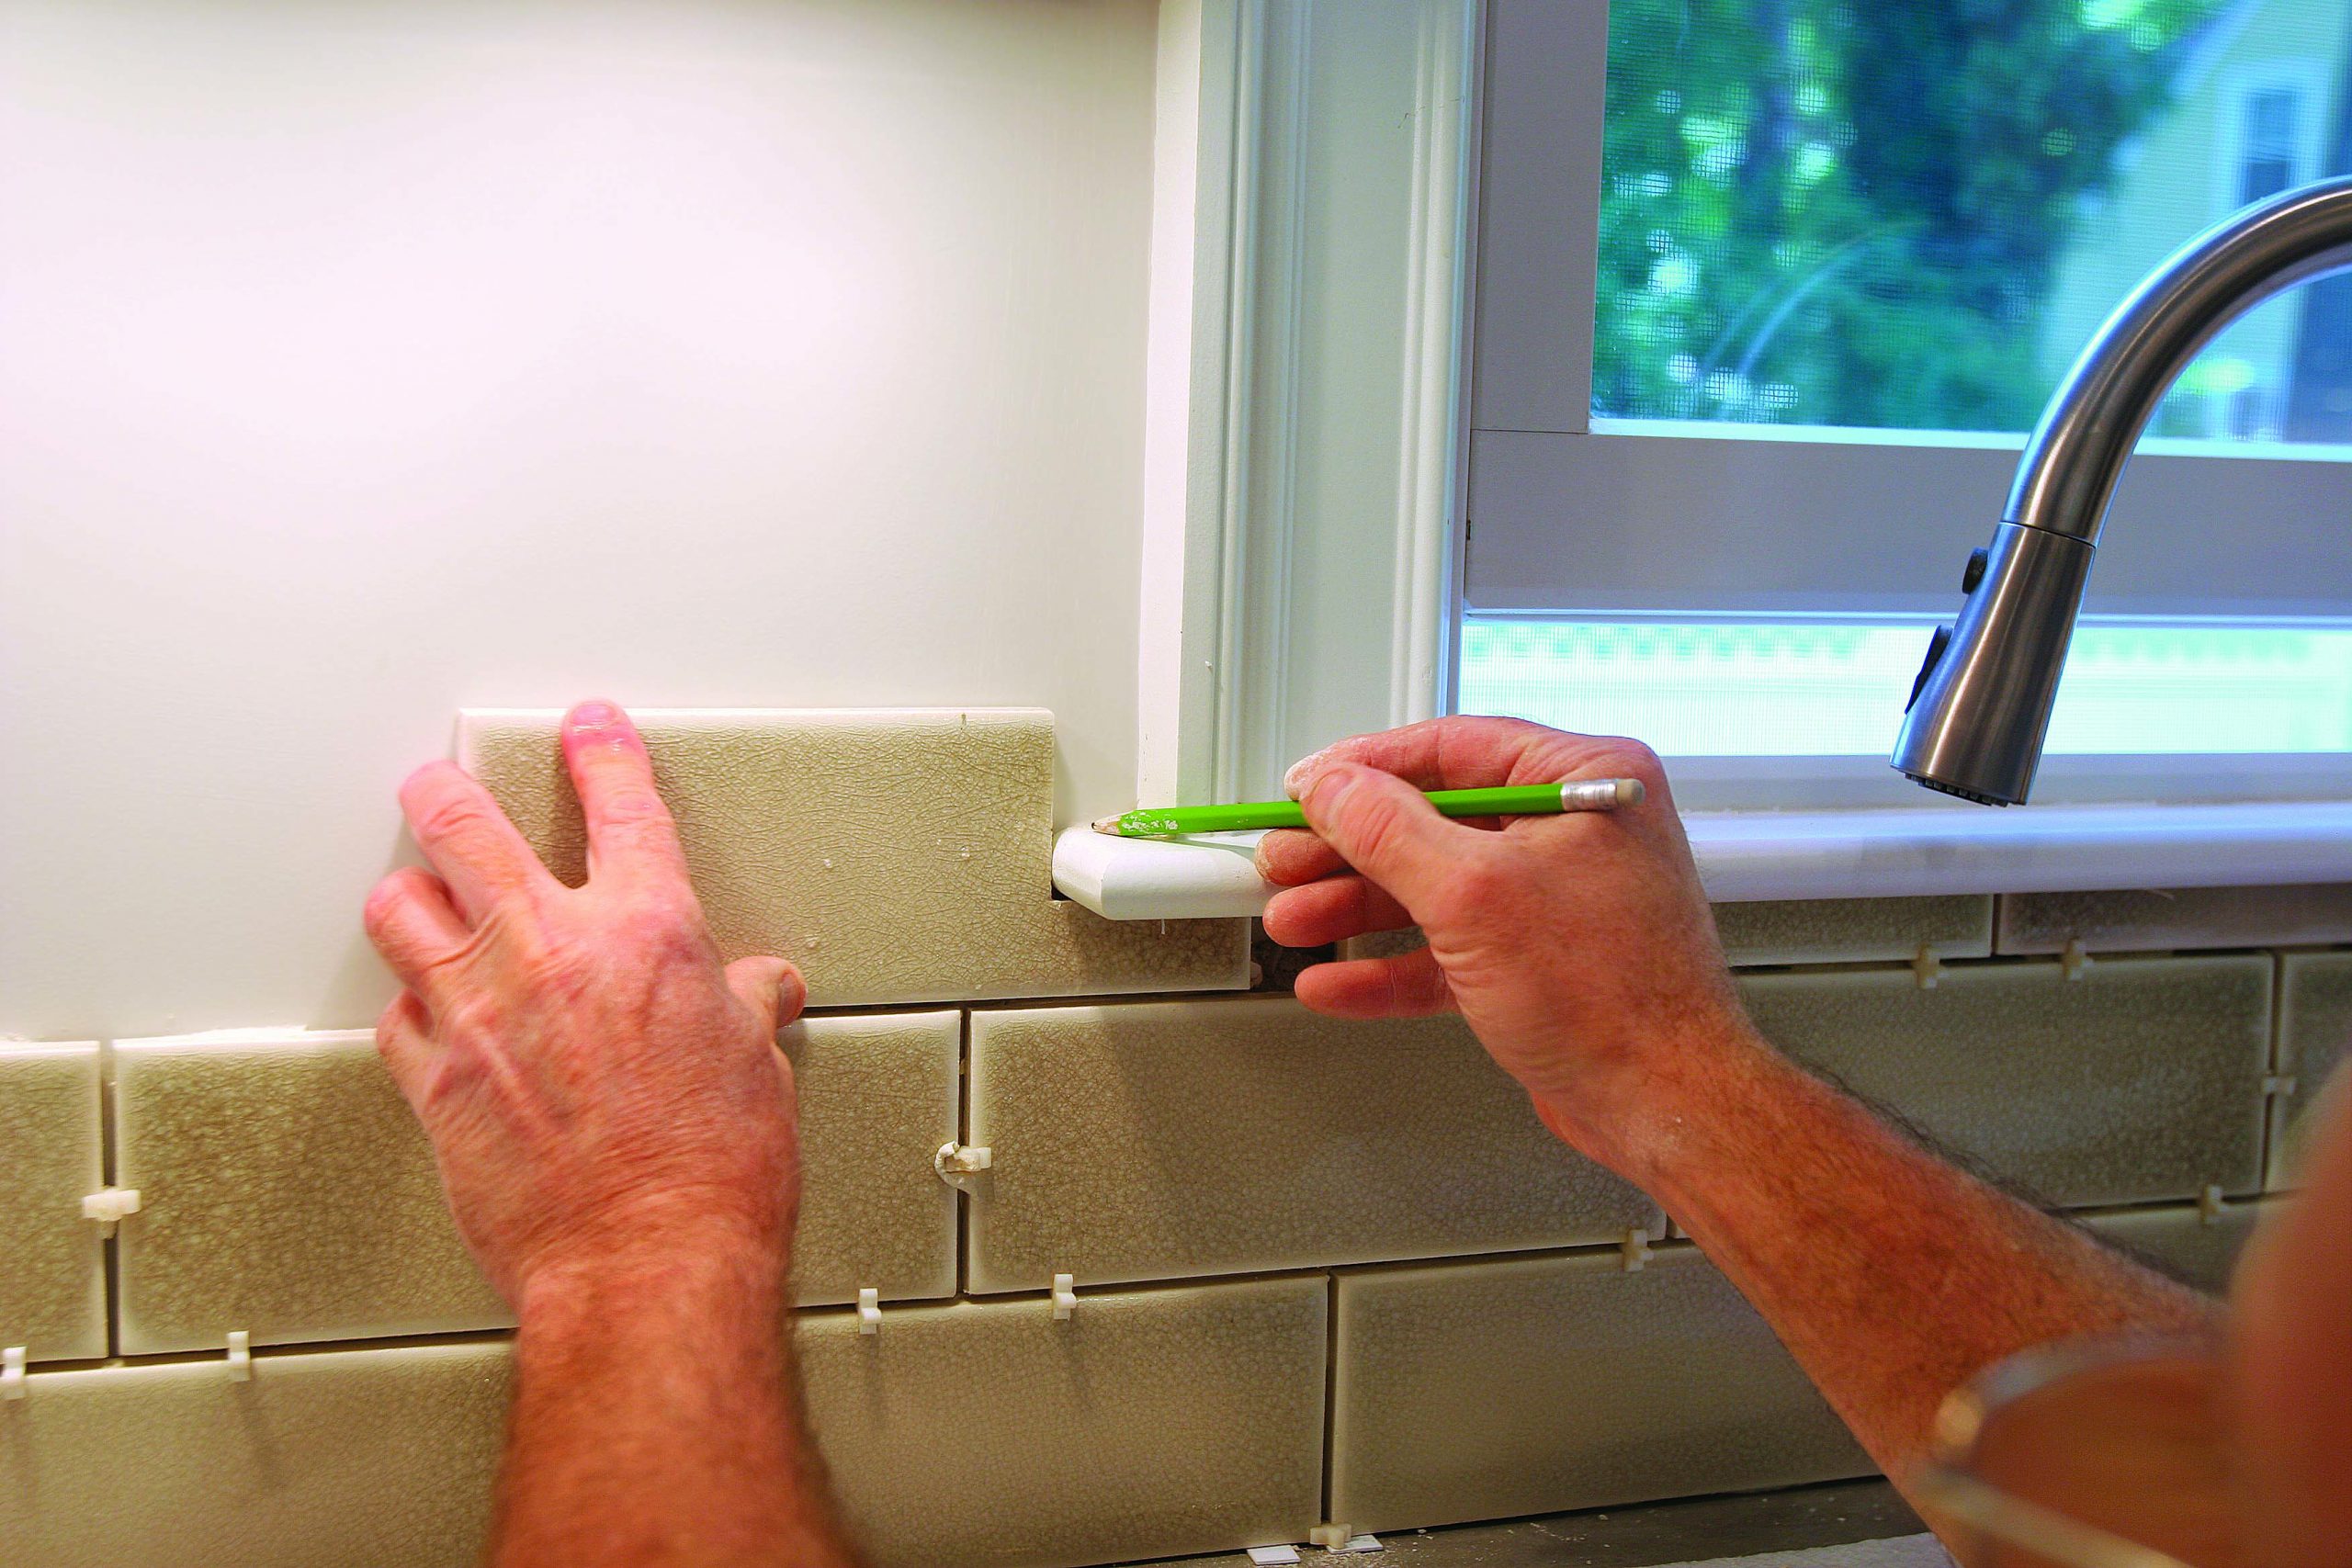
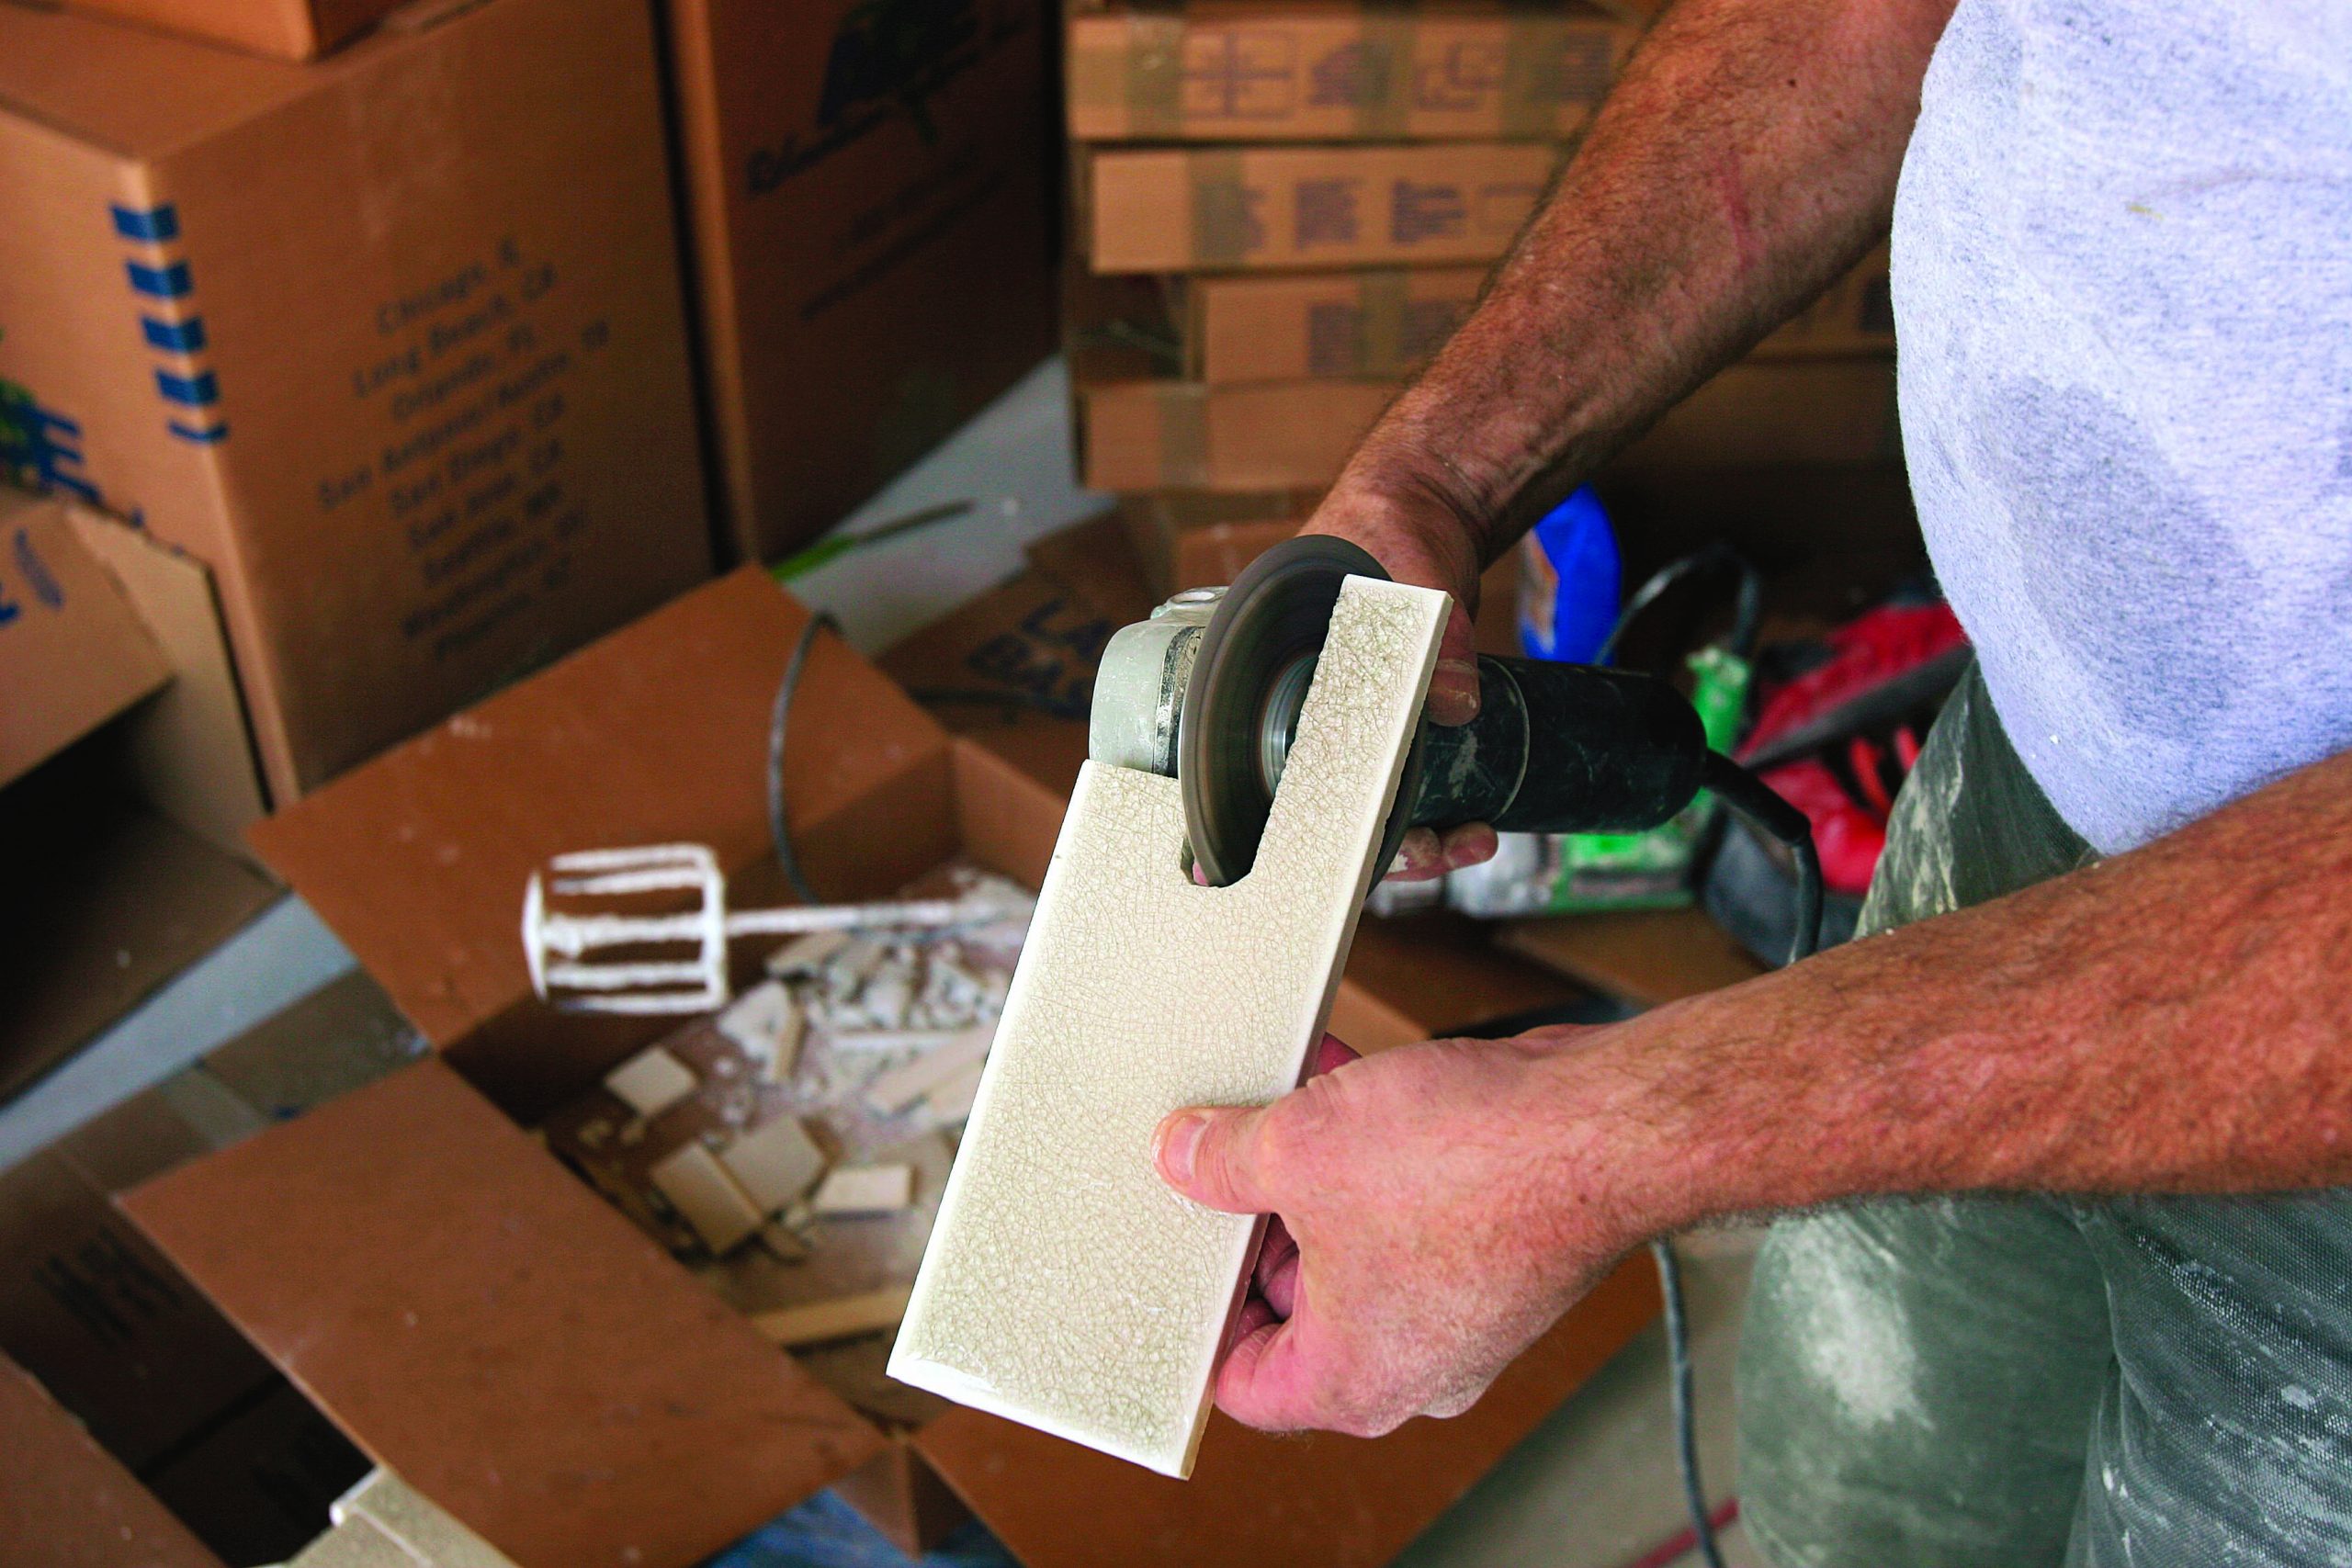
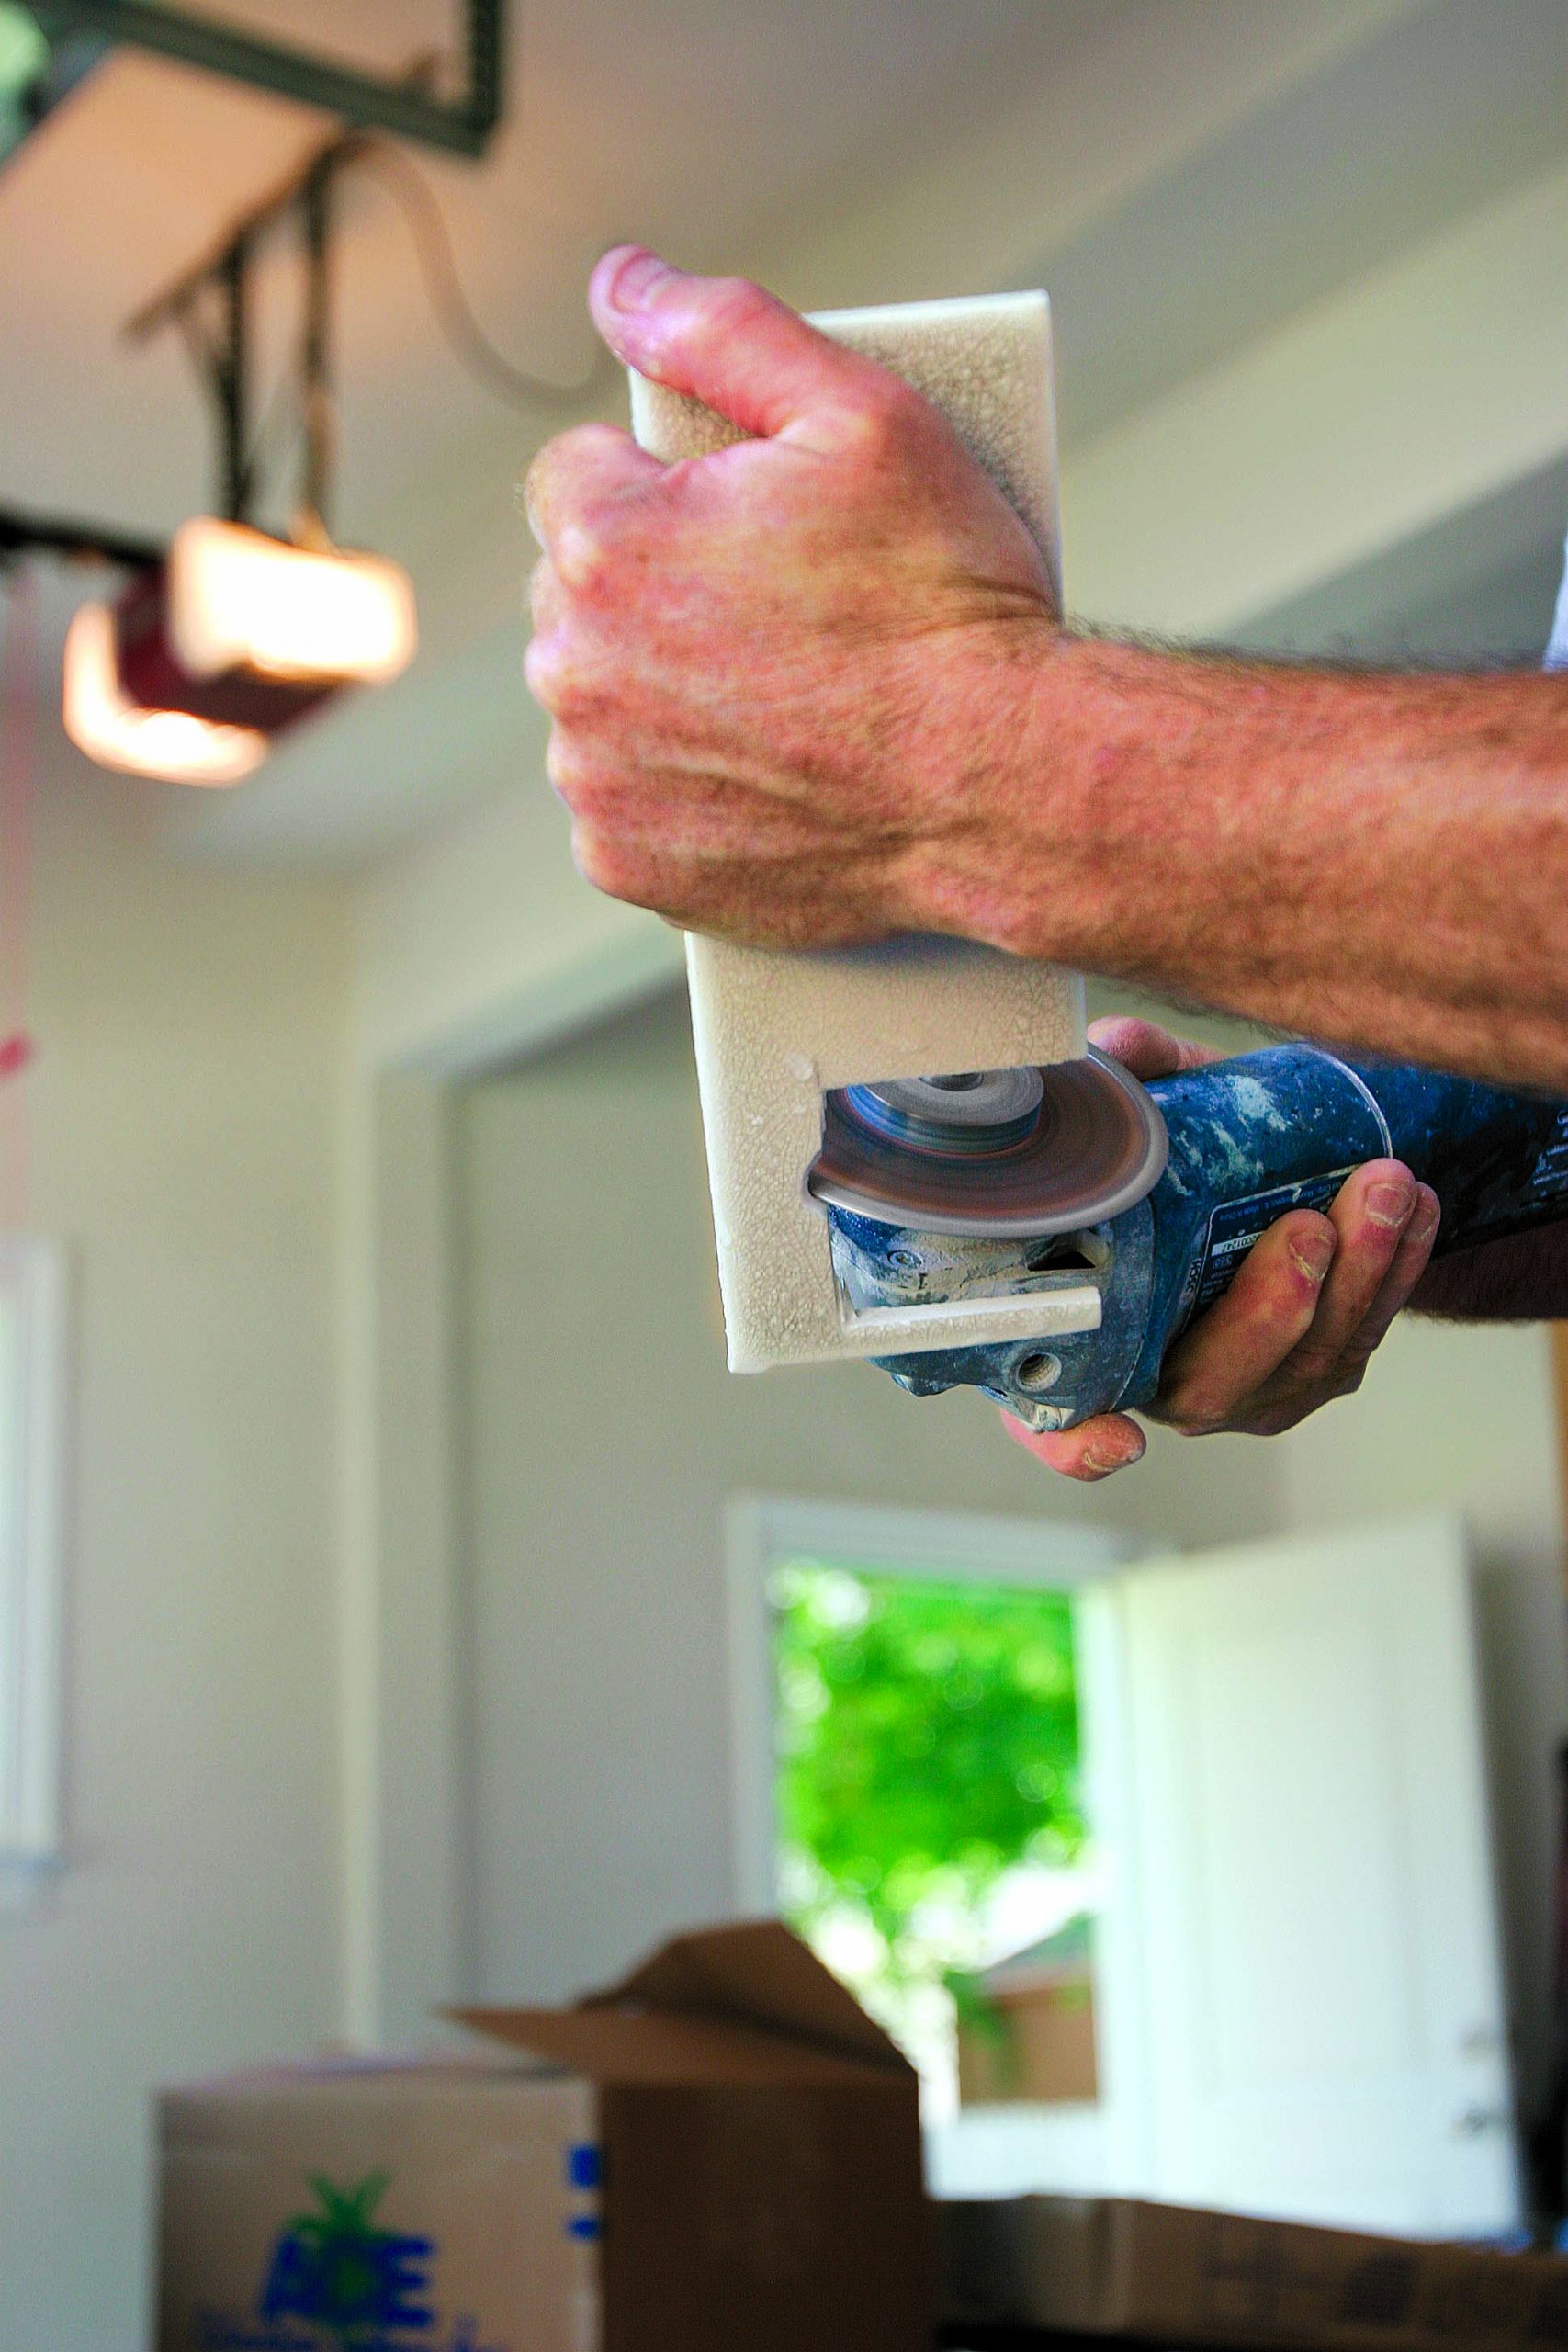
STOOLS SHOULD STAND ALONE Scribe tile to fit around windows and stools using a diamond blade in an angle grinder to create the curves. Because it’s harder to notch around the subtle ins and outs of the apron molding below most stools, remove the apron molding so that the tile can run uninterrupted below the window. |
|||
 |
 |
 |
 |
|
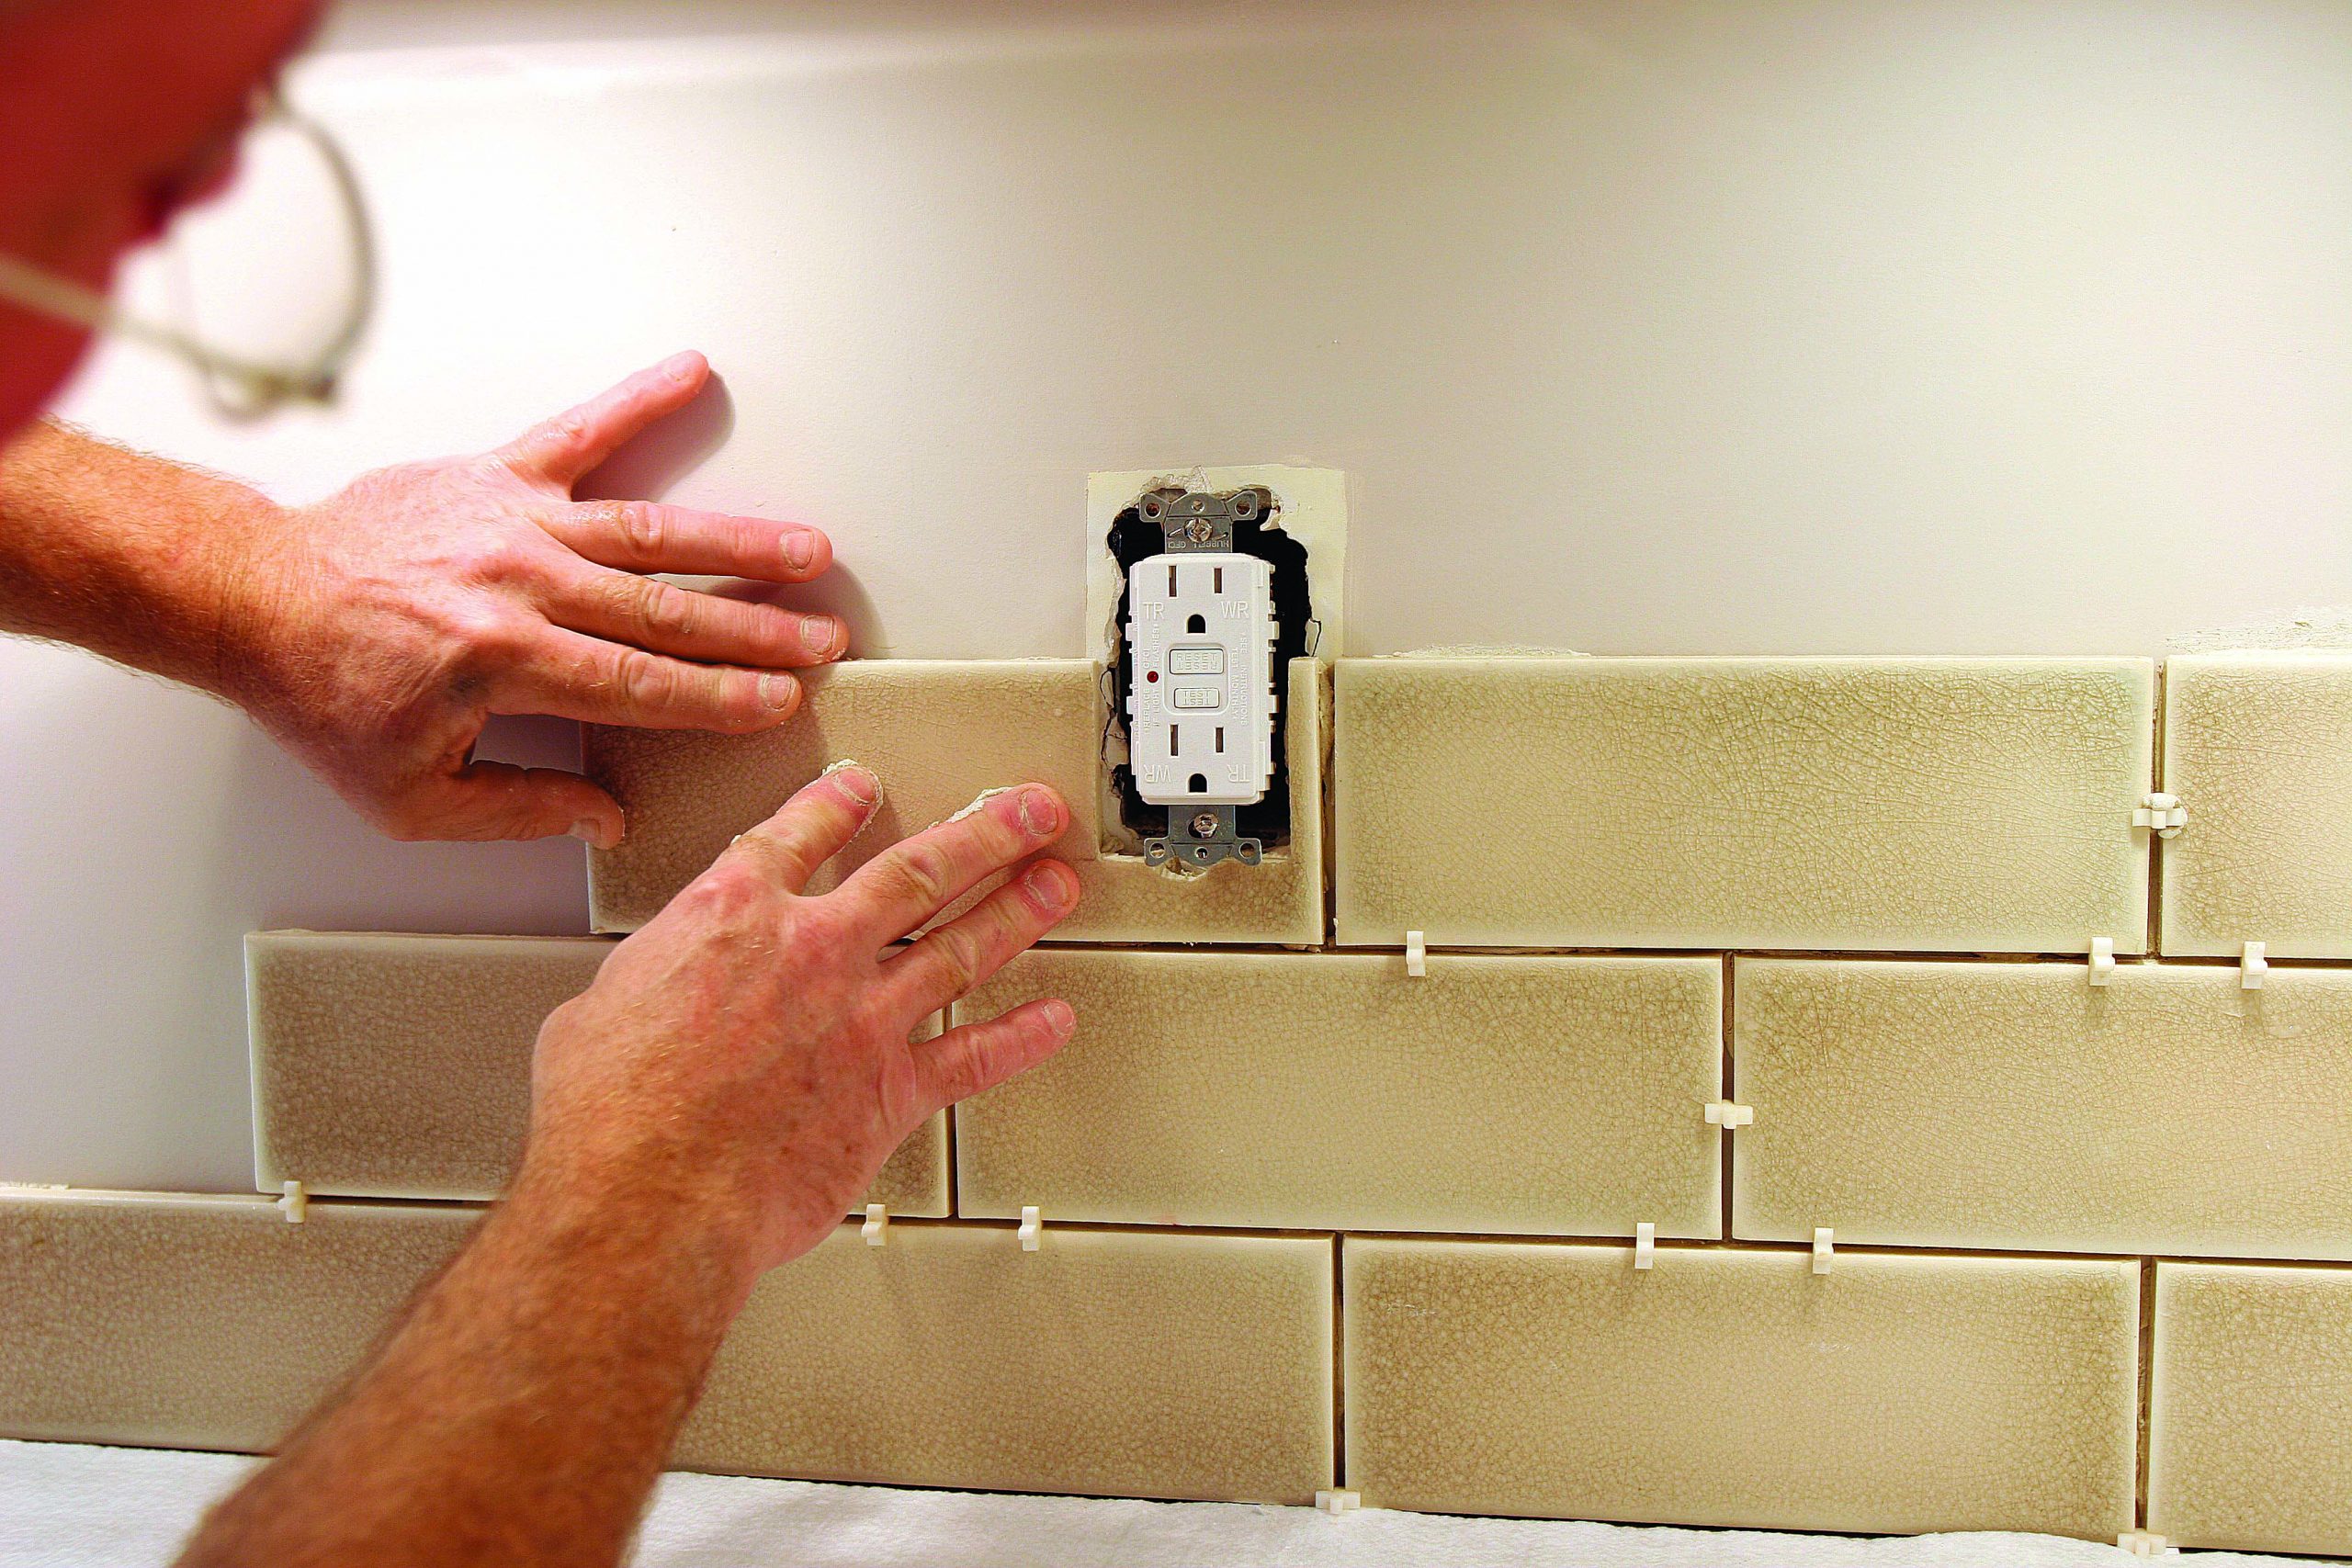
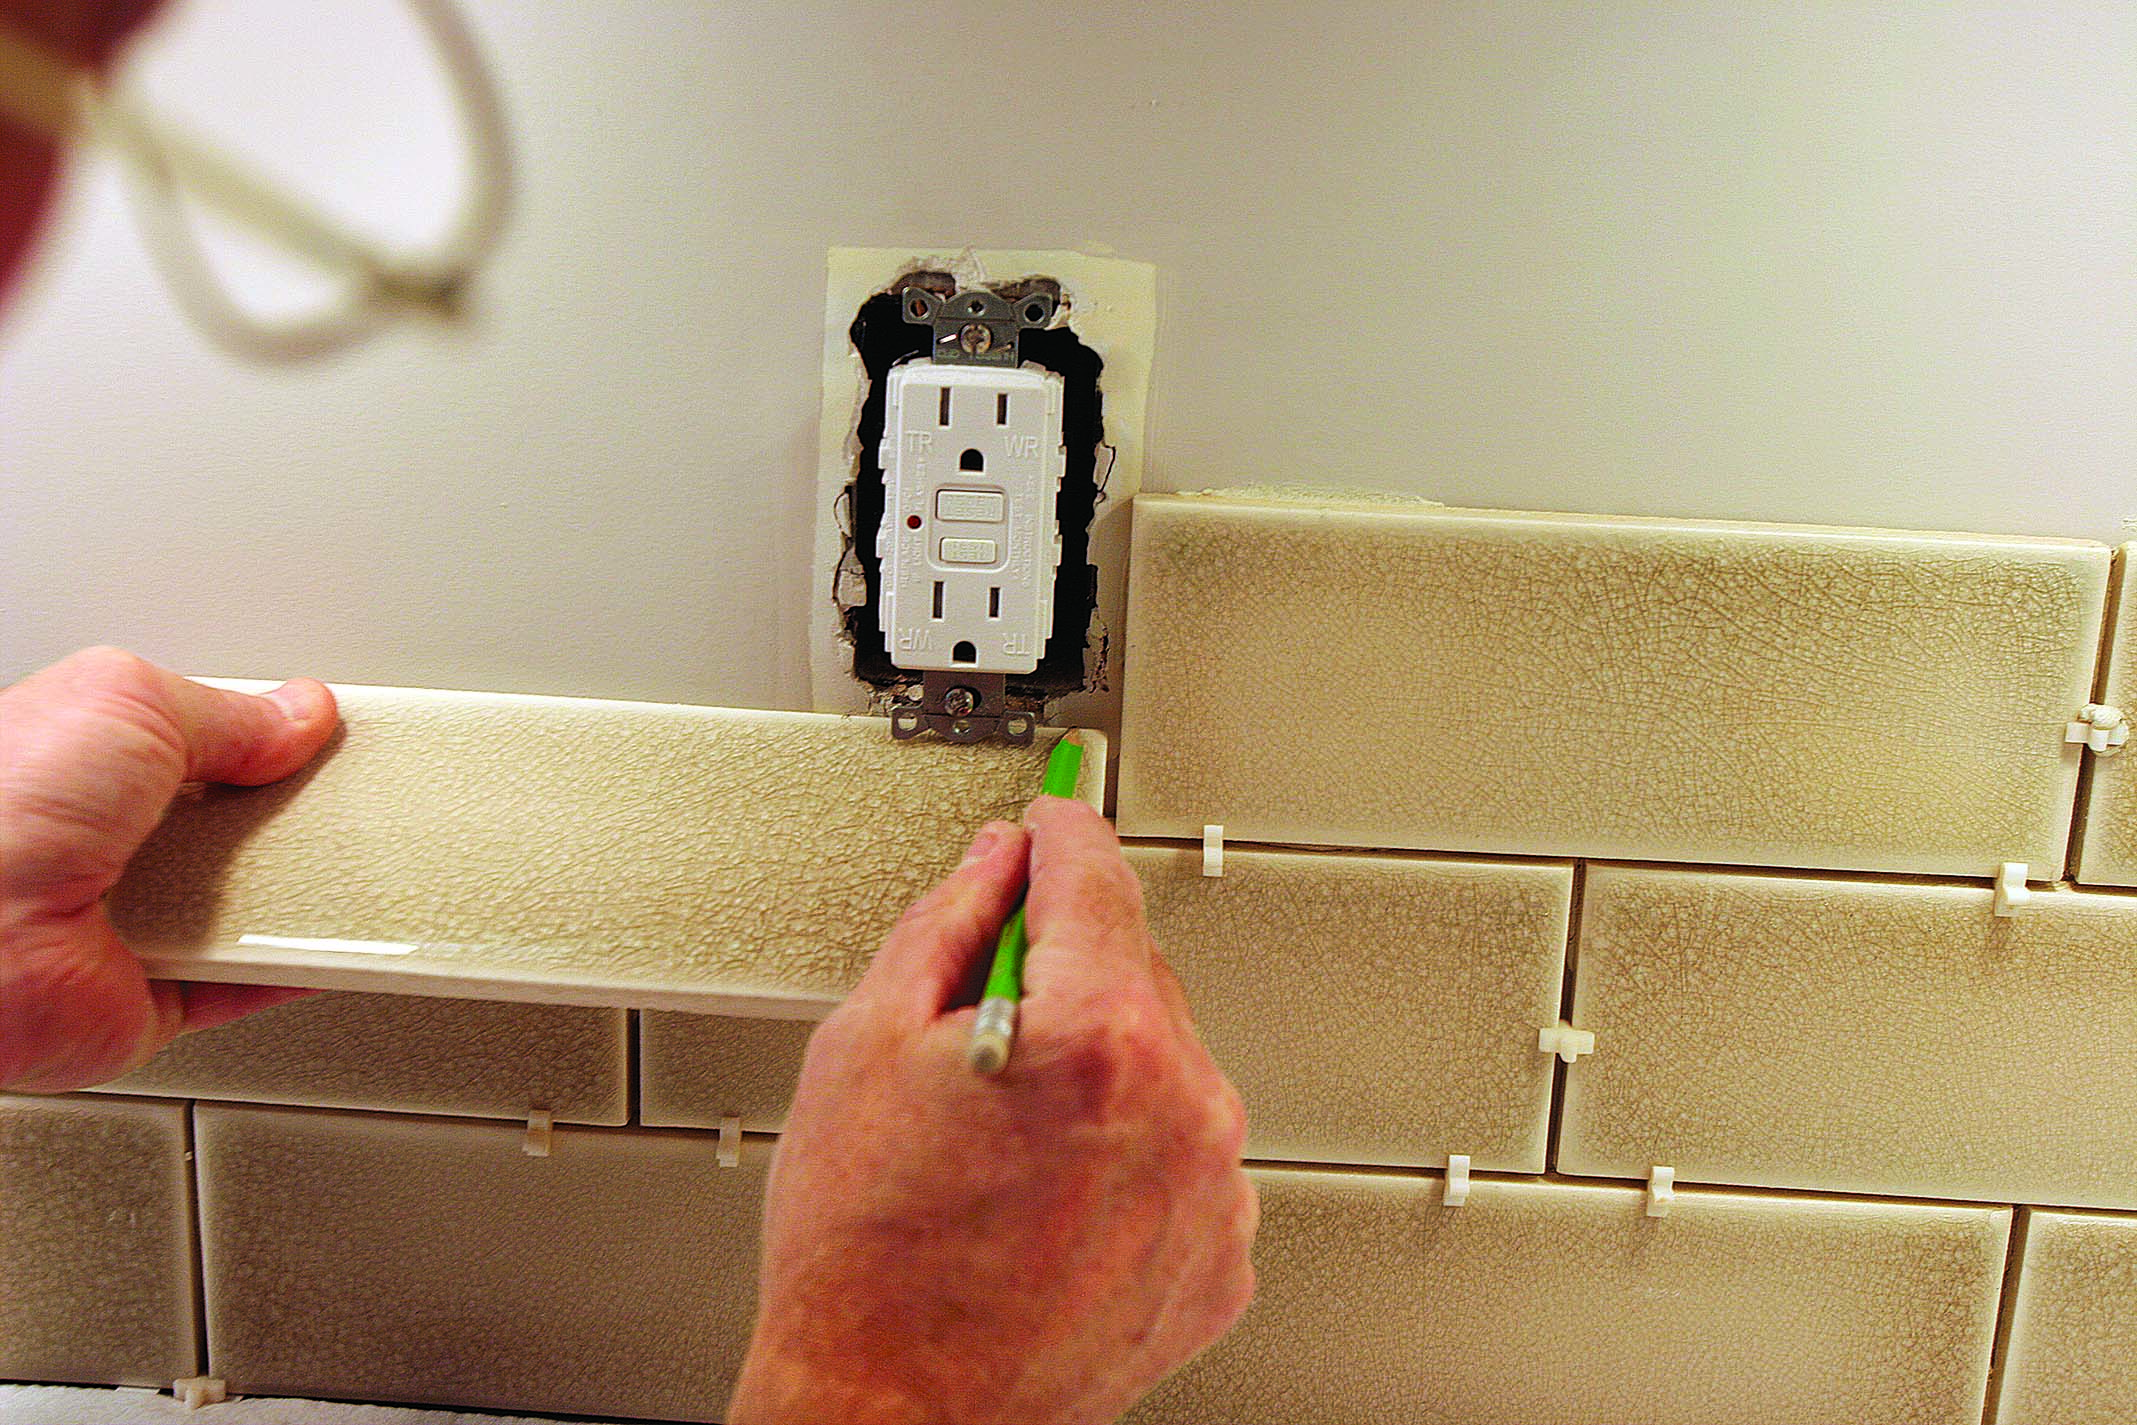
KEEP IT TIGHT AT THE OUTLETS Cut tile so close to electrical fixtures that you have to notch for receptacle screws with an angle grinder, which eliminates the need for spacers or box extenders. This also helps avoid any concern about the coverplate not hiding your cuts. |
|||
 |
 |
 |
 |
|
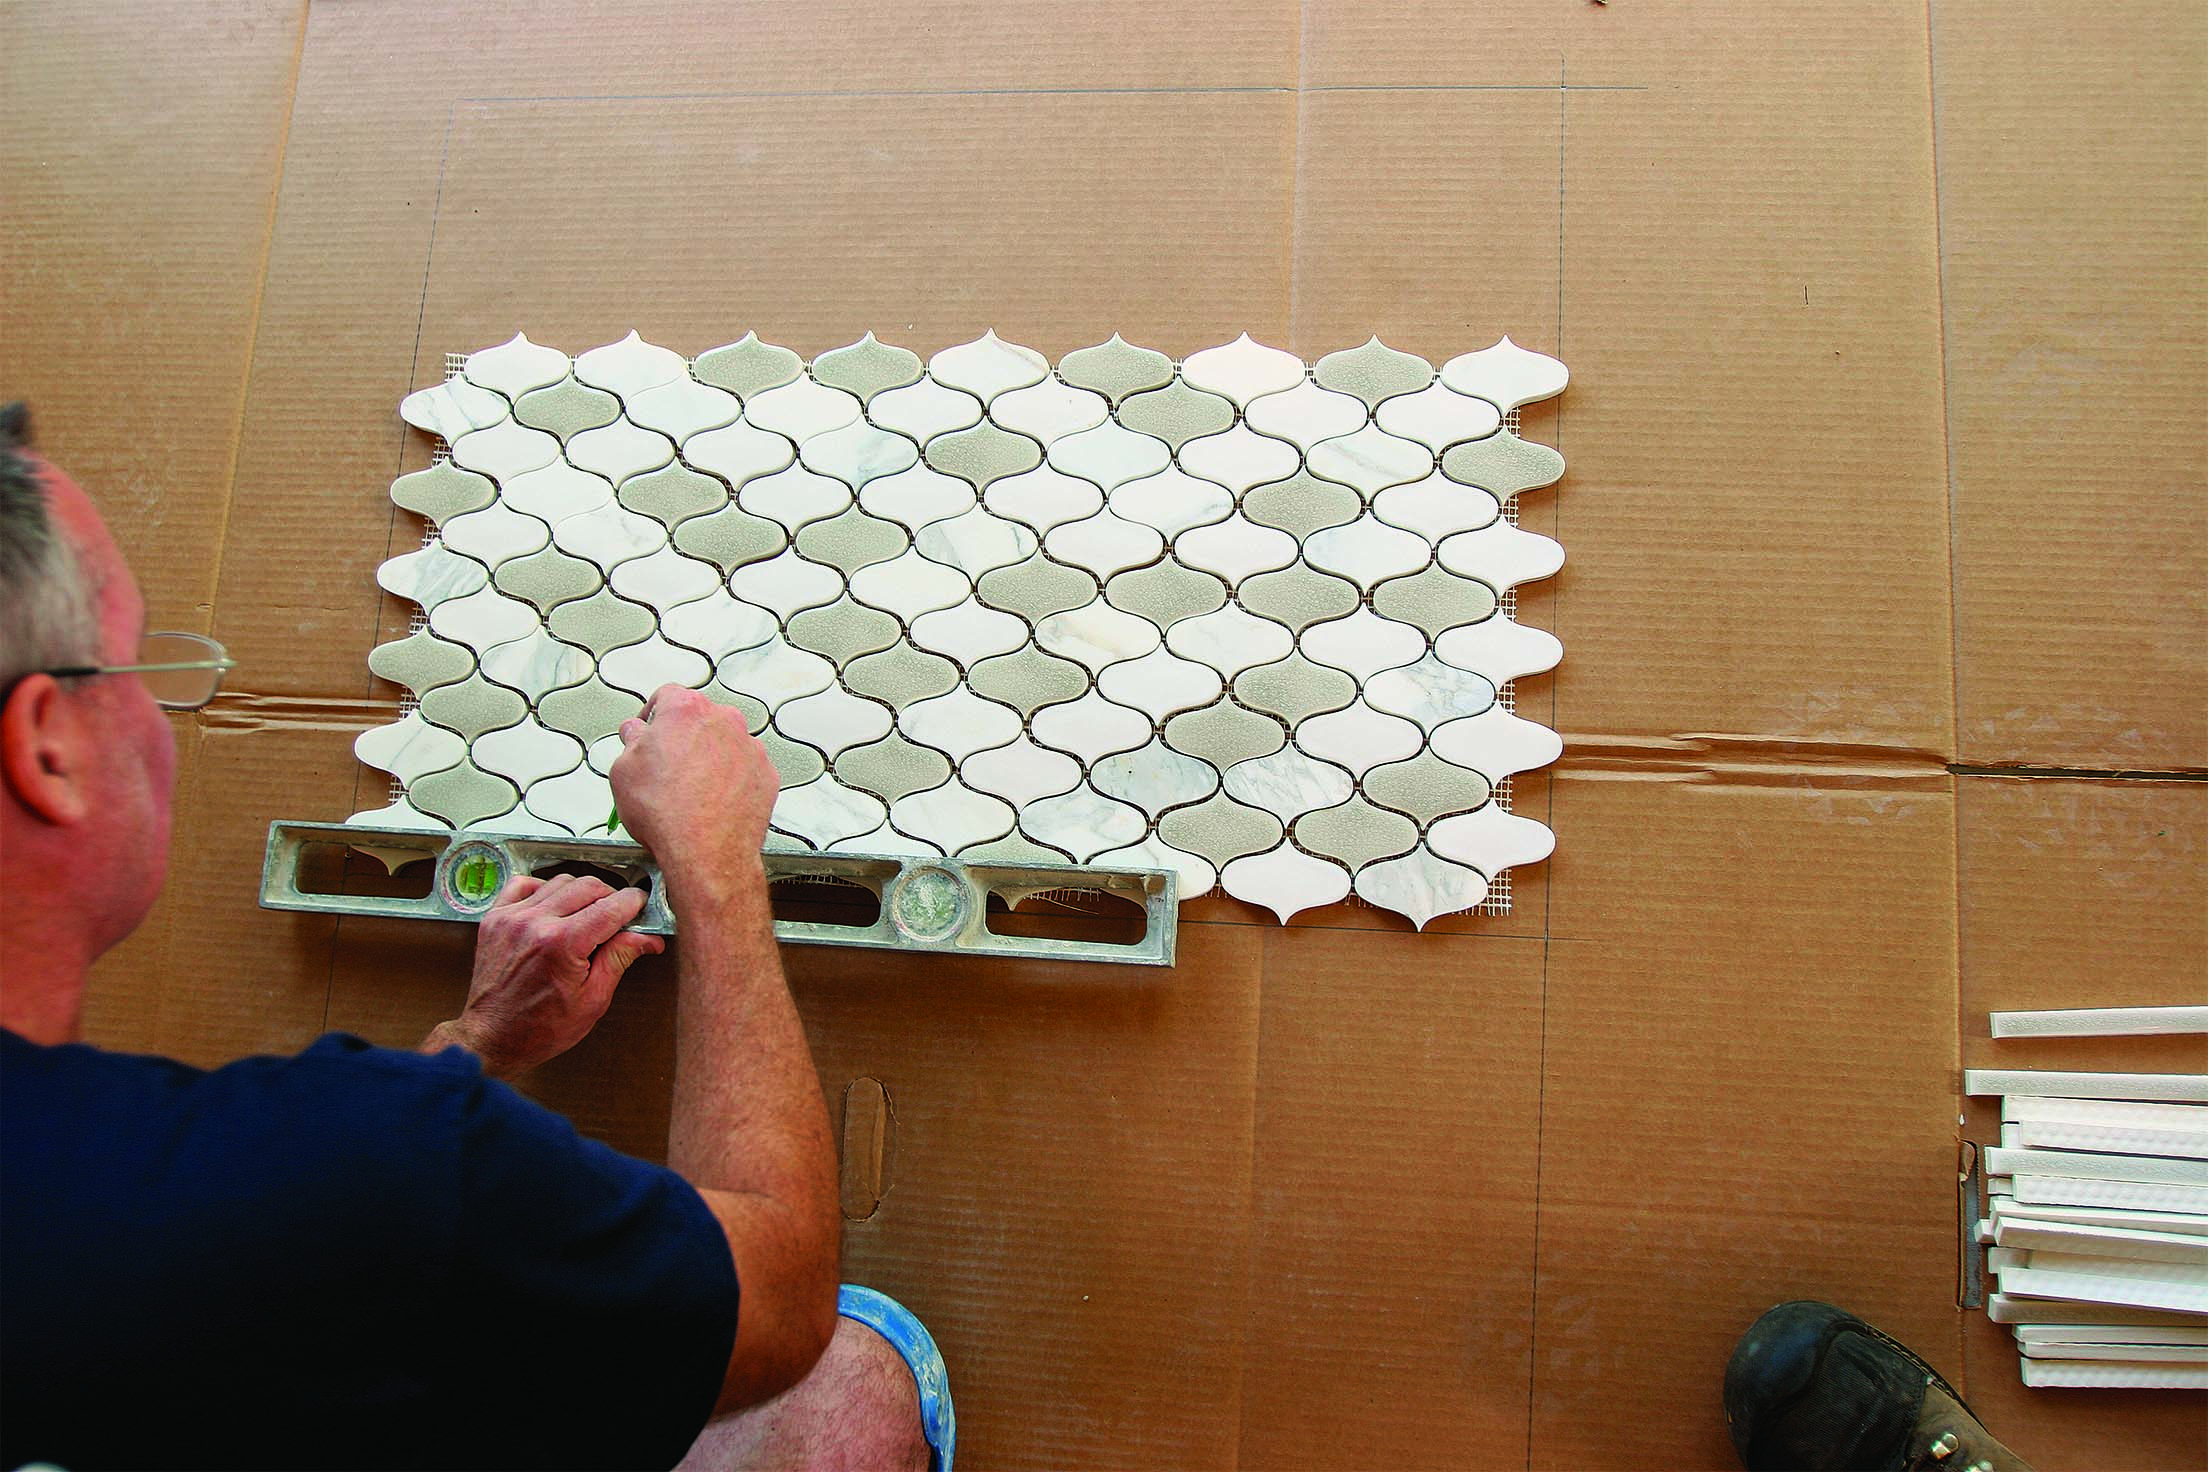
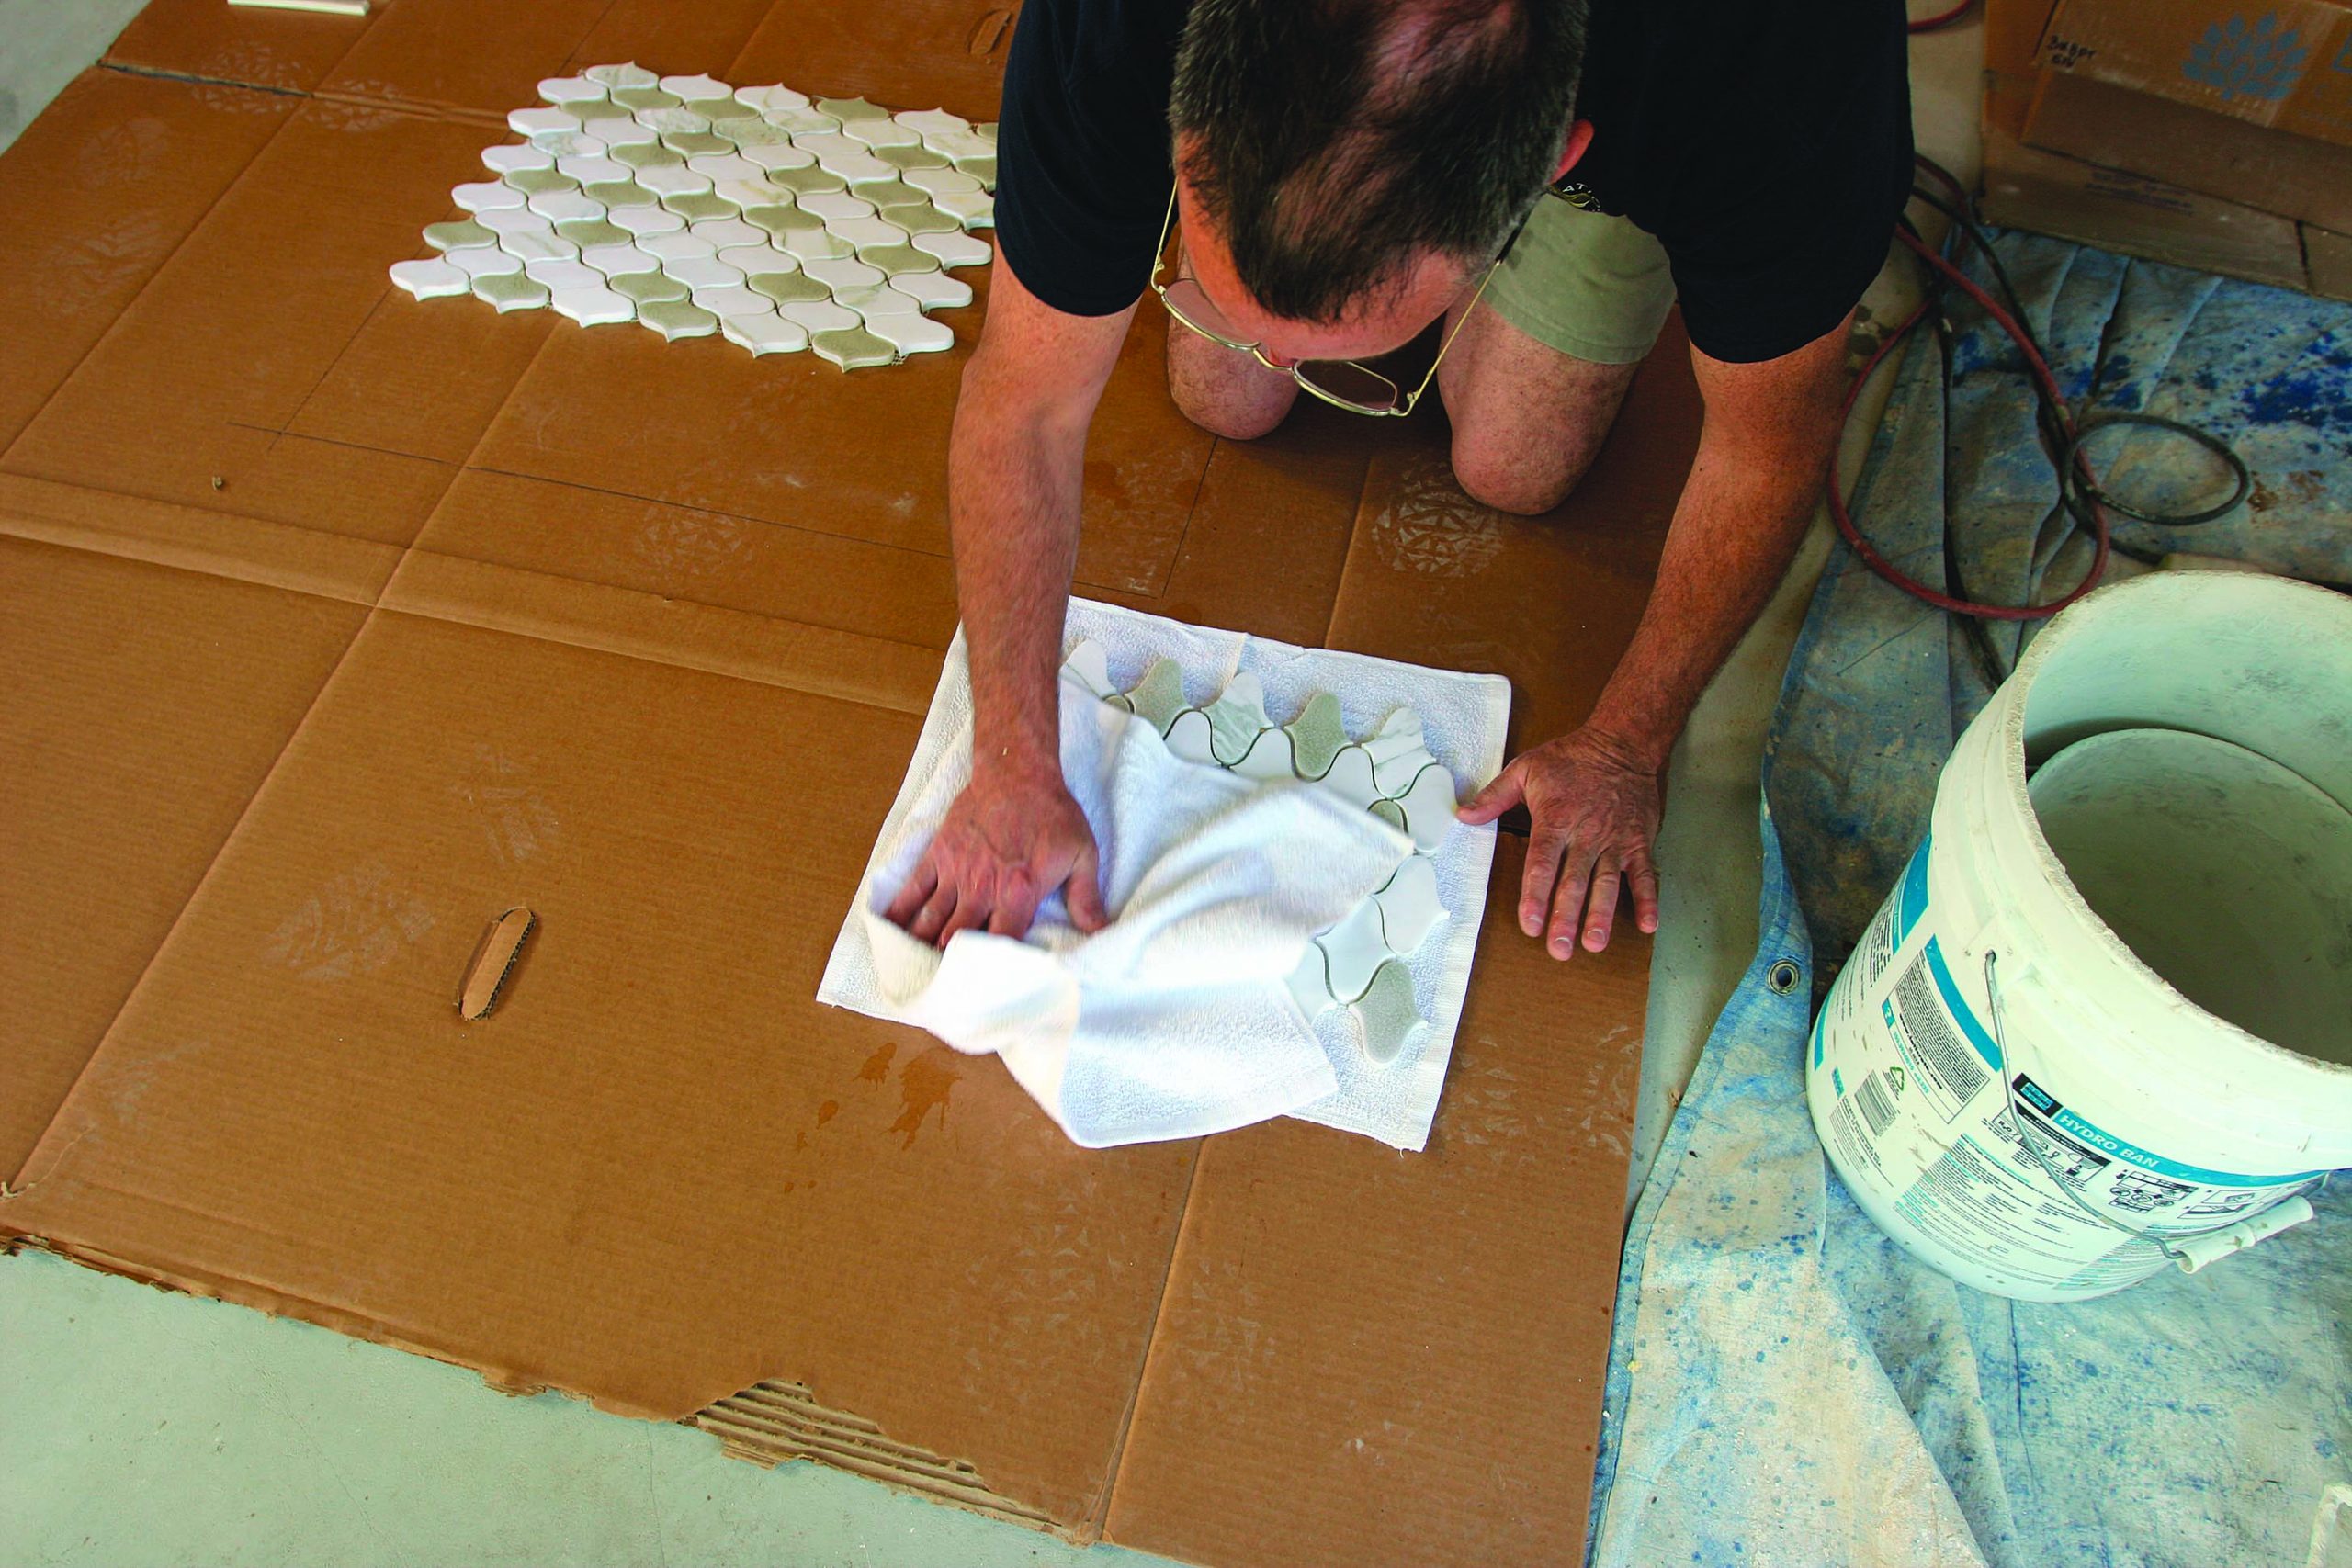
FOR ACCENTS, SYMMETRY TRUMPS SIZE Transfer the rough dimensions of the accent to cardboard, and then modify the layout until there are even cuts on all sides. After cutting, dry the tiles quickly because some mosaic-tile sheets are held together with water-soluble adhesives. |
|||
Install one tile at a time
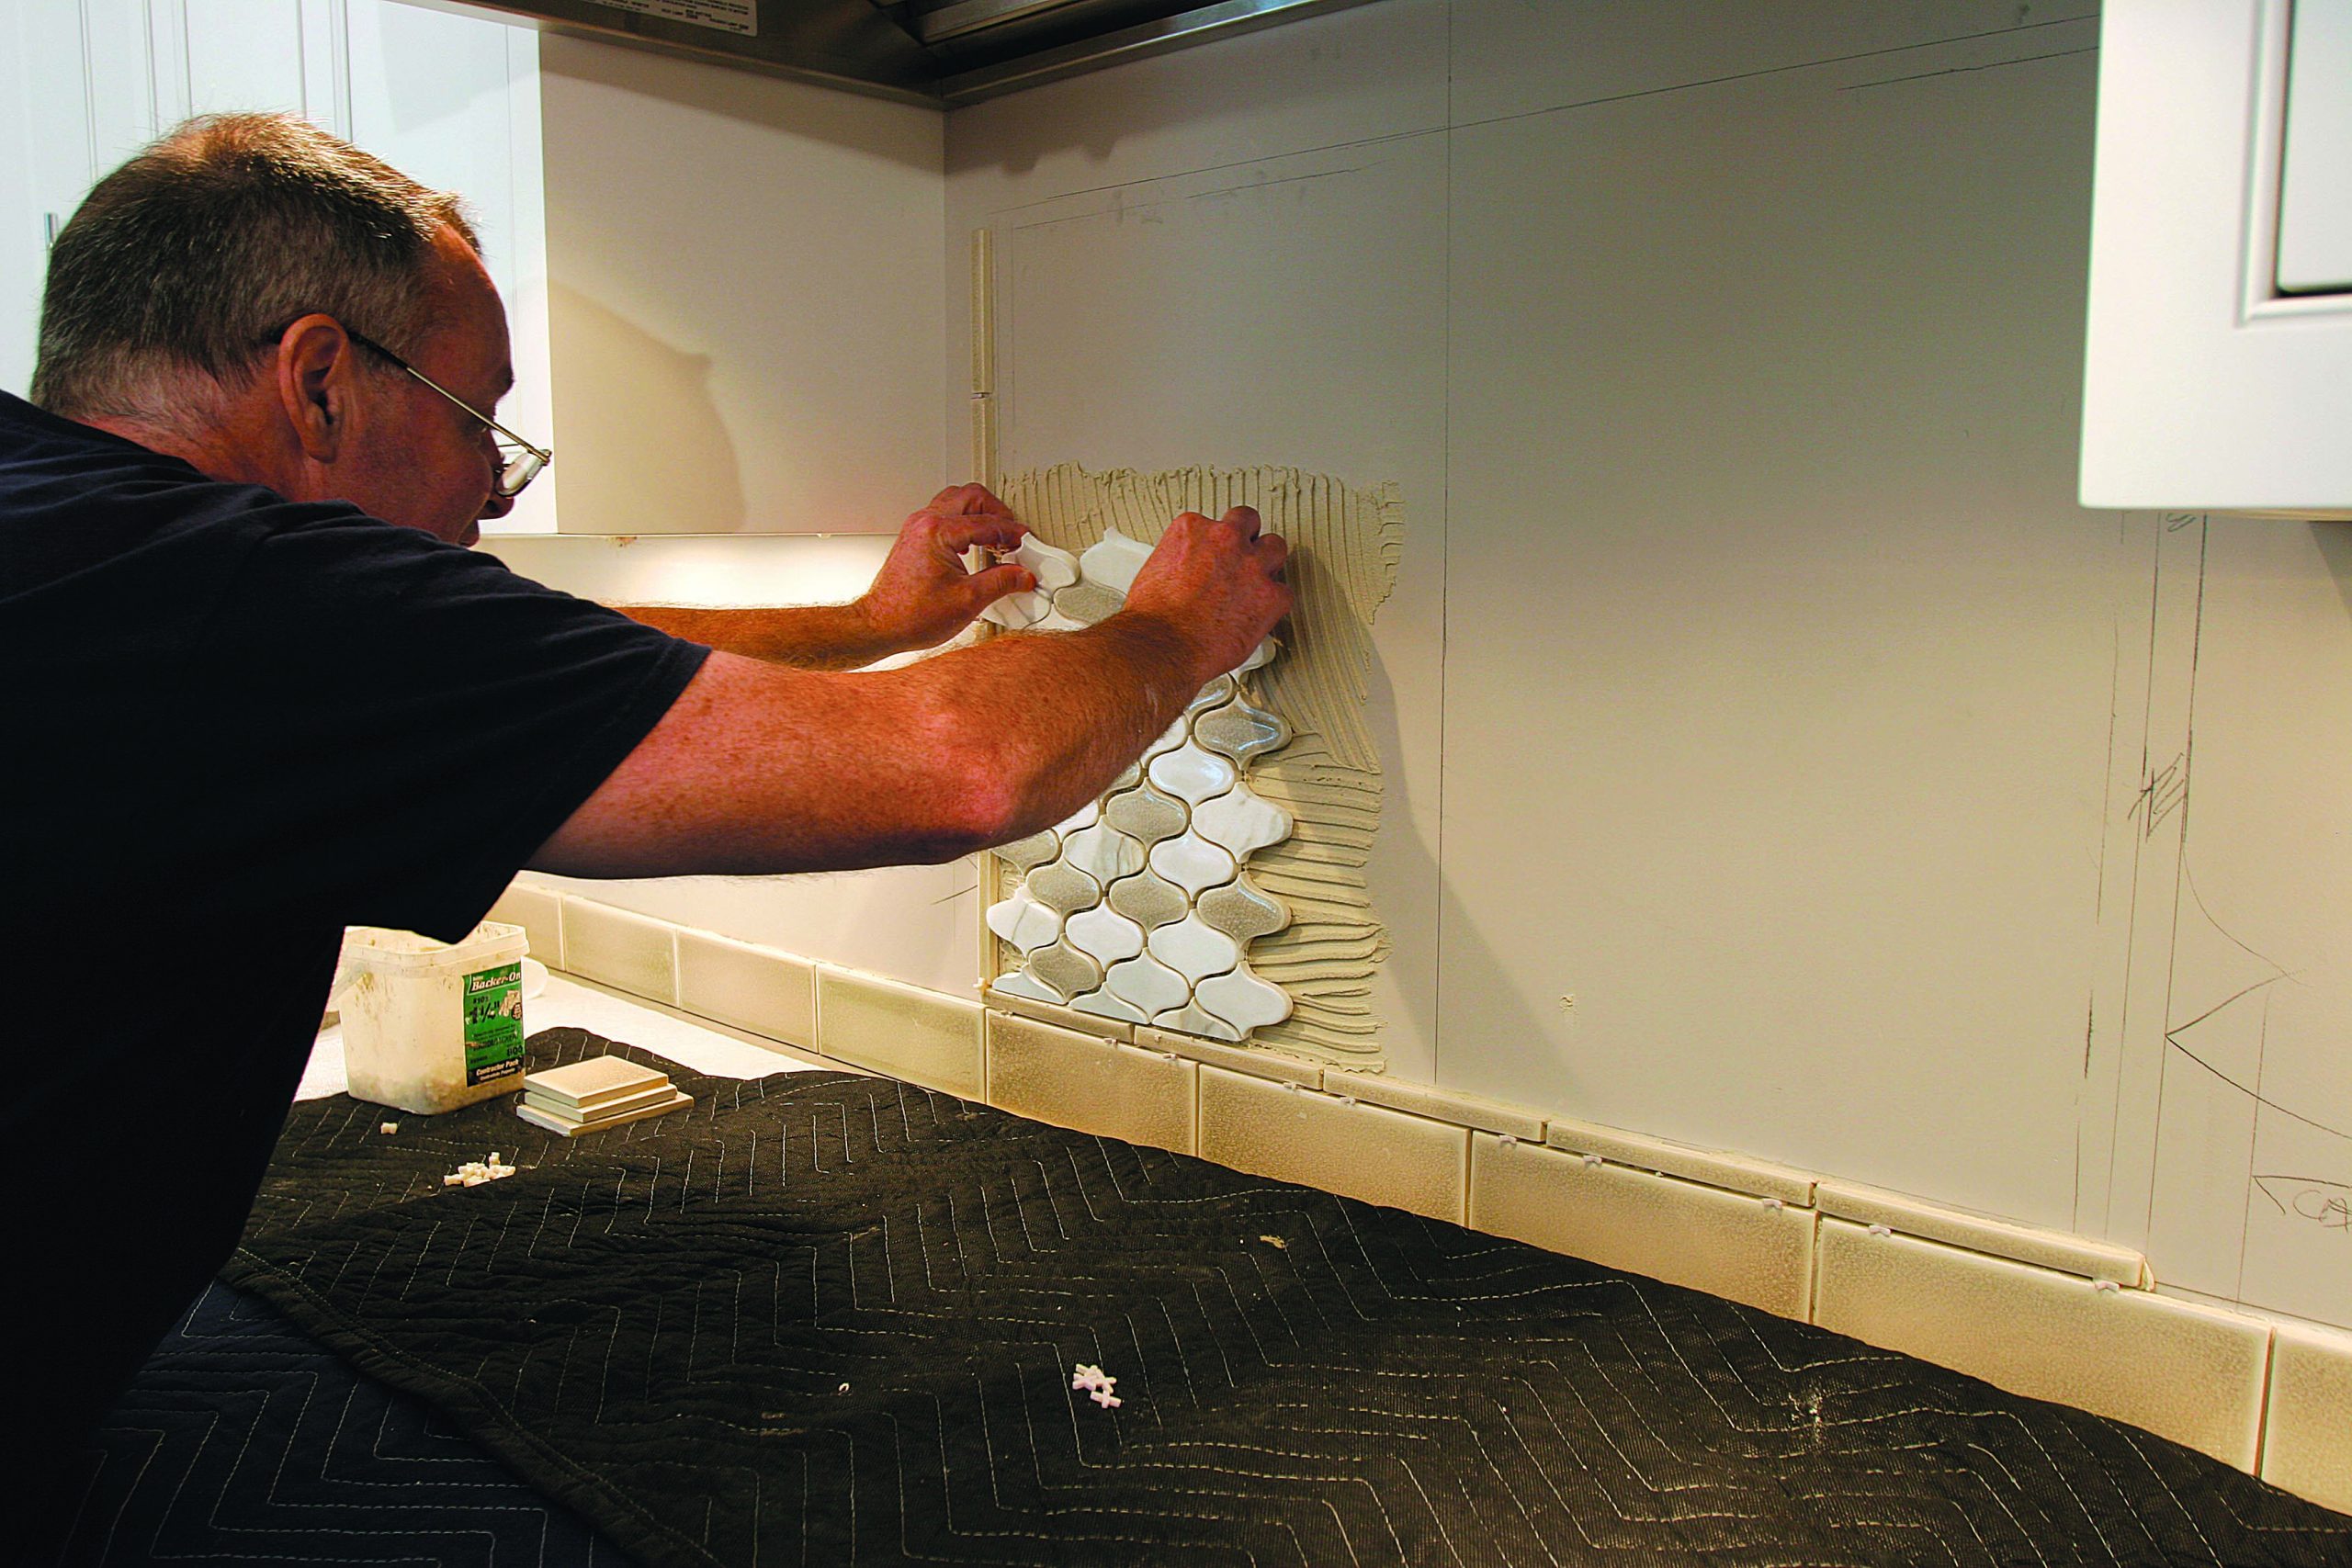
There are two common choices for adhering tile to a wall: mastic, which is a latex-based adhesive that comes ready to use out of the bucket; or thinset, which is a cement-based mixture that is combined with water. I don’t like mastic because it shrinks as it dries, making it harder to build up any low spots in the wall. My go-to thinset lately has been laticrete Sure Set, a polymer-modified thinset that bonds tenaciously.
Rather than combing thinset onto the wall and throwing up tiles rapid-fire style down the line, I work more slowly. I spread thin-set onto one tile, apply it to the wall, and then support and position it with spacers. Other installers might call me crazy, but I don’t have to lean over the counter awkwardly while spreading thinset on the wall, I don’t have to worry about the thinset skinning over if I don’t work fast enough, and I have no doubts about getting good contact between cement and tile.
For the best results, thinset should be wet enough that the cement penetrates the back of the tile, but not so wet that it sags or drips off. The size of the trowel used to apply the tile also matters, even when applying one tile at a time, and it varies based on the type and size of tile being installed. for 3×6 subway tile like this, a 1⁄4-in. by 1⁄4-in. square-notch trowel is my preferred tool.
Grout ties it all together
The job of grout is largely aesthetic—it fills the gaps between tiles and smooths differences in flatness or projection from the surface of one tile to the next—but it also adds a bit of strength. I prefer laticrete’s Perma-Color grout because it cures to make an uncommonly strong joint compared to other cementitious grouts. Plus, unlike standard unsanded grout, PermaColor can be used in joints as narrow as 1⁄16 in. wide. This grout dries a bit faster, so it has to be mixed in small batches until you become accustomed to the working time. However, it still needs to dry for 48 hours prior to sealing.
The mosaic accent area on this job was going to be grouted in a different color from the field tile surrounding it, which is not an uncommon situation. In cases like this, I start Trade secrets with the field tile, not worrying about any grout that oozes into the area of the mosaic accent. Once the grout firms up somewhat, it’s easy to clean out the joints with a utility knife. Then when I’m ready to grout the mosaic section, the surrounding field-tile grout will have firmed up enough so that I can wipe away any overgrouting with a sponge.
The last step in the process is to apply caulk to any areas where the tile meets a hard edge. These areas include trimwork, cabinetry, a range hood, and the countertop. Most brands of grout offer a color-matched caulk for these spots, but once again, I find that laticrete caulks are the best products available for color match.
Trade secrets
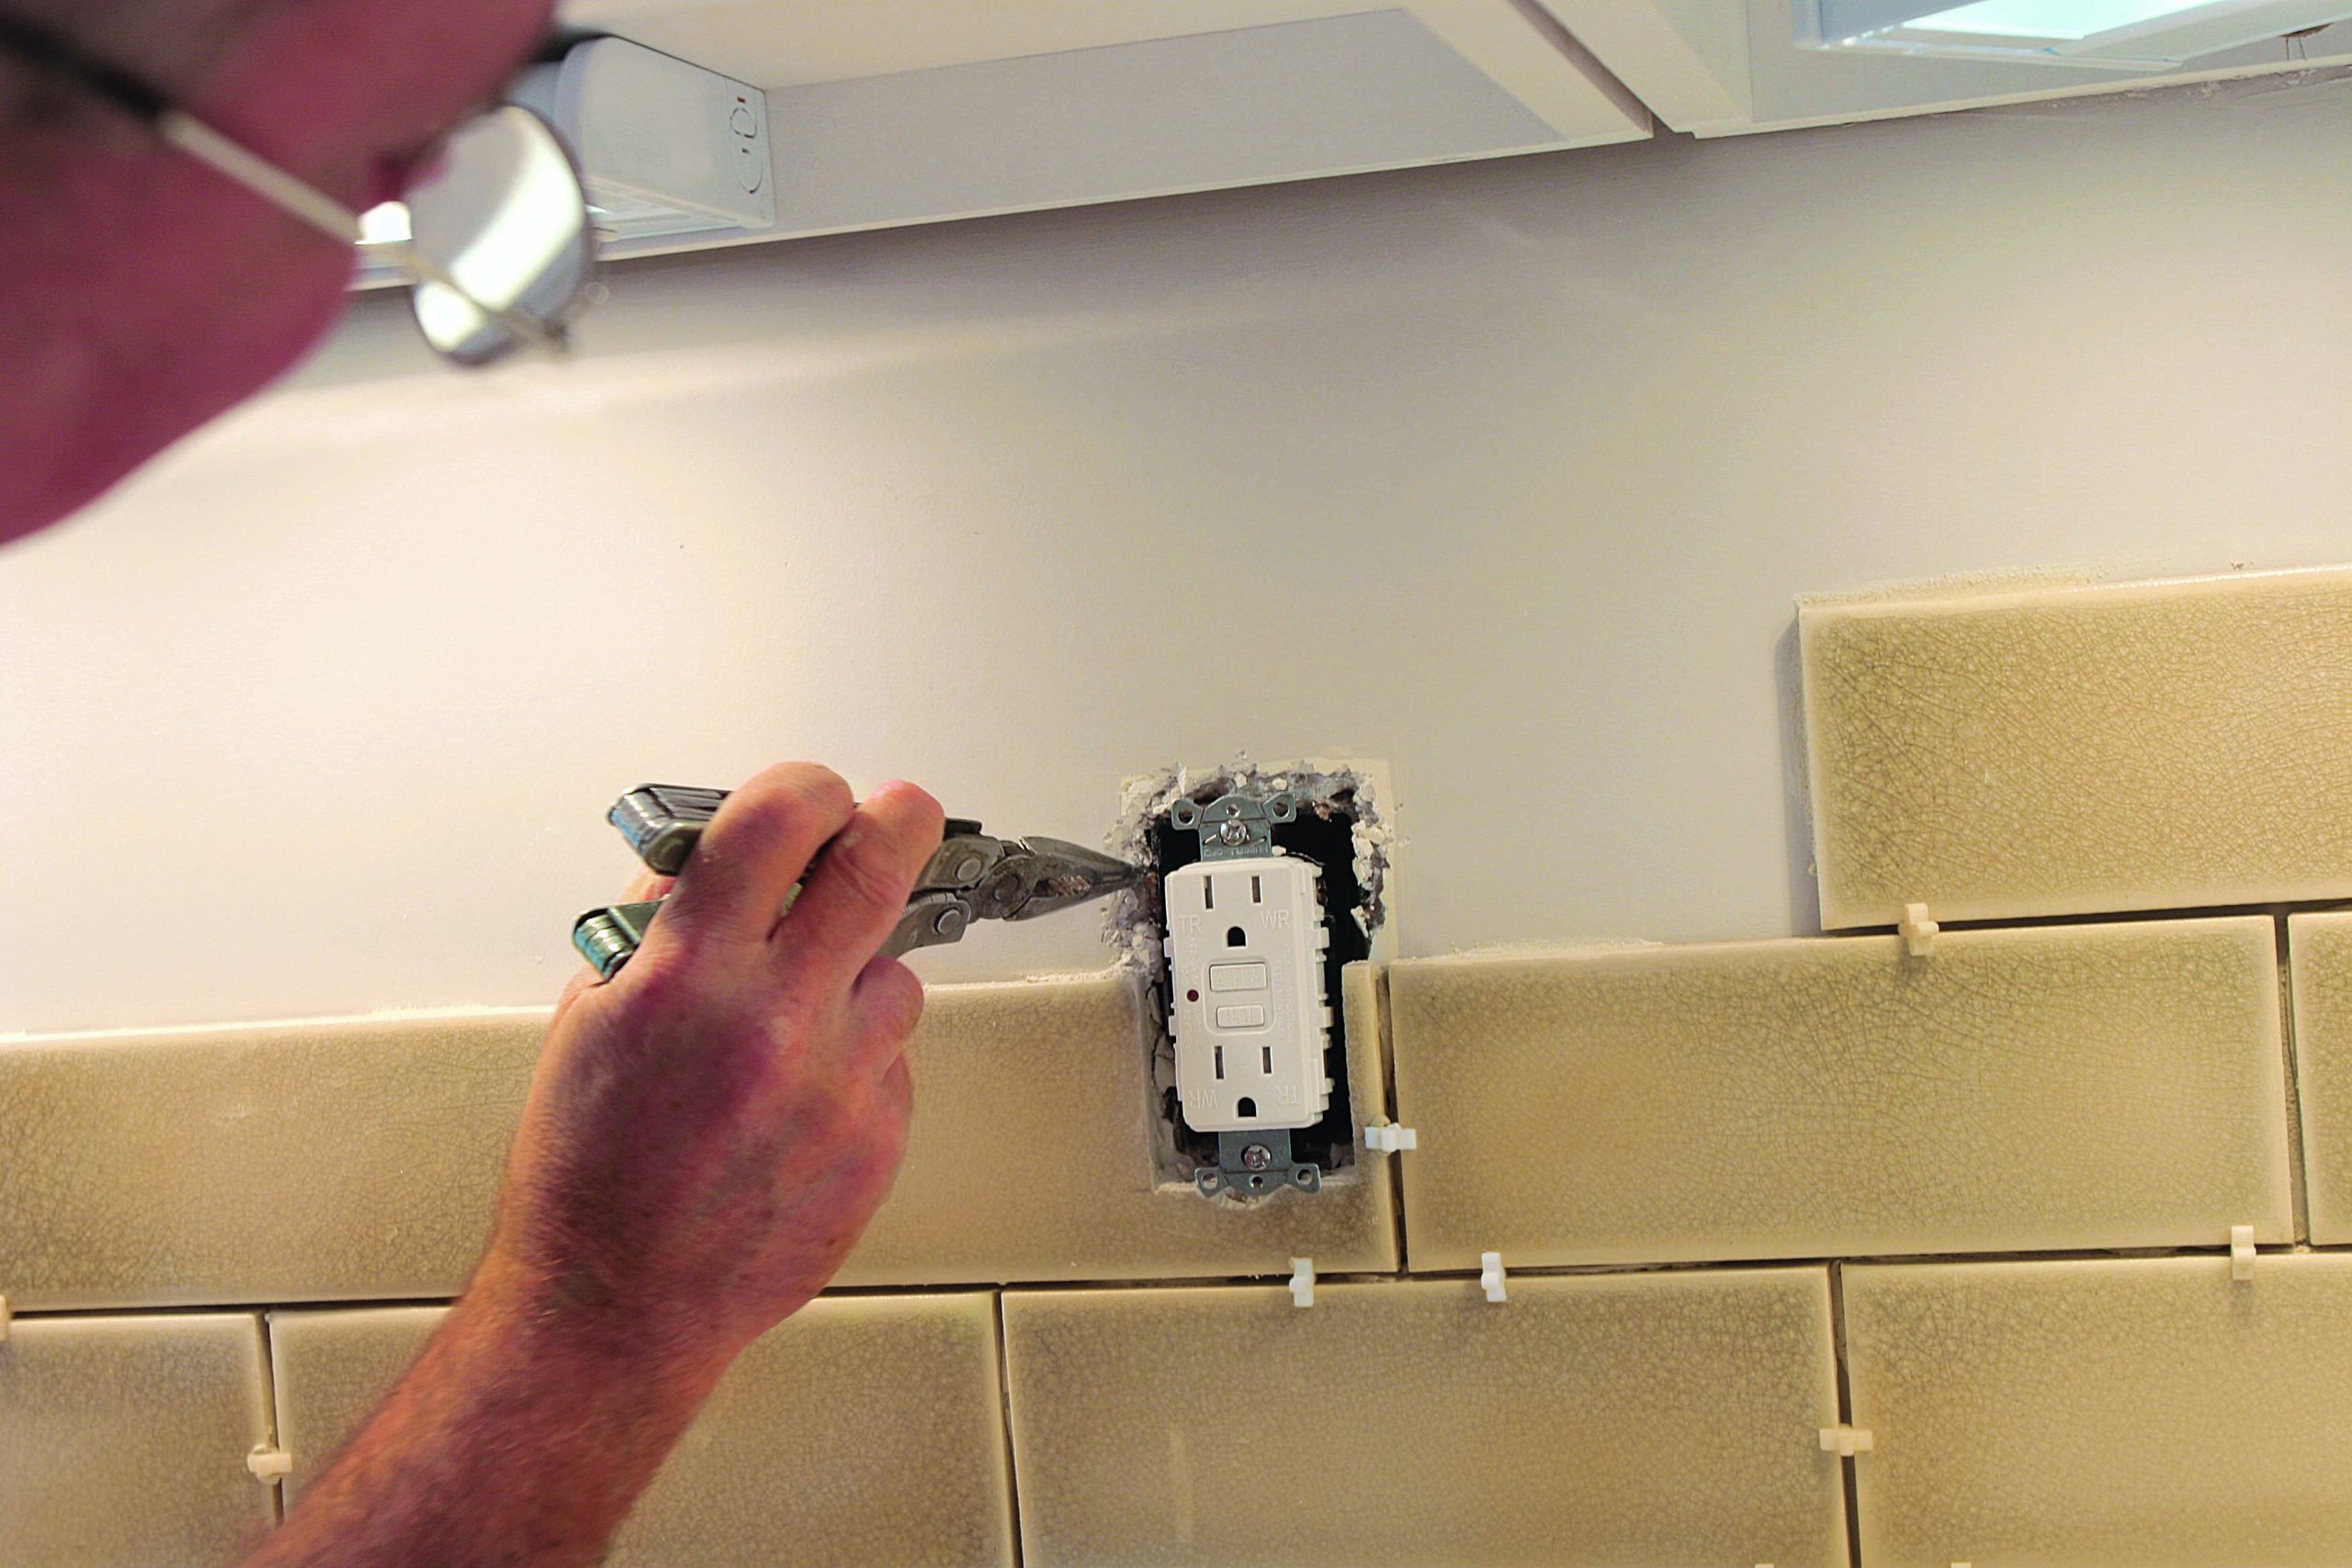 |
With the power off, break away built-up drywall compound around electrical fixtures so that tiles will lie flat. |
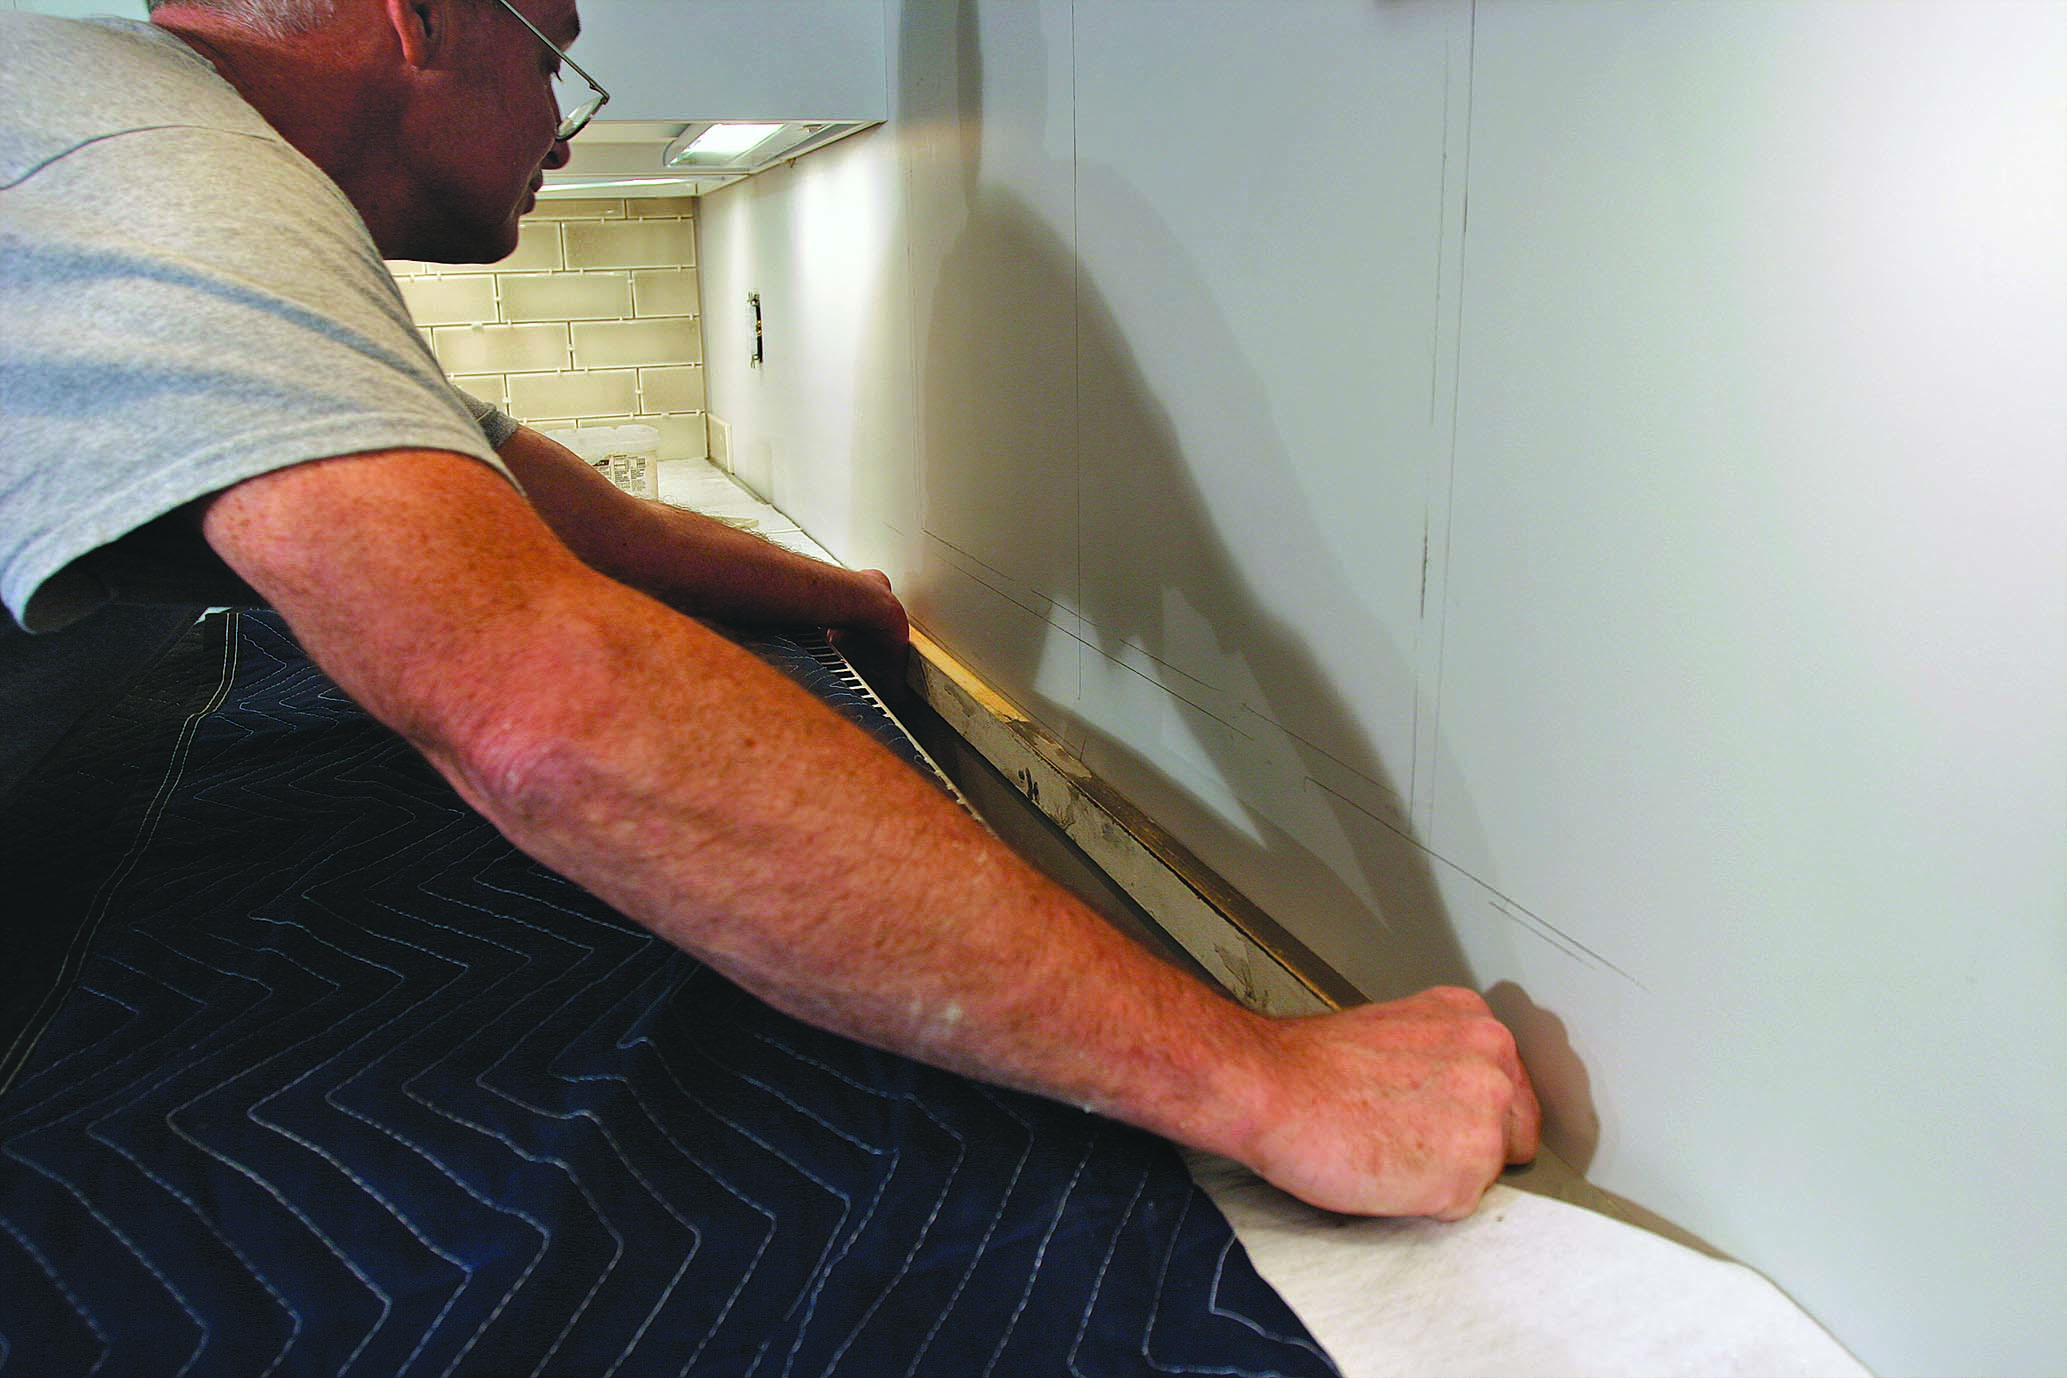 |
You don’t need to screw in a ledger behind the oven to support the first row of tile. Instead, cut a piece of wood so it can be pressure-fit between the countertops. |
 |
Thinset should be a creamy, peanut-buttery, plasterlike consistency. Dip a finger in the mix. If it hangs without dripping, you got it right. |
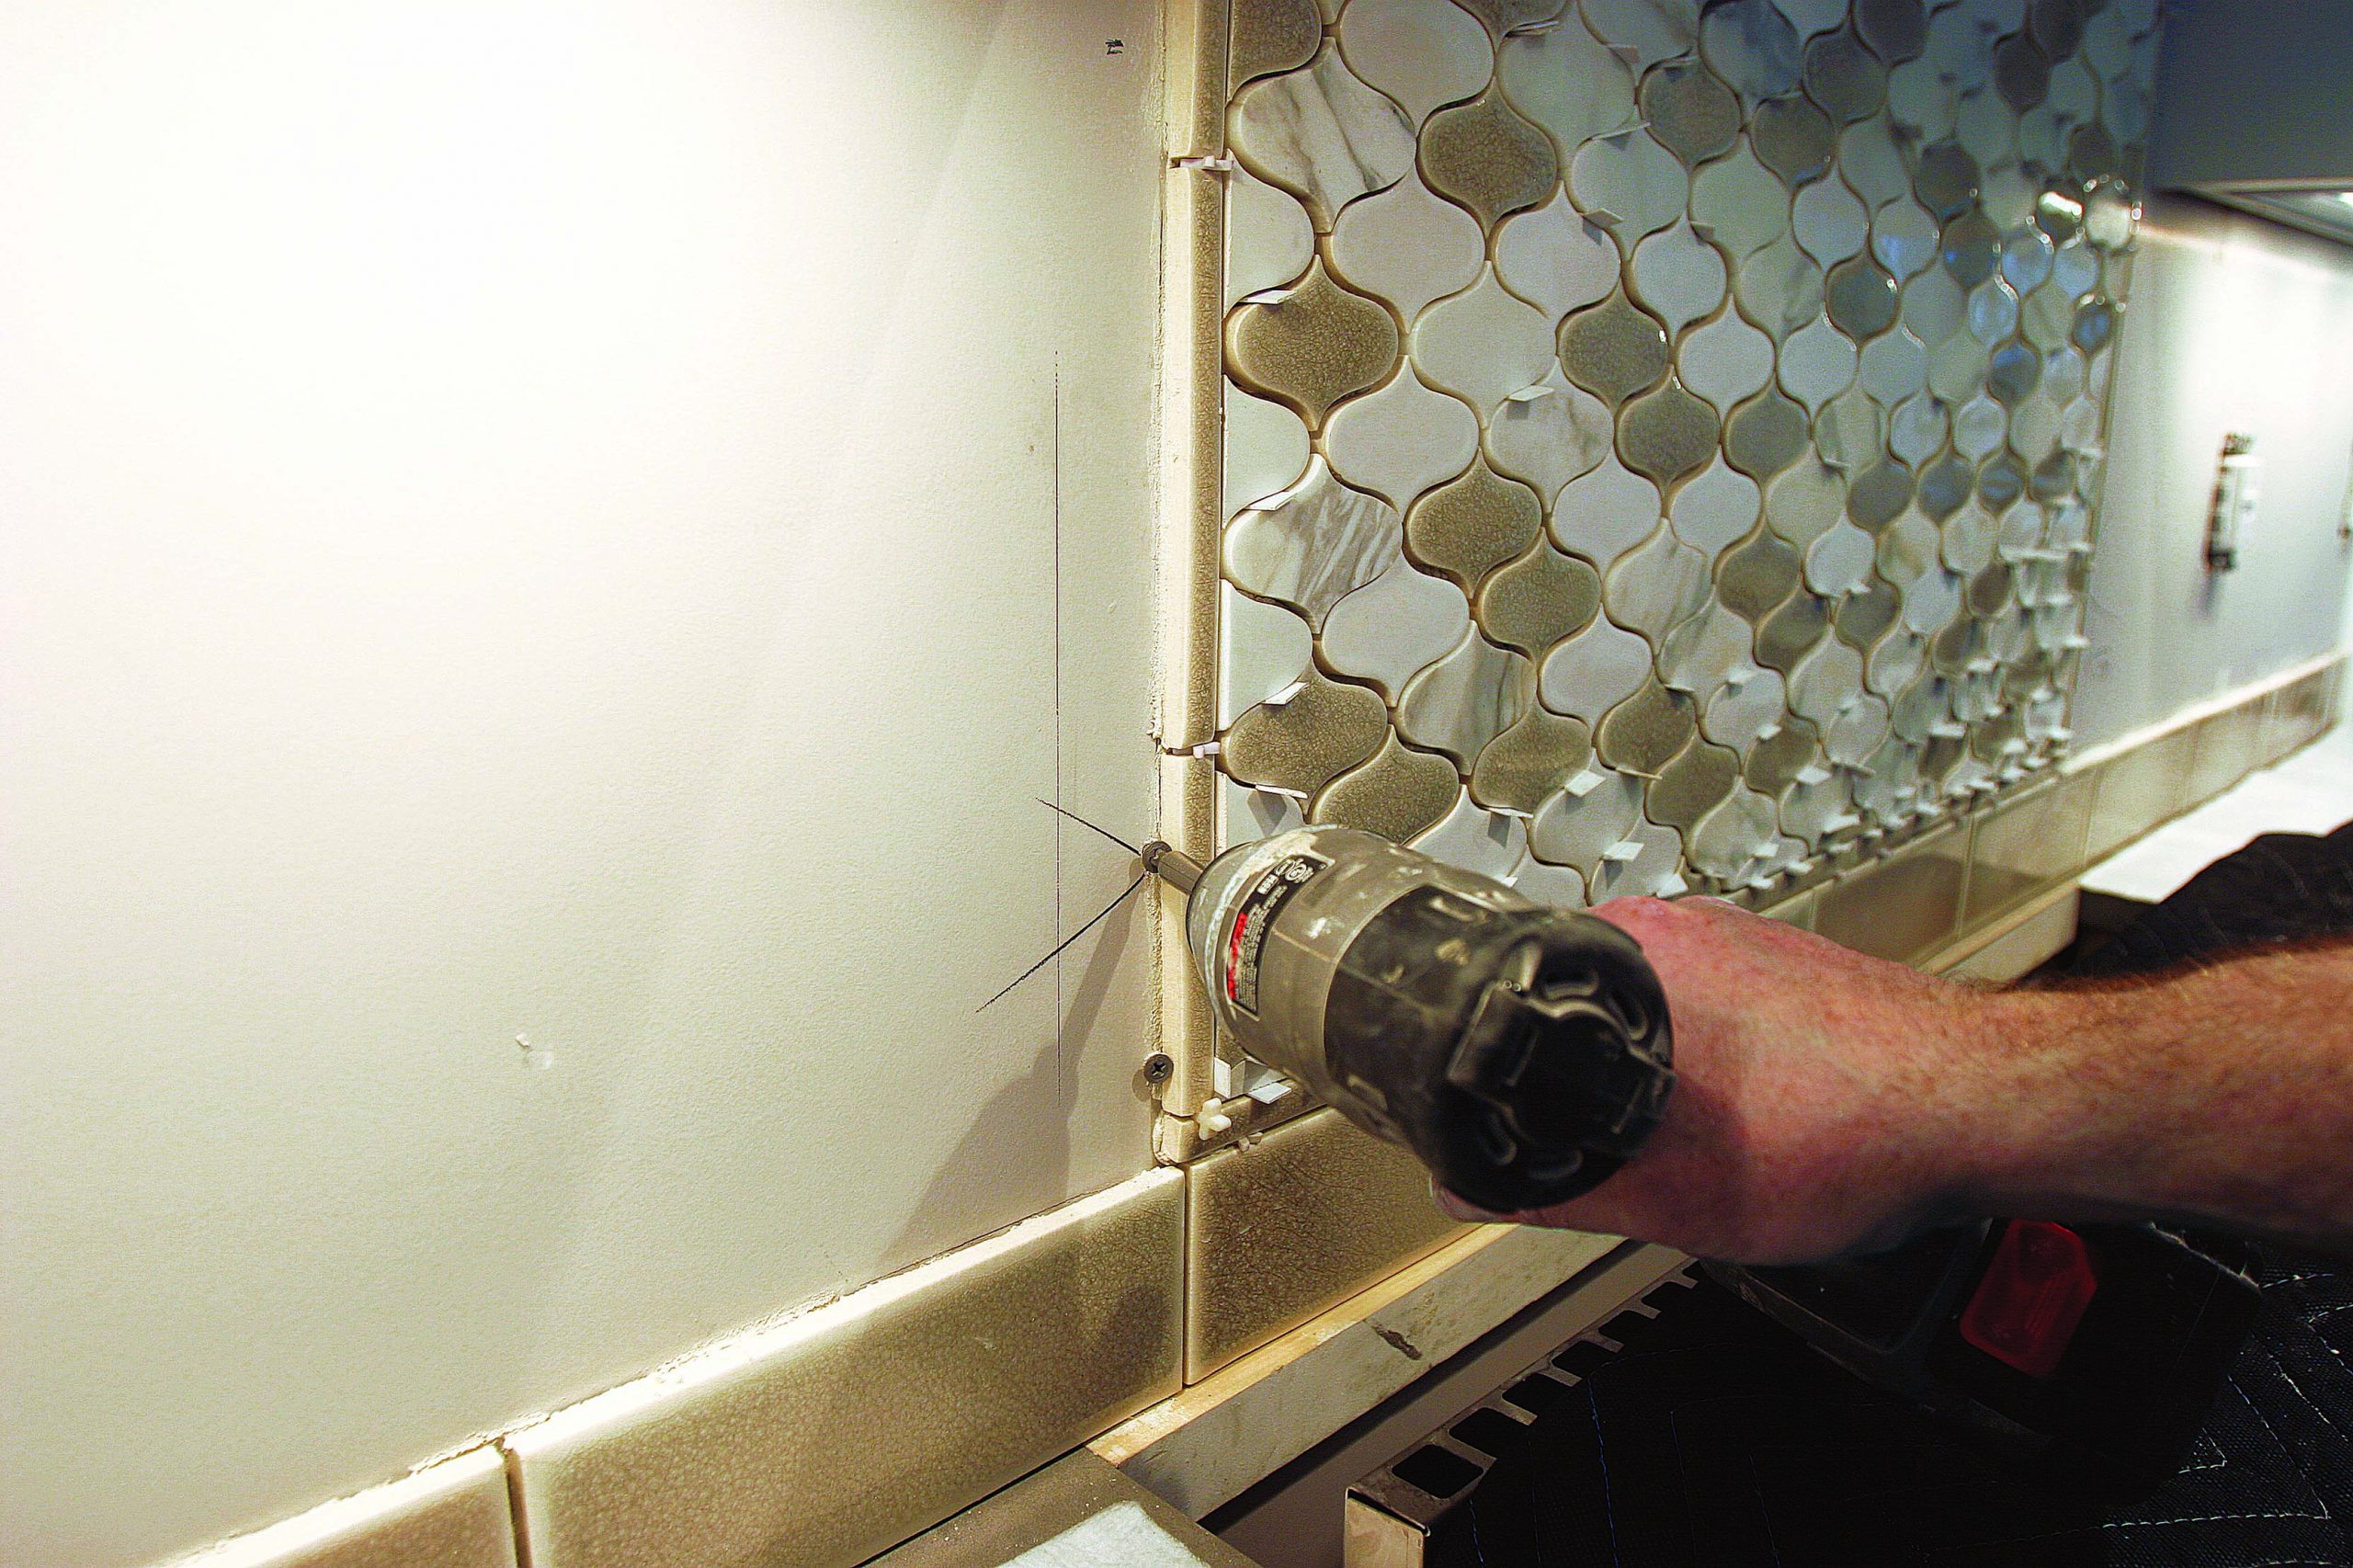 |
Screws driven into drywall offer enough holding power to temporarily support tiles that are sliding out of alignment. |
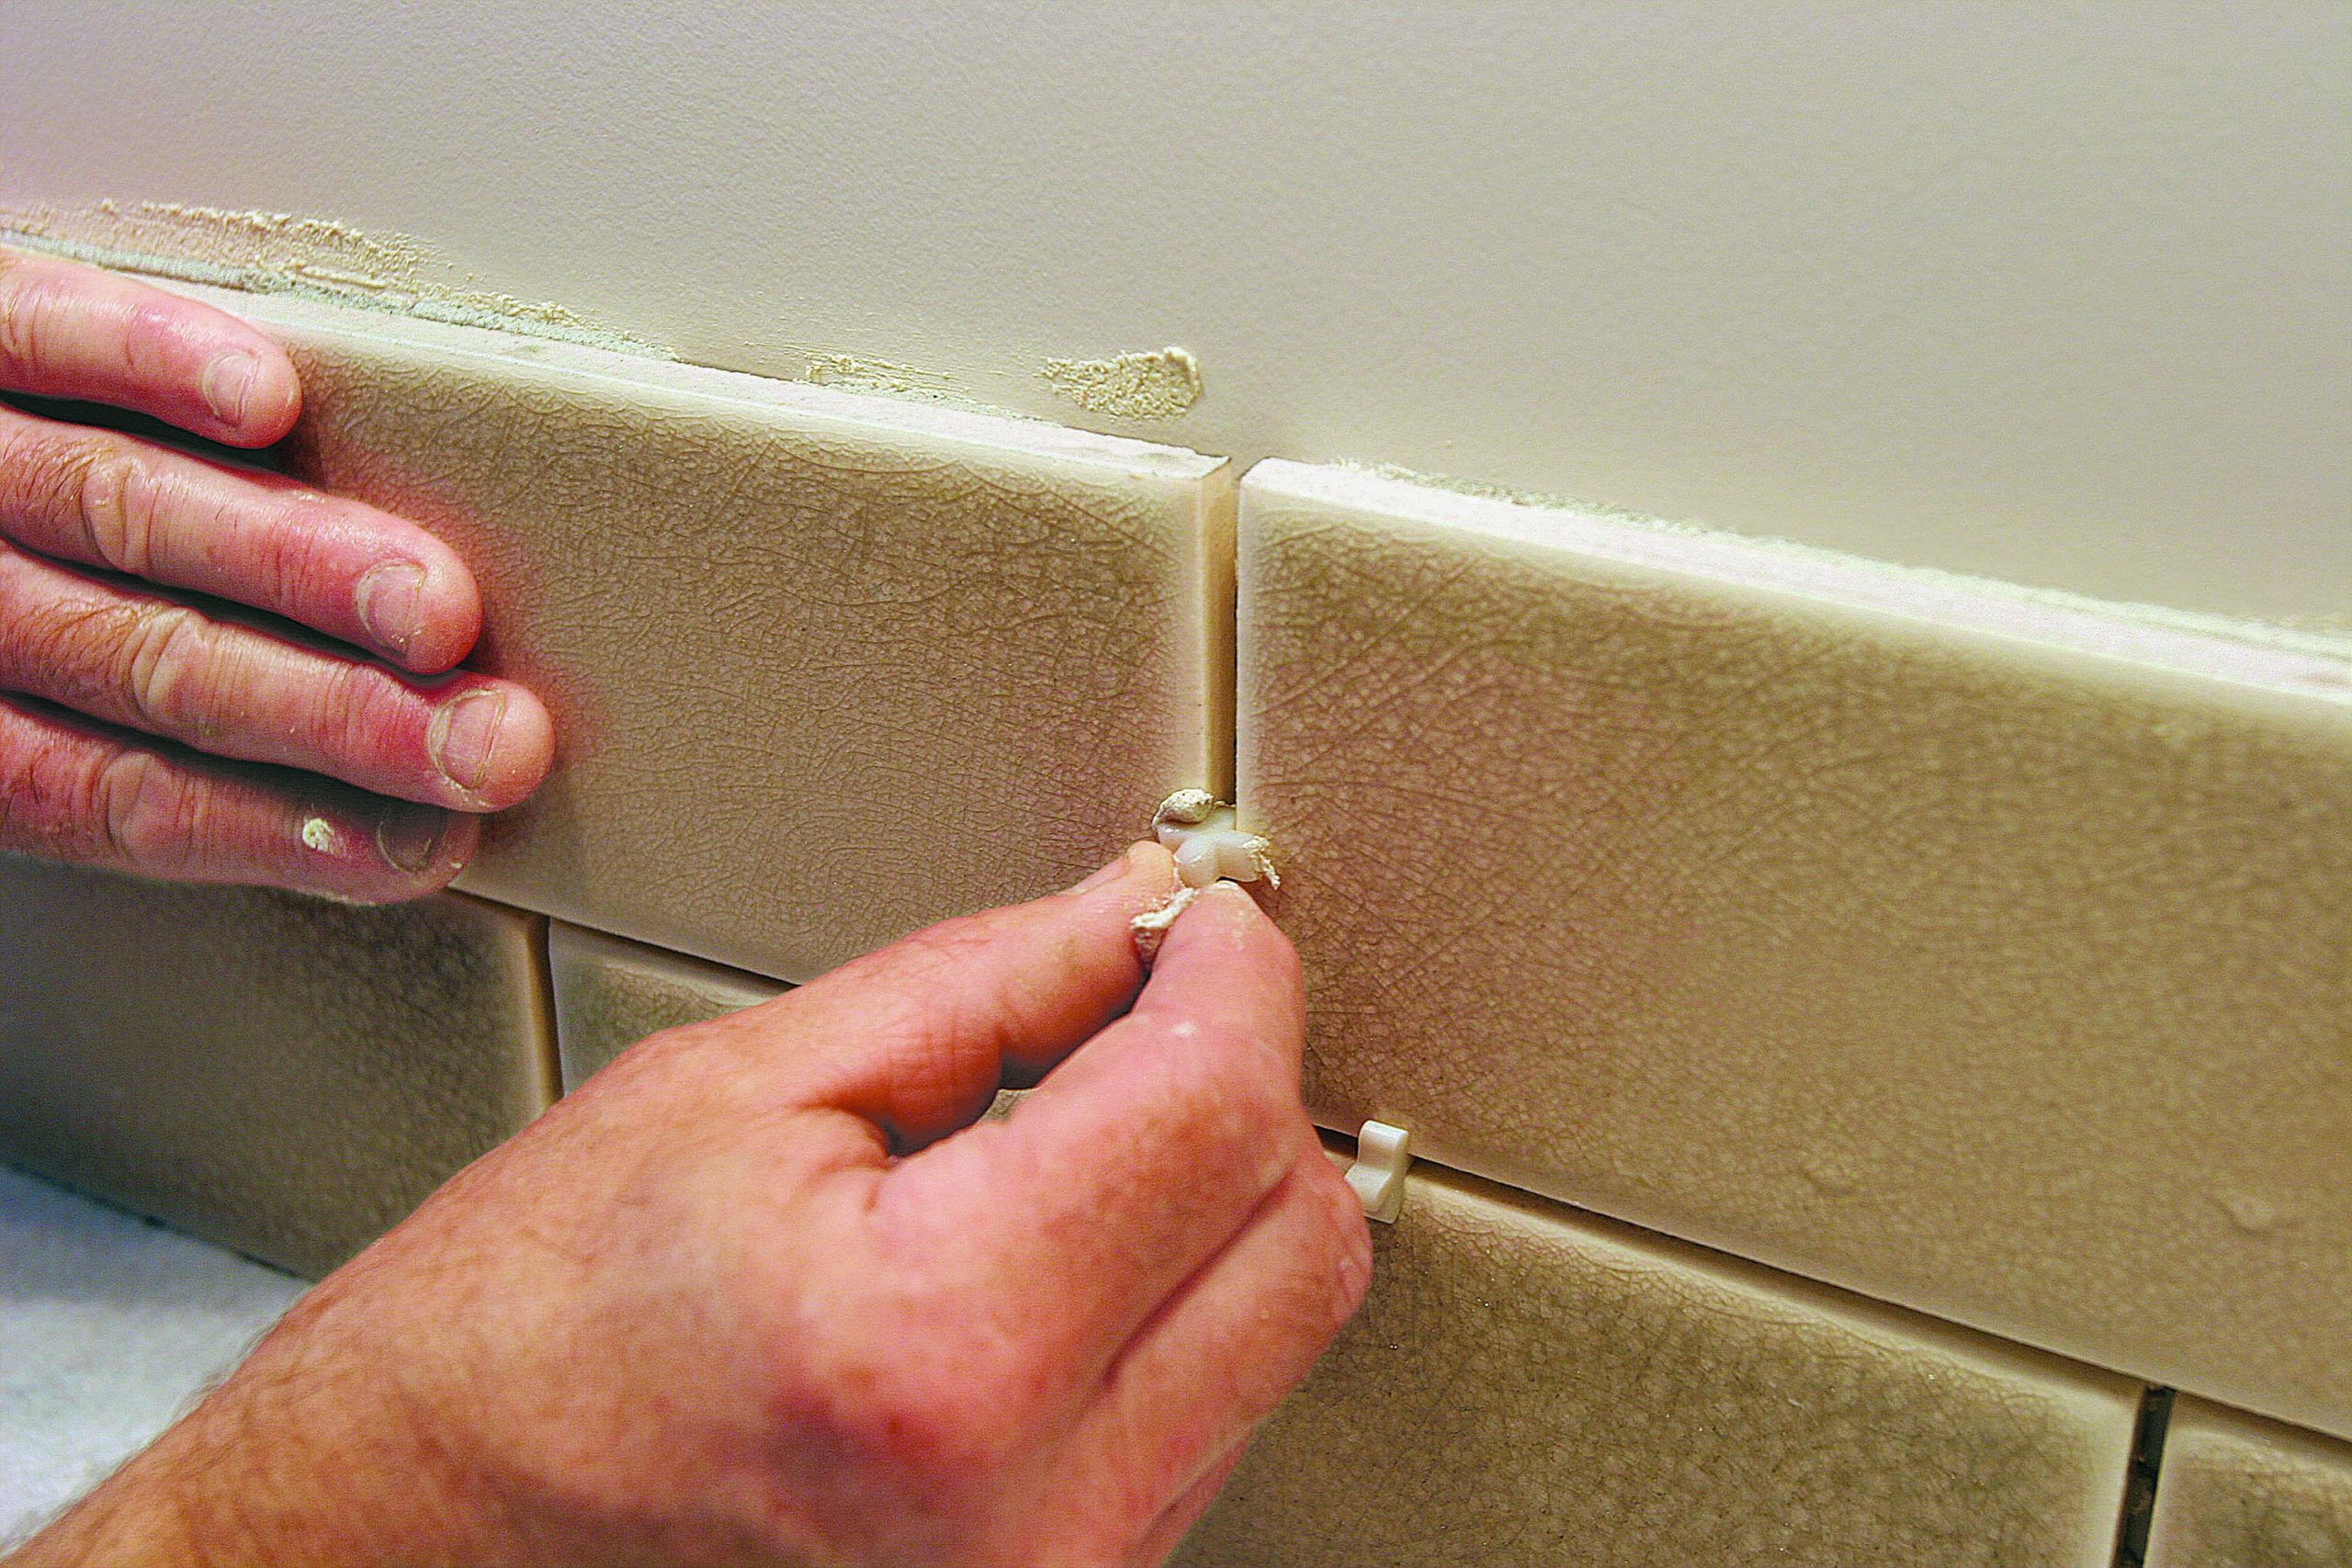 |
To ensure that tile spacers don’t fall out of vertical joints, swipe them through the thinset before pushing them into place. The sealed tile makes the cement easy to remove the next day. |
For more photos and details on tiling a kitchen backsplash, click the View PDF button below.

View Comments
How does the white grout hold up to cooking grease?