Advice .. Non bearing walls framing in basement – Concrete to Joist Bottoms 8′ 6″
tsenator
| Posted in Construction Techniques on
I’m sure many of you have done things like this a lot more often then I have, so I figured I’d just throw it out there for comment.
I am building a cabin myself and will be putting up 2×4 framing in basement in front of the Spray Foam I just had done. The thing is the Concrete floor to Joist Bottoms 8′ 6″. Do I buy 9′ 2×4 studs to cut down 8’3″ and put a single header and footer or do I buy easy & abundant precut 8′ 2×4 studs and put double header and double footer to get the 8’6″ (I think I know the answer but wanted to hear what everyone has to say… I like hearing from peoples wisdom)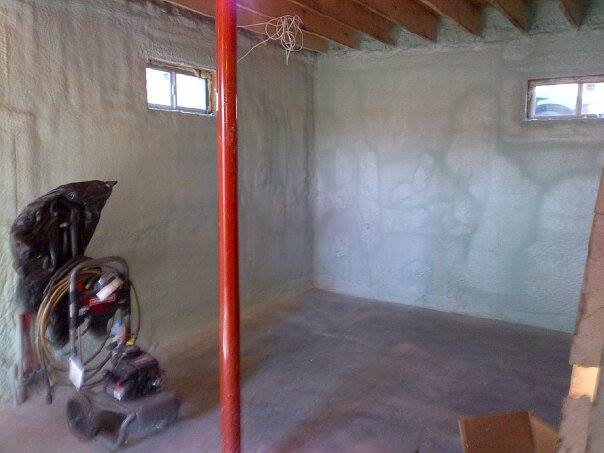


Replies
PRECUT studs for a 9' ceiling would be 104-5/8" (you mention "precut" 8' studs-if you order precuts-they'll be 92-5/8" (so 3 plates plus the precut gets you just above 96" to set joists on-thus and 8' ceiling) Can't say for sure but there aren't "9ft" 2x4's available here.
or
8' studs-are 96+inches-they'd need cut down to make an exact 8'-2x4.
You know with a basement floor you'll be either shimming the plates or cutting every stud to fit (and toenailing) and building walls on the ground (* you'll never be able tip up a full ht. prebuilt wall)-you'd need another plate (either floor or ceiling) to first stand up the wall, then lift up or place under that extra plate.
However you elect to do this.........
If you want to build on the floor and place the wall-you'd need 3 plates times the lengths of your walls. You'd need 9' precuts and the scrap would be 7+ inches per stud. What's the extra plate cost v. the cutoffs?
If you toenail-you'd need 2 plates times the lengths of the walls. Scrap 5-1/2+inches per stud.
or-use metal stud track and 9' precuts and scrap would be a couple inches per stud and you don't have to cut exact length to fit the track. If you are in an area where the slab floats and can rise and fall-use deep track at the top and let it float up there. Remove the screws after the wall is drywalled.
another consideration-drop ceiling or drywalled? With drywall, you'll need "lath catchers" on all walls paralleling the joists above (to catch the drywall).
The quality of precuts here is usually better than a linear 2x4-but nothing is sacred-straight is straight and a good supply worth the premium to me.
Thus the conundrum-save a tree-save a couple bucks-make it easy on yourself-any of the above.
Positive side to scrap-you've got a cabin-one would assume you'd need kindling at one point or another
Best of luck.
Calvin thanks
Yes -- I meant 8' studs (96" -- did not mean to say "pre-cut" for 8' walls) .
You wrote "(* you'll never be able tip up a full ht. prebuilt wall)-you'd need another plate (either floor or ceiling) to first stand up the wall,).....
Thank you for that advice. I never would have thought of that ! So you don't think that with the width of the 2x4 I could tilt up the premade wall I built up on the floor if it was eactly 8'6" and my exact height was 8'6" (I figured if I needed to a could hammer in the last little bit if it was snug).
But you think I could do it fine if I alreadt have the bottom plate down ... Interesting. But since I have never done this thats why I can on here to ask.
As for length of studs to buy it seems like a waste for the extra length studs -- but like you said -- it'll make good kindling ;)
Thanks
I will guarantee you and be ready to put large sums of money on it-you cannot tip up a 2x4 wall even "pretty" close to the actual height (if you are putting that wall perpendicular to the joists.
If you're a math wiz-you can figure the arc that it will take----------
or-
take a book that just fits in the bookcase-try to tip that up.
edit: however, you can tip it up within a joist space then struggle to get it where you want it. The more walls that go up times the goofyness of the joists or floor..............best have a big hammer. It can be done if you plan it right-do the correct order of building and placing and leave some shim room.
and-
Most basement concrete floors vary in "level/flat" so you'd best check that close b/4 you cut anything.
I carry around a box with 3-1/2" blocks of various thickness plywood. I make these out of scrap ply-1/8" to 3/4". These I use for hanging doors to get the jambs close, to place under kitchen cabs to make up the goofy floor heights, etc rather than using a boatload stack of shims. You might find it handy to have some of those as well.
Remember too-if using wood-any wood in contact with concrete should be treated. If you don't want to go the route of treated inside the space-use other non absorbing solid product-perhaps a Trex like plate-pvc if you wish ($$) or metal stud track (metal stud track can sometimes be bought at 3-1/2"+ or the more popular 3-5/8". Some will put down a strip of concrete expansion strip to isolate the reg. lumber from the concrete floor.
These are usually partition walls and carry no load other than the finish applied to the framing-so the big deal is hold it in place and isolate if from moisture contact.
as to the scrap and $.............
you'll have 7 pcs of scrap per 8' of wall. at either 5+ or 7+ inches long.
so-36" of scrap or 49 inches.........
the extra plates will be 8' long. either one or two extra (and we already figure you'd need at least 3)
Then figure the goofy heights to cut to if you go that route-time is money on top of the extra plate costs.
You've found one of the fun things of remodeling-how much/how long/why?
Thanks Clavin -- that pretty much sums it up
"I will guarantee you and be ready to put large sums of money on it-" LOL I believe you and got the visual after you wrote about the book on a tight bookshelf.
yes -- I was going to use treated wood and as an added precaution was probably to add some sort of a "Sill Seal" strip under the wood to isolate the lumber from the concrete floor. I was just going to go to HD and get a roll or two of that white Sill Seal stuff
Thank you for your time explaining all of this.
ts
You're welcome.
Steel studs.
I wouldn't use wood studs at all. I'd use steel studs. Great for any framed in place nonbearing wall. Use 9 footers and cut them.
Mike's post is great advice. Calvin recommended this as a good option as well.
The biggest advantages I see are that steel studs are light weight, moisture and pest resistant, and dead straight. The only thing I would make sure you add is to install strips of 30# roofing felt between the bottom metal track (acting as sole plate) and the concrete to avoid potential corrosive reactions between these two materials.
Good Options...
Many good options from Big Cal.
Realize that the only way you can really build a wall on the floor and tip it up are if the floor-to-jioist height is fairly consistent across the wall.
If you had good height and you wanted to build it flat and then tip it up, two things:
1) On the walls that are parallel to the ceiling joists, if the width of the top plate (3-1/2") wall can fit in the width of the last ceiling joist bay, you could build the wall flat with the TOP PLATE towards the basement wall. Raise the wall up by lifting the top plate vertically right next to the basement wall, as you raise it the bottom plate will drag on the floor, moving closer to teh basement wall. By raising the wall this way you can lift the top plate "into" the open joist bay, there will be no binding. Once vertical you can place it where it needs to be.
A second method:
2) Tapcon a single pressure treated 2x4 bottom plate onto the basement floor where you want the wall to sit. Then build your wall on the floor out of non-PT lumber, with single top and sole plates. With your floor-built wall being 1-1/2" shorter than the ceiling height, you can tip it up, then set it on the PR sub-plate and hammer it home with your favorite pursuader.
If you want the walls to be tight to the floor and ceiling and the height is wonky, Calvin's suggestion to set a PT plate on the floor and a non-PT plate on the ceiling, then filling in your studs one-by-one with toenailing, would probably be the easiest. If you go that route, cut a couple of 14-1/2" long scrap pieces of 2x4 to use as stud spacers, that's if your framing will be 16" oc.
Cut and set your first end stud plumb in place and nail it off. Put a 14-1/2" spacer on the PT sole plate, butted against the end stud. Lift your yet to be cut and too long second stud and set it on the sole plate, right up against the spacer. Hold it plumb and mark the length to cut by registering it off the top plate. Cut it to length. Hold the second spacer against the underside fo the top plate and set your newly cut stud in place, set it tight against the two spacers. The spacers will space your stud 14-1/2" edge-to-edge, or 16" oc, from the end stud. Plus the spacers will prevent the stud from shifting as you toenail it in place.
After the stud is toenailed off, pop out the spacers and set them against the just installed second stud.
Repeat.
A note of caution...depending on how you frame your walls and tie them together, for your sheet goods to fall where they should on teh studs, the end stud space on your wall might not be 14-1/2" wide. It might be 3/4" narrower. But the rest of the stud bays should be 14-1/2" wide.
Hopefully my post helps more than it confuses. Good luck!
STOP!
Stop right now- you're about to make the same proven mistakes everyone does.
First off, a basement is not a house - so why do you want to use "house" methods? Basements, in the words of my insurance company, are NOT made to be lived in, and WILL flood. So, let's start over ...
First off, that floor is nowhere near as flat as a slab, or even the typical driveway. Step #1 is to level the floor, making sure there are not the slightest dips to poll water. A slight grade, or channells to, the sump is a plus. Count on floor levelling to shave an inch or two off the total height. Sure, you can pour gypcrete even thinner than that; you'll need the extra thickness to make up for the flaws in the concrete pour.
Next, space the perimiter walls off the concrete a bit. This will allow for wall seepage / condensation to drain. I suggest using 3/4" "hat channel;" that will give you room to run wires, yet still let you mount your boxes directly to the concrete.
All walls should either not touch the floor at all (attach to the concrete walls), or be raised off the floor an inch or two. Perhaps you can set 'bottom plates' atop spaced bricks? This will let water drain under walls. The caps can be concealed with plastic molding. Don't like plastic? James hardie makes some fiber cement trim.
For drainage, I like the finished floor to be mounted above the concrete, I would NOT put down a layer of plastic. I'm with Mike Holmes on this. You can raise the floor using "firring strips" cut from foamboard, lay down another layer of foamboard, then plywood atop that. The plywood will let you do any sort of floor you want. Or, you can keep it simple, and limit floor covering to small throw rugs. (Small enough to pich up and carry out wet)
Finally, I'd make sure the basement had it's own air make-up and ducting. You need lots of air changes to keep the humidity and condensation to a minimum.
It's amazing how even an inch of water can quickly cause $10,000 in damage- and leave you with a mold nightmare.
renosteinke wrote:
For drainage, I like the finished floor to be mounted above the concrete.
Really? And this is opposed to everyone else liking finished floors mounted BELOW the concrete?
Sounds like you lived through both the Katrina Hurrican and recent Colorado flooding. Waaaaaaaaay too paranoid for me. Most folks who have finished basements actually live in them. They're always dry, and fully insured as habital spaces. I don't know why??? Maybe this is because the floors were NOT poured dead level...with a slight slope to the sump pump. That sounds like somewhere Lewis Carroll could have written about while contemplating life down the rabbit hole.
Experience trumps ignorance
Nearly everyone simply adds a finished floor to the face of the existing concrete. This approach is simple - but has it's drawbacks. By contrast, Fine Homebuilding has run at least two completely separate articles, where experienced contractors have shown how they raise the finished floor a couple inches above the concrete, with room for drainage. The major difference between my advice and these articles is that they advise a layer of plastic be laid atop the concrete. I, and Mike Holmes, oppose that idea.
(This water-trapping issue is also why I'm not a fan of vinyl florring glued to the concrete).
Sure, most everyone tries to turn their basement into living space. No matter- look to your homeowners' insurance and you'll find a specific exclusion for water damage. Only under certain narrow circumstances will a claim for water damage be honored. As far as insurance companies are concerned, you don't belong in the basement. Your assertion that basements are 'fully insured as habitable spaces" is simply wrong. Check any of the four basic insurance 'forms' if you doubt me.
No, I have not been through either of the floods you describe. I have, however, helped repair the results of several 'floods' that were barely enough to drown the carpet. Such repairs usually cost between $10,000 and $15,000.
Why? Well, first off, there's a lot of water to remove. Even if the basement has a sump and working pump, that point in the floor almost always is the highest point. That inch or so of water is enough to do the harm. Place your eye down at floor level, and you'll see all manner of dips in the floor - dips that trap plenty of water. Enough to kick-start a mold problem. Mold will begin to stink in as little as 36 hours.
That 'trivial' amount of water reaches a wall, and the real damage begins. Ordinary drywall will wick water up about 6", and fiberglass batts will wick water up 12-15". Panelling typically wicks water up 8".
So, I don't want ANYTHING that can get 'wet' within several inches of the floor.
You can only suck or fan-blow so much water from a carpet. You're still often left some mighty heavy carpet to wrestle out. Might as well just use throw rugs; then you can simply lay them our on a sunny driveway to dry them out. Limit throw rugs to 4-ft x 6-ft.
I'll repeat: It doesn't take much of a 'flood' to cause massive damage. An inch of water is plenty. And water ... happens. Sooner or later, that basement will have some water in it- whether it be from outside, inside, or condensation doesn't matter.
PS: Steel studs are not a solution. The bottom track acts as a trough, retaining water. Hello mold!
More responses to inline comments
"Nearly everyone simply adds a finished floor to the face of the existing concrete."
That is not in the plan today, but I will defintely take it under advisement to not just lay flooring (whatever it is, directly onto concrete - makes sense)
"Sure, most everyone tries to turn their basement into living space. No matter- look to your homeowners' insurance and you'll find a specific exclusion for water damage. Only under certain narrow circumstances will a claim for water damage be honored. As far as insurance companies are concerned, you don't belong in the basement. "
I know and have talked to quite a few insurance people. (Plus I have read the details in the policy which I know 95% of people never do) To make a blanket statement like that above is misguiding people. It depends "How" the basements get water damage. If you are in a flood zone and don't have flood insurance, yes, but many flooding/water damage issues, like lets say plumbing pipes break and they do cover it. To imply insurance companies rarely cover water damages in basements (that are properly built as habitable spaces by code) is untrue.
"That 'trivial' amount of water reaches a wall, and the real damage begins. Ordinary drywall will wick water up about 6", and fiberglass batts will wick water up 12-15". Panelling typically wicks water up 8".
So, I don't want ANYTHING that can get 'wet' within several inches of the floor."
These are valid points and if and when I DO sheet rock/finish the basement I will take that into account. Maybe have a "Non-Absorbant" Plastic kind of "kick board" or Molding of some sort the first 6 " or so
Very intrigued by Metal Studs & might do it, a few issues though
First lets start with a few comments that were posted .
"First off, that floor is nowhere near as flat as a slab, or even the typical driveway."
Huh ?! (nowhere as level as a driveway ?! ) I have never seen ANY driveway more level than my newly poured basement floor. The did a great job making my basement floor flat and level ... In fact I have no doubt the floor is a lot more flat and level that the bottom of my joists. In fact when it was raining before the roof was up and water pooled on the basement floor I was amazed at how level it was. Maybe one area was maybe 1/16 " of water dipped down from the whole basement slab.
"Next, space the perimiter walls off the concrete a bit. This will allow for wall seepage / condensation to drain."
Were you able to see the picture I attached and my description at the top ? I have spray foamed the WHOLE basement wall all the way up to the sill ... but yes I will most likely have space between the studs and the spray foam.
Floor first
It's a lot easier and faster to build the rough floor first, unless you're just leaving the slab. Foam under a floating plywood subfloor is my favorite. Steel studs are a great way to go, but I hate everything about working with them, so I try to avoid them. You can buy Bluewood in a lot of areas, which is treated to with borates to resist mold and mildew. Use a regular PT bottom plate.
I like to build the walls on the floor and raise them, even in basements. Measure below each joist to find the minimum ceiling height. Then use the Pythagorean theorum to find the diagonal measurement of a 2x4 that height. That's your arc, and you can't raise a wall taller than that. I make them about a quarter inch shorter for safety. Build the walls, raise them, shim below the studs as needed.
As to stud height, by the time you add in the floor thickness, you might get away with 8 footers, especially with a double plate or two. If not, I'd see what was cheaper, 9 ft. precuts, 10 footers, or cutting 18 footers in half.
Do you actually read what you post?
Andy, where in the world are you going to find 18 foot framing stock that will compete in price with anything under that length? As a matter of fact, I've never seen any of my lumber suppliers stock anything between 16' and 20' lengths for SPF framing material. IMO, you would ONLY buy 18' stock because you need the length, not for the economy of halving it.
It's worth asking. Probably 18 footers will be more expensive, but maybe not. And in my part of the world at least, 18 footers are stocked a most decent lumberyards. You won't find them at HD.
Raise the floor as I advised, allow for top plate and bottom plates, and ... voila! ... you can now use ordinary 8-ft / 96" studs.
Who said I was doing anything to the floor ?!?
Who said I was finishing ~anything~ ?
I'm trying to keep this simple -- I just want to stud out the basement peremeter for 3 reasons, 1) bays to add extra instulation down the road, 2) a place to attach electrical outlets & 3) a place to hang mechanicals like radiant water pumps or shelves down the road.
seal the slab
If the floor is going to be the concrete slab, consider sealing the slab with a vapor permeable sealer when all is done. Vapor can still tramsmiss through the concrete, but blood won't stain the slab. It'll help you clean things up before the police come over.
Great Point Mongo
Mongo wrote:
but blood won't stain the slab. It'll help you clean things up before the police come over.
Great Point ~~
Never assume...
Assuming you're talking about adding insulation around the perimeter, rigid foam works far better than batts in basements. Keeps heat in, can keep humid air from reaching and condensing on cool concrete. Point being, insulate before studding.