FHB Logo Facebook LinkedIn Email Pinterest Twitter X Instagram Tiktok YouTube Plus Icon Close Icon Navigation Search Icon Navigation Search Icon Arrow Down Icon Video Guide Icon Article Guide Icon Modal Close Icon Guide Search Icon Skip to content
Subscribe
Log In
  • How-To
  • Design
  • Tools & Materials
  • Restoration
  • Videos
  • Blogs
  • Forum
  • Magazine
  • Members
  • FHB House
  • Podcast
Log In

Discussion Forum

Discussion Forum

BIN peeling from ceiling

ckib | Posted in General Discussion on February 4, 2006 04:58am

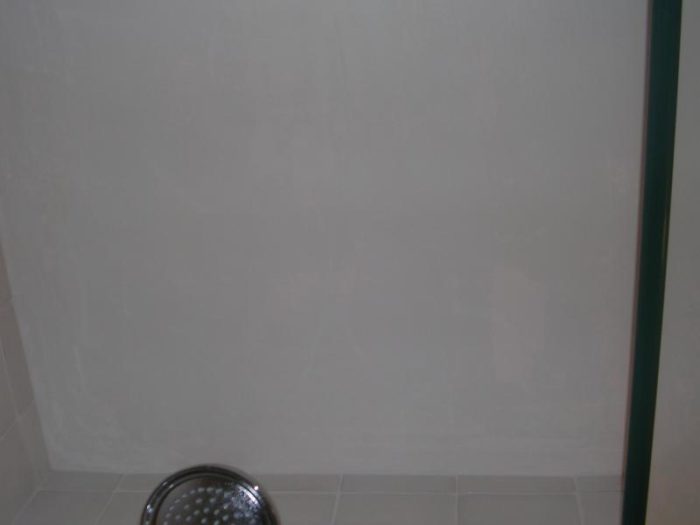
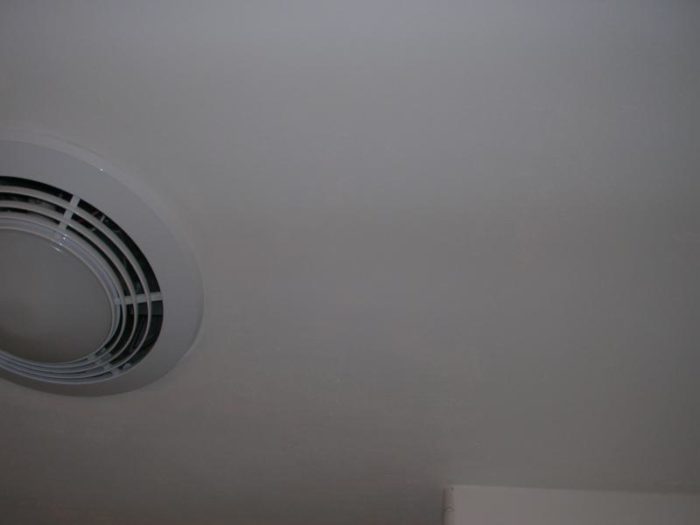
Hi, I made the sorry mistake of priming the bathroom ceiling with BIN too soon after plaster.  The GC told me 2 weeks was plenty of time to wait.  🙁  I read an article in TOH magazine which recommended BIN for bathrooms.  In any case, I primed too soon, about 3 weeks after fresh plaster.  It has now been an entire YEAR and the primer is still peeling!  Every 5 or 6 weeks I vacuum the loose stuff and keep hoping it will stop so I can deal with trying to repair it, but there seems to be no end.  I’ve included a few photos, but not sure if you can really see what it looks like.  Does anyone know how I can fix this????

Reply
  • X
  • facebook
  • linkedin
  • pinterest
  • email
  • add to favorites Log in or Sign up to save your favorite articles

Replies

  1. User avater
    MarkH | Feb 04, 2006 06:17pm | #1

    Scrape what you can off and sand it down smooth. I'd use another primer because BIN is supposed to be a spot primer.  Maybe some PVA type primer would work better.

    1. ckib | Feb 04, 2006 07:16pm | #2

      Are you sure it won't continue to peel through the new coat of primer?  If it's still peeling after a year, does that indicate that the bond between the plaster and the BIN failed? 

      1. User avater
        MarkH | Feb 04, 2006 07:31pm | #3

        Never can be sure of anything, but if you can't scrape it off now, it's probably stuck.  PVA primer is pretty much like glue and should consolidate everything together.

        1. ckib | Feb 04, 2006 07:43pm | #4

          I took took some sandpaper to it this morning.  I got practically all of it off above the shower.  The rest of the ceiling is still spotty with same bare spots and some places with primer still on it.  Usually, the only primer I use is Ben Moore latex primer.  What is PVA primer?  Is it oil base?  Thanks.

          1. highfigh | Feb 04, 2006 07:58pm | #5

            PVA is Poly Vinyl Acetate, like white glue. Sticks to just about everything.
            "I cut this piece four times and it's still too short."

          2. User avater
            MarkH | Feb 04, 2006 08:09pm | #7

            PVA is water based Polyvinyl Acetate. The can will say PVA on the front if it is PVA.  Supposedly it is not for going over old paint, only bare plaster and drywall, but I haven't had a problem.

            Try the BM freshstart 100% latex all purpose primer. None of the BM primers are PVA as far as I know.

          3. alanj | Feb 05, 2006 06:53am | #8

            <!---->>

            Are you sure you don't mean 100% Acrylic?

            That's the real sticky stuff.<!---->

          4. User avater
            MarkH | Feb 05, 2006 03:14pm | #9

            Exactly. Didn't proofread my comment.  100% acrylic.

  2. mike4244 | Feb 04, 2006 08:02pm | #6

    If possible check the duct connection from bathroom fan, if you have one. Do you have water lines in the ceiling? If you do and you find they do not leak, insulate them. I mention this because you say the ceiling continues to peel. The peeling should have stopped when the plaster dried. I believe the humidity in the room or above the ceiling is the problem.If there is insulation in the ceiling , it will be damp too. Turn the fan on, where the duct exits the house you should be able to feel some air. It won't be a blast of air, the fans don't put out much cfm's.If you do not feel any air at all, the duct is not connected to the fan.

    mike

    1. ckib | Feb 05, 2006 05:04pm | #10

      There are no pipes above the ceiling.  It's a 2nd floor bathroom with attic above.  I think the vent is in the roof.   I'm not too keen on going up there, but I could check the attic for a disconnection in the fan vent.  Thanks.

      1. painter | Feb 05, 2006 06:56pm | #11

        Did you prime with BIN or another zinnser product? Bin is made by them but they also make other paint products such as Perma White witch is there bathroom paint . Its a selfpriming product. Bin is a term that gets thrown a round a lot. Real BIN made by Zinnser is white  pigmented shellac. Shellac is not very moisture tolerant( which is why they only recommend spot priming ext work) so it makes sense it really peeled over the shower. I would try to sand.scrape off all I could and then patch if needed and prime with a product like others mentioned

        Hope this helps

        1. ckib | Feb 05, 2006 10:23pm | #13

          Yes, I used true BIN.  Normally I prime with BM water based primer.  The only reason I didn't this time is because before the bathroom remodel, I had a 40 year old bathroom.  I've been in this house for 17 years and for the first 10 years or so, I battled mold on the ceiling.  At that point I cleaned the ceiling thoroughly with a bleach solution and primed the whole thing with Kilz, then 2 coats of BM latex ceiling paint.  I never had another spot of mold on the ceiling after that!  Just before the bathroom remodel I read a TOH article which recommended BIN for priming bathrooms.  Argh!  Thanks to all who have posted.  I am a terrific painter (provided I know the right product to use) but don't have experience with patching, so I'm considering hiring someone to give the ceiling a light skim coat so it will look smooth.  I think if I just scrape, sand, prime and paint, I will never be happy with the way it looks.  What is the proper material to use for this purpose?  Is there something that can be used that will dry in a day or two?

  3. omaha | Feb 05, 2006 09:25pm | #12

    I would scrape / sand off as much loose material as possible.  BIN is an excellent stain killer but not a very good primer for new plaster over a shower.  I would apply a coat of Peel Stop over the entire surface in question.  I believe Peel Stop is made by Zinzser as well.  The Zinzser Perma White is a good choice for a top-coat.  It is real thick and can be hard to roll.  I sprayed 8 gallons of it this week on a ceiling and it worked great.  Very translucent when rolled so it may take 2 coats.  Perma White contains mildewcides that will supposedly repel mold and mildew for 5 years.  It is very shiny and seems to dry quite hard.   I would not put PVA on.  PVA is great for bare drywall but will not perform to the levels that the above products will.  If you are planning on skimming the ceiling, be sure to lock down the peeling prior to application of mud.

    Best of luck.

  4. User avater
    Matt | Feb 05, 2006 11:14pm | #14

    Too late now but maybe part of the problem was that the shower/bath may have been used during the initial 2 or 3 weeks of cure time for the plaster?  This may have generated moisture which was absorbed into the surface of the curing plaster so that when it did get painted it didn't bond too well.... just a thought.

    1. ckib | Feb 06, 2006 05:36am | #15

      Yes, I believe we did use the shower before it was primed.  It's the only shower in the house!  If I have the ceiling skim coated, will I have to wait 2-3 weeks before using the shower?

      1. omaha | Feb 06, 2006 07:45am | #16

        "If I have the ceiling skim coated, will I have to wait 2-3 weeks before using the shower?"

        Absolutely not.  Skim coating will be done with drywall mud.   Once the ceiling is skimmed it can be sanded, primed and painted the following day.  I would allow the paint to dry for at least 24hrs and then normal shower use can be resumed.  

        Your original plaster job needed a month to cure because of the high water content in the plaster that must work it's way out.  I would be inclined to skim the ceiling with a quick setting compound (either 20min or 45min) depending on the amount of mud needed.  A second coat of mud may be needed and that could be topping compound or regular joint compound.  Either one will dry over night. 

        1. ckib | Feb 06, 2006 05:16pm | #17

          Thank you!

          1. Frankie | Feb 06, 2006 08:24pm | #18

            STOP! Step away from the ceiling.1. Scrape cealing with a putty knife as best you can. You will want to get all the loose material off.2. Prime ceiling with an ALKYD (OIL) PRIMER. Alkyd primers are recommended for plaster and compound because they soak in and bond to anything - including plaster or compound dust.3. Scrape primed ceiling with a 6" putty knife. This will get the burrs created by the primer and dust/ loose material off. 4. Skimcoat ceiling with an all-purpose compound - USG green lid - 2 Coats. You can do this yourself. Use a 6" knife for the first coat. Keep it tight. You will not be applying anything measurable and it will look awful when you are done. When dry, (4 hrs) scrape with a 10" - 12" knife and skim again with the larger knife. You will see a marked difference with this coat vs. the first. Compound applies to compound really well. Scrape and apply a thrid coat, if neccessary (yes). DO NOT SAND between coats. You are putting on material thin, so if you sand you are undoing your work. Dry time should be 4-6 hrs at 68* during the winter. Light sand, by hand, only after final coat,5. Prime ceiling with an Alkyd (oil) primer.6. Paint ceiling with BM Aquapearl or Semi Gloss paint. 2 Coats.7. Step back and admire your fine efforts.Note: If you have a fan in the bathroom, keep it on while showering and for 15 min afterwards while doing the repair - especially when plaster or compound is exposed.Hope this helps,FrankieThere he goes—one of God's own prototypes—a high powered mutant of some kind never even considered for mass production. Too weird to live and too rare to die.—Hunter S. Thompson
            from Fear And Loathing In Las Vegas

          2. ckib | Feb 10, 2006 02:50am | #19

            Well, it sounds excrutiating ... but you sound like you know what you're talking about!  Off to Home Depot.  Could I possibly use a water based primer instead?  I really hate oil based paint/primer because of the cleanup.  Yes, there is a fan which is vented through the attic and out the roof.  And ... there is lots of plaster exposed now, almost the entire area over the shower, as I've been scraping/sanding the peeling BIN so it must be absorbing some moisture every time one of us takes a shower.  And this has been going on for a year.

          3. Frankie | Feb 10, 2006 03:50am | #22

            You MUST use an alkyd (oil) based primer. Oil primers soak INTO the plaster while waterbased primers FLOAT on plaster. It is what it is. I did not make the rules. Clean-up for oil is more involved, but it's the price we pay to get things that last.Good luck.FrankieThere he goes—one of God's own prototypes—a high powered mutant of some kind never even considered for mass production. Too weird to live and too rare to die.—Hunter S. Thompson
            from Fear And Loathing In Las Vegas

  5. paperhanger | Feb 10, 2006 03:25am | #20

    since Bin is shellac based, use alcohol as a solvent to loosen the remaining primer. I would use Perma White as a bath ceiling paint. No need for a primer, 1 coat primes. 2cnd coat finishes. Why did the gc tell you when to paint, I have painted new plaster after a few days curing. The Bin did too good of a job of sealing the plaster, next time use a primer made for the job at hand.   Jim Z

    1. User avater
      MarkH | Feb 10, 2006 03:28am | #21

      I picked up a gallon of satin permawhite for $2.00 last week at lowes because it was damaged.  Looks like another can leaked on it. ??? Good discount!

      1. paperhanger | Feb 10, 2006 06:16am | #23

        great price, read the label. it self primes.

        1. User avater
          MarkH | Feb 10, 2006 06:59am | #24

          I read that, but i'm pretty big on using primer first.

Log in or create an account to post a comment.

Sign up Log in

Become a member and get full access to FineHomebuilding.com

Video Shorts

Categories

  • Business
  • Code Questions
  • Construction Techniques
  • Energy, Heating & Insulation
  • General Discussion
  • Help/Work Wanted
  • Photo Gallery
  • Reader Classified
  • Tools for Home Building

Discussion Forum

Recent Posts and Replies

  • |
  • |
  • |
  • |
  • |
  • |
View More Create Post

Up Next

Video Shorts

Featured Story

Podcast Episode 690: Sharpening, Wires Behind Baseboard, and Fixing Shingle Panels

Listeners write in about fireplaces and ask questions about sharpening hand tools, easier wiring upgrades, and fixing cedar siding.

Featured Video

Video: Build a Fireplace, Brick by Brick

Watch mason Mike Mehaffey construct a traditional-style fireplace that burns well and meets current building codes.

Related Stories

  • Podcast Episode 690: Sharpening, Wires Behind Baseboard, and Fixing Shingle Panels
  • FHB Podcast Segment: Hand Tool Sharpening Tips
  • Old House Air-Sealing Basics
  • A Drip-Free, Through-Window Heat Pump

Highlights

Fine Homebuilding All Access
Fine Homebuilding Podcast
Tool Tech
Plus, get an extra 20% off with code GIFT20

"I have learned so much thanks to the searchable articles on the FHB website. I can confidently say that I expect to be a life-long subscriber." - M.K.

Get home building tips, offers, and expert advice in your inbox

Signing you up...

This site is protected by reCAPTCHA and the Google Privacy Policy and Terms of Service apply.
See all newsletters
See all newsletters

Fine Homebuilding Magazine

  • Issue 332 - July 2025
    • Custom Built-ins With Job-Site Tools
    • Fight House Fires Through Design
    • Making the Move to Multifamily
  • Issue 331 - June 2025
    • A More Resilient Roof
    • Tool Test: You Need a Drywall Sander
    • Ducted vs. Ductless Heat Pumps
  • Issue 330 - April/May 2025
    • Deck Details for Durability
    • FAQs on HPWHs
    • 10 Tips for a Long-Lasting Paint Job
  • Old House Journal – August 2025
    • Designing the Perfect Garden Gate
    • Old House Air-Sealing Basics
  • Issue 329 - Feb/Mar 2025
    • Smart Foundation for a Small Addition
    • A Kominka Comes West
    • Making Small Kitchens Work

Fine Home Building

Newsletter Sign-up

  • Fine Homebuilding

    Home building tips, offers, and expert advice in your inbox.

  • Green Building Advisor

    Building science and energy efficiency advice, plus special offers, in your inbox.

  • Old House Journal

    Repair, renovation, and restoration tips, plus special offers, in your inbox.

Signing you up...

This site is protected by reCAPTCHA and the Google Privacy Policy and Terms of Service apply.
See all newsletters

Follow

  • Fine Homebuilding

    Dig into cutting-edge approaches and decades of proven solutions with total access to our experts and tradespeople.

    Start Free Trial Now
    • Facebook
    • Instagram
    • X
    • LinkedIn
  • GBA Prime

    Get instant access to the latest developments in green building, research, and reports from the field.

    Start Free Trial Now
    • Facebook
    • YouTube
  • Old House Journal

    Learn how to restore, repair, update, and decorate your home.

    Subscribe Now
    • Facebook
    • Instagram
    • X

Membership & Magazine

  • Online Archive
  • Start Free Trial
  • Magazine Subscription
  • Magazine Renewal
  • Gift a Subscription
  • Customer Support
  • Privacy Preferences
  • About
  • Contact
  • Advertise
  • Careers
  • Terms of Use
  • Site Map
  • Do not sell or share my information
  • Privacy Policy
  • Accessibility
  • California Privacy Rights

© 2025 Active Interest Media. All rights reserved.

Fine Homebuilding receives a commission for items purchased through links on this site, including Amazon Associates and other affiliate advertising programs.

  • Home Group
  • Antique Trader
  • Arts & Crafts Homes
  • Bank Note Reporter
  • Cabin Life
  • Cuisine at Home
  • Fine Gardening
  • Fine Woodworking
  • Green Building Advisor
  • Garden Gate
  • Horticulture
  • Keep Craft Alive
  • Log Home Living
  • Military Trader/Vehicles
  • Numismatic News
  • Numismaster
  • Old Cars Weekly
  • Old House Journal
  • Period Homes
  • Popular Woodworking
  • Script
  • ShopNotes
  • Sports Collectors Digest
  • Threads
  • Timber Home Living
  • Traditional Building
  • Woodsmith
  • World Coin News
  • Writer's Digest
Active Interest Media logo
X
X
This is a dialog window which overlays the main content of the page. The modal window is a 'site map' of the most critical areas of the site. Pressing the Escape (ESC) button will close the modal and bring you back to where you were on the page.

Main Menu

  • How-To
  • Design
  • Tools & Materials
  • Video
  • Blogs
  • Forum
  • Project Guides
  • Reader Projects
  • Magazine
  • Members
  • FHB House

Podcasts

  • FHB Podcast
  • ProTalk

Webinars

  • Upcoming and On-Demand

Podcasts

  • FHB Podcast
  • ProTalk

Webinars

  • Upcoming and On-Demand

Popular Topics

  • Kitchens
  • Business
  • Bedrooms
  • Roofs
  • Architecture and Design
  • Green Building
  • Decks
  • Framing
  • Safety
  • Remodeling
  • Bathrooms
  • Windows
  • Tilework
  • Ceilings
  • HVAC

Magazine

  • Current Issue
  • Past Issues
  • Magazine Index
  • Subscribe
  • Online Archive
  • Author Guidelines

All Access

  • Member Home
  • Start Free Trial
  • Gift Membership

Online Learning

  • Courses
  • Project Guides
  • Reader Projects
  • Podcast

More

  • FHB Ambassadors
  • FHB House
  • Customer Support

Account

  • Log In
  • Join

Newsletter

Get home building tips, offers, and expert advice in your inbox

Signing you up...

This site is protected by reCAPTCHA and the Google Privacy Policy and Terms of Service apply.
See all newsletters
See all newsletters

Follow

  • X
  • YouTube
  • instagram
  • facebook
  • pinterest
  • Tiktok

Join All Access

Become a member and get instant access to thousands of videos, how-tos, tool reviews, and design features.

Start Your Free Trial

Subscribe

FHB Magazine

Start your subscription today and save up to 70%

Subscribe

Enjoy unlimited access to Fine Homebuilding. Join Now

Already a member? Log in

We hope you’ve enjoyed your free articles. To keep reading, become a member today.

Get complete site access to expert advice, how-to videos, Code Check, and more, plus the print magazine.

Start your FREE trial

Already a member? Log in

Privacy Policy Update

We use cookies, pixels, script and other tracking technologies to analyze and improve our service, to improve and personalize content, and for advertising to you. We also share information about your use of our site with third-party social media, advertising and analytics partners. You can view our Privacy Policy here and our Terms of Use here.

Cookies

Analytics

These cookies help us track site metrics to improve our sites and provide a better user experience.

Advertising/Social Media

These cookies are used to serve advertisements aligned with your interests.

Essential

These cookies are required to provide basic functions like page navigation and access to secure areas of the website.

Delete My Data

Delete all cookies and associated data