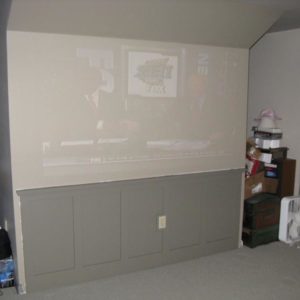
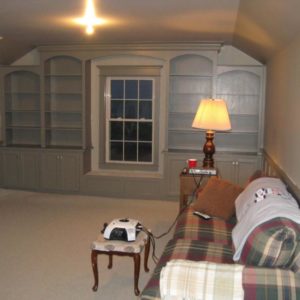
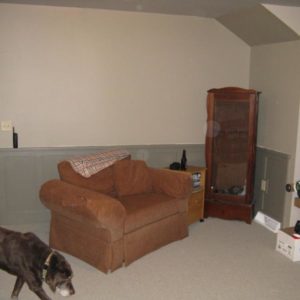
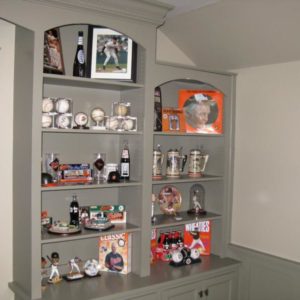
I actually posted these in another thread where I was asking for projector mounting suggestions but thought I should post them here to get a little feedback….ok maybe gloat a little. Was a big project for doing it in the evenings and weekends(evenings mostly) but I am happy with how it turned out. Last year at some point I had started a thread on Knots for suggestions on whether it was worth spending three times the amount to use QSWO which I would have loved too. But in the end I am happy I went with poplar and birch ply for everything then painted. I still like the look, it was 1/3 the price, and it left me some leeway to fix the inevitable mistakes.
Built-ins are birch play and poplar FF’s. Wainscot is same material, pocket screwed frames and routed rabbet in back for ply, liquid nails and finish nailed over the drywall.
The pictures are a little premature…please excuse the mess in the dormers, the paint around the wainscot has been touched up and the carpet guys are comign next week to restretch and fit the carpet where I had to cut for the built-ins. The projector is obviously a temporary set up. Haha
What do you all think? I can take the criticism.
Thanks


Replies
Lots of dial-up folks hereabouts,so I've shrunk the pics a bit more. Looks like good manspace (complete with old dawg), but I'm hoping that projector shows a brighter picture!
jt8
"The unfortunate thing about this world is that good habits are so much easier to give up than bad ones."
-- Somerset Maugham
Thanks John. I did them 50% of original size thinking that would be enough. Sorry.
Yeah that pic with the projector on was taken in full daylight with the lights on as well. Typically when watching a projector you need the room pretty dark, then the picture is way way brighter.
Good effort and i love the window seat - did something similar in my Victorian - but i'll be soooo glad when the 'taupe' phase has run its course.
Double, that looks good. The painted wood looks great, and besides being less expensive, it must've been easier and faster than stain-grade work! Plus the paint can be updated as styles change.
The details remind me a lot of the original 1830s wainscotting in my home. Are the frames flush with the door trim, or proud like my early example (photo below)? I think the "proud" style looks good, but some folks think it's weird.
On my example, the panels are two horizontal boards, tongue-and-groove with a bead.
View Image
Allen
Edited 2/12/2008 6:45 pm ET by WNYguy
WNYguy,
Actually I made the door frame about 1/8" proud of the wainscot. Not sure why my initial thought was to do it that way because after seeing your original wainscot there I like the wainscot being proud. I love the craftsman style and bought a book on bungalow interiors before I started the project and as soon as I looked at the book I wanted to tear everything out of our house and redo it!! LOL.
Since our house is only six years old I will do a little at a time. With the built-ins it kind of turned out a little neo-classical looking or something but I am happy with it.
I intend on replacing all of the trim in our house with the style I did in this room. Do it a room at a time.
Thanks for the compliments.
"Actually I made the door frame about 1/8" proud of the wainscot."
Double, I think that probably looks the best. Even in my house, when I put wainscotting in a new bathroom, I did it more like you did. That's the "normal" way.
That "neo-classical" look is timeless and will never be out of style. I think it is the perfect choice in a new house like yours. Looks great!
Allen
Bless your pea-pickin' heart. I was NOT wanting to make 1-1/2 posts around my doorways to remain proud of the wainscot and base...never occurred to me i could make the wainscot proud. Thank-you, dear-- you've made that back-burner project a lot simpler.
Splinter,
Yes, it is a simple solution. And with historic precedent, if that's an issue.
I had to replicate that same wainscoting when I replaced a wall that previous owners had removed.
The panels are flush with the door trim, and each panel is made up of two planks joined with a beaded tongue-and-groove joint. They're face-nailed near the joint, so they can freely expand and contract.
The base-board (12" tall), the stiles (3' wide) and the top rail (3" wide) are all rabbitted to accept the panels. One-half inch is the exposed thickness. They are also rabbitted where they overlap the door trim.
The cap is 1-inch thick, torus with a small fillet at the base.
Attached are a couple shots of the recreated wall (and new homemade doors ... which are still missing their panel moulding).
Allen
Edited 2/13/2008 11:45 am ET by WNYguy
I'm not doing anything historical on this place, by any means. (1940s hip-roof rancher) But i want to run my electrical boxes behind the baseboard, meaning the wainscot face would be off the wall about 1/3-8", base/shoe even more. I was originally planning how it would look around the arches, then realized it would really play havoc with inward door openings. This fixes the whole hinge-clearance dilemma.Nice job. I posted some pics of my wainscot job using salvaged Eastlake doors in my Victorian in slateman's 'salvage' thread.
Double B
The work looks good! I'm not the biggest fan of the color but you didn't chose it for me.
I'm curious though, why didn't you run your wainscoting completely around the room? You didn't need to but just wondering.
You did good.
Doug