I have to do a retaining wall, 4′ in height along a fairly steep slope, (the wall rises end to end in the direction of the slope). How’s the best way to do this thing? Pour a footing with a high slump mix of concrete and then somehow form the wall on top of that? Monolithic pour, (maybe easier to form)? Piers? Any suggestions or even where to look for input? Thanks, Tom.
Discussion Forum
Discussion Forum
Up Next
Video Shorts
Featured Story
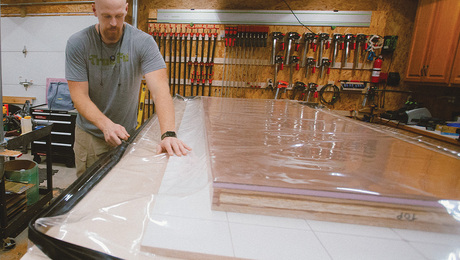
Engineered materials and vacuum-press laminations prevent warping and keep a tall, flush-panel door from being excessively heavy.


Highlights


"I have learned so much thanks to the searchable articles on the FHB website. I can confidently say that I expect to be a life-long subscriber." - M.K.
Fine Homebuilding Magazine


Fine Home Building
Follow
-
Fine Homebuilding
Dig into cutting-edge approaches and decades of proven solutions with total access to our experts and tradespeople.
Start Free Trial Now -
GBA Prime
Get instant access to the latest developments in green building, research, and reports from the field.
Start Free Trial Now
- Home Group
- Antique Trader
- Arts & Crafts Homes
- Bank Note Reporter
- Cabin Life
- Cuisine at Home
- Fine Gardening
- Fine Woodworking
- Green Building Advisor
- Garden Gate
- Horticulture
- Keep Craft Alive
- Log Home Living
- Military Trader/Vehicles
- Numismatic News
- Numismaster
- Old Cars Weekly
- Old House Journal
- Period Homes
- Popular Woodworking
- Script
- ShopNotes
- Sports Collectors Digest
- Threads
- Timber Home Living
- Traditional Building
- Woodsmith
- World Coin News
- Writer's Digest

Replies
been awile since I looked into retaining walls.
first they ain't trivial
2nd, IIRC you are the max (4') for relatively simply walls.
don't understand wall orientation as to what is behind the wall.
may need wide footor, and deadmen (forget the correct name.
how long is the wall?
bobl Volo, non valeo
Baloney detecter WFR
"But when you're a kibbutzer and have no responsibility to decide the facts and apply the law, you can reach any conclusion you want because it doesn't matter." SHG
I'd estimate 15' on the length of the wall. It'll hold back a good sized hill of the same type of material that a soils engineer analyzed for a pier and grade beam foundation on my house. There he specified 8' deep piers 18" in diameter and not less than 54" apart. Nothing too radical.
I'll backfill with drain rock, do the proper drainage and such so that's not an issue. I'm just wondering how to actually build the thing, forming-wise. What's the easiest method that'll work? I realize 4' is the maximum before I have to get it engineered so that's why I'm trying to keep it to that. Shouldn't be a problem there.
you need a design, and without proper engineering it will have to be way overbuilt.
you may be able to come up with something, but what if your idea doesn't work and in a couple of years it starts leaning?
you will probably need a deep foundation, that means piles. cast in place is probably cheaper for a small job than driven, although they have some nice small vibro hammers that you can use with a small boom truck.
you may also need some tie backs, imagine a hole drilled horizontally with a slight downward angle, 20 - 30 degrees, then install several cables and fill with pressurized grout. after it cures you will be able to apply tension to those cables and if you bury the tie off point inside the structural concrete retaining wall it will anchor your wall to the bottom of the hill its holding back.
you need to know stuff about the soils and all the specialized equipment required to do the work described above. check out american piledriving equipment's website for related info.
Are you sure about that? My neighbor out there works on really fancy wineries down in Napa and he digs footings for retaining walls all the time. He mentioned the tie backs, (what he called soil nails), for tall walls but says four feet and under requires very little in the way of a footing and no tiebacks. He doesn't do the pour though so I'm wondering how it's formed up, especially when you aren't on the flat.
Also, why would the building department say it's cool to do anything 4' and under if it were so critical? I'm thinking the wall doesn't hold back the whole mountain, just the part that wouldn't naturally stay there on it's own, unless some sort of liquifaction is going on. The soils engineer wasn't too worried about that for the house which is 50' away. Good drainage should take care of any hydrostatic pressure problems. I've done a few basements so I'm sure I can handle the drainage without the additional engineering costs.
i stand by my original post, i don't know enough of the particulars to say i am sure or not, if you are comfortable with it then go ahead and build it without engineering.
i still say engineering will keep you from overbuilding and give at least some assurance that it wont lean or move.
you could just get those interlocking blocks if they will fit, those wont fail because they are stepped out instead of being a vertical wall, also regional differences in soils can make huge differences in requirements for structural concrete. best to get a design from someone that knows or just go to the local building dept and ask them.
Actually, what I'm really interested in is whether or not anyone here has done a retaining wall that's not on the same elevation for the length of the thing and if so, how they formed it up and poured it. I'm trying to figure out the easiest way to do that. I've seen the built ones often so there must be a typical way of going about it.
I have. More than once.
I always tried to make separate pours for footing and walls, but often that wasn't possible due to budget constraints on the ordering of short loads, or for other reasons. You can build the footing forms , place whatever bar you are going to use in the footing form area then use PT 1 x 4 on the flat and strap across the footings to support plywood forms for the wall itself.
Pour stiff as possible and slow with a break between walls and footings if possible. I start the pour with the wall, just enough to have the mud fill the footing area directly under the wall up into the wll forms by a few inches, then go around and finish pouring the footing , then return and slowly pour the wall full.
They can't get your Goat if you don't tell them where it is hidden.
I must be missing something here in your explanation. Are you spanning perpindicular to the trench with the p.t. then setting forms on top of those? Are the forms constructed of pywood? I'm familiar with using snap ties for substantial walls such as in basements but the forms are constructed on a level surface which allows for easy fastening at the base. How do you do the form to footing connection when the base is irregular, considering blowout tendencies and all? Is it necessary to scribe everything. If so, I get the picture. I was hoping for an easier route though.
Actually, this is helpful, I'm starting to get an idea for an easy way to do this, monolithic pour and all. Maybe snap ties are the ticket.
Yes I use the PT as support for the wall forms , they bridge the footing forms perpendicular to the wall.
The whole form is a "T" upside down, footing is the top of the T , wall is the long leg.
Also I use "form clips " at the bottom and top of the plywood forms for the wall. Snap ties in the field.
Clips at the bottom can be fastened right to the PT and will align the wall forms for you, or you can fasten a 2x piece to the PT to give you solid backing at the bottom of the form. Clips at the top can be removed after the pour has started setting to allow for finishing of the top surface.
There are other methods for these last two items , I am just telling you what I do.
They can't get your Goat if you don't tell them where it is hidden.
So the pressure treated material is embedded in the wall then? That does sound like a fairly fast way to anchor the base.
Embedded in the footing actually.
Think of a footing forms as a rectangular box, say 1' deep, 4' wide 12' long.
Now you place some 1x 4 PT across the 4' at 4' O.C. Now screw a 2x that runs the 10' dimension to the 1 x 4 . (or use the clips as I do) then stand your plywood from panels.
They can't get your Goat if you don't tell them where it is hidden.
piece of cake ? not exactly.
doing this monolithic can get tricky, particularly if your concrete has too high of a slump. as you start to fill the wall form the concrete can push over the tops of your footing forms.
doing your footing pour first and then forming your walls on top is a simpler way to do it, especially for a first timer.
the rebar is the most critical element whether you do monolithic or two pours. in particular, the bent bars which are attached to the lower footing mat. you will want your bent bars to project within a few inches of the top of your wall. bar size should be at least 1/2"
here is a sketch showing a decent description. it comes from the article link below
View Image
http://www.concreteconstruction.net/industry-news.asp?sectionID=714&articleID=619324
carpenter in transition
I'll check out the article Tim. I've been pouring the foundations on the houses I build for a whole lot of years now so the monolithic pour won't be a problem. Mainly I was curious on how concrete guys, (by trade), typically form walls that follow non level surfaces. There area some issues inherent in that situation which I'm unfamiliar with. We go to a lot of trouble to deal with level on houses.
The other way to deal with this is step the footing up the slope and keep the wall forms plumb and level. Mostly it is a matter of controlling the pour rate in either case.
They can't get your Goat if you don't tell them where it is hidden.
how much elevation change do you have in the 15' length ?
carpenter in transition
Yeah, I think I figured it out. Forming pins through the footings, monolithic pour. Piece of cake. Thanks for the input everyone.
after you set your forms you put in a chamfer strip with 4 penny nails on both sides. that is what you finish the concrete to.
the forms can extend past the pour. you build the forms square or even stepped and you can curve the chamfer/pour strip to match the contour of the existing whatever you are retaining.
chamfer strip is just square stock ripped down on a 45, usually 3/4" but i think you can find it smaller if you want.
now if you want instruction for warped wing walls thats going to cost you.
I have done it using the modular wall blocks.The bottom row is suppose to be fully burried in the ground and have a couple of inchs of base under them.Start at the lowest place.Trench it out and put in the base and first row. Continuely checking to see that it stays level.Then keep extending it out until it is deep enough for 2 courses. Then step up the base the thickness of one row.And you will need to put some of the 2nd row blocks on deeper section.You will use it to level between the deeper section and the new section. It will be a PITA at first as you need to keep removing blocks and adding/removing base to get the new section to level up with the deeper one.And do that each place that there is an elevation change.Once you get that done all the way the wall goes up quickly..
.
A-holes. Hey every group has to have one. And I have been elected to be the one. I should make that my tagline.