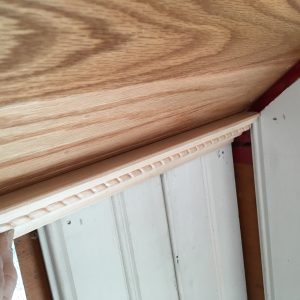
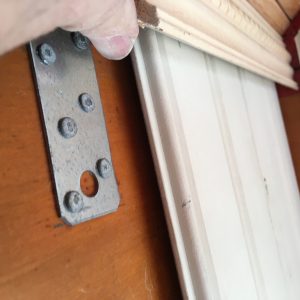
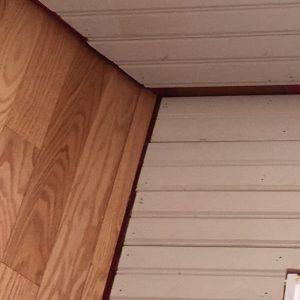
I need some advice about how to install crown when the angle between the wall and ceiling is greater than 90 degrees. The crown is going to be painted. I would like to use the molding in the photos but it doesn’t meet the wall and ceiling. If I lay it against the wall there is a gap at the top. If I lay it against the ceiling the gap is at the bottom. I see two options. I can make a wedge to fill the gap, at the top or bottom but that seems like it would look bulky. I can also forget about this molding and make my own with a regular profile with the right angles to fit. Complicating the problem is that, in the corner, the crown has to meet the piece coming down the gable ceiling.
I would think this is a fairly common problem. What is the correct way to handle this?
Thanks.
George




Replies
George,
I do not have solution for you but I do have the same problem. Hopefully someone has a solution for us.
This is not easy nor easy to explain. Easy answer is like exterior rake trim, ideally you need two different size PCs of the same profile. But, in trim carpentry there’s always some way, hopefully that fools the eye or ends up looking good.
But.....
Take a look at Gary Katz’s explanation at Gary’s site.
http://www.garymkatz.com/TrimTechniques/cutting_crown_transitions.html
As he’ll explain in the article, much credit is given to a FHB long ago forum called Breaktime, member.....Joe Fusco. Joe’s gone from here and the planet but some of his great teachings and ideas remain. Maybe even in the dust here if you could find it.
Best of luck.
Set up a crude jig which reproduces the angles you will be dealing with, cut some scrap lumber to the approximate dimensions of the crown, then play with it until you get a satisfactory fit.
2 options I know of . corner blocks . They're bulky boxes built from square edge lumber and trimmed out on the bottom with crown to match . Not the best look in my opinion . The second is a 3 piece corner . Working left to right when you round the corner to go up the rake of the ceiling your first cut is just as if the ceiling was flat .. I generally cope all my corners . Although mitered joints may be less confusing for a 3 piece corner You then need to know the pitch of the ceiling. I use a handy digital level for this . Then cut the right side of this 2nd piece in at this predetermined angle pie shape from what I call something to nothing . Nothing being the top edge of the crown and something being the bottom . Then the final piece is cut at the same angle and runs on up the rake of the ceiling. Hope you can follow my rambling instructions . This Is the best I could explain this as honestly I would need some practice myself . Plan on spending a lot of time on one corner .. I've put up thousands of feet of crown and spent most of a day on 3 corners my first time . I'll try to find pics of some I've done and add to the comments .
Continuous crown molding. "No corner blocks"
George,
The molding you show is more of a chair rail or mantle molding. The top is cut square to the back. Usual crown molding will have both the top and bottom back of it relieved to place angled at the wall. You may be able to relieve your molding top enough to work.....
Good point Calvin. If I'm not mistaken I believe the bottom of most crown molding is relieved at a 53 deg. Angle and the top at 37 deg. Which allows more of the molding to pertrude down the wall and less out on the ceiling.
The molding is crown and sits correctly on a 90 degree ceiling and wall. The angle between the wall and gable ceiling is 127 degrees. Thanks for the pointer to the article. It really helps plain things.
George, might be local jargon but in my experience that would not be crown. While you can use it as such, the crown angle backprofile is what in various sizes is what we consider usual crown molding. The back is removed so the usual dips and bumps one runs into on install are easier to correct.
Painters caulk. Seriously. 15 years later and the places where my trim skills were deficient, still looks good.