FHB Logo Facebook LinkedIn Email Pinterest Twitter X Instagram Tiktok YouTube Plus Icon Close Icon Navigation Search Icon Navigation Search Icon Arrow Down Icon Video Guide Icon Article Guide Icon Modal Close Icon Guide Search Icon Skip to content
Subscribe
Log In
  • How-To
  • Design
  • Tools & Materials
  • Restoration
  • Videos
  • Blogs
  • Forum
  • Magazine
  • Members
  • FHB House
  • Podcast
Log In

Discussion Forum

Discussion Forum

Curved portico rebuild

jonblakemore | Posted in Photo Gallery on September 29, 2009 01:16am

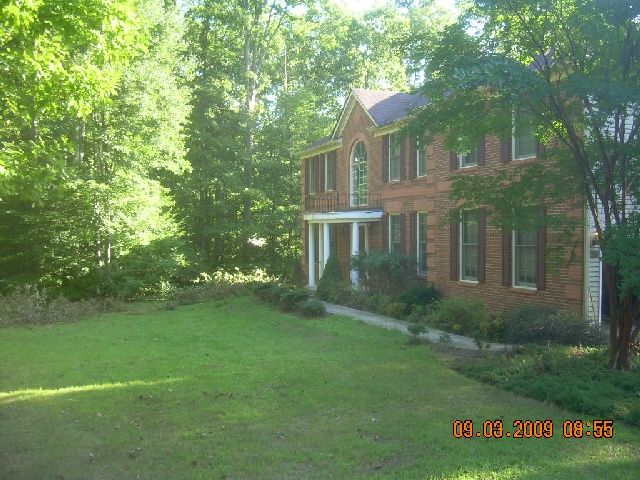
Got a call a few weeks ago about some “rot” in some wood columns.

View Image

The columns weren’t that bad (as far as exterior wood columns go)…

View Image

but the rest looked like mulch that had been in a flower bed for 18 months.

View Image

The drip edge detail didn’t do too much good,

View Image

And the EPDM was “sluffing” on the job.

View Image

I had seen enough. I bid for a full replacement to closely approximate the existing, which is what the client wanted. I was not intersted in considering a repair job- too many unknowns and the potential for big change orders.


Jon Blakemore

RappahannockINC.com

Fredericksburg, VA

Reply
  • X
  • facebook
  • linkedin
  • pinterest
  • email
  • add to favorites Log in or Sign up to save your favorite articles

Replies

  1. User avater
    ToolFreakBlue | Sep 29, 2009 01:20am | #1

    Good call

    TFB (Bill)
  2. User avater
    jonblakemore | Sep 29, 2009 01:21am | #2

    Sure enough, when demo started, my fears were confirmed.

    View Image

    I'm glad we planned for complete R&R job.

    View Image

    Demo done.

    View Image

    We set up a trammel and cut the pieces of Advantech at the appropriate radius. On these 4 pieces, we laid (layed?) out the joists and took our measurements from there.

    View Image

    Once the framing was installed (working in a "top down" fashion) we started fabricating the rest of the parts. Here's a template used to cut pieces of 1/2" CDX and 3/8" MDO for the various curved pieces.

    View Image


    Jon Blakemore

    RappahannockINC.com Fredericksburg, VA

    1. User avater
      jonblakemore | Sep 29, 2009 01:26am | #3

      I planned on cedar to wrap the joists and the beam at the curved sections, and MDO to make the roof soffit area (~9" overhang) and the underside of the beam.Our grizzly planer complained a little, but not too much. A lot of cedar shavings (anyone with a giant hamster?)

      View Image

      Here's the pre-cedar shot of the framing.

      View Image

      3/4" Advantech T&G roof sheathing with two plies of 1/2" CDX making up the rim joists. The Advantech has not been nailed of yet, we tacked it until we had better support to get on the roof and finish fastening with the nail gun.

      View Image

      *Edit- Mispelling of "CDX" Jon Blakemore RappahannockINC.com Fredericksburg, VAEdited 9/28/2009 6:37 pm ET by JonBlakemore <!-- JONBLAKEMORE -->

      Edited 9/28/2009 6:38 pm ET by JonBlakemore

      Edited 9/28/2009 6:42 pm ET by JonBlakemore

      1. User avater
        jonblakemore | Sep 29, 2009 01:35am | #4

        Here's the cedar applied. We doubled up the strip where the cedar meets the MDO to hide the gap. This was somewhat of a pain getting the boards to bond together solidly. I almost wish we would have done 1/4" laminations, and just had a three ply section under the soffit to give a 3/4" appearance.

        View Image

        View Image

        We screwed some blocks on the ends of the recalcitrant pieces to give the PL premium a chance to grab. The next day we saw that it worked. The joints are not furniture quality, but it looks pretty good. Definitely better than the segmented circle that the original builder called "round".

        View Image

        We pressure washed the concrete stoop to remove some of the shadow from where the 10" column bases were for 16 years. This worked quite well, but the clean concrete also revealed some spots that were hidden pre-cleaning.

        View Image

        3/8" beadboard applied on the underside. I would have liked to do the whole thing in Permacast and Azek, but the client wanted natural wood. MDO was a compromise as I could not think of a passable way to make the curved horizontal pieces with 1x12 cedar or something like that. I think we would have had about 4x as many joints.

        View Image

        The columns are in my basement now awaiting paint. They were back ordered so we just used 2x4 temp supports. We will install the columns when we go back to install the Owner-refinished iron railing.

        Thanks to Grant and Duane for the tips on working with the drip edge. It was pretty slick bending the "L" metal with a pair of downspout crimpers.


        Jon Blakemore RappahannockINC.com Fredericksburg, VA

        Edited 9/28/2009 6:44 pm ET by JonBlakemore

        1. mikeroop | Sep 29, 2009 01:51am | #5

          cool! everything looks good

          don't ya wonder how some people can call themselves carpenters and still make a living?

        2. User avater
          Sphere | Sep 29, 2009 02:17am | #6

          Great job!

          And kudos for going with a total rebuild. I can just imagine how ugly that could get on a quick fix plan.

          I too have been doing all curved work of late, must be a shortage of straight and square work (G)Spheramid Enterprises Architectural Woodworks

          Repairs, Remodeling, Restorations

          View Image

          1. User avater
            jonblakemore | Sep 29, 2009 02:34am | #7

            It's been a while for us to do some "craftsman" type work. It's definitely enjoyable and challenging. 

            Jon Blakemore RappahannockINC.com Fredericksburg, VA

        3. danno7x | Sep 29, 2009 11:41pm | #17

          Thanks to Grant and Duane for the tips on working with the drip edge. It was pretty slick bending the "L" metal with a pair of downspout crimpers.

          I've missed this somewhere along the way tell me all about it please.  Haven;t done anything rounded that was too complicated really but I will jump at the chance so I guess I should know this stuff. 

          I take it you make the drip yourself?

          1. User avater
            jonblakemore | Sep 30, 2009 12:18am | #18

            We purchased standard aluminum drip edge.

            View Image

            Take your crimpers and crimp the edge that will stay flat (not the edge to be bent).

            View Image

            View Image

            When complete, you will have a bent drip edge. This was a 7' radius- I think you could do less, but not too much less with the crimpers I have. If you had longer crimpers I would expect you could get more aggressive.

            View Image

            There were still some humps when I installed the drip edge, but I was able to flatten most of them. Maybe deeper throat crimpers would allow the metal to remain more flat?


            Jon Blakemore RappahannockINC.com Fredericksburg, VA

          2. danno7x | Sep 30, 2009 04:38am | #21

            Thanks, I appreciate that.   I was thinking there would be some serious wrinkles or humps, I guess some properly placed nails and some hammering it flat, would get it flat enough that it wouldn't affect the roofing.

        4. dug | Sep 30, 2009 03:05am | #20

           jon,

             Excellent job!

            I love to do jobs like that ..... jobs that challenge you to think outside the box.

            Sadly, around here on alot of those jobs the H.O. just dont have or more likely won't turn loose of the appropriate budget for a complete rework.

            How many manhours would you say you are gonna have in this when done.

            Again, great job.

             dug

          1. User avater
            jonblakemore | Sep 30, 2009 05:28am | #22

            We will probably be at about 60 hours. 

            Jon Blakemore RappahannockINC.com Fredericksburg, VA

          2. User avater
            jonblakemore | Nov 12, 2009 07:09pm | #23

            I forgot to post the finished pics. Here are some:

            View Image

            View Image


            Jon Blakemore RappahannockINC.com Fredericksburg, VA

          3. StanFoster | Nov 13, 2009 04:48am | #24

            Jon-   I just checked into this thread.  That is real nice work.  Something about curves always catch my eye...and not just the woman kind!


            Stan

  3. User avater
    McDesign | Sep 29, 2009 04:27am | #8

    Darned fine. 

    I love these kind of threads - thanks for posting it.


    Forrest - usedta' build stuff

    1. User avater
      jonblakemore | Sep 29, 2009 04:51am | #9

      I should have added this link before.

      If anyone wants to see more of the same, check out our set on Flickr. 

      Jon Blakemore RappahannockINC.com Fredericksburg, VA

      1. theslateman | Sep 29, 2009 02:06pm | #10

        Jon,

        I'm thrilled to see your  great project fully illustrated with pictures .

        Thanks for taking time to put all those in for us .

        Best ,  Walter

        1. User avater
          jonblakemore | Sep 29, 2009 06:42pm | #11

          Walter, you've kept me sated with copper and slate pictures for some time now, I should be the one thanking you! 

          Jon Blakemore RappahannockINC.com Fredericksburg, VA

          1. Bing187 | Sep 29, 2009 07:00pm | #12

            Nice looking work there.

            Wondering if you used exterior MDF....Medex or the like, typically used for sign making, etc. Regular MDO in that application would be a no-no imho. If it's damp, it'll swell like my gut in winter, and eventually fall apart. Just curious.

            Fun doin something that takes some talent, huh? Jobs like that make it fun for me again, as opposed to drudgery.

            Cool.

            Bing

          2. User avater
            jonblakemore | Sep 29, 2009 07:41pm | #14

            Bing,I hope we used the right stuff. No MDF was used- all of the MDO was bonded to a plywood substrate.I've used MDO on ply like this in the past to good effect, but I hope I'm not missing something. 

            Jon Blakemore RappahannockINC.com Fredericksburg, VA

          3. seeyou | Sep 29, 2009 07:05pm | #13

            Jon - just spotted this thread. Nice work.copper p0rn

      2. stevent1 | Sep 29, 2009 08:08pm | #15

        Jon,Really nice work. Thanks for sharing.Chuck Slive, work, build, ...better with wood

      3. florida | Sep 29, 2009 11:37pm | #16

        Beautiful work on a great house. When I first looked at he photos I thought it looked like Virginia. I want some of those jobs.

  4. runnerguy | Sep 30, 2009 01:22am | #19

    Great job Jon. Went to Flckr and saw all the photos.

    I enjoy these threads the most. Been photographing a little fireplace mantle project of my own and it's threads like this one that might make me get up the gumption to post it.

    Again, nice!

    Runnerguy

Log in or create an account to post a comment.

Sign up Log in

Become a member and get full access to FineHomebuilding.com

Video Shorts

Categories

  • Business
  • Code Questions
  • Construction Techniques
  • Energy, Heating & Insulation
  • General Discussion
  • Help/Work Wanted
  • Photo Gallery
  • Reader Classified
  • Tools for Home Building

Discussion Forum

Recent Posts and Replies

  • |
  • |
  • |
  • |
  • |
  • |
View More Create Post

Up Next

Video Shorts

Featured Story

FHB Summit 2025 — Design, Build, Business

Join some of the most experienced and recognized building professionals for two days of presentations, panel discussions, networking, and more.

Featured Video

Video: Build a Fireplace, Brick by Brick

Watch mason Mike Mehaffey construct a traditional-style fireplace that burns well and meets current building codes.

Related Stories

  • Affordable Scans, Accurate Plans
  • FHB Summit 2025 — Design, Build, Business
  • A Summer Retreat Preserved in the Catskill Mountains
  • Fine Homebuilding Issue #332 Online Highlights

Highlights

Fine Homebuilding All Access
Fine Homebuilding Podcast
Tool Tech
Plus, get an extra 20% off with code GIFT20

"I have learned so much thanks to the searchable articles on the FHB website. I can confidently say that I expect to be a life-long subscriber." - M.K.

Get home building tips, offers, and expert advice in your inbox

Signing you up...

This site is protected by reCAPTCHA and the Google Privacy Policy and Terms of Service apply.
See all newsletters
See all newsletters

Fine Homebuilding Magazine

  • Issue 331 - June 2025
    • A More Resilient Roof
    • Tool Test: You Need a Drywall Sander
    • Ducted vs. Ductless Heat Pumps
  • Issue 330 - April/May 2025
    • Deck Details for Durability
    • FAQs on HPWHs
    • 10 Tips for a Long-Lasting Paint Job
  • Issue 329 - Feb/Mar 2025
    • Smart Foundation for a Small Addition
    • A Kominka Comes West
    • Making Small Kitchens Work
  • Issue 328 - Dec/Jan 2024
    • How a Pro Replaces Columns
    • Passive House 3.0
    • Tool Test: Compact Line Lasers
  • Issue 327 - November 2024
    • Repairing Damaged Walls and Ceilings
    • Plumbing Protection
    • Talking Shop

Fine Home Building

Newsletter Sign-up

  • Fine Homebuilding

    Home building tips, offers, and expert advice in your inbox.

  • Green Building Advisor

    Building science and energy efficiency advice, plus special offers, in your inbox.

  • Old House Journal

    Repair, renovation, and restoration tips, plus special offers, in your inbox.

Signing you up...

This site is protected by reCAPTCHA and the Google Privacy Policy and Terms of Service apply.
See all newsletters

Follow

  • Fine Homebuilding

    Dig into cutting-edge approaches and decades of proven solutions with total access to our experts and tradespeople.

    Start Free Trial Now
    • Facebook
    • Instagram
    • X
    • LinkedIn
  • GBA Prime

    Get instant access to the latest developments in green building, research, and reports from the field.

    Start Free Trial Now
    • Facebook
    • YouTube
  • Old House Journal

    Learn how to restore, repair, update, and decorate your home.

    Subscribe Now
    • Facebook
    • Instagram
    • X

Membership & Magazine

  • Online Archive
  • Start Free Trial
  • Magazine Subscription
  • Magazine Renewal
  • Gift a Subscription
  • Customer Support
  • Privacy Preferences
  • About
  • Contact
  • Advertise
  • Careers
  • Terms of Use
  • Site Map
  • Do not sell or share my information
  • Privacy Policy
  • Accessibility
  • California Privacy Rights

© 2025 Active Interest Media. All rights reserved.

Fine Homebuilding receives a commission for items purchased through links on this site, including Amazon Associates and other affiliate advertising programs.

  • Home Group
  • Antique Trader
  • Arts & Crafts Homes
  • Bank Note Reporter
  • Cabin Life
  • Cuisine at Home
  • Fine Gardening
  • Fine Woodworking
  • Green Building Advisor
  • Garden Gate
  • Horticulture
  • Keep Craft Alive
  • Log Home Living
  • Military Trader/Vehicles
  • Numismatic News
  • Numismaster
  • Old Cars Weekly
  • Old House Journal
  • Period Homes
  • Popular Woodworking
  • Script
  • ShopNotes
  • Sports Collectors Digest
  • Threads
  • Timber Home Living
  • Traditional Building
  • Woodsmith
  • World Coin News
  • Writer's Digest
Active Interest Media logo
X
X
This is a dialog window which overlays the main content of the page. The modal window is a 'site map' of the most critical areas of the site. Pressing the Escape (ESC) button will close the modal and bring you back to where you were on the page.

Main Menu

  • How-To
  • Design
  • Tools & Materials
  • Video
  • Blogs
  • Forum
  • Project Guides
  • Reader Projects
  • Magazine
  • Members
  • FHB House

Podcasts

  • FHB Podcast
  • ProTalk

Webinars

  • Upcoming and On-Demand

Podcasts

  • FHB Podcast
  • ProTalk

Webinars

  • Upcoming and On-Demand

Popular Topics

  • Kitchens
  • Business
  • Bedrooms
  • Roofs
  • Architecture and Design
  • Green Building
  • Decks
  • Framing
  • Safety
  • Remodeling
  • Bathrooms
  • Windows
  • Tilework
  • Ceilings
  • HVAC

Magazine

  • Current Issue
  • Past Issues
  • Magazine Index
  • Subscribe
  • Online Archive
  • Author Guidelines

All Access

  • Member Home
  • Start Free Trial
  • Gift Membership

Online Learning

  • Courses
  • Project Guides
  • Reader Projects
  • Podcast

More

  • FHB Ambassadors
  • FHB House
  • Customer Support

Account

  • Log In
  • Join

Newsletter

Get home building tips, offers, and expert advice in your inbox

Signing you up...

This site is protected by reCAPTCHA and the Google Privacy Policy and Terms of Service apply.
See all newsletters
See all newsletters

Follow

  • X
  • YouTube
  • instagram
  • facebook
  • pinterest
  • Tiktok

Join All Access

Become a member and get instant access to thousands of videos, how-tos, tool reviews, and design features.

Start Your Free Trial

Subscribe

FHB Magazine

Start your subscription today and save up to 70%

Subscribe

Enjoy unlimited access to Fine Homebuilding. Join Now

Already a member? Log in

We hope you’ve enjoyed your free articles. To keep reading, become a member today.

Get complete site access to expert advice, how-to videos, Code Check, and more, plus the print magazine.

Start your FREE trial

Already a member? Log in

Privacy Policy Update

We use cookies, pixels, script and other tracking technologies to analyze and improve our service, to improve and personalize content, and for advertising to you. We also share information about your use of our site with third-party social media, advertising and analytics partners. You can view our Privacy Policy here and our Terms of Use here.

Cookies

Analytics

These cookies help us track site metrics to improve our sites and provide a better user experience.

Advertising/Social Media

These cookies are used to serve advertisements aligned with your interests.

Essential

These cookies are required to provide basic functions like page navigation and access to secure areas of the website.

Delete My Data

Delete all cookies and associated data