This tip was one of the hijacks in the “Slow” thread, but I thought it might be good to put it in a thread of its’ own.
I have a no mess method (no rock cutting):
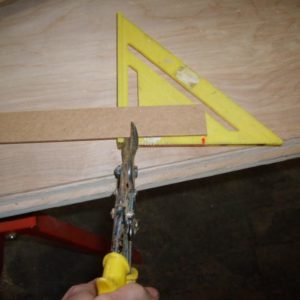
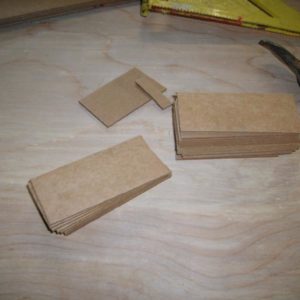
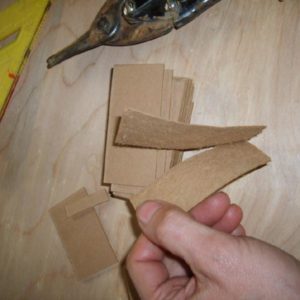
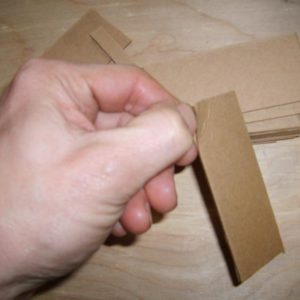
Cut a bunch drywall shims to just under stud depth (3-1/4″ for instance–fits between the rock).
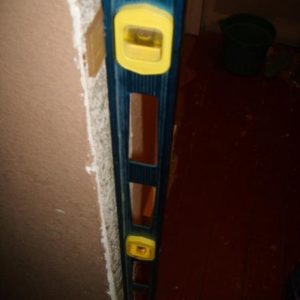
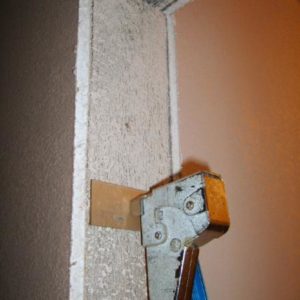
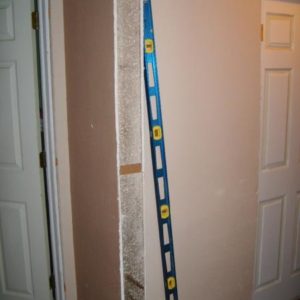
The opening pictured here needed one shim for the bottom hinge, 2 at the top hinge and 2 & 1/3 shims at the middle hinge.
If the rock is really bad, add another shim or two to all hinge locations (my level has top middle and bottom vials at typical hinge heights if the level is tight to the head).
Hammer tacker works…narrow crown stapler even better.
I preshim all the RO hinge sides like this in the entire house, before I set the first door.






Replies
always like new shimming techniques. JLC had an an article on using drywall screws to shim for ext jambs on vynil windows--I tried it and wouldn't ever do anything else now...
Does drywall shim material compress at all? Is it corrugated? I haven't used it.
Not corrugated, it is pretty dense. The density makes it a good shim for heavy doors (less compression potential than cedar or pine shims.
Can you elaborate on the drywall screw tip? Ive used drywall screws too for shimming operations. Im wondering how to do it with vinyl windows. Bob's next test date: 12/10/07
Jim,He's using the Piffinscrews to shim the extension jambs, not the windows themselves. At least, that's how I read it.Bill
Yes, it's for shimming jamb extensions away from the RO to create the reveal on the vinyl window.
It's from May '07 JLC I think.
Basically, you drive screws into the RO around the perimeter of the window, about 8" OC. The heads will be perpendicular to the window.
Then using a hand screwdriver, move screw heads in or out until flush with the edge of the window. Use a square-cut block for each end, then flush all in the middle up to a level or straightedge. Once one side, or top is done, the you can really fly by cutting a stick exact length to guage the other side.
Right after reading that article I tried it out in a house I trimmed out. It was so bloody fast and very positive. Just build the jamb extensions--I built in nice big wide sills too, and set them with the extensions on two rows of screw heads at the sill. A little rattle and shove and they all slipped perfectly in place, perfect reveal, perfect perfect perfect...
A screw with a much larger, flatter head, like fastap's powerheads, would probably work really well, even for the window itself.
Laser worked really well with the screw thing too. Set the laser exactly where you want all the sill screw heads--like when you've got 4 windows in a row... then drive all the screws near where they go. Put a white piece of cardboard or stiff paper behind the screws so the laser shows up well behind them. Then go along with your hand driver and pull the screws up until the head just splits the beam.
Bingo--really flat, level sill shimming.
Before doing the whole house, I took a few scraps, put them in place as extensions with the drywall screw shims, beat on them a bit to test. Softer woods definitely would dent a bit on the screw heads, but put more in and I don't think you'd ever have a problem. Hardwoods, no problem whatsoever.
Hope helpful.
Pat
I got it now Pat, thanks. I was mistakenly thinking that the vinyl windows were being shimmed. Now I understand that it is the JAMB EXTENSION that is being shimmed which is the same type of thing that I've been doing since the late 80's with certain situations involving wall board and other trim pieces in. I can't remember when I started using this technique or why but back then I was doing a lot of interior commercial tenant work with vinyl coveredd wall board and metal studs. We'd often be tying in new metal studs work with old warped wood framing and I used the screws as a type of drywall shim. I basically used the screws to hold out other finished parts and filled behind them with construction glue, shimming up to 3/8" max. If we needed more than that, we'd shim it out with scraps of drywall. Our "system" worked fine as long as the glue had time to set up. Ive used variations of that same idea out in rough frame situations. I like the ideas presented here using the beams. I haven't done enough interior work since the lasers have become cheap enough to use but I can see how they would be useful in some of these situations. Bob's next test date: 12/10/07
I will sometimes pad the RO to plumb as you've shown. It works really great. My preference is to use a plumb bob to align the top and the bottom shims though instaed of a level and use my level to pad out the shims in between top and bottom. If my RO is too wide I'll use 1/4" masonite shims in the same way.
BjR
I sometimes use masonite as shims too. It just depends on what I have laying around. I have some bizarre stuff in my shim bucket:1-1/2" rips of different thickness of plywood cut to 3-1/4" and 5-1/4"laminate ripsa deck of playing cardsand, oh yeah--actual cedar shims (and drywall shims)
"My preference is to use a plumb bob to align the top and the bottom shims though instaed of a level"
Do you have a laser plumb bob?
I have a dot/line laser that does plumb with dot. Fantastic tool. Just put it on the floor and click it on.
When I hang a door in place I mark center on the headjamb, and center on a spreader at the floor between the jamb legs. Move the centers to the dots--fix the head and feet of the jambs. Then all that's left is a straightedge on each jamb for shimming.
"Do you have a laser plumb bob?"
Nope.........
I use a standard issue gravity fed ninja plumb bob like the one shown below. It has a pin mount option for wood jambs and a magnet option for metal studs or hollow metal jamb. Plus it's retractable. I like it better than a laser because gravity never lies and sometimes accurately measuring to the center of a laser dot can be inconsistent when you are trying to read your tape when you measure upside down on a bottom shim or hinge.
I also will string a door jamb to check for the slap if I don't have the door when I set the frame.
Tajima PZB-400 Plumb-Rite Plumb Bob Setter
View ImageBjR
Cool.
The dot is 'fat' for me sometimes.
Funny thing, I once heard an old timer with gravelly voice say, "Straight up and down in the world..." for 'plumb.'
I used to teach carpentry at a local community college and when I tried to get my students to remember the difference between "level" and "plumb". I used to joke that Sir Isaac Newton didn't get hit on the head with an apple as the history books say. I tried to convince them it was a plumb from a plumb tree that fell straight down on his head. They got it after that.
BjRView Image
BjR
Plumb = level....straight up and down.......
when the dot is fat you measure to the center of it. I read that in the instructions to my laser plumb bob.
Logically.
I also noticed my 'dots' get quite a bit fatter when the lenses are clouded with drywall dust!
How big is that thing? I had a guy asking me about a old brass plumb bob reel with a pin set that held out an even 1.5". It was small, only a couple inches across, according to him. Never did find one.
The one I have is about as big as my hand. The one I pictured is not the same one I have. I couldn't find a picture on the internet of the one I have but it's basically the same thing. I think I know of the brass one you are referring to. I also had one of those but this one is much better because you can just pull the string up or down as you like and it stays in place. Unlike the brass one your talking about takes two hands to adjust it up or down. This one holds the line out about 1-1/2" too.
BjR
Edited 12/18/2007 2:10 am ET by BjR
That is a great tool, I bought one a year ago and it is worth it's weight in gold.
No more mess with loose string, it winds itself.
The pin is nice and leaves a small hole, the magnet is strong and has come in handy as well.
I attach the bob to the magnet when it's in my pouch or in the truck.
Woods favorite carpenter
FKA- Stilletto