FHB Logo Facebook LinkedIn Email Pinterest Twitter X Instagram Tiktok YouTube Plus Icon Close Icon Navigation Search Icon Navigation Search Icon Arrow Down Icon Video Guide Icon Article Guide Icon Modal Close Icon Guide Search Icon Skip to content
Subscribe
Log In
  • How-To
  • Design
  • Tools & Materials
  • Restoration
  • Videos
  • Blogs
  • Forum
  • Magazine
  • Members
  • FHB House
  • Podcast
Log In

Discussion Forum

Discussion Forum

Drywall advice: closing the gap between wall and flush built-ins

firsttimeroller | Posted in Construction Techniques on August 25, 2022 10:30pm

Hi,

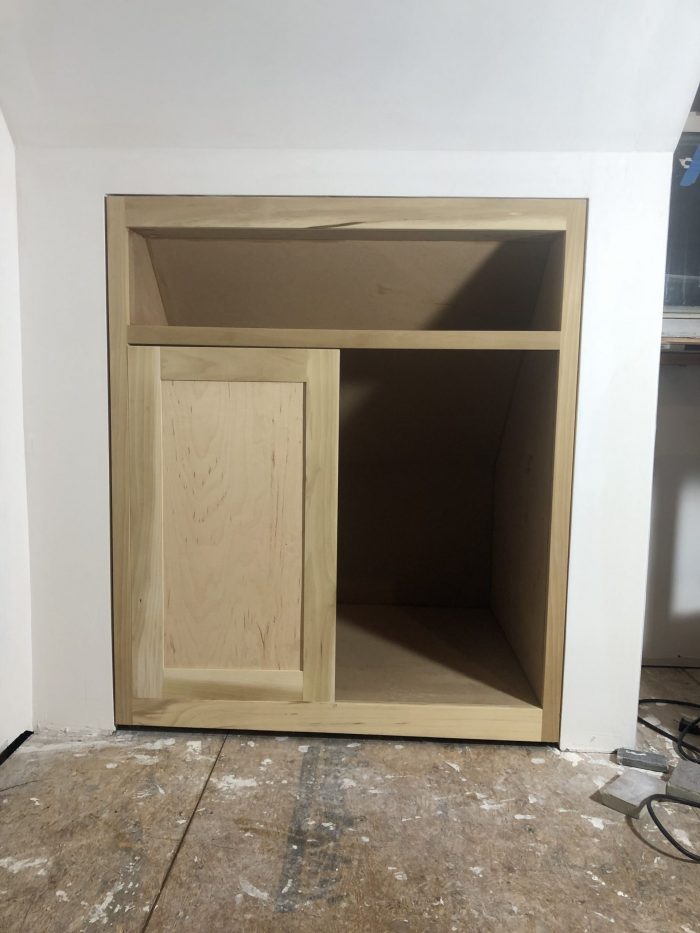
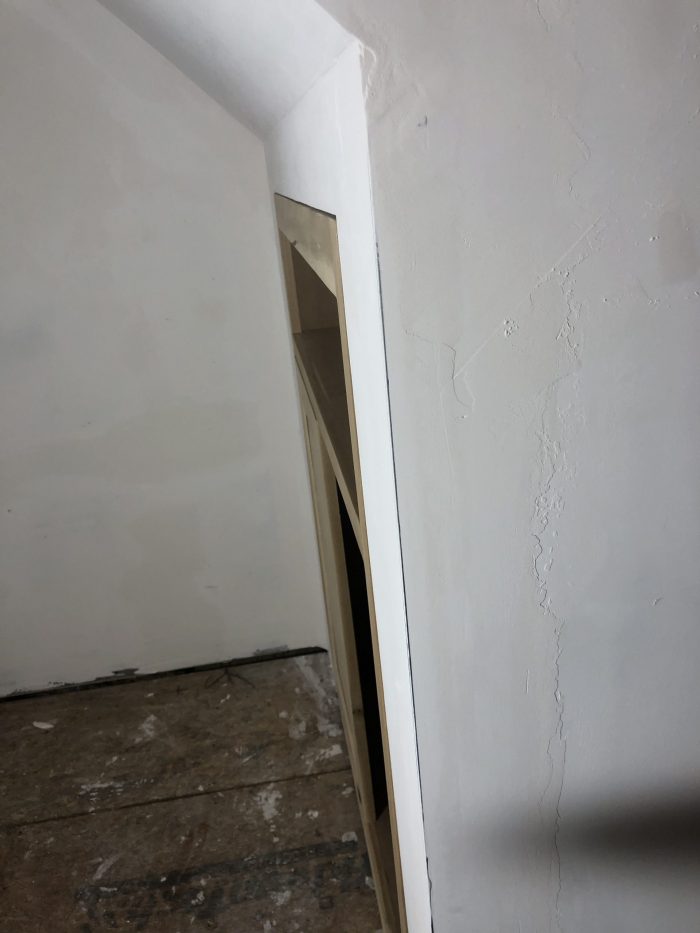
 I’m trying to make cabinets where the face frame is flush with the drywall.  Obviously my cabinets are a little smaller than my opening.

What is the best way to close the gap and get an nice clean look here?  Should the gap be closed all the way or should there be a small, even space on all sides? 

Because I don’t know what I’m doing, I’ve already put on the plastic corner strips with a few layers of light mud.

If I had to wing it on my own I would maybe staple a plywood strip to the edges of the face but set back a little bit then fill it in with mud in front of it–or something like that…but should the mud actually touch the face frame?

Thanks for taking the time to help me out!

Matt

Reply
  • X
  • facebook
  • linkedin
  • pinterest
  • email
  • add to favorites Log in or Sign up to save your favorite articles

Replies

  1. agm413 | Aug 26, 2022 09:58am | #1

    Tearaway drywall beads should do the trick for that gap - https://www.trim-tex.com/products/overview/commercial-beads/tear-away-beads/

    Get the L into the gap, mud all the way into the tear away leg, let dry and tear off.

    1. User avater
      firsttimeroller | Aug 27, 2022 06:40pm | #2

      Nice. Thanks for the info.

      1. calvin | Aug 28, 2022 10:10pm | #3

        Positive second on the tearway “L” bead!

  2. User avater
    Deleted | Jun 01, 2023 05:43pm | #4

    “[Deleted]”

  3. User avater
    firsttimeroller | Jun 01, 2023 05:45pm | #5

    Would it be stupid to try to put the new L bead right over the existing corner bead and flatten out the wall by building up the rest of the wall even more? Or should I just suck it up and start cutting out all the older beads? I know that's probably the right way....but there's twelve cabinets so it's frustrating. but it has to be perfect.

    1. calvin | Jun 01, 2023 07:26pm | #6

      Honestly I can’t see it from my house.
      But,
      I’ve used regular and tear away L bead to give what you are wanting, numerous times. It’s a shame there’s already corner on it and if I could see it I might tell you it could still work, laying L over what’s there.

      We would staple L bead to the drywall, use Durabond for the first coat and it would hold fast. With mudded corner……might hold, might not. The staples have to go so they don’t interfere with subsequent coats.

      You’ve already built out the corner somewhat with your corner bead, but.
      If you feather out the L bead way out, it might appear flat.

      Is your corner bead out beyond the cab face now?

      Edit: There’s the easy way out if you can live with it.
      Take “backer rod the is a bit thicker than your current gap. With a putty knife, stuff the foam rod back in the gap at least a 1/4 inch deep in the gap. Get some good flexible caulk (that will stay pliable forever!) Masking tape the wall face to the edge and the cabinet face to the cabinet edge. Apply the caulk and knife it smooth using the cabinet face as your guide. Let it fall where it will along the inner edge of the wall.
      As soon as you’re done with a side, top or other side, pull that tape away
      A slight recess will look better than than a wavy line flush with the wall bead.

      It’ll close the gap, be a straight line of cabinet edge and should be a neat line to the wall.

      But then again, I’ve caulked like this a lot. There’s a bit of trick to it. Painters often do it. I’m just a dumb carpenter, retired.

      There should be some u-tube available.

      And do come back and report.

      1. User avater
        firsttimeroller | Jun 03, 2023 04:39pm | #8

        Calvin,

        Yes! This is the way. I'm going to try this method. I've got the luxury of being able to cut the face frames to size (they aren't glued on yet) so I can take my time and have a nice even space all around. I will try to attach the backer rod to the sides of the faces before I squeeze the cabinets back into the wall. If that doesn't work, I'll try the stuff method. Now you've got me wondering if I could even skip the caulk if I could find some other material to staple to the sides of the frames since they aren't installed...vinyl compression jamb liners for windows maybe? Something that will fill the gap and look clean all in one...

        Anyway this is great advice. I'm going to go this route.

        Much appreciated.

        1. calvin | Jun 04, 2023 08:45am | #9

          You can pull the pantry out? Face frames loose?

          Well, this from a dumb carpenter.
          I’d yank the corner bead. If the opening allowed it, add some 1/4” or whatever would close the gap a bit more….
          Install cabs with face frame attached. THEN use the tear away L-Bead to finish.

          Honestly any other way would be a huge waste of time. A homeowner would shoot me if I spent this much time on it. Make it easy on yourself.

          The flush flat look is nice, but detailing that assumes the walls and cabs are in plane and everything goes as planned. You can “fool the eye” but never fool yourself.

          Do come back with some finished photo’s!

        2. calvin | Jun 05, 2023 12:38pm | #10

          Check this out from Trim-Tex.

          https://bnp.omeclk.com/portal/public/ViewCommInBrowser.jsp?Sv4%2BeOSSucwxctRH9VZ6F07S04D7wz%2Bj%2BNCSonfOuDiZguLRxGSe3CTsTIQMAs2KNwFmMfy4ejbNXFsF5U6T3w%3D%3DA

          There will also be user tutorials on all their drywall trim products.
          A must see as to different ideas and applications.

          Like this!
          https://d2mqprs2ylgk9j.cloudfront.net/media/imported/Blog/Create20Flush20Baseboards20with20Architectural20L20Bead.jpg

          1. User avater
            firsttimeroller | May 10, 2025 12:44am | #11

            Calvin, long time no see. I actually wish I would have seen this last post a year ago. This picture looks like it would be a nice clean look, with no gap.

            I tried the backer rod and tape method first. it actually worked great, but honestly, my openings were the issue, not uniform enough. in the end the spaces between the cabinets and mud were inconsistent, and I struggled to keep all the gaps the same width.

            I ended up cutting cutting everything out from all six cabinets...yeah...

            I got the trim-tex z-shadow beads - had to order about three times what I needed from a local supplier, but it was fairly cheap anyway. being able to push the bead up against the cabinet edge helped clean up my edges. I also ended up using the same stuff for the baseboards (which aren't installed yet).

            Here's some pics. I still haven't painted the cabinets or built doors yet, there's a glimps of the where the baseboard will go in the one picture. as you can see, my wife has taken over my five year man cave project already...lol...i'm now relegated to the basement once again...bumping my head on the boiler pipes daily....

            I appreciate all your replies sir.

  4. 1095mike | Jun 01, 2023 08:53pm | #7

    The wood will expand and contract with changes in humidity, so there will be a gap when humidity is lower. If you put drywall mud on unfinished face frames the wood will expand and gaps will appear when it dries out. Caulk that stretches is probably the best solution.

    1. User avater
      firsttimeroller | May 10, 2025 12:48am | #12

      Yep, I'm seeing this with the z-shadow bead I just mentioned above. there was an eighth inch gap between the cabinet and the bead during the winter above that double cabinet in the one picture and now it's almost gone today, which I didn't notice until read your post and went back up and checked.

      This is actually great news to me, because i was really worried the gaps might be related to all the drywall and double-sistered rafters pulling down and pushing out the knee-walls...and the outside walls...which is still a really risk for me, i think, but oh well....I'll be dead and gone before it gets too bad...i hope.

Log in or create an account to post a comment.

Sign up Log in

Become a member and get full access to FineHomebuilding.com

Video Shorts

Categories

  • Business
  • Code Questions
  • Construction Techniques
  • Energy, Heating & Insulation
  • General Discussion
  • Help/Work Wanted
  • Photo Gallery
  • Reader Classified
  • Tools for Home Building

Discussion Forum

Recent Posts and Replies

  • |
  • |
  • |
  • |
  • |
  • |
View More Create Post

Up Next

Video Shorts

Featured Story

Making the Move to Multifamily

A high-performance single-family home builder shares tips from his early experience with two apartment buildings.

Featured Video

How to Install Exterior Window Trim

Learn how to measure, cut, and build window casing made of cellular PVC, solid wood, poly-ash boards, or any common molding material. Plus, get tips for a clean and solid installation.

Related Stories

  • Fire-Resistant Landscaping and Home Design Details
  • A New Approach to Foundations
  • A Closer Look at Smart Water-Leak Detection Systems
  • Guest Suite With a Garden House

Highlights

Fine Homebuilding All Access
Fine Homebuilding Podcast
Tool Tech
Plus, get an extra 20% off with code GIFT20

"I have learned so much thanks to the searchable articles on the FHB website. I can confidently say that I expect to be a life-long subscriber." - M.K.

Get home building tips, offers, and expert advice in your inbox

Signing you up...

This site is protected by reCAPTCHA and the Google Privacy Policy and Terms of Service apply.
See all newsletters
See all newsletters

Fine Homebuilding Magazine

  • Issue 332 - July 2025
    • Custom Built-ins With Job-Site Tools
    • Fight House Fires Through Design
    • Making the Move to Multifamily
  • Issue 331 - June 2025
    • A More Resilient Roof
    • Tool Test: You Need a Drywall Sander
    • Ducted vs. Ductless Heat Pumps
  • Issue 330 - April/May 2025
    • Deck Details for Durability
    • FAQs on HPWHs
    • 10 Tips for a Long-Lasting Paint Job
  • Issue 329 - Feb/Mar 2025
    • Smart Foundation for a Small Addition
    • A Kominka Comes West
    • Making Small Kitchens Work
  • Issue 328 - Dec/Jan 2024
    • How a Pro Replaces Columns
    • Passive House 3.0
    • Tool Test: Compact Line Lasers

Fine Home Building

Newsletter Sign-up

  • Fine Homebuilding

    Home building tips, offers, and expert advice in your inbox.

  • Green Building Advisor

    Building science and energy efficiency advice, plus special offers, in your inbox.

  • Old House Journal

    Repair, renovation, and restoration tips, plus special offers, in your inbox.

Signing you up...

This site is protected by reCAPTCHA and the Google Privacy Policy and Terms of Service apply.
See all newsletters

Follow

  • Fine Homebuilding

    Dig into cutting-edge approaches and decades of proven solutions with total access to our experts and tradespeople.

    Start Free Trial Now
    • Facebook
    • Instagram
    • X
    • LinkedIn
  • GBA Prime

    Get instant access to the latest developments in green building, research, and reports from the field.

    Start Free Trial Now
    • Facebook
    • YouTube
  • Old House Journal

    Learn how to restore, repair, update, and decorate your home.

    Subscribe Now
    • Facebook
    • Instagram
    • X

Membership & Magazine

  • Online Archive
  • Start Free Trial
  • Magazine Subscription
  • Magazine Renewal
  • Gift a Subscription
  • Customer Support
  • Privacy Preferences
  • About
  • Contact
  • Advertise
  • Careers
  • Terms of Use
  • Site Map
  • Do not sell or share my information
  • Privacy Policy
  • Accessibility
  • California Privacy Rights

© 2025 Active Interest Media. All rights reserved.

Fine Homebuilding receives a commission for items purchased through links on this site, including Amazon Associates and other affiliate advertising programs.

  • Home Group
  • Antique Trader
  • Arts & Crafts Homes
  • Bank Note Reporter
  • Cabin Life
  • Cuisine at Home
  • Fine Gardening
  • Fine Woodworking
  • Green Building Advisor
  • Garden Gate
  • Horticulture
  • Keep Craft Alive
  • Log Home Living
  • Military Trader/Vehicles
  • Numismatic News
  • Numismaster
  • Old Cars Weekly
  • Old House Journal
  • Period Homes
  • Popular Woodworking
  • Script
  • ShopNotes
  • Sports Collectors Digest
  • Threads
  • Timber Home Living
  • Traditional Building
  • Woodsmith
  • World Coin News
  • Writer's Digest
Active Interest Media logo
X
X
This is a dialog window which overlays the main content of the page. The modal window is a 'site map' of the most critical areas of the site. Pressing the Escape (ESC) button will close the modal and bring you back to where you were on the page.

Main Menu

  • How-To
  • Design
  • Tools & Materials
  • Video
  • Blogs
  • Forum
  • Project Guides
  • Reader Projects
  • Magazine
  • Members
  • FHB House

Podcasts

  • FHB Podcast
  • ProTalk

Webinars

  • Upcoming and On-Demand

Podcasts

  • FHB Podcast
  • ProTalk

Webinars

  • Upcoming and On-Demand

Popular Topics

  • Kitchens
  • Business
  • Bedrooms
  • Roofs
  • Architecture and Design
  • Green Building
  • Decks
  • Framing
  • Safety
  • Remodeling
  • Bathrooms
  • Windows
  • Tilework
  • Ceilings
  • HVAC

Magazine

  • Current Issue
  • Past Issues
  • Magazine Index
  • Subscribe
  • Online Archive
  • Author Guidelines

All Access

  • Member Home
  • Start Free Trial
  • Gift Membership

Online Learning

  • Courses
  • Project Guides
  • Reader Projects
  • Podcast

More

  • FHB Ambassadors
  • FHB House
  • Customer Support

Account

  • Log In
  • Join

Newsletter

Get home building tips, offers, and expert advice in your inbox

Signing you up...

This site is protected by reCAPTCHA and the Google Privacy Policy and Terms of Service apply.
See all newsletters
See all newsletters

Follow

  • X
  • YouTube
  • instagram
  • facebook
  • pinterest
  • Tiktok

Join All Access

Become a member and get instant access to thousands of videos, how-tos, tool reviews, and design features.

Start Your Free Trial

Subscribe

FHB Magazine

Start your subscription today and save up to 70%

Subscribe

Enjoy unlimited access to Fine Homebuilding. Join Now

Already a member? Log in

We hope you’ve enjoyed your free articles. To keep reading, become a member today.

Get complete site access to expert advice, how-to videos, Code Check, and more, plus the print magazine.

Start your FREE trial

Already a member? Log in

Privacy Policy Update

We use cookies, pixels, script and other tracking technologies to analyze and improve our service, to improve and personalize content, and for advertising to you. We also share information about your use of our site with third-party social media, advertising and analytics partners. You can view our Privacy Policy here and our Terms of Use here.

Cookies

Analytics

These cookies help us track site metrics to improve our sites and provide a better user experience.

Advertising/Social Media

These cookies are used to serve advertisements aligned with your interests.

Essential

These cookies are required to provide basic functions like page navigation and access to secure areas of the website.

Delete My Data

Delete all cookies and associated data