FHB Logo Facebook LinkedIn Email Pinterest Twitter X Instagram Tiktok YouTube Plus Icon Close Icon Navigation Search Icon Navigation Search Icon Arrow Down Icon Video Guide Icon Article Guide Icon Modal Close Icon Guide Search Icon Skip to content
Subscribe
Log In
  • How-To
  • Design
  • Tools & Materials
  • Restoration
  • Videos
  • Blogs
  • Forum
  • Magazine
  • Members
  • FHB House
  • Podcast
Log In

Discussion Forum

Discussion Forum

Flooring/Pad Construction for Wood Stove

| Posted in General Discussion on June 17, 2003 07:48am

Hi, my name is DennisP.  Just heard about this website and was interested in getting some information on how to build a floor/pad to put a wood stove on.  We looked at some stone and tile at one of the local stores.  I’ve got quite a few books at home on home repair and maintenance, but none that discuss installation of flooring for a wood stove.

Anyone have any idea on where I get get some information on how to build one of these babies?

Thanks,

Dennis
Reply
  • X
  • facebook
  • linkedin
  • pinterest
  • email
  • add to favorites Log in or Sign up to save your favorite articles

Replies

  1. Ralvarez | Jun 17, 2003 10:40pm | #1

    Dennis .... Provided your subfloor can handle the load..... there are prefab slabs of heat resistant material that both spread the load over the subfloor and act as a fireproof subflooring. The are approx 4' x 4' x 1.5" high & have a nice finish (faux brick) on the top with a black synthetic wood border. I laid my on top of the carpet , placed the stove on top (Heavy duty Jotul) and installed the chimney pipes. Very easy, looked good and was in code for Marlborough, Mass.

    Good luck

  2. calvin | Jun 17, 2003 10:47pm | #2

    Dennis.  Many years ago we heated entirely with wood.  Used several floor coverings as material permitted.  For an old coal stove that would get cherry red on the face, we had a sheet metal base, then concrete block laid sideways with a cap over the top of brick.  The brick got warm but never hot enough to concern us about combustion.  In another application we picked up from an old hardware, a wood stove "pan".  Decorative painted metal that was pressed around 3/8's inch of something.  Could have been a non flamable material, don't really know.  That one had a Fisher stove on top of it.  Stood up maybe on 6" legs.  The under side of that never got too hot either.  Most of the heat goes up or radiates to the sides.  With the air movement under the stove and the firebrick on the bottom of (inside) the combustion chamber, the metal pan was there to protect from burning embers falling outta the door.  We used some salvaged sidewalk sandstone under another.   Whatever you do, be sure to give it room in your bare feet.  And pay attention to weight you put on the floor.  Additionally,  be  concerned with distance away from combustibles to the back and the sides. 

    __________________________________________

    Remodeling Contractor just outside the Glass City.

    http://www.quittintime.com/

  3. dtaylor137 | Jun 18, 2003 01:04am | #3

    Dennis, the prevab units work great and are the proper dimensions. Remember that the dimension are specified by code. there will be a metal label on the back of any new woodstove that will specify stove placement. If you want to build the hearth yourself you must start with a solid sheat of wonderboard (cement board) so any ember don't slip thru the cracks of the finish material and onto the subfloor. You can then build up with brick, tile or any non-combustable. Masonary fireplaces must have a hearth extending 20" beyond the opening. Woodstoves might be 16" but check your local code. I don't have mine in front of me.

    Dave

    If a tree falls in the woods and nobody hears it is it still lumber?

  4. User avater
    Dinosaur | Jun 18, 2003 05:53am | #4

    I heat our place with wood; I run a Jotul #3 and burn between 7 & 10 cords a year, depending on the temperature.

    The hearth is constructed directly on top of the finish floor in the following manner:

    1. Box in the area the hearth will occupy with a finish-grade trim like a 1x3 ripped down to 2-2¼" high. Set the trim on edge and screw it to the floor through counter-bored holes. Plug the screw holes.
    2. Pour a half-inch bed of concrete into the form. Make sure the mix doesn't contain any large aggregate, and don't add too much water; it should pour, but not slop.
    3. Set 1½" thick concrete patio tiles into the wet concrete. Score & break them to fit, filling the form as much as you can but leave at least ½-¾" grout lines all around and between pieces of patio tile.
    4. Pour on more concrete and work it well into all the grout lines. Make sure you don't leave any air bubbles.
    5. After the concrete is dry, trowel on Full Flex and set your tiles or slates in that.
    6. Grout the tiles or slates as for any ordinary tile floor.
    7. Install a quarter-round shoe moulding around the trim, and stain all to match the floor.

    You will also probably want to build a heat-shield on the wall behind and/or next to the stove, depending on its placement. This allows you to reduce the distance the stove must be from the flammable wall from 48" to 24" (check your stove's homologation certificate and local regulations for the exact distances). The heat shield must not touch the wall and must have air circulation behind it to remove heat build-up.

    1. Screw metal furring strips to the finish-wall surface, laying them vertically on 12" or 16" centers (max) over the studs. Do not use wall anchors; you must be in solid wood.
    2. Screw ½"-thick cement backer-board on top of the metal furring strips, setting the bottom edge 1" off the hearth. (When you build the mantel over it later, you must leave another 1" space over the top edge of the heat shield.)
    3. Set your finish tiles or slates in Full flex on the backerboard.

    One suggestion I'd make is to build the hearth a bit bigger than code requirements if you've got the room; it's nice to have the space to dump snow-covered logs, wet winter boots & so forth near the stove to dry out. Do also take the trouble to seal your slate or tiles (if they're not a gloss finish); it will make cleaning the ashes off a lot easier.

    Dinosaur

    'Y-a-tu de la justice dans ce maudit monde?

    1. ButteUptown | Aug 24, 2003 08:01am | #5

      I'd like to bring this back to life.

      I need to construct a 30 sq ft pad for a woodstove in our large, old home. The pre-fab units may work, but we'd like to pick the tile. Does anyone know how they supposedly reach the ~2.22 R factor in an inch and a quarter in these things? They must use some fabric between the particle board on the back and the tile/Durock(?) sandwich on the front.

      I'd like to make something that will float on our 113 yr-old flooring, but not be 3" thick. The guy at the stove store said "two sheets of Durock beneath tile should be fine." My friends at the lumber store aren't so sure, and they don't know what the k or R values of their materials are.

      Is there some fabric (asbestos replacement) that is used in the sandwich? Anyone know what it's called?

      thks a bunch--Larry, Butte MT

      1. User avater
        Dinosaur | Aug 28, 2003 06:05am | #6

        It doesn't have to be 3" thick; just 2". I use 1.5" patio tiles rough cut to fit in a form made of finish-grade trim; then I fill to 2" thick with concrete/Full-Flex and set the tile/slate/whatever on top of it flush with the form. Finish the form as trim any way you like.

        If you want it to 'float' on top of 113-year-old floors, you're gonna need some way to prevent it cracking as the floor moves. This is not gonna be easy; nothing I can think of will be guaranteed. You might try setting rebar grids into the concrete (no patio tiles here; full pour 2" deep); I don't know how that would affect heat transmission, tho. You might also try floating several lifts of concrete with a few layers of Fibreglas mesh set into it. Maybe just four layers of Fibreglas-reinforced ½" backer board glued together (or not!--there's a thought) with Full Flex or similar. All this is brainstorming for the 'float' problem. Take your pick....Dinosaur

        'Y-a-tu de la justice dans ce maudit monde?

        1. ButteUptown | Aug 28, 2003 07:03am | #7

          Thanks for the reply. Problem is... I wonder how to meet the R or k rating asked for by the stove manufacturer? I don't know what the values are for a cement mixture and patio blocks, but  Durock has a k value of 1.92. That translates to needing 4.25" of the stuff to reach an R value of 2.22 requested by the stove (Quadrafire). My guess is that portland cement products are not very different. (I am sure that if I followed your design, I'd not torch my house, even if it didn't meet the R value spec!).

          I'm on something of a quest to figure out what product will give the higher R rating... my friends at the lumber store suggested 1/2" hard foam (R 7 per inch) beneath 2 or 3 layers of Durock, but they realize that wouldn't meet the spec for non-flammable materials.

          I've still got some calls to make before I punt and use a pre-fab slab. I think I'll convince my stove guy to slice a sample of one in half! Larry

          1. User avater
            Dinosaur | Aug 28, 2003 04:32pm | #8

            The best information on stove and fireplace installations is contained in a 28-page booklet published by the Association des professionnels du chauffage à combustibles solide. Their phone number is (514) 270-4944; the fax is (514) 270-5488. (This info comes from my 1989 edition which is somewhat out of date.) I assume the booklet is published in English, but my edition is in French. Someone there should speak English, if your French is not at the functional level--they're in Montréal, also known as Québec's English Ghetto....

            This is the reference we use here for intallations that meet both the NBC and the insurance companies' requirements--which are sometimes stricter, BTW. Below is a scanned spread illustrating two different ways to built a sub-stove fire floor, depending on the homologation of the stove in question and the distance of the bottom of the stove to the floor (ie, length of legs).

            Remember that circulating air in the heat shield is important to keep it cool, whatever it is. The solid 2" concrete job I described is appropriate for modern stoves with integral bottom heat shields. These illustrations show how to deal with an older stove that throws off too much heat through its bottom plate.Dinosaur

            'Y-a-tu de la justice dans ce maudit monde?

          2. fredsmart48 | Aug 28, 2003 07:06pm | #9

            I don't know the R value of rock wool but it is fire proof.  You can direct the flame from a propane torch directly on rock wool  with a penny laying on the rock wool and it won't catch fire but the penny will melt. 

          3. ButteUptown | Aug 28, 2003 08:45pm | #10

            An obvious addition to my posts would have been that AIR seems to be the only way to reach a higher R value. Clearly, setting open concrete blocks on their side is the way to go (thus a higher hearth). The problem with rock wool, is that all of the air will squish out of it if you lay 500-700 lb of stove and tile on top of it!

            Still looking for air packaged in a thin, non-flammable substance!

            Larry

          4. ButteUptown | Aug 29, 2003 04:49pm | #11

            I found what I was looking for, now I have to find someone who can get it for me. The product is Micore, it comes in 160 and 300 versions in thicknesses from 3/8 to 3/4", made by US Gypsum. I guess it's a non-flammable, sound deadening panel product used for cubicles and stove hearths(!) The 160 version is only 16 lb/cu-ft, has a k value of 0.35 giving an R value of 1.43 in 1/2". The 300 version is 24 lb/cu-ft, has a k value of 0.458, giving an R value of 1.09 in 1/2". I think that the 300 version is most likely used for hearths, as it's harder and stronger. Just over 1" of the stuff with a tile cap is what I'm looking for--the equivalent insulating value of 4.3" of Durock or brick.

            Hope this helps someone else.--Larry

Log in or create an account to post a comment.

Sign up Log in

Become a member and get full access to FineHomebuilding.com

Video Shorts

Categories

  • Business
  • Code Questions
  • Construction Techniques
  • Energy, Heating & Insulation
  • General Discussion
  • Help/Work Wanted
  • Photo Gallery
  • Reader Classified
  • Tools for Home Building

Discussion Forum

Recent Posts and Replies

  • |
  • |
  • |
  • |
  • |
  • |
View More Create Post

Up Next

Video Shorts

Featured Story

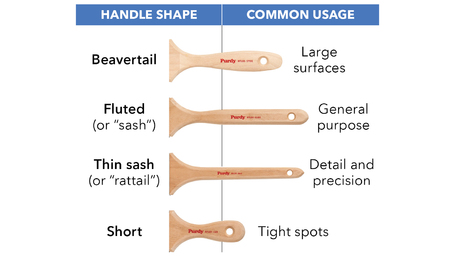
Choosing a Paintbrush

Tips for picking the right paintbrush based on paint type, surface, and personal comfort.

Featured Video

Builder’s Advocate: An Interview With Viewrail

Learn more about affordable, modern floating stairs, from design to manufacturing to installation.

Related Stories

  • Midcentury Home for a Modern Family
  • The New Old Colonial
  • Modern and Minimal in the Woods
  • Bryce Hollingsworth, Dry-Stone Waller

Highlights

Fine Homebuilding All Access
Fine Homebuilding Podcast
Tool Tech
Plus, get an extra 20% off with code GIFT20

"I have learned so much thanks to the searchable articles on the FHB website. I can confidently say that I expect to be a life-long subscriber." - M.K.

Get home building tips, offers, and expert advice in your inbox

Signing you up...

This site is protected by reCAPTCHA and the Google Privacy Policy and Terms of Service apply.
See all newsletters
See all newsletters

Fine Homebuilding Magazine

  • Issue 333 - August/September 2025
    • A Practical Perfect Wall
    • Landscape Lighting Essentials
    • Repairing a Modern Window Sash
  • Issue 332 - July 2025
    • Custom Built-ins With Job-Site Tools
    • Fight House Fires Through Design
    • Making the Move to Multifamily
  • Issue 331 - June 2025
    • A More Resilient Roof
    • Tool Test: You Need a Drywall Sander
    • Ducted vs. Ductless Heat Pumps
  • Issue 330 - April/May 2025
    • Deck Details for Durability
    • FAQs on HPWHs
    • 10 Tips for a Long-Lasting Paint Job
  • Issue 329 - Feb/Mar 2025
    • Smart Foundation for a Small Addition
    • A Kominka Comes West
    • Making Small Kitchens Work

Fine Home Building

Newsletter Sign-up

  • Fine Homebuilding

    Home building tips, offers, and expert advice in your inbox.

  • Green Building Advisor

    Building science and energy efficiency advice, plus special offers, in your inbox.

  • Old House Journal

    Repair, renovation, and restoration tips, plus special offers, in your inbox.

Signing you up...

This site is protected by reCAPTCHA and the Google Privacy Policy and Terms of Service apply.
See all newsletters

Follow

  • Fine Homebuilding

    Dig into cutting-edge approaches and decades of proven solutions with total access to our experts and tradespeople.

    Start Free Trial Now
    • Facebook
    • Instagram
    • X
    • LinkedIn
  • GBA Prime

    Get instant access to the latest developments in green building, research, and reports from the field.

    Start Free Trial Now
    • Facebook
    • YouTube
  • Old House Journal

    Learn how to restore, repair, update, and decorate your home.

    Subscribe Now
    • Facebook
    • Instagram
    • X

Membership & Magazine

  • Online Archive
  • Start Free Trial
  • Magazine Subscription
  • Magazine Renewal
  • Gift a Subscription
  • Customer Support
  • Privacy Preferences
  • About
  • Contact
  • Advertise
  • Careers
  • Terms of Use
  • Site Map
  • Do not sell or share my information
  • Privacy Policy
  • Accessibility
  • California Privacy Rights

© 2025 Active Interest Media. All rights reserved.

Fine Homebuilding receives a commission for items purchased through links on this site, including Amazon Associates and other affiliate advertising programs.

  • Home Group
  • Antique Trader
  • Arts & Crafts Homes
  • Bank Note Reporter
  • Cabin Life
  • Cuisine at Home
  • Fine Gardening
  • Fine Woodworking
  • Green Building Advisor
  • Garden Gate
  • Horticulture
  • Keep Craft Alive
  • Log Home Living
  • Military Trader/Vehicles
  • Numismatic News
  • Numismaster
  • Old Cars Weekly
  • Old House Journal
  • Period Homes
  • Popular Woodworking
  • Script
  • ShopNotes
  • Sports Collectors Digest
  • Threads
  • Timber Home Living
  • Traditional Building
  • Woodsmith
  • World Coin News
  • Writer's Digest
Active Interest Media logo
X
X
This is a dialog window which overlays the main content of the page. The modal window is a 'site map' of the most critical areas of the site. Pressing the Escape (ESC) button will close the modal and bring you back to where you were on the page.

Main Menu

  • How-To
  • Design
  • Tools & Materials
  • Video
  • Blogs
  • Forum
  • Project Guides
  • Reader Projects
  • Magazine
  • Members
  • FHB House

Podcasts

  • FHB Podcast
  • ProTalk

Webinars

  • Upcoming and On-Demand

Podcasts

  • FHB Podcast
  • ProTalk

Webinars

  • Upcoming and On-Demand

Popular Topics

  • Kitchens
  • Business
  • Bedrooms
  • Roofs
  • Architecture and Design
  • Green Building
  • Decks
  • Framing
  • Safety
  • Remodeling
  • Bathrooms
  • Windows
  • Tilework
  • Ceilings
  • HVAC

Magazine

  • Current Issue
  • Past Issues
  • Magazine Index
  • Subscribe
  • Online Archive
  • Author Guidelines

All Access

  • Member Home
  • Start Free Trial
  • Gift Membership

Online Learning

  • Courses
  • Project Guides
  • Reader Projects
  • Podcast

More

  • FHB Ambassadors
  • FHB House
  • Customer Support

Account

  • Log In
  • Join

Newsletter

Get home building tips, offers, and expert advice in your inbox

Signing you up...

This site is protected by reCAPTCHA and the Google Privacy Policy and Terms of Service apply.
See all newsletters
See all newsletters

Follow

  • X
  • YouTube
  • instagram
  • facebook
  • pinterest
  • Tiktok

Join All Access

Become a member and get instant access to thousands of videos, how-tos, tool reviews, and design features.

Start Your Free Trial

Subscribe

FHB Magazine

Start your subscription today and save up to 70%

Subscribe

Enjoy unlimited access to Fine Homebuilding. Join Now

Already a member? Log in

We hope you’ve enjoyed your free articles. To keep reading, become a member today.

Get complete site access to expert advice, how-to videos, Code Check, and more, plus the print magazine.

Start your FREE trial

Already a member? Log in

Privacy Policy Update

We use cookies, pixels, script and other tracking technologies to analyze and improve our service, to improve and personalize content, and for advertising to you. We also share information about your use of our site with third-party social media, advertising and analytics partners. You can view our Privacy Policy here and our Terms of Use here.

Cookies

Analytics

These cookies help us track site metrics to improve our sites and provide a better user experience.

Advertising/Social Media

These cookies are used to serve advertisements aligned with your interests.

Essential

These cookies are required to provide basic functions like page navigation and access to secure areas of the website.

Delete My Data

Delete all cookies and associated data