FHB Logo Facebook LinkedIn Email Pinterest Twitter X Instagram Tiktok YouTube Plus Icon Close Icon Navigation Search Icon Navigation Search Icon Arrow Down Icon Video Guide Icon Article Guide Icon Modal Close Icon Guide Search Icon Skip to content
Subscribe
Log In
  • How-To
  • Design
  • Tools & Materials
  • Restoration
  • Videos
  • Blogs
  • Forum
  • Magazine
  • Members
  • FHB House
  • Podcast
Log In

Discussion Forum

Discussion Forum

HOW to install those new under cabinet light strips?

Fonzie777 | Posted in Construction Techniques on December 16, 2014 08:19am

We have just hung all the cabinets for a new kitchen and are getting close to installing this latest in undercabinet lighting – the filmstrip LEDs.  I like LEDs.  I hadn’t seen these.   

The way I see the problem – they have come out with this faster than they have developed the way to use the stuff.  

I’m hesitant for example to trust the sticky back to hold the light strip to the bottom of the cabinet for 20 years.  If it does what will come off with it?  

We are wrestling with two things as we’ve been trying to figure this out ahead.  First – the countertop is quartz and reflective.  The customer doesn’t want a row of dots revlecting – especially if they’re not perfectly straight.  We saw what she meant at the showroom.  I ask them what about putting it on top of the undercabinet trim and making it indirect – but the designer said that wouldn’t get enough light out of these.  

We ordered a diffuser.  It’s an aluminum “U” with a lens.  The lens isn’t easy to get out.  The aluminum is of course conductive.  Every so often in this strip there is a place where there are “contacts” to be had.  I don’t trust the strip inside aluminum.  Plus, if there is a need to work on the strips first you have to get the lens popped out (hopefully without breaking it because it’s discontinued), then remove the screws inside the aluminum holder, then, then,.  

We have an idea – but I don’t want to interfere with any incoming better or great solutions I’ve overlooked.  If you know the best way I hope you’ll give us a clue.  I know I’ll appreciate it.   
Reply
  • X
  • facebook
  • linkedin
  • pinterest
  • email
  • add to favorites Log in or Sign up to save your favorite articles

Replies

  1. User avater
    Mongo | Dec 16, 2014 08:58pm | #1

    I've used the channels and diffusers from elementalLED before. No issues with either the channels, shorts, or getting the diffusers on or off.

    I'll be using them again in a couple of weeks, but for a slightly different application. I'll be inserting the strip light into a channel in the bottom of a run of closet rods. See how that works out.

    1. DoRight | Dec 17, 2014 12:52pm | #5

      adhesive tape or mounting brakets?

      The ElementalLED products look pretty nice.  When you used the aluminum channels did you use the mounting brackets or just use teh tape?

      1. User avater
        Mongo | Dec 20, 2014 06:57pm | #10

        tape only

  2. calvin | Dec 16, 2014 09:01pm | #2

    Fonzie

    tape a pc up , on edge just inside the light rail.  Sort of the way you suggested.  Point it towards the backsplash, hide the dots appearing by keeping it just back of the edge of the light rail.

  3. User avater
    deadnuts | Dec 16, 2014 10:05pm | #3

    shouldn't be a problem

    The 3M backing sticks well to the aluminum channel. I've never had a probelm with conduction or the flexible polymer diffuser either.

    Here is one example whre we used it for as indirect lighting of a cathedral timber framed ceiling at the top of wall. We routed the 5/8" x 7/8" dadoes in the heel of the trusses while framing (3'0" O.C.trusses)...and then slide the tracks in 30" (5' stock cut in half) sections. Butted them up and then slide 15' of LEDstrips and diffuser as we worked back to feed each side. Dimmable and works great. Not cheap. These are meant for long service life w/o regular maintainence, but we made it is accessible if necessary. The D.Fir trim valence is made in two pieces with the top piece simply dry fit into a lower valence dado.

    1. DoRight | Dec 17, 2014 12:36pm | #4

      Looks great, but

      But there is no insulation? 

      1. User avater
        deadnuts | Dec 17, 2014 04:40pm | #6

        Sure there is

        There's plenty of insulation. It's outboard of the finishes you're seeing in the photos I presented.

        1. DoRight | Dec 17, 2014 06:54pm | #7

          on the ..

          on the outside of the blocking between the beam work?

          1. User avater
            deadnuts | Dec 18, 2014 11:54am | #8

            off topic issue

            Insulating exposed timber frame construction is not the piont of this thread and I don't want to get off topic. I posted the LED strip light photo to show an application with this product that might be helpful to Fonzi or others.. Send me a P.M. and I'd be happy to anwswer any questions you have about this particular project with regard to insulation or framing.

          2. DoRight | Dec 18, 2014 12:37pm | #9

            So in other words ..

            There is no insulation or air sealing at the plate to blocking junction.  As I thought.  Thanks.

  4. Fonzie777 | Dec 24, 2014 09:34am | #11

    Here's the way we ended up installing the LED tape under cabinet lights.   We ripped a 1 1/8 strip of cabinet filler, routed a 1/4 x 1/4 notch to allow a strip of 1 1/2 difuser to lay in the notch and on top of the under cabinet trim.  I picked an extra thick diamond diffuser panel and cut it into 1 1/2 inch strips. 

    We cut a 1/4 x 3/8 rabbet in the top to allow a 1/4 strip with a groove for the light strip.  All the inside was painted white

    We put the system together in a "U" shape, installed the LED strip with connector and drilled to be held up with 1 5/8 torx.  

    The diffuser strip on the side where the connection is made needed to be put in in two pieces to make it easy.  The difuser helped hold the wire connection up and over to the side.  

    Removing 3 screws will get the system down for strip replacement. 

    I found out the strip won't work if polarity is backwards.  So I started at the first of the circuit and got the polarity right as I went down the line.

    Also, (I suppose this in the unclear directions) you can't just cut the atrip just anywhere - it has to be cut at the special cut lines.  I was to the end and thought I could just cut it off - the last two lights didn't work.  I had to solder on a piece.  

    I plan to post a picture when we get the tile on the backsplash, window trimmed, etc.  

Log in or create an account to post a comment.

Sign up Log in

Become a member and get full access to FineHomebuilding.com

Video Shorts

Categories

  • Business
  • Code Questions
  • Construction Techniques
  • Energy, Heating & Insulation
  • General Discussion
  • Help/Work Wanted
  • Photo Gallery
  • Reader Classified
  • Tools for Home Building

Discussion Forum

Recent Posts and Replies

  • |
  • |
  • |
  • |
  • |
  • |
View More Create Post

Up Next

Video Shorts

Featured Story

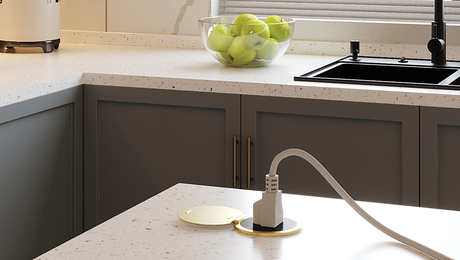
Simple and Discreet Countertop Power

A new code-compliant, spill-safe outlet from Legrand offers a sleek solution for a kitchen island plug.

Featured Video

SawStop's Portable Tablesaw is Bigger and Better Than Before

The 10-in. Jobsite Saw PRO has a wider table, a new dust-control port, and a more versatile fence, along with the same reliable safety mechanism included in all SawStop tablesaws.

Related Stories

  • Guest Suite With a Garden House
  • Podcast Episode 688: Obstructed Ridge Vent, Buying Fixer-Uppers, and Flashing Ledgers
  • FHB Podcast Segment: Finding the Right Fixer-Upper
  • Keeping It Cottage-Sized

Highlights

Fine Homebuilding All Access
Fine Homebuilding Podcast
Tool Tech
Plus, get an extra 20% off with code GIFT20

"I have learned so much thanks to the searchable articles on the FHB website. I can confidently say that I expect to be a life-long subscriber." - M.K.

Get home building tips, offers, and expert advice in your inbox

Signing you up...

This site is protected by reCAPTCHA and the Google Privacy Policy and Terms of Service apply.
See all newsletters
See all newsletters

Fine Homebuilding Magazine

  • Issue 332 - July 2025
    • Custom Built-ins With Job-Site Tools
    • Fight House Fires Through Design
    • Making the Move to Multifamily
  • Issue 331 - June 2025
    • A More Resilient Roof
    • Tool Test: You Need a Drywall Sander
    • Ducted vs. Ductless Heat Pumps
  • Issue 330 - April/May 2025
    • Deck Details for Durability
    • FAQs on HPWHs
    • 10 Tips for a Long-Lasting Paint Job
  • Issue 329 - Feb/Mar 2025
    • Smart Foundation for a Small Addition
    • A Kominka Comes West
    • Making Small Kitchens Work
  • Issue 328 - Dec/Jan 2024
    • How a Pro Replaces Columns
    • Passive House 3.0
    • Tool Test: Compact Line Lasers

Fine Home Building

Newsletter Sign-up

  • Fine Homebuilding

    Home building tips, offers, and expert advice in your inbox.

  • Green Building Advisor

    Building science and energy efficiency advice, plus special offers, in your inbox.

  • Old House Journal

    Repair, renovation, and restoration tips, plus special offers, in your inbox.

Signing you up...

This site is protected by reCAPTCHA and the Google Privacy Policy and Terms of Service apply.
See all newsletters

Follow

  • Fine Homebuilding

    Dig into cutting-edge approaches and decades of proven solutions with total access to our experts and tradespeople.

    Start Free Trial Now
    • Facebook
    • Instagram
    • X
    • LinkedIn
  • GBA Prime

    Get instant access to the latest developments in green building, research, and reports from the field.

    Start Free Trial Now
    • Facebook
    • YouTube
  • Old House Journal

    Learn how to restore, repair, update, and decorate your home.

    Subscribe Now
    • Facebook
    • Instagram
    • X

Membership & Magazine

  • Online Archive
  • Start Free Trial
  • Magazine Subscription
  • Magazine Renewal
  • Gift a Subscription
  • Customer Support
  • Privacy Preferences
  • About
  • Contact
  • Advertise
  • Careers
  • Terms of Use
  • Site Map
  • Do not sell or share my information
  • Privacy Policy
  • Accessibility
  • California Privacy Rights

© 2025 Active Interest Media. All rights reserved.

Fine Homebuilding receives a commission for items purchased through links on this site, including Amazon Associates and other affiliate advertising programs.

  • Home Group
  • Antique Trader
  • Arts & Crafts Homes
  • Bank Note Reporter
  • Cabin Life
  • Cuisine at Home
  • Fine Gardening
  • Fine Woodworking
  • Green Building Advisor
  • Garden Gate
  • Horticulture
  • Keep Craft Alive
  • Log Home Living
  • Military Trader/Vehicles
  • Numismatic News
  • Numismaster
  • Old Cars Weekly
  • Old House Journal
  • Period Homes
  • Popular Woodworking
  • Script
  • ShopNotes
  • Sports Collectors Digest
  • Threads
  • Timber Home Living
  • Traditional Building
  • Woodsmith
  • World Coin News
  • Writer's Digest
Active Interest Media logo
X
X
This is a dialog window which overlays the main content of the page. The modal window is a 'site map' of the most critical areas of the site. Pressing the Escape (ESC) button will close the modal and bring you back to where you were on the page.

Main Menu

  • How-To
  • Design
  • Tools & Materials
  • Video
  • Blogs
  • Forum
  • Project Guides
  • Reader Projects
  • Magazine
  • Members
  • FHB House

Podcasts

  • FHB Podcast
  • ProTalk

Webinars

  • Upcoming and On-Demand

Podcasts

  • FHB Podcast
  • ProTalk

Webinars

  • Upcoming and On-Demand

Popular Topics

  • Kitchens
  • Business
  • Bedrooms
  • Roofs
  • Architecture and Design
  • Green Building
  • Decks
  • Framing
  • Safety
  • Remodeling
  • Bathrooms
  • Windows
  • Tilework
  • Ceilings
  • HVAC

Magazine

  • Current Issue
  • Past Issues
  • Magazine Index
  • Subscribe
  • Online Archive
  • Author Guidelines

All Access

  • Member Home
  • Start Free Trial
  • Gift Membership

Online Learning

  • Courses
  • Project Guides
  • Reader Projects
  • Podcast

More

  • FHB Ambassadors
  • FHB House
  • Customer Support

Account

  • Log In
  • Join

Newsletter

Get home building tips, offers, and expert advice in your inbox

Signing you up...

This site is protected by reCAPTCHA and the Google Privacy Policy and Terms of Service apply.
See all newsletters
See all newsletters

Follow

  • X
  • YouTube
  • instagram
  • facebook
  • pinterest
  • Tiktok

Join All Access

Become a member and get instant access to thousands of videos, how-tos, tool reviews, and design features.

Start Your Free Trial

Subscribe

FHB Magazine

Start your subscription today and save up to 70%

Subscribe

Enjoy unlimited access to Fine Homebuilding. Join Now

Already a member? Log in

We hope you’ve enjoyed your free articles. To keep reading, become a member today.

Get complete site access to expert advice, how-to videos, Code Check, and more, plus the print magazine.

Start your FREE trial

Already a member? Log in

Privacy Policy Update

We use cookies, pixels, script and other tracking technologies to analyze and improve our service, to improve and personalize content, and for advertising to you. We also share information about your use of our site with third-party social media, advertising and analytics partners. You can view our Privacy Policy here and our Terms of Use here.

Cookies

Analytics

These cookies help us track site metrics to improve our sites and provide a better user experience.

Advertising/Social Media

These cookies are used to serve advertisements aligned with your interests.

Essential

These cookies are required to provide basic functions like page navigation and access to secure areas of the website.

Delete My Data

Delete all cookies and associated data