I’ve had a couple of people ask about how to make your own door jambs. I’ll try to outline my approach but questions would be helpful because we all glaze over the things which are more familar to us. 1st I am very poor at spelling and my wife, who is VERY good at spelling is at Girls Night Out, so there will be lots of spelling mistakes. 2nd I don’t much like routers, so if you are the type of guy who has to plug it in first to use it, probably want to stop reading now. No where will a router be used for the fairly simple task of making door jambs.
Now that I’ve lost most of you I’ll inpart what little I know.
Making your own door jambs probably only makes sense if you are doing custom work. In spec houses, etc. the walls will be 2×4 or 2×6 with 1/2″ sheetrock, so why go to all the trouble if you can buy it cheaper.
When I go up to a RO I check if the wall is plumb. If it isn’t is it close enough to cheat to hang the jamb plumb, and then rabbet the door casing. Next I take a try-square and measure the width of the wall, then check in several places to see if it is the same. If it is you can set your table saw and rip everything to that width. Most of the time it isn’t. I measure the top of the right leg & the bottom to the right leg then cut a board with that taper. Repeat for the left leg. The jamb header has to have the width at the top of both the left & right leg so it make taper as well.
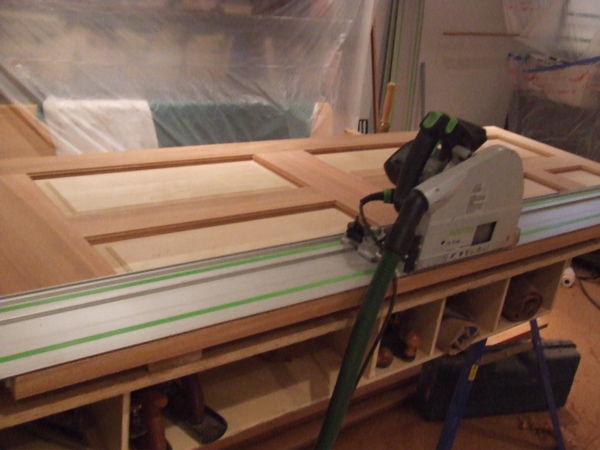
Next cut the rabbet for the jamb header to fit into. I set the depth stop on the sliding chop saw to 3/8″ and remove waste material the width of the stock.
Clean, square & set finial depth with a shoulder plane & router plane.


Replies
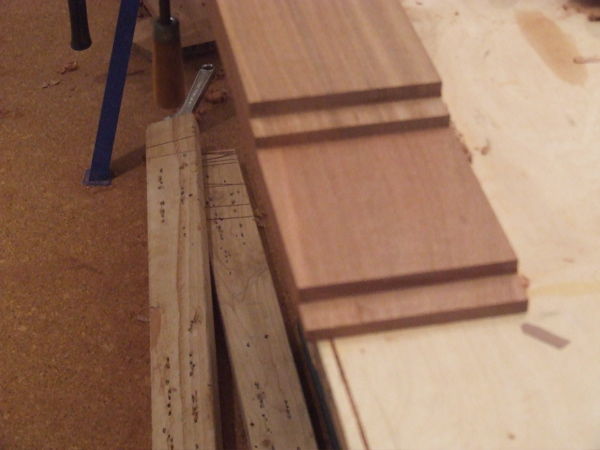
Now that the legs & header are cut it is time to make the story pole to lay out for the hinges.
I take a thin stick and fast-cap glue on a small square of thin material. The thickness of the material shoud be the offset of hinges you are using, most of the time it is around 1/8". This piece of 1/8" sticks past the story pole on all sides. To lay out the pole lay the door flat and hook the end of the story pole over the top of the door, measure down 7" and make a knife line. Next take the hinge you will use on this job and slide it up to the knife in the knife line then mark the other side of the hinge with the knife. With a try square mark lines the width in which the will go. To mark along the long side of the mortise do not use a knife at the end of the try-square, it will wander with the grain. Instead use a marking gauge. Repeat from the bottom of the door measuring up 11".
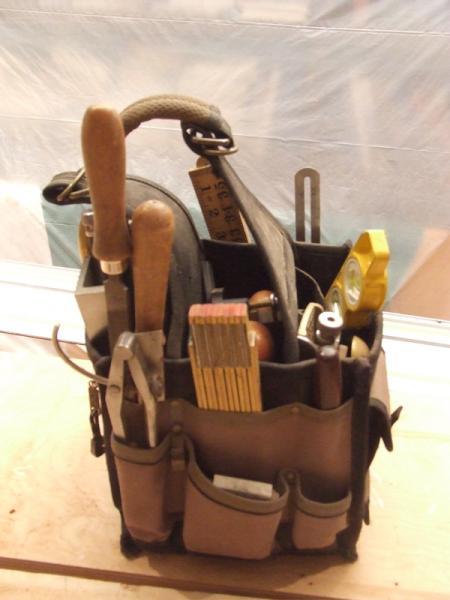
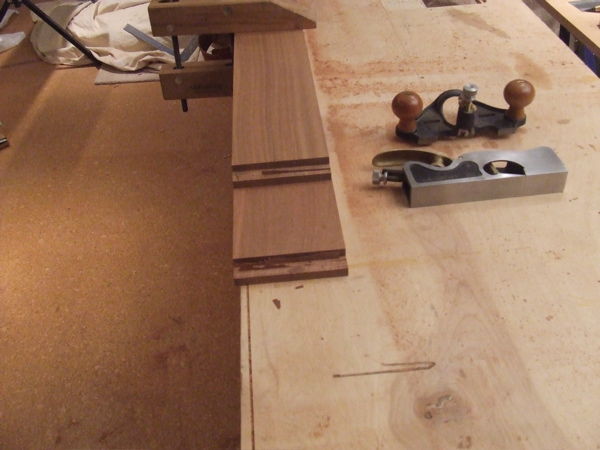
Mortising for the jamb is next after the story pole is made. Take the story pole and bring it up flush with the edge of the rabbet on the jamb. The lay out marks are now about 1/8" lower to allow for the reveal at the top of the door. Lay out is the same as for the door.To mortise for the hinge I use a chisel & a butt mortise plane. A side note: trying to use hand tools and not sharpening them is like having a saws-all and never changing the blade. You don't blame the saws-all and say it works too slow, you get a sharp blade- same with hand tools.After the mortising is done clean up the surfaces. Those who haven't tuned out before will probably do so now. I use a edge plane to clean off the saw marks on the sides. And (here we go) a card scraper the remove any planer marks off the face. And then I use a #2 molding plane to round over the edges.
I can go into more detail if people are intererested. In this attachment is a pic of the guy who changed my whole approach several years ago. He is retired now, a 3rd generation craftsman of the highest order. I used to be a power tool man all the way. More power meant more accomplished. Until Darrell, who was near retired at the time beat the pants off me in productivity one day by using a few hand tools. It took awhile to learn how to use them, but I am faster now in my 50's than I was in my 40's and the quality has improved.
"I can go into more detail if people are intererested."Please do.I only need to make a jamb or hang a door in an existing jamb once in a great while. Your story pole idea is priceless for me. I don't want to buy a hinge jig for occasional use.I'm very interested in your hand tool approach. I do small jobs in houses that are almost always occupied. I spend more time setting up my power tool,stringing the cord and containing the dust than doing the task sometimes.
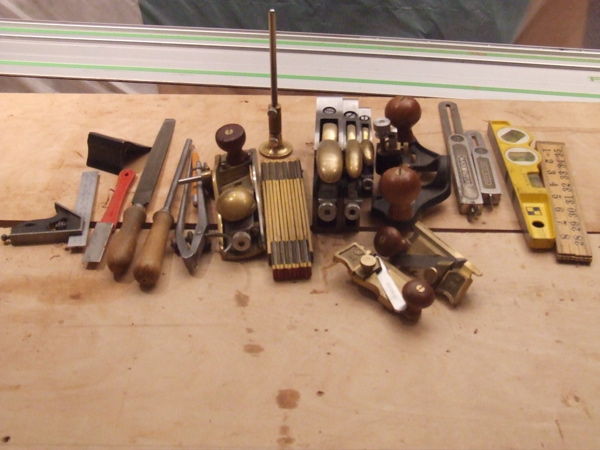
Doode, you have ALL the toys! I really like the way the shop vac works with the planes<G> Please keep them coming... If dogs run free, then what must be,
Must be, and that is all.
True love can make a blade of grass
Stand up straight and tall.
In harmony with the cosmic sea,
True love needs no company,
It can cure the soul, it can make it whole,
If dogs run free.
Good thread. What I like best is the picture of Darell and the others deeply paying attention. Don't see that enough lately Mike
Trust in God, but row away from the rocks.
I learned on hand tool but went to power then half back to hand tools. I never did master the power plane. I still have my old cordless Yankee. My dad gave it to me.
Excellent work Mathewson. Your spelling is pretty good too. Bob's next test date: 12/10/07
My wife is home lol, better than a dictionary!
"I take a thin stick and fast-cap glue on a small square of thin material. The thickness of the material shoud be the offset of hinges you are using, most of the time it is around 1/8". This piece of 1/8" sticks past the story pole on all sides."
I'm not sure what you mean here. I couldn't get enough resolution on your pic to understand what you were doing.
It looks like you glue a 1/8" thick square of wood on the story pole end and that it sticks out 1/8" on all four sides. I can see how marking with the square over the top of the door allows you to bring everything down 1/8", but why does the square hang out on all 4 sides?
What do you mean by hinge offset? Are you referring to the thickness of the hinge material that will have to be recessed into the jamb and the door?
I enjoy building jambs, but have not got it down to a science, and do not do it often enough to have a system developed. I pretty much use a router and a chisel to do most of the work.
And yes, I do not sharpen my chisels nearly enough.
Having said all that, I still enjoy seeing how others do this type of craftsmanship. Please continue the story.
I just glue a 1/8" piece of material on the end of a thin stick. It only needs to protrude on one side, but since these are fast & throw-away I don't worry about the other 3 sides. The only reason for the one side sticking out is to hook over the top of the door.
The hinge off set is the amount distance (gap) when the hinge is closed. I.E. the gap between the jamb and door.
Edited 5/2/2008 10:16 pm ET by mathewson
I have to admit that I'm jealous of your tooling.
First time I made jambs was thirty some years ago. Working on a log home and every wall required a different thickness jamb. I used a radial arm saw back then both for ripping and for the dado at head. Those were for applied stops like yours.
But all I make now are solid jambs - integral stop. To mill that, I take the chunk of meat out on the TS, then clean it up on the William's and Hussey with a 2" wide dado cutter. That step can be done with a shaper or router table also, with the right bit.
Welcome to the
Taunton University of Knowledge FHB Campus at Breaktime.
where ...
Excellence is its own reward!
Please continue. I too love to work with hand tools. I have yet to be good enough to be faster with them. I once bet a guy that I could cut through a 6X6 with a handsaw faster than he could with a 7-1/4" circ saw. I won $100!!
"It is what it is."
I expected more people to say they don't use hand tools at all. I wonder how many use them and if so what they use.
My most used hand tools are, hand planes, and chisels. Then I guess they would be marking and measuring tools and then saws.
"It is what it is."
LOL! That's an interesting bet. I had to think awhile before I could figure out what I'd do. I think I'd take that bet. Since I don't normally take bets that I might lose, I'd probably check myself at home and test the speed both ways until I knew for sure I could do it. It would be a close call and if it was too close I'd pass. I did lose a dollar to a guy who used MY handsaw to cut a spike in half and didn't dull the teeth. Bob's next test date: 12/10/07
What slowed him down was squaring around the 6x6 b/c he needed lines on both sides of the board and he had to make 2 cuts. I only needed one. My first year as a cabinetmaker's apprentice, I couldn't use anything with a cord. So I got pretty good at using hand tools. I still use them once in a while to keep the tools and myself sharp.
"It is what it is."
Something I forgot to mention on cutting the mortises. Once the knife lines are marked you need to deepen the lines with a chisel and then back chisel to the line a couple of times so as not to make the orginal lines wider than you intended them to be.
Thank you sir, I do the same ans to be sure to keep the bevel toward the waste.
"It is what it is."
It really depends. If the jambs are only off a little then either rabbiting the trim or gouging the drywall may make sense. Its really not a big deal to make a jamb though.
You are right a whole prehung unit is maybe close to cost or a little cheaper, but if you're in a pinch and need to hang the door now as opposed to waiting two weeks for a special jamb its just not that big a deal.
When you make your own jambs do you use square corner hinges or round corner? For the round corner hinges what do you use to get the radius?
After reading what some of you guys do, I feel like "caveman carpenter". I just trace the hinge on the jamb then run it free hand with a router.
If its a square hinge I just finish up the cut with a chisel.
I plowed rabbets in two very short jamb legs for a transom I built and installed above a set of french doors today and thought of your thread and your hand tool collection. You have me looking through wood working catalogues.
Brian,I admit to a tool collecting addiction. I was at the Woodworking Show last week and bought the Veratas router plane. I already own 5. But it had some features which the others didn't and besides when I'm on a job an there is a young kid who I think has promise I'll dig through find a plane which I hope he'll use. I've sold a lot $100 planes for $10.It's not a plane but have you ever used a Stanley 30 angle divider? I've carried one for years in my bags.
I have a cheap aluminum angle divider that is a variation on the Stanley. I see that the real thing sells for $40 - $100 on Ebay.What do you most often use it for?
Doors, windows, stairs, etc. anything that is out of square and needs trim. The new festool chopsaw has one as part of the unit, but it is so big it is crazy.
Here are some pics of the finished job. It was a basement finish.In all I think 2 jambs were the same width, floors way out of level & ceiling heights changing in every room. Made things interesting.
Wow, that's JFB! Just____Beautiful.Spheramid Enterprises Architectural Woodworks
Repairs, Remodeling, Restorations
"We strive for conversion,we get lost in conversation, and wallow in consternation. "Me.
Thanks, it was a fun job.
Breathtaking!
Forrest - another caveman carpenter
Here are a couple more pics, only these ones make my toes curl when I see them. The owner went on vacation & I started another job while he was away. Only thing is he scheduled the painters to do the finish not per schedule but while he was away. Its my own fault, should have finished right away. It's done now, he doesn't know the difference but it really bugs me.