Knotty western red cedar bevel siding
casadelsolbrian
| Posted in General Discussion on
Removing leaking poorly flashed vertical shiplap siding from a Post and Beam SIP paneled house and installing new windows, rain screen system with new horizontal bevel siding. Considering using Tight Knotty Western Red Cedar: 11/16″ x 8″ rated both sides.Will prime first with oil then 2 finish coats coats of paint…
Clear is over budget ( double the cost) and I don’t feel comfortable using finger joint cedar. Has anyone painted knotty cedar with good results?


Replies
You going to use a rain
Whoops, came back to edit. You answered my questions clearly in original post. My bad.
So let me throw this out there. Not so much anymore, but as recently as 20 years ago, virtually every house out here in the Great Northwest had some form of cedar siding on it somewhere.
The use of latex paints, and their impermeability, led us through many hoops dealing with blistering paint - backpriming, rainscreens, housewrap/felt paper changes, until today, I'm wondering really, if it wouldn't be smarter to NOT backprime cedar when it's gonna get painted, when applied over a rain screen. Maybe it's better to allow any moisture an exit path out through the back of the board?
Really hoping some folks jump in here with opinions. Lots of food for thought here.
A few years back...
I did demos for the Western Red Cedar Lumber Association, and became very familiar with their installation standards. Their take was to coat all 6 sides of very clap with a stain-blocking primer/sealer. They didn't specifically say to use oil in the literature, but the reps all swore oil was the way to go, followed with a 100% acrylic topcoat. They went as far as to say that if you installed the cedar unfinished, to consider that to be a permanent condition because paint wouldn't stick to non-back and end-primed wood.
Installation standards
Yeah. That was (is) probably the apex of the learning curve; the safest for them to advise. Pretty hard to argue against a thorough sealing like that.
Still, it has been bothering me all weekend. Here's the thing, I'm not comfortable saying I know how many of our standard building practices are based on good sound choices, and how many are reactions to previous decisions that created problems.
So let's go all the way back to this.
Why did Western Red Cedar become a favorite choice for siding in the first place? There were a few reasons, like first off, we had all these HUGE straight grained trees out here that milled easilly but lacked structural strength. And when mature, these cedars were saturated with naural oils, which made the lumber pretty darned decay resistant.
So for a lot of very practical reasons, from logging efficiency to weather resistance, it made sense that we'd use it for exterior weather cladding like siding and roofing. Plus, lots of people thought it looked great.
And there were so many of these big old mature trees that from when they started really logging in tha Pacific NW in the late 1800's through about the early 1960's it became the standard exterior building material (that's what, 2 generations of home owners and builders, 3 generations?).
But there was a problem. These cedar trees grow slow. I mean REALLY slow. And our demand for it outstripped the supply, and by the way, lots of people preferred painted sidng, so they painted over the face of that cedar, pretty much nullifying one of the key advatages cedar had in the first place, the fact that the natural oils repelled water.
Then, because these paints became more impermeable, we saw a lot of blistering as we sealed one face of the once porous siding with an impermeable skin and we developed techniques and products to deal with adhesion issues and from the late 1960's until today we have gone farther and farther down the rabbit hole reacting to the unexpected results of each previous step in the sequence.
Okay, there are probably some inaccurate assumptions underlying what I just wrote, but I think these are the broad strokes of how we got to where we are today.
But I wonder, was it smart to use paint over cedar in the first place? Is it smart today with the choices we have?
Fair question.
There's no need to paint cedar heartwood, that's true. Beyond that, it's an asthetic decision. And you can always just stain it or use a penetrating oil.
One factor you didn't mention is that we started insulating houses in that same time frame. Between that and going from balloon framing to platform framing, we seriously changed how our buildings respond to moisture. So, where you might have once gotten away with not back priming because the house's huge natural ventilation rate prevented moisture buildup behind the siding, we've changed the rate of drying so that back-priming is needed.
Only with oil
With the natural oils in cedar, the best results have always been to prime with oil base. This is especially true with knotts, as they seem to bleed more than the rest of the wood. Good oil base paints are getting hard to find but there are still some out there.
Not priming the back of the boards to allow moisture to escape raises an interesting question. Are the rain-wraps of today completely water proof, ensuring that the moisture will not get into the structure. Do they allow the house to breate, if so wouldn't there be condensation where the warm and cool air meet?
I lean towards back-priming, but .....
I am in the PNW. I've left my new cedar siding unfinished by choice so the OP's question is purely academic for me. My two-cents worth is about the cedar siding I removed from my house during a remodel. This was western red, 1x6 vertical t&g. It was painted on the exposed face with nothing on the back. As far as I could tell, the paint was in good condition. I don't know if it was oil or water based. It wasn't over a rainscreen... simply nailed over sheathing. No felt, no tyvek.
Edit, to add: I want to emphasize that the old cedar siding was not back primed and this is in a high moisture environment. Now according to current thought, back priming is vital to the health of wood siding. But that doesn't seem to ring true in my house's case. Why? It would seem to me that there are additional factors at work here.
I'm not trying to make the case that one should not back prime wood siding. It can't be harmful and might be helpful. But doing so must be a tremendous hassle and adds cost to an already costly process. Here, in the PNW, it rains for days at a time. Where does one do the back priming... who has a shop or garage large enough to work in with thousands of feet of siding? So, OK, one figures out how/where/when to do the priming all the while thinking, "His house didn't need it, why does mine?"
Sorry, I guess I'm just being devil's advocate.
Tight shell?
Well, one place I've routinely found blistering paint is beneath windows. And what do I usually find INSIDE the house on the interior wall under those same windows? Cadet type wall heaters. I'm pretty sure there's a causal relationship there as heat radiates through the CDX into the back of the siding, providing a great environment for moisture that affects adhesion of the paint on the other face of the siding. Maybe your house doesn't share that one detail?
Or maybe your siding was installed when really dry...below 10% moisture level maybe, then the paint kept moisture from getting in there and any that did wicked out into the sheathing because there was no moisture barrier between the siding and sheathing?
Just a couple ideas that spring to mind. I'm sure there are plenty more examples of additional factors.
No one set of details is universal, will ensure sucess. That's what makes it so challenging a profession.
Windows also leak
You might be onto something with the heaters being below the windows driving moisture outward. But another factor could be poor window flashing - In my experience, there are about three people in the US who do that right, and at least two of them are in this thread.
We didn't have any of those Cadet style heaters. I've got one now but its on an interior wall... and we really don't ever turn it on.
I think that out of all you suggest, the lack of any house wrap material might have played a role. The vertical siding had lots of channels to let any moisture drain and even gave a bit of a gap for air exchange such as a rainscreen provides. So, perhaps I ought to praise the crazy guy who built this house rather than shake my head in disbelief at some of the things he did. Naw!
"...the lack of any house
"...the lack of any house wrap material might have played a role."
Yeah, that could very well be. There could have been just enough free air movement for the moisture to fluctuate without building up anywhere, plus that sheathing had some capilary potential to help.
So let me ask you this - this priming 6 edges of siding - is that so different than vapor barriers on both sides of a wall? If moisture DOES get into the siding, like through a joint between two boards, or by following a knot crack or nail, how does it get out? Seems to me like it gets trapped in there and if enough gets trapped and accumulates it can definitely lead to far worse problems than blistering paint.
Do you remember how the sheathing looked when you took the siding off? Was it blackened? Like in an almost waterstained pattern but more evenly distributed (still irregular but not gravity driven like water stains)?
Paint doesn't waterproof
It just slows the penetration. It all depends on the relative concentration of water inside and out, and resulting vapor drive. I imagine you could build up enough water inside a painted piece of wood that its vapor pressure could blow off the paint. But mostly that doesn't happen because the paint slows the process and evens out the highs and lows.
Bill Rose could explain it. Have you read his Water in Buildings, An Architect's Guide?
The point of coating all 6 sides is that the moisture level will be nearly uniform throughout the material. This means that there will be far less differential movement of the material, less stress on the material, less stress on the coating, less cracking, less caulk failure, et al.
Painting cedar siding
Thanks for all the imput, priming all 6 sides makes the most sense, Western Red Cedar Assoc. is recommending also.
Still trying to decide if the STK cedar bevel siding will be right for the project. Have seen knotty siding stained, have also painted some samples, knots don't bother me, most likely house will be white, knots staining the paint might be a problem for some time.
Clear smooth cedar would better suit the look but at 2x the cost it is hard to justify these days. Has anyone installed WRC Finger joint thats been up a while. Have seen a few different samples from suppliers, some looks better that others. Paint is critical for longevity, would help if this house had decent overhangs.
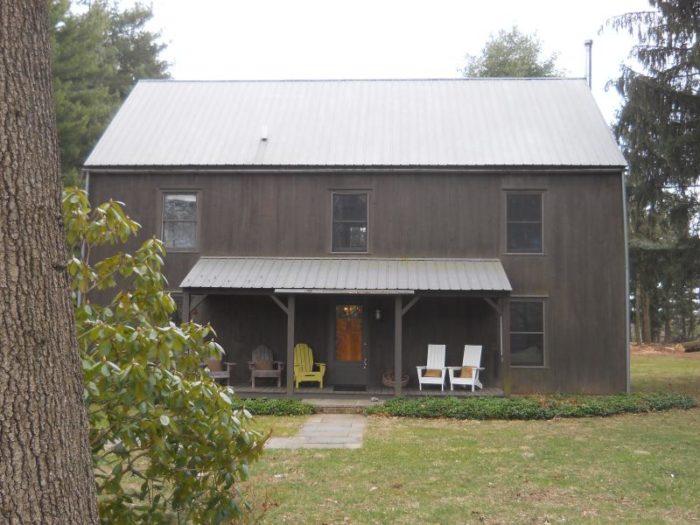
Also thinking about 15lb felt 1/2 lap instead of Tyvek or other. Going to rip some of the existing 5/4" WRC shiplap siding for battens on rainscreen. Might be issues with unprimed cedar and the house wraps? Existing wrap is in pretty rough condition after 20 yrs.Was definitely getting wet where the shiplap opened up and the unflashed windows. Pic of the OSB on the SIPs that needs to be replaced around alot of the windows.
casa
Here in NW Ohio I can get clear fingerjointed primed cedar. Quality is good, last job-5 yrs ago looks great and has held up. We used a solid colored stain instead of paint. Something to think about.
Sun heat might be the only concern I'd have w/knots. Might bleed or halo.
Finger joint cedar
Its available here also, did you use solid color stain? Can you see the FJ s?
casa
The homowner (my customer who happens to be the neighbor next to our drive out of the woods) used solid colored stain-sort of barn red........not as bright. I drive by my work every day and it looks fine. I did not see the joints and don't want to go trudge through deep snow to find out close up. They are satisfied.
remember of course, different manufacturers-sometimes different quality.
Jim,
The plywood sheathing had staining that seems to be the result of exterior water intrusion. There were dark lines at each vertical lap, growing progressivly darker and wider nearer the bottom. A photo of the gable end shows markedly less discoloration near the roof than just above the sill. The area under the covered front porch has sheathing looking nearly brand new.
Then there was the sheathing behind a rock wainscoat: rot, rot, bugs and more rot. This was the only area that had 15# felt on the sheathing. One might then conclude that the felt caused the rot. But that would be neglecting the near lack of flashing above the applied rock, the porusness of the rock itself, and the leaky shower on the inside of that wall.
You will be pleased to learn that the offending rock has a new life as a retaining wall. The rotted sheathing had no redeeming value at all so was discarded. And the bugs went somewhere else to live.
By the way.... two foot overhangs certainly help my house to battle the elements except during the frequent storms that drive rain horizontally onto my south-west exposure. I hear you regarding the importance of good flashing.
William B. Rose
The book isn't an easy read, but it really helped me to understand water. Bill's a great guy - did an article with him sometime last century.