Sometimes you get a fun job like this one. The customer asked about demo’ing this old shed and building a new one because the floor had rotted out and she refused to use it anymore because of her fear of bugs, snakes and rodents.
Rather than tear it down and build a new one, I told her we could fix this one up. Other than the floor and being in serious need of a new paint job, the shed is in surprisingly good shape.
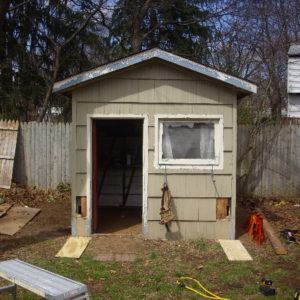
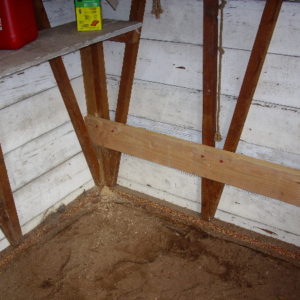
Here it is right after I started. I’ve cut holes for 2X6 girders that will pass through the shed from front to back.
I carefully removed 1 shingle so I can re-install it when I’m done.
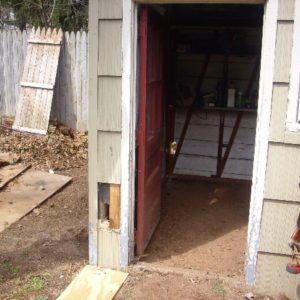
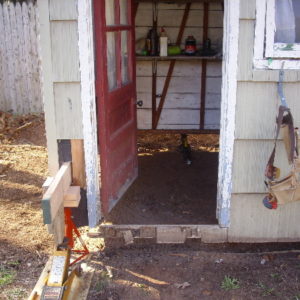
In this pic, I’ve removed the old pieces of the floor with a rake and the shed continues to just sit on mostly dirt.
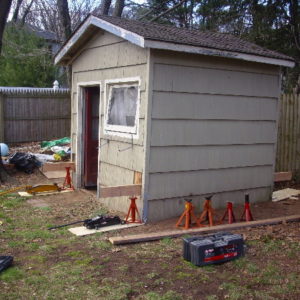
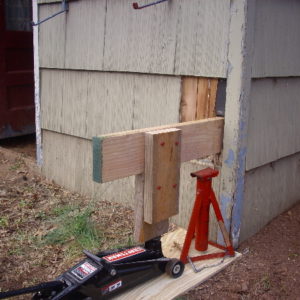
Here’s the pass-through girders in place and I’m setting up the jacks. I borrowed 3 jacks since I only own 1. It’s nice to have family.
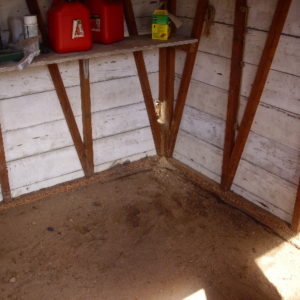
The girder is bolted to the framing from the inside using Trusslok screws. The girder is a 2X6. The first one broke along a fault in the wood and I had to get another one. To do it again, I would use a 2X8.
This is how I set up the jacks.
And the lifting begins. Little by little working my way around the 4 corners and trying to keep it as level as possible.
Free of the ground. That’s about it for Day 1.
Day 2 starts with a platform frame. The band clamps pull it square until I can tack on some plywood.
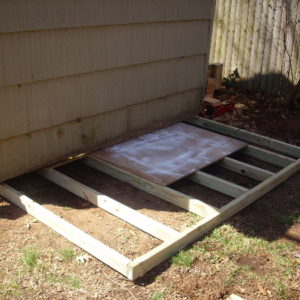
Sliding the platform under the shed. 2 people would have made light work of this step, but I just had me.
Halfway under. I put handles on thinking I could pull it in, but that was better in theory than practice.
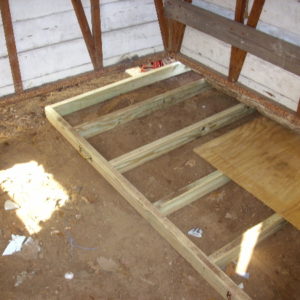
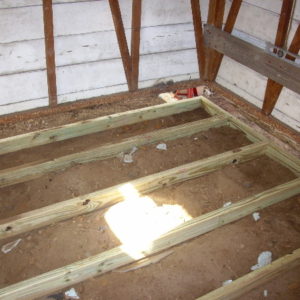
All the way under. Now it needs to be leveled.
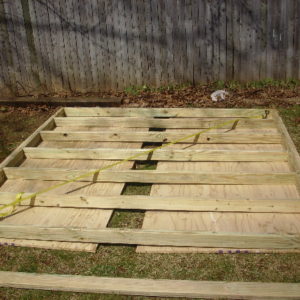
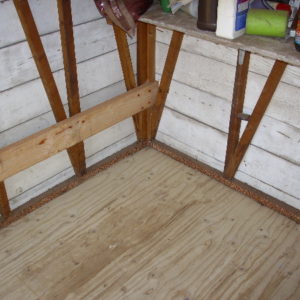
After leveling, the decking gets put on and the shed is lowered onto it.
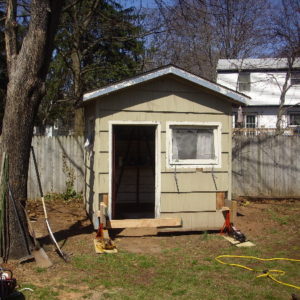
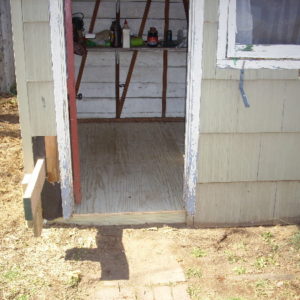
It sits a little higher than it used to. All the better to prevent future rot.
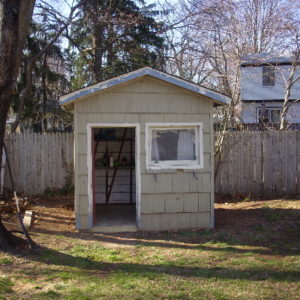
All done! Well, ok I still have to replace the broken glass and paint it. Maybe if I remember, I’ll post a pic when it’s REALLY all done.




Replies
Thats some interesting framing!
Yes, it is. It seems to add tremendous structural rigidity. Even after settling into dirt for many years, the shed is still quite sound and square. In fact, it seemed that if I lifted one corner ahead of the others, the shed didn't rack at all.
The framing and the shiplap sheathing were important factors in my wanting to save it. Oh yeah, and that "green" thing.
Nice job Don.
Looks like it was fun to do.
J. D. Reynolds
Home Improvements
Thanks for the post, good ole Yankee ingenuity.
There is no questioning that DonCanDo it.
.
What was that framing? 2x2 with every otther one angled? Wonder if it was some kind of kit. Cool job
I have to ask though, why wouldn't you lift it a little further and then set that new frame on some sleepers (like 4x4 or 4x6)? That would get that siding up off the ground.
why wouldn't you lift it a little further and then set that new frame on some sleepers (like 4x4 or 4x6)?
I thought about that, but that red cedar siding has been in direct contact with the ground for many years and shows very little damage. You can see where it was buried in this picture:
View Image
I figure if it held up that well so far, my fix has to be good for at least another 10 years. And any higher and I would have to add a ramp at the door. Not a big deal, but I don't want to be careless with my customer's money.
slick...
Life is not a journey to the grave with the intention of arriving safely in a pretty and well preserved body, but rather to skid in broadside, thoroughly used up, totally worn out, and loudly proclaiming
WOW!!! What a Ride!
Forget the primal scream, just ROAR!!!
Nicely done. Looks like a good warm up for our deck project.
Speaking of which- I've got work in May, but no definite dates for anything. So whatever dates you come up should be OK with me, as long as you give me some notice.
Also, I was thinking that we'll need to brace the deck so that once we separate it from the ledger, it won't fall over toward the lake.
Sorry I didn't return your e-mail. I was tired from playing golf for 4 days straight, and haven't done much at night. Today I actually got bills out. A customer called yesterday asking for hers, from work I did a month or so back. So I figured I might as well do the rest, and get some money in LOL
I was tired from playing golf for 4 days straight, and haven't done much at night.
Oh F U!
Come on....somebody hadda say it, LOL
J. D. Reynolds
Home Improvements
LOL! Ya beat me to it.
I knew I could count on you guys for support LOL
Thanks.
Can we shoot for the week of May 11?
Yeah, that works for me.
We may or may not be living in Wanaque by then, so as things get closer, we can decide about commuting together.
Don,
You get the Golden Hammer Award for this week!!
Very cool and green. I'm gonna store this one in the memory bank.
Cheers,
Bob
Thanks everyone. It's about as rewarding to get such positive feedback as it was to do the project itself.
Absolutely - posting here is a big motivation for doing things around the house!
Forrest
Pretty neat that you didn't even have to clear the shelves to do this project.
Clean burning natural gas is the energy independence future of America.
Just in case anyone likes to see before and after (and who doesn't) here you go:
View Image
No, those aren't 2 sheds side-by-side. It just came out looking that way by coincidence.
It's sort of a cute little shed all cleaned up. It was well worth saving. In hindsight, it's funny to think that if I had told the homeowner that it couldn't be saved, they would have a new shed for more than twice what this cost.
Great Job! You know I'm a big fan of fixing it rather than throwing it away.Kevin
Don - THANK YOU for posting this thread. I have 2 properties with very similar sheds that are just melting into the ground. I've been planning to tackle them (and hoping to salvage them, not replace them). Now I know EXACTLY how I'm going to approach it. Did you have four jacks or just move two of them around corner to corner till you got the height you wanted?
Also, can you describe how to post pictures in the thread rather than just as attachments? I think everyone here has figured that out but me.
Thanks again ... Bill.
I used 4 jacks and 4 jack stands. Each corner got lifted a little bit - maybe 1/4 to 1/2 inch - and I moved on to the next corner. When the space between the jack stand and the girder got a little over 1-1/2", I inserted a 2X block so that if it slipped off the jack it wouldn't fall too far.
Before I dragged the platform underneath, each corner was supported by a jack stand AND a jack.
This particular shed was extremely well-built, but for an ordinary shed, I would have used diagonal bracing to prevent racking.
To get the pic in the thread:
First of all, keep it small (100 - 200 kb).
Attach the file, then preview the post.
Click on the attachment to see it.
Right click on the pic and select copy
Use the browser's back button.
Select revise.
Wherever you want the pic, right click and select paste.
Hey Don, looks good. Can you come to my place and do the same thing ? Twice?
Actually just kidding, too tight now to do much of anything!
Rich
nice...
looks good..
Life is not a journey to the grave with the intention of arriving safely in a pretty and well preserved body, but rather to skid in broadside, thoroughly used up, totally worn out, and loudly proclaiming<!----><!----><!---->
WOW!!! What a Ride!
Forget the primal scream, just ROAR!!!
"Some days it's just not worth chewing through the restraints"
I have a 12 x 18 single car garage that had about 3 inches of the siding below ground in the front from years of adding gravel, settling, etc. The thing is built like a tank...4x8 solid oak bottom plates and full 2x4 oak studs. I wanted to raise it up to the same level as the house (it was about 2.5 feet below the floor of the house) and thought about doing it the same way you did this one. I was going to lift it up enough to set on a trailer and move it out of the way so a block foundation could be built. But I got a crane operator to come down and set it off for $160.00. After we finished the foundation he came back and set it on for another $160.00. Best money I ever spent! :-) Saved a lot of "sweat equity".
Edited 4/9/2009 1:06 am ET by aswhitehead
twernt me...
Life is not a journey to the grave with the intention of arriving safely in a pretty and well preserved body, but rather to skid in broadside, thoroughly used up, totally worn out, and loudly proclaiming<!----><!----><!---->
WOW!!! What a Ride!
Forget the primal scream, just ROAR!!!
"Some days it's just not worth chewing through the restraints"
The cost of the crane really does sound like a bargain.
No pictures?
I did it last year and not sure I took any pictures of the crane. I will have to look. I always kick myself after a project because I forget to take pictures of the progress.
Awesome! Love your lifting meathod. I'll put that in my back pocket for later!