I just picked up a Peel-A-Shim pack (http://www.speedshims.com/) at Jeff Daniels’ family’s lumberyard in Chelsea, MI.
I’d call them Post-It shims, because that’s the physical format (almost). Each Peel-A-Shim says that it is “Engineered Wood Fiber with Moisture Guard.”
Each shim is about the size of a calling card, 1 7/8″x3 3/8″, and they come in 1/2″ thick decks of 22. They say you can use them to shim from 1/32″ to 1/2″, but my math tells me that each shim must measure 1/44″ in thickness.
I paid about $3.70 for 6 decks of shims. Buy ‘em in bulk and you can cut that in half.
The idea is you peel off the backer strip to expose the adhesive. Stick on the full 1/2″ thick deck, and then peel off the individual (non-adhesive Post-It) shims until you like what you’ve got.
The shims themselves are non-adhesive, bonded together into a deck only by the glue painted onto their top edges, just like a standard notepad.
These folks focus on pre-plumbing jambs, sticking the deck on the stud, then peeling individual shims off until you have plumbed and straightened the rough jamb.
But what happens if you peel off one too many? Each 1/2″ deck has an adhesive back, but the individual shims do not. You’ll end up tossing the peel-offs into your shim box, along with all the other cut-off butts and tips. That’s not so bad, but it’s not much improvement on business as usual.
I’m waiting until each shim has its own sticky back before I really embrace this system.
I’ll still add a pack or two to my collection of tongue depressors, popsicle sticks, mini popsicle sticks, and coffee stirrers, though, as one more useful shimming increment.
Whatever it takes, ya know?
One suggestion I would make for their product line would be to make larger decks as well, designed for shimming hinges. 4 1/2″ perhaps, with perforations at 4″, 3 1/2″, and 3″. Perforated lengthwise as well, so you can shim the hinge fully, or the back edge or front edge only.
(If you don’t know why you’d shim only one edge, that’s another subject that’s been covered pretty well – do an advanced search.)
SO…
Anyone else try these shims?
AitchKay


Replies
Okay, went to the web site you provided & watched the vidio they had showing their system in use. Never mind the peel & stick shims I like the flying nail gun & leval, makes me wonder what other automatic flying tools they have.
Without trying them myself think I'll stick with cedar shim shingles
No one should regard themselve as "God's gift to man." But rather a mere man whos gifts are from God.
Edited 3/7/2009 10:41 pm ET by CardiacPaul
They are a handy shim to have.
I use ply rip blocks in various thicknesses and just use the peel-a-shim to fine tune.
Tapered cedar and pine are still handy for some things too.
Edited 3/7/2009 11:08 pm ET by basswood
No kidding, I once bought a package of standard white pine shims from HD.
The packaging said "New and Improved"
I should have kept a package to show people. I didn't notice it until I got back to the jobsite and then lmao.Whenever government "gives" to one it must first take from another.
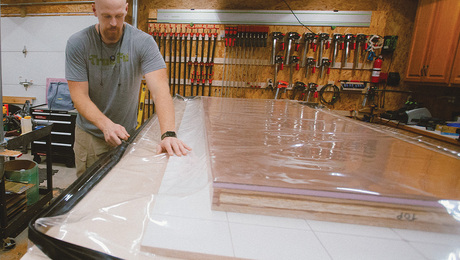
Re: 5x32_x_5_plys_of_peelashim.jpgInteresting. How many shims in your 1/2†deck?When I stack 10 of mine, I get about 7/32†(just using my tape measure). That works out to .021875†per shim. That’s consistent with 1/44†(.0227â€) x 22 shims = 1/2†per deck.Maybe your ply was 5/32†before it was sanded?But where’s your “collection of tongue depressors, popsicle sticks, mini popsicle sticks, and coffee stirrers...†and, I forgot to add, various sizes of barbecue skewers, for plugging bad screw holes? I cut all of these down to 4 1/2†so that they’ll fit in old racquetball jars (which are also good for storing rolls of sticky-back sandpaper).Once the jambs are up, and for remodeling, and tweaking the fit of existing doors, the wooden coffee-stirrers are the ones I reach for most. They’re pretty thin, and at 1/4†wide, they’re perfect for shimming hinges:Put one at either edge of the mortise --need to move the door over even more? REMOVE the one at the back edge.Door rubbing on the latch side? Put one under the back edge of the hinge to pull the door back. That’s one reason I always bevel both edges of the door, to gain that extra tweaking room.Once I like the fit, I put some Titebond on the stirrers. The hinge will clamp it, and once it’s dry, no painter is going to lose it, making me come back on a Saturday because “you didn’t hang the door right.â€(BTW, thanks again for the fluting post!)AitchKay
Edited 3/8/2009 1:33 pm ET by AitchKay
I'll have to check on the thickness of the shims...Shims are fun to get creative with. A decade before peel-a-shim, I started using playing cards in the same manner... just never thought to take it to the next level with the "book binding" and sticky back.Another opportunity to make a fortune missed.Glad you like the fluting tip (you mean the connect the dots, no burn method--right?).Have a good day,Brian
I remember reading in an early FWW about playing-card shims. I can't remember now how many thousandths they measure, but it's standardized, and after stating the thickness, the guy said, "You can bet on it!"And yes, I was referring to the connect-the-dots method in your column on fluting posts, or your post on fluting columns, I forget which one.AitchKay
I like the idea of the playing cards or the peel-a-shims for thinner, more precise shimming. Up to now the 'thin' shims in my shim bucket have been plam. - regular thickness and bending thickness.
I do pre-shim door openings, but I staple the shims on (hammer tacker or narrow crown)... so the adhesive "post-it" feature is not something I really use.
I mark the hinge heights on my level for this.