I am painting a room with a combination of newly hung drywall and old walls with existing paint. We are painting mostly white/natural and the existing colors are very saturated oranges and greens.
<!—-><!—-> <!—->
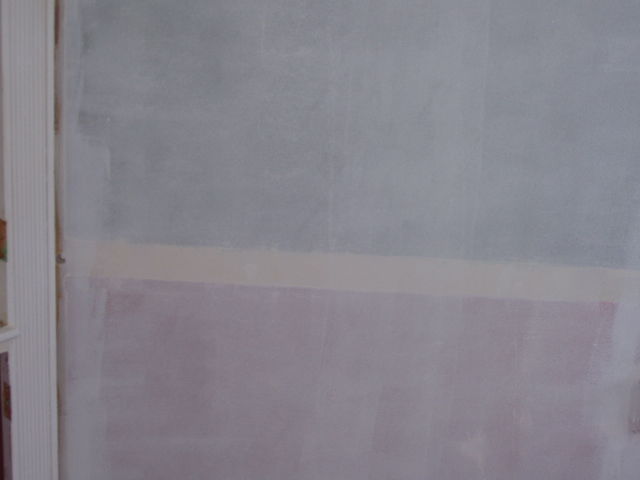
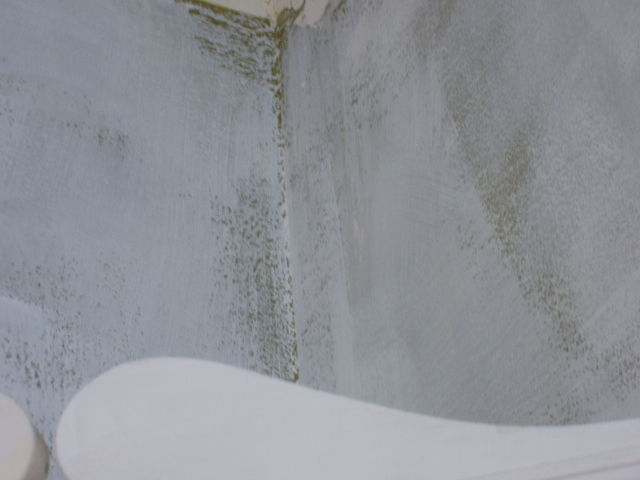
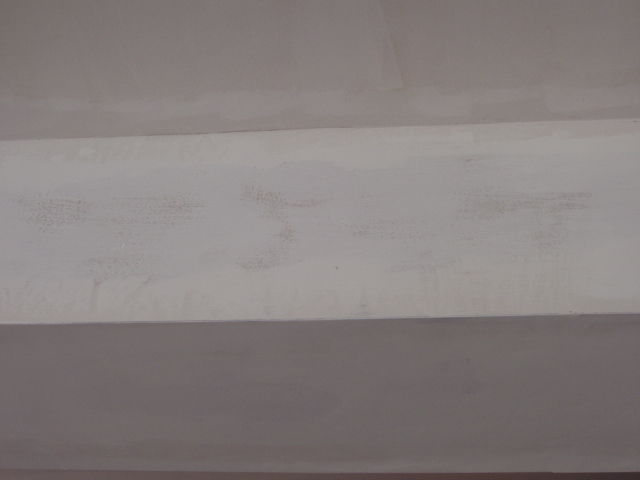
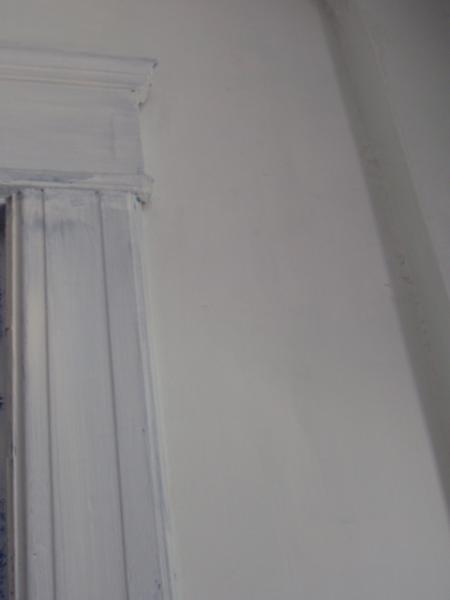
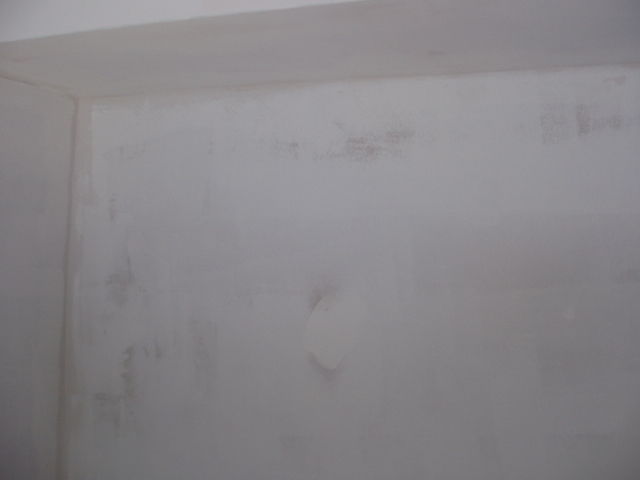
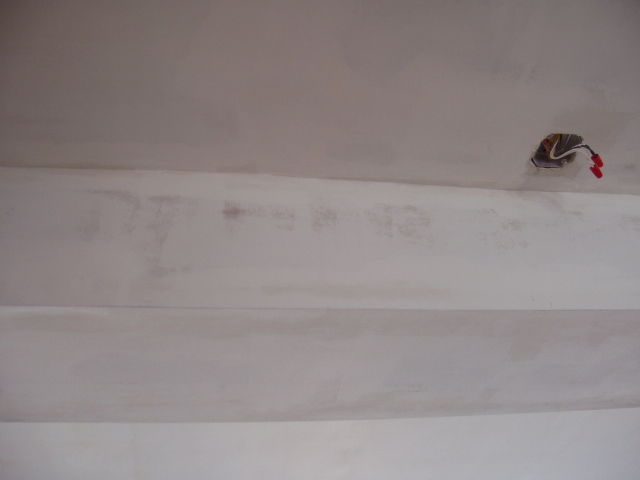
I’ve primed the walls but the primer I used (Benjamin Moore, it was very tacky and hard to spread) combined with the irregularity of the walls lead to sort of a poor job; not very surface is fully covered, I can see where some brush strokes end, etc. See images below (the first are of the old walls the rest of the new).
<!—-> <!—->
My questions:
– Should I touch up the primer to make sure that every portion of the walls are covered? – – How good is “good enough†with primer?
– Should I put another coat of primer over the orange/green (I can still see the color through the primer)
– Any technique advice that would help me prime better (I did the walls and ceiling with a nice roller which worked well, the small portions with a good brush which worked less well)
Thanks, Mischa


Replies
I didn't look at the pictures, so this is off the cuff.
After you brush, back roll with a roller for consistent texture. Do this for both primer and paint. Use a small (4") roller to get into small areas. Have the roller cover damp with paint, but not dripping, so that you won't pick up paint from the surface. Use the same type of roller cover as you do with your bigger roller.
To insure that you seal out bright colors, prime first with white pigmented shellac. You can spot prime with this.
Then apply a full coat of primer over *everything*. This will insure good adhesion of the paint, and an even surface. If you are at all concerned, apply another coat of primer. It can't hurt.
Normally, you don't need a very thick coat of primer so any brush strokes, which should be minimal, should disappear under the top coat. For previously painted surfaces, the primer is acting as a bonding agent. For new drywall, the primer is acting as a sealer. It doesn't take much primer to do this and it's hard to tell from the pictures, but you may have stretched the primer a little too far.
In paint_004, it looks like something is bleeding through the primer. I would definitely hit this, and any similar spots, again. If it still bleeds through, it's time for an oil-based primer or BIN. If it bleeds through the primer, it will bleed through the top coat.
You may need to re-spackle any bad spots. Now is the time to do it. Each subsequent coat of primer or paint will just accentuate any flaws.
"In paint_004, it looks like something is bleeding through the primer. I would definitely hit this, and any similar spots, again. If it still bleeds through, it's time for an oil-based primer or BIN. If it bleeds through the primer, it will bleed through the top coat."It does not look like it is bleeding through. To me it looks like it just did not get a good covering in that corner.And in 01 I see paint "ropes" where the roller was push too hard or an overloaded cheap roller was used.After getting the paint on the wall run the "dry" roller over it in a random pattern to smooth out any of the ropes..
William the Geezer, the sequel to Billy the Kid - Shoe
And in 01 I see paint "ropes" where the roller was push too hard or an overloaded cheap roller was used.
Take a good look at your monitor. That's where the ropes must be because there is no picture in paint_001. In fact, it's 0 bytes. :-)
Maybe you see them in other pics, I don't. But it does seem that BigMish was in a BigRush and could have done a neater job, even though it's just the primer.
Hey, Don-
I've got a question for you. I've been working on the house we'll be moving into, dealing with a lot of nail pops and a previous poor paint job.
I finally got a coat of primer on today, and there were a couple of small areas where it looks like the primer didn't stick; like its over grease, or silicone, or something.
Anyway, I was thinking I'd wash those areas with TSP, then spot prime with shellac-base BIN, then probably re-prime.
Do you think this would work? Do you have any other suggestions on how to deal with this?
Thanks!
Sometimes I'll see "grease" spots that won't take primer. Usually, it's where someone had been touching the wall with dirty hands or hand cream. I've also seen where someone slept with their head against the wall leaving a "greasy" spot. At another house, someone with a bug phobia had sprayed bug killer in many areas of the bedroom creating numerous "greasy" spots.
In all of these cases, I used an oil-based primer rather than BIN. I feel like it adheres better. So much better, in fact, that I really only did a quick cleaning with a damp cloth and no TSP. Admittedly that was a shortcut, but the job turned out fine.
However, if you want to prime and then paint 20 minutes later (as I often do), then BIN should also work fine, but don't use it on large areas because there is a risk of crazing since BIN is not very flexible.
If it's actually silicone, which is unlikely, then I don't know what you would do.
I've always understood that you can't paint oil over latex, so since I've already primed the walls with a PVA latex primer, I'm guessing I can't now use an oil primer?
Considering the condition of these walls, I probably should have washed everything first before I painted. Oh, well. I like dragging work on my own house out. Keeps my wife from thinking I can get things done in a weekend. <G>
These spots are weird. The primer went on and sort of streaked on the wall; not the usual stippling from the roller. And the spots are up fairly high, near the ceiling.
I've always understood that you can't paint oil over latex...
That caution is for exterior painting only. The reasoning is that the latex can expand/contract with the surface as the temperature/humidity changes, but the oil can't. In theory, this can lead to peeling.
I say "in theory" because I've never seen it happen, but I do very little exterior painting. Also, if it were a common problem, it seems like it would never be a good idea to use oil for exterior surfaces, but this is specifically where oil primer works better.
I have seen a peculiar issue when using oil primer on interior walls. If you oil prime, then spackle, then latex prime, you can get bubbles in the spackle. I THINK the reason this happens is because the spackle absorbs moisture from the primer, but it can't dry evenly because the oil primer is a lot more impervious to moisture transmission. So the moisture migrating one-way can cause bubbles.
The solution is easy: oil primer, spackle, then oil primer again.
I don't know what's on those walls, but I have noticed an interesting issue when painting walls that haven't been painted for many, many years. The paint (or primer) never covers as well near the ceiling. It seems that the paint near the ceiling dries out more over the years and becomes more porous than the rest of the walls. I talking about the top several inches, no more than a foot. I'm assuming this is caused by hot air rising and settling near the ceiling. It seems like an unlikely thing to happen, but I've noticed it often enough that I'm sure it isn't just coincidence.
I learned NOT to put6 oil over latex the hard way.We had some nice stools that the wife had painted with latex 2-3 years previously, but it was not wearing well, so I sprayed a nice coat of oil paint over, reasoning that it would wear better. The latex was just some leftover wall paint, and the oil was a trim satin.Well, the next AM I went out to the shop to check whether it was dry, and the latex had blistered and was wrinkling like a prune - lifting right away from the sealer coat under it.
Welcome to the Taunton University of Knowledge FHB Campus at Breaktime. where ... Excellence is its own reward!
Primer is not paint. Some primers have a fair amount of pigment but others don't. You can have pigment added to primer to help in covering existing color. As someone else stated, primers seal the new drywall and provide adhesion for subsequent coats of paint. They don't necessarily color the wall on their own. They do their job but don't expect a visual appearance like that of paint.
Beat it to fit / Paint it to match
I agree with Hammer1--most primer is made to provide good adhesion between it and the wall and it and the top coats. Most primer is semi-transparent at best. I have had problems with BenMoore primer in the past with it not covering and it wants to wrap back up on the roller if you roll it more than an up and down stroke.
I would recommend "High Hiding" primer. I know Lowe's has it (I think it is called "Ultra Hide" and may be made by Glidden?). It has lots of titanium dioxide and that pigment will really cover the previous color. I have had very good luck with it. There is a difference between "bleed through" where the old paint literally bleeds through the next coats of paint, and "showing through" because the next coats of paint are not opaque. High hiding primer is the answer for priming over bright/bold colors.
Sounds like I should:
lightly sand down the roping
touch up the primer to make sure that all spots are covered with brush and 4” roller
Should I do another coat of primer over the old colored walls as I didn’t use “high hiding”?
lightly sand down the roping Yes
touch up the primer to make sure that all spots are covered with brush and 4” roller Couldn't hurt
Should I do another coat of primer over the old colored walls as I didn’t use “high hiding”? I wouldn't bother--you may need two coats of your top coat, but the paint made for top coats has more pigment. Two coats of primer isn't that great, IMO. You could go to the store and buy high hiding primer and do a second primer coat with that, but that's a lot of fooling around. May just need to do two top coats.
Some times a photo can be inaccurate by comparisson to being right there, but what I think I see in these photos is that you were trying to wring that roller dry on the walls, not getting near enough paint applied. Perhaps you had too fine a nap on the roller to hold much paint.
All the above mentioned is true about primer not covering well to begin with, but it really does look to me like you failed to get much on the wall in the first place. The idea is to apply as heavy a coat as possible without leaving drips and runs.
It looks too, like there is some uneven texture on the wall and you used a fine thin nap roller, maybe even a thin foam roller.
Get a roller cover with about a 1/4" nap, saturate it, apply paint, then backroll to smooth it evenly.
Welcome to the
Taunton University of Knowledge FHB Campus at Breaktime.
where ...
Excellence is its own reward!