I have an interesting dilema. I’ve been remodeling and restoring houses for over ten years, and only recently (in my own house) have I had the opprotunity to install a new bathtub.
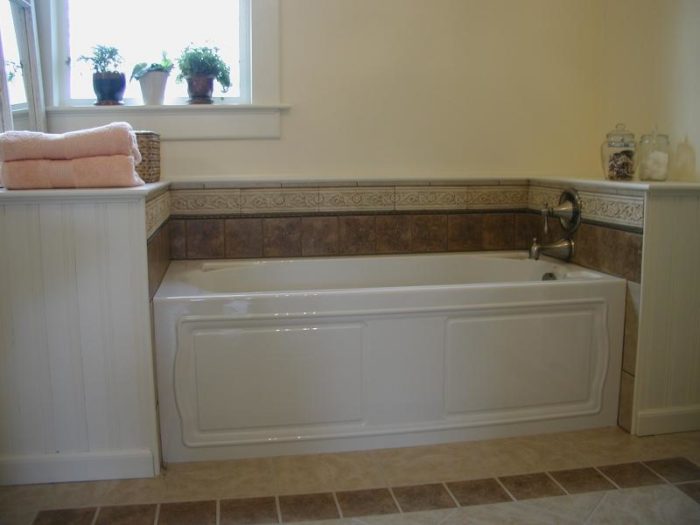
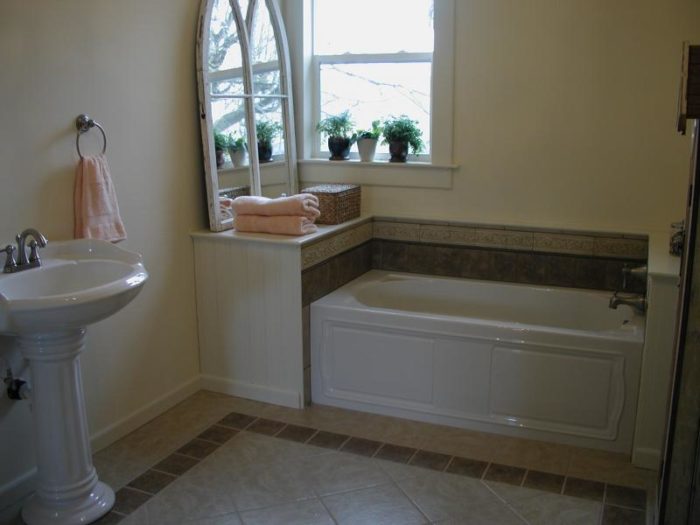
We are restoring/remodeling an 1880’s farm house. I turned one of the upstairs bedrooms into a Masterbath and a walk in closet. The original bedroom was 13’x13′ and I made the bathroom 8’x13′ w/ a 5’x13′ walk in closet. The floor joists are old growth 2″x8″ 24″o.c., I reinforced them by sistering new 2×8’s the full span of the floor, resulting in 4×8’s 24″ o.c. over a 13′ span. The floor has 3 1/2″ T&G fir that I put 1/2″ hardib (including under the tub) and then tiled. The tub is a 5′ x 21″ deep acrylic tub that I put a tiled surround around.
I installed the tub along the exterior wall per the manufacturers instructions using construction adhesive on the feet. The tub had a slight squeak when it was framed in before I tiled which went away when a placed a shim under the lip of the front on the faucet side. After I tiled, everything was fine until the first bath. Now the tub squeaks everytime you step near it. I did grout right up to the tub because I was in a hurry and was planning on pulling the grout out and caulking later. I haven’t had time for that yet, but I wondered if it would really help anyway.
On a side note: I installed the same type of tub in a downstairs bath and while I was tiling it, there was squeaking as well I noticed that a piece of Hardib was rubbing against the tub and when I adjusted it went away. The floor under this tub is rock solid with 2×8’s 12″o.c. with two layers of 3/4″ plywood.
At long last, my question is: Does anyone have any ideas on the best method of making the squeak go away? Should I pull the grout from around the tub and inbetween the tiles and try to put 1/4″ wide shims along the front? Or, is there something about acrylic tubs that I should know. Any input would be greatly appreciated.
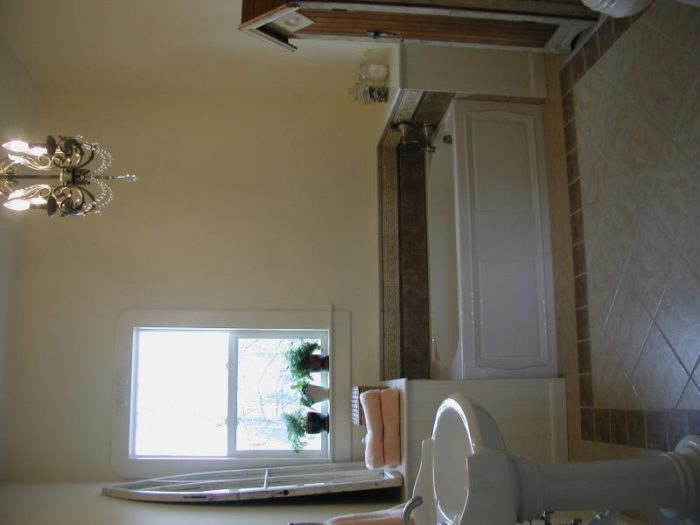
P.S. I’ve posted a couple of comments, but this is my first question to BT. I’ve attached some photos. (I deleted the photos because of their size and posted them later at a smaller size)
Many thanks,
Ottcarpentry
Edited 2/12/2007 7:13 pm ET by ottcarpentry


Replies
View Image
only life affirming platitudes allowed - Doud '07
Thanks for putting the picture up. How did you get it to load like that? Were the files to large? (first posting)Thanks,Ottcarpentry
Greetings ottcarp,
Many viewers of Breaktime are on a dialup system and cannot download real large files.
To assist the dialups with photos, keeping the KB picture size to preferably 50 to 75 KBs or at least under 100KBs goes a long way.
It is overly time consuming for dialups to open large files if they can open them at all.
Posting a pic within the post can be found at 84420.85 but IMHO should be done sparsely and with a very low KB size as dialups must wait for a pic to open sometimes rather long blocks of time and often the post will end up being skipped over because of this complication.
If you've ever used dialup after becoming accustomed to cable/DSL you'd feel for the folks stuck on dialup.
Using an embedded photo like that for a question and not as a documentary style thread is best embedded as a single sample of the problem where a reader can open the other photos as needed.
24441.75 is a link to an older thread in the archives which contains a lot of data regarding a popular picture sizing download called Irfanview.
Some posters, when desiring to display a large photo for needed detail or what ever reason, will chose to post the attachment twice, once in the large KB format and again in the smaller 50 to 75KB range for the dialups.
Cheers
only life affirming platitudes allowed - Doud '07
Edited 2/12/2007 5:50 pm ET by rez
Normally we set tubs and shower bases in a plaster or sandmix bed so all parts of the bottom is firmly supported. Finding the cause of the squeek could be a difficult hunt. Along the front tile to tub joinst is very possible. I would get the grout out of there and repack with a color matched caulk (available at your tile supply). If that doesn't end the sound, you might look to the tub deck/tile joint. After that, maybe you can access some possible areas by removing the panels of the tub.
Best of luck.A great place for Information, Comraderie, and a sucker punch.
Remodeling Contractor just outside the Glass City.
http://www.quittintime.com/
Calvin,Thanks for the reply. I use mortar all the time for building showers but, I didn't like the prospect of trying to set the tub in it and end up with it level and exactly where I wanted it. Do you use really wet mortar and leave plenty of room around the area where the feet go? Or do you just usually use plaster? Do you also bed the lip of the tub as well?Ottcarpentry
I don't use a thick bed, just judge areas and the thickness needed to support. I have never done a lip of the tub.A great place for Information, Comraderie, and a sucker punch.
Remodeling Contractor just outside the Glass City.
http://www.quittintime.com/
We use mortar mixed dry under the tub also. Some of the acrylics do squeak but with a mortar bed it goes away as it is not pivoting on any particular point. This method also keeps some of the tubs from settling and breaking the caulk joint later down the road. A method to keep the mortar from actually sticking to fiberglass tubs is to mix it in a trash bag and set the bag under the bottom. DanT
Dan, did you read my previous post? Have you ever tried foaming in a tub? I like your idea of the plastic bag though.. Last shower I did was a neo-angle from Kohler. The installation sheet said if using it over a "particle board" floor, that a felt underlayment was absolutely required to eliminate the possibility of squeaks (no felt needed over a ply floor though). I found that interesting. I foamed that one in. No squeaks.
Check your install sheet next time and see if it says to NOT get any mortar under the feet. I've seen that more often than not. They seem pretty adamant about it, for whatever reason.
Pinko,The directions did say not to get any mortar under the feet. That's a large part of why I decided to glue the feet (wood) instead of trying to mortar. I certianly would try the garbage bag idea from Dan if I do decide to mortar a future tub. I did grout up to the tub ( I have always caulked on every other job) because I was in a hurry and it is my bathroom and I planned on cleaning it out and caulking if it gave me trouble. Which it obviously is. It is nice to know that acrylic tubs can have this issue. I can plan ahead to ensure no problems in the future.Thanks,Ottcarpentry
We have foamed tubs in during a retro fit if someone was having a support issue. My experience (50+ baths in the last 2 years) has been that most tubs (unless cast iron, we have used 1 in 7 years) are simply not as rigid as they used to be and given time and america's increasing body weight they will flex. Thus we use mortar on all installs except American Standard Americast which they specify to not use mortar.
We also mortar in all shower bases. I can't tell you how many showers we have repaired/replaced simply because the base started flexing, the drain finally worked loose, water leaked and rotted out the floor. I have drilled up under a tub or shower base at times and shot foam in to avoid pulling the unit that leaked but the floor was solid. I think mortar is a cheap safety issue, simple to do and whether needed or not provides a safety barrier that will last years. DanT
Dan,Thanks for the tip! That's a great idea and I will definetly remember it for future projects. I'm always coming up with creative/unusual ways to handle restoration issues and will certianly keep that one in my arsonal.Ottcarpentry
I've recently been noticing the same types of little squeaks with these acrylic tubs after a couple installs I recently did. The squeaks are basically a result of poor design on the manufacturers part. I think they're only avoidable if you know what to do before installing the tub, otherwise you're stuck with them.
Next time you're installing an acrylic tub, turn it on it's side and you will see what looks like a support grid made out of the same acrylic as the tub. It looks as if that grid is there for a purpose but for what ever strange reason they have a lot of play and this is where the squeaks come from and I wish the manufacturers would weld/glue that grid on better.
I think the best solution on your next install would be setting the tub in a thick bed of cheap thin-set verses construction adhesive. The installation instructions actually advise this. This way the thin-set has a better chance of filling in that squeaky support grid. Of course, after you set the tub, give it at least a day or two to fully harden before you step in it.
Is there any prayer you can get to the bottom of your tub from the underneath? If so, then you might be able to locate the squeak with the help of an assistant stepping in and out of the tub from above.
Mike
Rez,Thanks for the information, Here are some smaller pics.Ottcarpentry
Mike,Thanks for your reply. I did notice the grid and assumed (I know, never ####...u..me) that it was enough reinforcement to make it stable. The instructions said gluing down the feet was enough. It is a very nice tub and stays warm, I'd use one again in a heartbeat. There's just a squeak. The kitchen below is finished and there's 1x8 lapboard above the sheetrock anyways. I like the Idea of thinset. I can certianly see it moving easily out of the way of the feet. I guess I'll end up removing the grout from infront of the base and see if the squeak goes away. If not I'll proceed deeper. It's at times like this I wish I had a MM. (Still paying on too many other tools right now.)Thanks again.Ottcarpentry
Hey Ott, were the tub feet Styrofoam? If it squeaks when you walk NEAR the tub, this tells me it's the floor flexing and rubbing against the border or the feet underneath. Pull out the grout at the transition and listen for any change in the squeak. You didn't grout the wall to tub transition, did you? And I usually do not set tubs/shower bases in anything--just level the floor dead flat beforehand. I've found that 1) mortar beds are more trouble than their worth, as it rarely adds any degree of stiffness to a quality tub 2) this is almost always an "optional" step according to most manufacturers, and when it is done, most newer tubs/showers will specify that the installer NOT get any mortar under the feet (how does one do this?) 3) If you F something up and need to pull out the tub (ever drop a full mud tray into a new acrylic tub?) God help you. Sometimes I've used spray foam w/ a layer of painters plastic btw it and the tub/shower bottom. This eliminates the 'hollow' feel of the tub floor + it has the added bonus of insulating the tub for longer bath-time ;) Don't overdo it, though--the foam can actually expand the tub up and out of level!