Started work on a straight run flyer made of Canary wood this week.
Should be fun, It will be exposed on all sides .
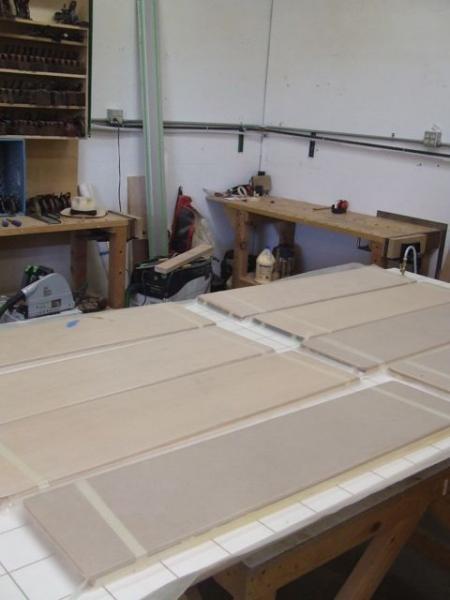
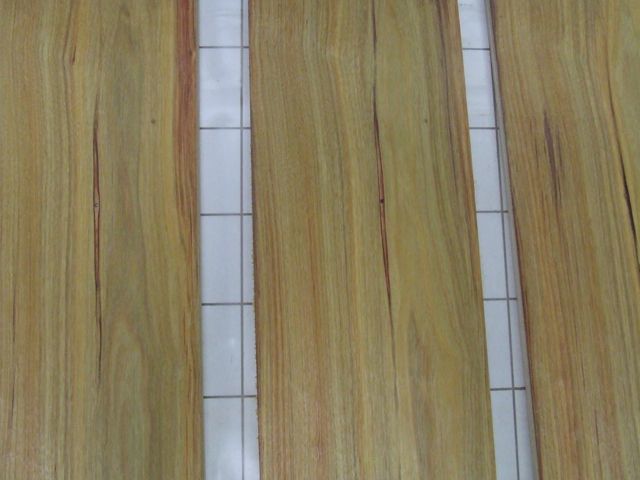
I resawed and sequenced the veneers so that the grain patterns will flow on both the face side and the underside. Canary wood has an interesting grain patterns from what I think may be a reaction to bugs, but by sequencing them a defect becomes an attractive feature.
Next week I’ll start veneering the curbed stringers


Replies
Be careful, some people are allergic to canary wood, like me.
What are you using for adhesive in the press?
Edited 9/25/2009 12:24 am by migraine
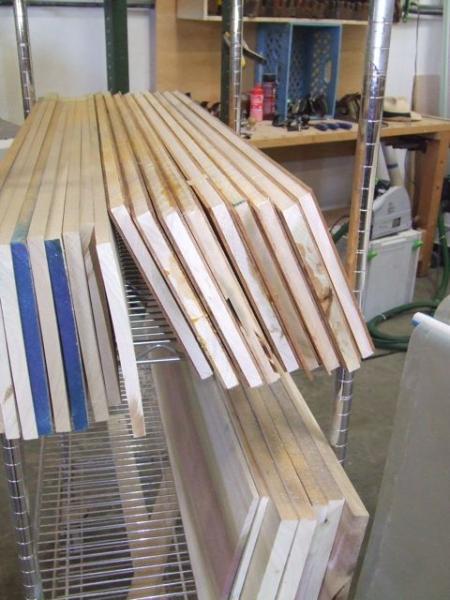
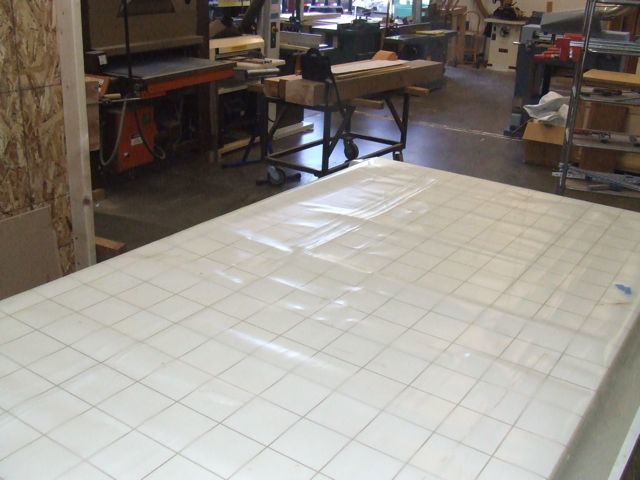
Canary wood doesn't seem to bother me. cedar is what gets to me, luckily I don't work with it much.For flat work I use titebond glue, for anything else it is mostly weldwood.Here are a couple of pics of the resaw.
Mathewson- Very interesting....and what a nice place you have to work. I have never worked with canary wood...and to be honest...have never heard of it!
Stan
Thanks Stan,Most of the approach I've learned about stairs comes from the guys at breaktime and JlC. From Armin approach I've gone to vacuum veneering hardwood faces onto popular cores. Now I take customers to the local hardwood supplier and telling them to pick a wood that they like to look of, hence this one will be canary wood.In the past I've made the parts and then assembled on site, but this time After seeing some of your pics I'm thinking of building the whole thing in shop and then shipping compete. The finished weight has me a little concerned. Hauling it into the house and then lifting into place seems like it might be a problem.
When I was working with Canary wood I found it only bothered me when once the sanding started. Nothing too bad, just irritating.
Brad
Nice looking material, and nice looking shop from what I can see of it. Looking forward to more photos
I'm like Stan. Never heard of it. Where is it from/grown? States or where?
Canary wood comes from South America, I'm told it is a sustainably grown wood. Besides the look of the material it was a driving factor in the customers choice. I'm trying to employ some green building practices. By resawing and applying it as a veneer a great deal less of it can be used.
I was not checking up on you greenness. I had just not heard of it and was curious.I don't know what's going on here at breaktime. I had to sign in just to read your reply. They seem to be getting less and less friendly around here.
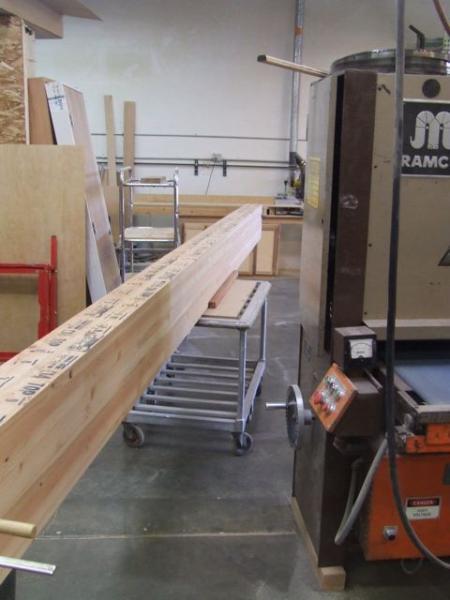
Started gluing up the stringers today.At 3" wide these things are going to be very stout and really heavy.
The vacuum bag really applies even pressure. In one of the pics glue is pressed through a worm hole.
Some pics attached.
so how do you get bags that long and narrow or diff shapes and sizes?
buy them or make them?
if you make them what kind of plastic do u use?
can you reuse them?
does the squeeze out stick to the plastic?
Mike,The bags are made of 30 mil polyurethane that I bought from Quality Vac Products. It comes 52" wide and you mark off as many feet as you need to make a bag. It can be folded length wise for a narrow bag or in half for a wide bag.The seams are glued together, I have a can at the shop but can't remember what it is called at the moment.The bags last for years and the glue usually doesn't stick to it, but it can be cleaned off if it does.Hope that helps,
Keith
Are you running an air compressor driven venturi for vac or a vane pump? I have a vane pump currently and while I've used both in the Lutherie biz, I wish I had a venturi that auto cycles.
I had a bud helping me on a big veneering job once and I was vaccing the veneers on, he never saw one in action..so I said watch this, and took his ham and cheese sammich still in the lunch baggie and put it in my vac table. Flattened that suckker like a dime. LOL.Spheramid Enterprises Architectural Woodworks
Repairs, Remodeling, Restorations
View Image
I have a Gast oil-less pump. At the moment it runs constantly which is annoying to listen to. I have an old 80 gallon tank from an air compressor and a vacuum controller. I need to quit stalling and hook the thing up.Love your story about the sandwich, I'll bet the look on his face was priceless.
Yeah it was, and it was HIS pump, used for vestment casting silver and brass, I just tee'ed off the table with my hose. He then gave me the pump, being as he had no use for it being retired from the school districts employ as a shop teacher.
I want a venturi, but then the comp is running more..I dunno which is worse..the hissing or the pump running.
I do watch the gage and shut off at 26 inches or so, then if it bleeds down to 20-22 I restart the pump, but you have to be watching it closely while you work. I am worried I'll kill the pump, mine is oil filled.Spheramid Enterprises Architectural Woodworks
Repairs, Remodeling, Restorations
View Image
Mathewson- I am very impressed. I need to consider doing this kind of work myself. I am building two 216 degree curved curb style stringers now...but would have to reinvent how I build the core...then vacuum bag it up. I would have to experiment first to see what problems vacuum bagging a tightly curved stringer would cause.
Keep up the good posting here....it reminds me of how Breaktime used to be.
Stan
Thanks for the tutorial. Couple of questions:How many pieces of Canary wood (never heard of it, either) are one stringer face? It looks like they're bookmatched pieces... how did you keep them from sliding around in the bag?http://www.tvwsolar.com
We'll have a kid
Or maybe we'll rent one
He's got to be straight
We don't want a bent one
He'll drink his baby brew
From a big brass cup
Someday he may be president
If things loosen up
Not sure what he does, but I use making tape on the blanks of what ever, and cover with cardboard so glue and sharp corners don't mess up the bag.Spheramid Enterprises Architectural Woodworks
Repairs, Remodeling, Restorations
View Image
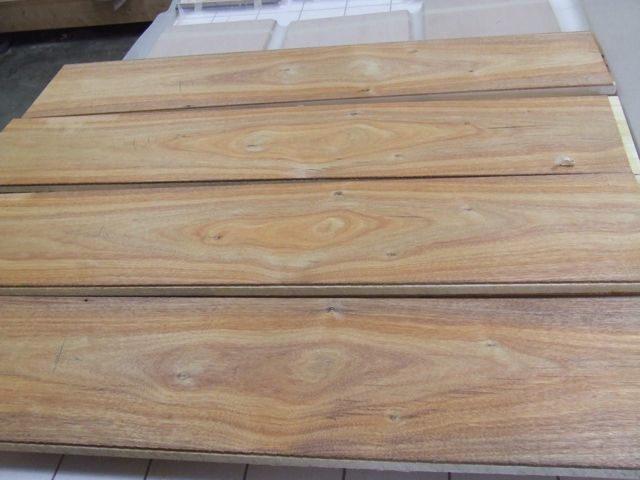
Snort,I use one piece of 8/4 to make one side of the stringer. I end up with 4 pieces which net out a little over 1/4" after planing. They are book-matched and then the other 2 are book-matched and flipped end for end in an effort to have all grains match.To keep things from moving all the parts are held together with 2-hole veneer tape, glue is applied and then I use stretch wrap in several places over the whole bundle. It is slide into the bag with the breather mesh on top.Keith
Neat system. How long are the canary pieces you used in the stringer? It is really pretty looking wood.http://www.tvwsolar.com
We'll have a kid
Or maybe we'll rent one
He's got to be straight
We don't want a bent one
He'll drink his baby brew
From a big brass cup
Someday he may be president
If things loosen up
The pieces are just under 12' and the stringer is 18'. So I'm able to have the longer piece at the bottom and the joint above eye level.I had designed the joints to be plumb on the inside and to land on a riser so that only about 3" would be seen above the nosing, but the owner changed how he wanted the landing laid out and now they are about 1" in front of the riser, UGH!!
Another option for the vac bags is Vacupress. He will custom make them in vinyl or poly (20mil or 30mil). I priced out a 20"x21'-0" long bag not long ago and it was $120 I think.
If you are vacuuming with a platten (you can see his platten setup off to the side in one of his first pics) you will use cauls or plastic to avoid glue sticking to the bag. For vacuuming without a platten there is a netting that will allow the air to flow freely within the bag and prevent glue sticking to the bag.
Even the vinyl bags are very durable. I have a 30mil vinyl setup and the bag is many years old and it has been used quite a bit.
Setting the treads and risers today.
The way that the finished stair needs to look presented a bit of problem. It is an open flyer, since it will be seen from underneath as well, I could not use wedges to secure the treads and risers. So I routed out for just the treads and risers.
It didn't seem likely I could get the treads and risers into the mortises on the whole stair before the glue set. So the treads are set and bolted into finial position, then the risers are cut to the length of the inside of the stair plus the depth of one mortise. The riser can then be placed into the mortise and slide 1/2 way into other allowing them to be set one at a time.
I want to be able to screw the riser into the back of the tread to close the gap while the glue sets. To hide the screws a strip of material is applied on top.
The first veneer I laid-up they were butt joined which looked alright on the table, but not so nice on the stair. On the second stringer it was laid out at the same angle as the rise of the stair. From there it was possible to have the riser land on the joint.
The profile for the nosing of the treads is not quite a true radius. None of my local retailers had a 1 1/8" bullnose bit. I had to use a 1" bit with a flared out end. This was a small problem when it came to making the template for the routing of the stair. I made up a template using Rockhard to fill-in the profile.The pattern bits come much too large to use on a thin template. The machine shop where I get my bits cut them down to any length you want so your template can be any thickness desired. I haven't tried it yet but it should work well on a curved stair using the template as a vacuum clamp.
What glue do you use for holding the treads & risers in their mortises?
The treads and risers are held into the mortises with GRK lag bolts. The treads and risers are glued to each other with Titebond.
mathewson....very nice work...
Stan
Stan,Thanks for the compliment. The stair is done and although it was very nice to build the entire thing in the shop I'm very concerned about how to lift this thing into place. It is very heavy. Any pointers would be appreciated. Today I applied the outside skins. I tried to use a disposable vacuum film to press the veneer skin to the finished stair. I didn't work, or at least I wasn't able to make it work this time. I reverted to clamps and cauls. The concept should work but I couldn't get the breather mesh to stay in place on the vertical surface and apply the film at the same time. Another time I will try a dry run to work out the bugs.
Installed it today, took a large forklift and 8 guys but it went in.
Looks good man, They didnt look that long in you other posts when seen in place thats a good size set.
that thing is huge! you doing the railing and if so what's it going to be?
Interesting you should ask, I was just about to post some pics on the balustrade. It will be a modern style stainless steel post with cables. I did one recently that was similar and drilling the holes was a challenge. The post is 1.9" od. so the bit is large, the hole needs to be plumb and the room for error is small.What I decided to use this time was a magnetic drill. It drills at a right angle so you can use the tread as a base and build up to get enough clearance. Next time I think I'll try using a couple of screw jacks like the ones used on campers to get elevation. The drill bit comes 2" od, I had it turned down to 1.95" to make the fit tighter. When drilling on an angle the edge of the cutters engage before the lead screw can engage so the bit wants to kick out. Pilot holes were drilled with a standard drill bit the same dia as the lead screw then the lead screw was replaced with the drill bit. Now the drill bit could enter the hole before the cutter engaged. When the drill was running the thing acted somewhat like a lathe in that one end was held by the drill bit and the other by the magnetic.Made the job easy and controlled. The first job took nearly 2 days to make jigs and drill the holes, this took under 4 hours.
cool, i love to see other peoples solutions to there problems. it helps me in the future with my own.
mathewson- Very respectable work and procedures! I am impressed.
Coming from having set these behemuths...it gives me pleasant company to see I am not the only "build the whole thing in one unit" nut!
Excellent work.....
Stan