FHB Logo Facebook LinkedIn Email Pinterest Twitter X Instagram Tiktok YouTube Plus Icon Close Icon Navigation Search Icon Navigation Search Icon Arrow Down Icon Video Guide Icon Article Guide Icon Modal Close Icon Guide Search Icon Skip to content
Subscribe
Log In
  • How-To
  • Design
  • Tools & Materials
  • Restoration
  • Videos
  • Blogs
  • Forum
  • Magazine
  • Members
  • FHB House
  • Podcast
Log In

Discussion Forum

Discussion Forum

stucco question

cb900 | Posted in General Discussion on April 29, 2005 04:00am

Looking for some help with stucco. I have a small job  filling in around a couple of windows and I’m looking for some tips or pointers. I haven’t worked with stucco before but plenty of mortar /cement. I have a bag of premix base coat, and a bag of premix finish coat and wire. The existing stucco is about 3/4″ to 7/8″ total thickness. How thick should the base be and the finish coat? How long between coats? How long before I can paint? Any help would be welcome.

Cam
Reply
  • X
  • facebook
  • linkedin
  • pinterest
  • email
  • add to favorites Log in or Sign up to save your favorite articles

Replies

  1. Dave45 | Apr 29, 2005 04:48pm | #1

    I've done several window replacements over the past few years and have found that stucco patch gives me the best results.  I don't have the brand name handy, but it comes in 10# bags and apparently has latex in it.

    After I get the window flashing and wire in place, I put on a first coat and hold it back slightly below the final thickness.  I leave it pretty rough so my finish coat will have good 'grab', then wait at least 24 hours before doing the finish coat.  The finish coat is where I bring it out to final thickness and ....here comes the tricky part.... match the existing texture.  The patch material I use is white and it's sometimes difficult to ignore a color difference but still get a texture match.  Some of my earlier repairs (on my own house) are somewhat noticable, but the later patches are invisible after the house has been painted.

    One other thing I strongly recommend is that you don't even try to work to a straight edge in the old stucco.  A lot of people use a masonary blade and cut the stucco away from an old window.  If you leave the straight line, your patch will eventally show through.  I always break out the old stucco with an air chisel and leave a jagged edge.

    1. cb900 | May 03, 2005 03:48pm | #3

      Good tip about the jagged edge. I will use that. Thanks for the info.

      Cam

  2. ClayBabcock | Apr 29, 2005 06:49pm | #2

    I am definitely no expert, having only two window replacements under my belt, but I did really find that the more expensive water resistant stucco was much easier to apply because it contained a lot of plastic fibers. As with concrete, you don't want your stucco to completely dry for four days to allow for maximum strength. As far as set-up time between coats, I, myself don't actually KNOW. But here is the content I just found on a site called diydata.com (it appears to be a british site). Sure wish that I'd read this first:

    Stucco Techniques

    Stucco has traditionally been applied in 2 or 3 layers. The first layer is normally about 10mm (3/8 inch) thick and is referred to as a "scratch" layer because once it has been applied, the surface is 'scratched' to provide a key for the second layer.

    The second layer (if used) is another "scratch" layer about 10mm (3/8 inch); this is sometimes referred to as a "floating" or "brown" layer.

    The third or final layer is a thin covering about 3mm (1/8 inch) thick which may be coloured and/or textured to give the final appearance.

    For the first layer on masonry, ensure that the surface is free of loose partials and, if necessary, roughen the surface to provide a good key - rack or chisel out the mortar between bricks/blocks.

    Dampen the masonry or laths before applying any mortar, this will help prevent them from pulling moisture out of the mortar too rapidly, which could cause cracking, loss of bond, and generally poor quality stucco work.

    Place some mix on a builders hawk, push some mortar onto the area using a steel plasterers float and spread it over the area. Make sure that it is worked into the joints of a masonry subsurface or in between/behind laths or into the wire mesh. Keep working within a limited area (say 1 metre/yard square) to achieve a thickness of about 10mm (3/8 inch), and then move onto an adjacent area.

    Allow the mortar to slightly harden (2 hours or so) and criss-cross score it as shown to a depth of about 3 mm (1/8 inch). Alternatively (if stucco is being applied to a large area) make up a 'rake' by driving a number of nails through a length of 50 x 50 timber at 25mm spacings - make sure that all the nails project the same amount from the timber.

    Allow the first layer to harden for 24 to 36 hours. Do not let the layer dry out, if necessary, keep it damp by misting it with water, do not spray it with a pressure hose as this will dislodge the mortar.

    Apply and score the second scratch layer in the same manner as the first layer.

    With a flat finishing trowel, apply the final layer to about 3mm (1/8 inch) thick.

    If desired, apply a texture to the final layer after it has hardened for 2 hours or so. A wide choice of finish textures can be used, the only limitation is the imagination of the worker. When choosing a texture, make sure that the pattern can be repeated across the full area. The following indicates how some popular finishes can be achieved:

    Smooth finish. Smooth the final layer several times using a steel float as the mortar begins to go off, occasional plunging the float into water will keep it clean and prevent it pulling mortar away from the wall.
    Swirl texture. Use a float in an arcing motion on the mortar just once while it is still fairly damp, and then leave it to harden - a wooden float often gives better swirls than a steel float.
    Stippled texture, After the mortar has started to dry, hold a stiff broom at an angle to the wall and pat the bristles onto the surface to give the desired pattern.
    Wavy, scratched texture. Smooth the final layer, allow it to dry slightly, then lightly draw a brush across the surface using a path to give the desired effect. Keep the bristles free from mortar build-up by knocking the brush head after each pass across the surface. The stiffer the brush, the coarser the pattern.
    Imprint finish. Smooth the final layer and use whatever necessary to make the desired imprint(s) (e.g. leaves, shoes, hands, the paws of pets or whatever). If required, leave the surface to further dry and lightly use a float or brush to soften the edges of the imprints.
    After the stucco has been completed, keep the mortar damp over several days; lightly mist the surface occasionally if necessary.

    Complete the job by sealing around doors and windows frames, these are areas especially susceptible to the ingress of water.

    Leave the mortar to dry out for at least six weeks before applying cement paint or colour wash if required.

    General Tips for applying Stucco

    To apply stucco, the skills of a plasterer are necessary. The following guidelines are important to remember:

    Only mix enough mortar as can be used within about one and a half hours. The actual time will depend upon the weather (the mix will dry out quicker in hot or dry conditions); experience will be the best guide. Any remaining mortar should be discarded; it should not be remixed.
    If coloured Stucco is required, add cement colouring dye to the mix for the final layer. Carefully note the measure used so that identical proportions can be achieved with each separate mix of mortar.
    Stucco mortar should not be over mixed - hand mix for 10-15 minutes after adding the water. Over mixing can cause the mortar to set too quickly, this may cause cracks and poor bonding to the underlying surface.
    Wooden laths and masonry subsurfaces should be thoroughly damped before applying the mortar - this will prevent the subsurface drawing moisture out of the mortar. Bonding agents (such as a weak PVA adhesive solution) will also aid bonding to existing masonry.
    To avoid cracking, it is imperative that mortar is not allowed to dry out too quickly. Avoid applying Stucco in direct midsummer sunshine or very hot/dry conditions. In hot weather, keep the mortar damp for 48 to 72 hours after application.
    Stucco should not be applied in cold weather (below 5° Celsius/40° Fahrenheit), or if there is danger of frost during the 'drying' period.
    Cover the ground at the foot of the wall so that any dropped mortar can be easily removed. Lay down some old planks or a tarpaulin, alternatively spread some sand to keep the mortar off of the ground.

    1. cb900 | May 03, 2005 03:49pm | #4

      Thanks for the info. This is exactly what I was looking for.

      Cam

      1. ClayBabcock | May 03, 2005 06:31pm | #5

        Glad I could help. Like I said earlier, I wish that I'd found the site before I'd done my own scratch coats (one of which isn't, well, up to scratch).
        best of luck

Log in or create an account to post a comment.

Sign up Log in

Become a member and get full access to FineHomebuilding.com

Video Shorts

Categories

  • Business
  • Code Questions
  • Construction Techniques
  • Energy, Heating & Insulation
  • General Discussion
  • Help/Work Wanted
  • Photo Gallery
  • Reader Classified
  • Tools for Home Building

Discussion Forum

Recent Posts and Replies

  • |
  • |
  • |
  • |
  • |
  • |
View More Create Post

Up Next

Video Shorts

Featured Story

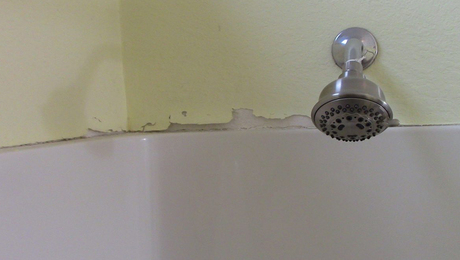
FHB Podcast Segment: Patching Drywall Near a Shower

Learn how to patch drywall above a fiberglass shower without totally redoing everything.

Featured Video

How to Install Exterior Window Trim

Learn how to measure, cut, and build window casing made of cellular PVC, solid wood, poly-ash boards, or any common molding material. Plus, get tips for a clean and solid installation.

Related Stories

  • A Summer Retreat Preserved in the Catskill Mountains
  • Fine Homebuilding Issue #332 Online Highlights
  • The Trump Administration Wants to Eliminate the Energy Star Program
  • Podcast Episode 685: Patching Drywall, Adding Air Barriers, and Rotted Walls

Highlights

Fine Homebuilding All Access
Fine Homebuilding Podcast
Tool Tech
Plus, get an extra 20% off with code GIFT20

"I have learned so much thanks to the searchable articles on the FHB website. I can confidently say that I expect to be a life-long subscriber." - M.K.

Get home building tips, offers, and expert advice in your inbox

Signing you up...

This site is protected by reCAPTCHA and the Google Privacy Policy and Terms of Service apply.
See all newsletters
See all newsletters

Fine Homebuilding Magazine

  • Issue 331 - June 2025
    • A More Resilient Roof
    • Tool Test: You Need a Drywall Sander
    • Ducted vs. Ductless Heat Pumps
  • Issue 330 - April/May 2025
    • Deck Details for Durability
    • FAQs on HPWHs
    • 10 Tips for a Long-Lasting Paint Job
  • Issue 329 - Feb/Mar 2025
    • Smart Foundation for a Small Addition
    • A Kominka Comes West
    • Making Small Kitchens Work
  • Issue 328 - Dec/Jan 2024
    • How a Pro Replaces Columns
    • Passive House 3.0
    • Tool Test: Compact Line Lasers
  • Issue 327 - November 2024
    • Repairing Damaged Walls and Ceilings
    • Plumbing Protection
    • Talking Shop

Fine Home Building

Newsletter Sign-up

  • Fine Homebuilding

    Home building tips, offers, and expert advice in your inbox.

  • Green Building Advisor

    Building science and energy efficiency advice, plus special offers, in your inbox.

  • Old House Journal

    Repair, renovation, and restoration tips, plus special offers, in your inbox.

Signing you up...

This site is protected by reCAPTCHA and the Google Privacy Policy and Terms of Service apply.
See all newsletters

Follow

  • Fine Homebuilding

    Dig into cutting-edge approaches and decades of proven solutions with total access to our experts and tradespeople.

    Start Free Trial Now
    • Facebook
    • Instagram
    • X
    • LinkedIn
  • GBA Prime

    Get instant access to the latest developments in green building, research, and reports from the field.

    Start Free Trial Now
    • Facebook
    • YouTube
  • Old House Journal

    Learn how to restore, repair, update, and decorate your home.

    Subscribe Now
    • Facebook
    • Instagram
    • X

Membership & Magazine

  • Online Archive
  • Start Free Trial
  • Magazine Subscription
  • Magazine Renewal
  • Gift a Subscription
  • Customer Support
  • Privacy Preferences
  • About
  • Contact
  • Advertise
  • Careers
  • Terms of Use
  • Site Map
  • Do not sell or share my information
  • Privacy Policy
  • Accessibility
  • California Privacy Rights

© 2025 Active Interest Media. All rights reserved.

Fine Homebuilding receives a commission for items purchased through links on this site, including Amazon Associates and other affiliate advertising programs.

  • Home Group
  • Antique Trader
  • Arts & Crafts Homes
  • Bank Note Reporter
  • Cabin Life
  • Cuisine at Home
  • Fine Gardening
  • Fine Woodworking
  • Green Building Advisor
  • Garden Gate
  • Horticulture
  • Keep Craft Alive
  • Log Home Living
  • Military Trader/Vehicles
  • Numismatic News
  • Numismaster
  • Old Cars Weekly
  • Old House Journal
  • Period Homes
  • Popular Woodworking
  • Script
  • ShopNotes
  • Sports Collectors Digest
  • Threads
  • Timber Home Living
  • Traditional Building
  • Woodsmith
  • World Coin News
  • Writer's Digest
Active Interest Media logo
X
X
This is a dialog window which overlays the main content of the page. The modal window is a 'site map' of the most critical areas of the site. Pressing the Escape (ESC) button will close the modal and bring you back to where you were on the page.

Main Menu

  • How-To
  • Design
  • Tools & Materials
  • Video
  • Blogs
  • Forum
  • Project Guides
  • Reader Projects
  • Magazine
  • Members
  • FHB House

Podcasts

  • FHB Podcast
  • ProTalk

Webinars

  • Upcoming and On-Demand

Podcasts

  • FHB Podcast
  • ProTalk

Webinars

  • Upcoming and On-Demand

Popular Topics

  • Kitchens
  • Business
  • Bedrooms
  • Roofs
  • Architecture and Design
  • Green Building
  • Decks
  • Framing
  • Safety
  • Remodeling
  • Bathrooms
  • Windows
  • Tilework
  • Ceilings
  • HVAC

Magazine

  • Current Issue
  • Past Issues
  • Magazine Index
  • Subscribe
  • Online Archive
  • Author Guidelines

All Access

  • Member Home
  • Start Free Trial
  • Gift Membership

Online Learning

  • Courses
  • Project Guides
  • Reader Projects
  • Podcast

More

  • FHB Ambassadors
  • FHB House
  • Customer Support

Account

  • Log In
  • Join

Newsletter

Get home building tips, offers, and expert advice in your inbox

Signing you up...

This site is protected by reCAPTCHA and the Google Privacy Policy and Terms of Service apply.
See all newsletters
See all newsletters

Follow

  • X
  • YouTube
  • instagram
  • facebook
  • pinterest
  • Tiktok

Join All Access

Become a member and get instant access to thousands of videos, how-tos, tool reviews, and design features.

Start Your Free Trial

Subscribe

FHB Magazine

Start your subscription today and save up to 70%

Subscribe

Enjoy unlimited access to Fine Homebuilding. Join Now

Already a member? Log in

We hope you’ve enjoyed your free articles. To keep reading, become a member today.

Get complete site access to expert advice, how-to videos, Code Check, and more, plus the print magazine.

Start your FREE trial

Already a member? Log in

Privacy Policy Update

We use cookies, pixels, script and other tracking technologies to analyze and improve our service, to improve and personalize content, and for advertising to you. We also share information about your use of our site with third-party social media, advertising and analytics partners. You can view our Privacy Policy here and our Terms of Use here.

Cookies

Analytics

These cookies help us track site metrics to improve our sites and provide a better user experience.

Advertising/Social Media

These cookies are used to serve advertisements aligned with your interests.

Essential

These cookies are required to provide basic functions like page navigation and access to secure areas of the website.

Delete My Data

Delete all cookies and associated data