Using a cove profile as crown moulding how do I cut and cope for an inside corner
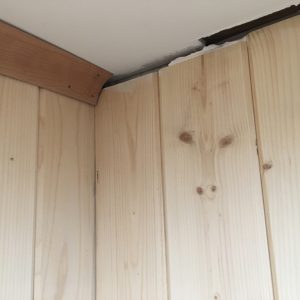
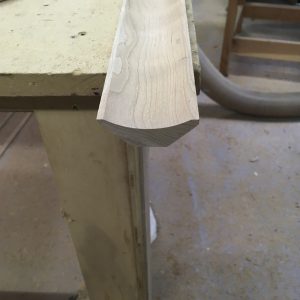
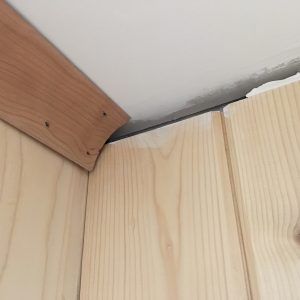
I made my own cherry cove moulding and attempted to cope an inside corner. It’s not working out. Can someone walk me through figuring out the angles I need.
Thanks in advance.




Replies
https://www.youtube.com/watch?v=9QpnWgGNtOk
If the corner is not 90 degrees, you will have to adjust the angles.
Nice molding, by the way.
I’ve tried the standard method for crown moulding and it’s not working. The standard 45 degree cut and cope out the back bevel will not work. It has something to do with the fact that my bevels that touch the ceiling and walls are at a 45 degree angle on both. Not 68 degrees and 22 degrees = 90 degrees. (I’m guessing I have no idea what the standard bevel is) on standard crown. I found some charts that suggested I needed to find a “Spring Angle” but not a real good explanation on how to find that. The crown I made is 3/4 thick. 2 1/8 in wide.
I would use an angle divider to bisect the actual angle. Set your saw to that angle and cut the free molding to that angle. Then, with a coping saw, cut the molded outline. When properly placed on the wall, it should fit into the other piece snugly and form a mitered appearance. It's advisable to practice on some scrap first.
I’m kinda stuck now doing the coping method. The butt joint end has been nailed up and is 20 + feet long. Thanks for the suggestion.
Since the wall is apparently not 90o, use an angle divider (available in most construction oriented hardware/lumber yards) to determine the actual angle of the corner. Instead of using the 20' piece, use a short piece of molding to experiment with. Use the angle divider to determine the angle, then set the saw to it. In case you are unfamiliar with this tool, it is a light weight tool with two arms that spread out and conform to the angle you are measuring. Tighten them down with the adjustment screw. There is a bar going down the middle which splits the angle exactly in half. Use it to set up the saw. Remember to set the molding at the same angle to the wall and ceiling before cutting it. It's possible that the next step will not be necessary if the two pieces don't fit together like a mitered joint. If not, then cut the angle more acutely with the coping saw, following the cut outlines as a guide. It's involved but that's why finish carpenters make the big bucks. Using scrap pieces of molding to perfect your technique will save you a lot of tears and swearing.
Your spring angle is 45 degrees.
You can try to lay the adjoining piece in place, and mark with some dividers. (then cope) How far off is your original effort? Can you adjust it some? (place and mark the next section and trim as needed)
The traditional method should work if your back angles are consistent between the pieces, and are mounted square to the wall and ceiling (also right angles)
Thanks for your help. I was over complicating this. I walked away and was able to cope this just fine using standard techniques. My bad.
One of the benefits of working on your own place is the option to go take a nap, or a walk, and come back with a fresh perspective.
Surfing the web, posting in forums, and watching videos can also help.
Thank You for returning to post your success. (would be happy see a photo of your joint if you would be willing to share)