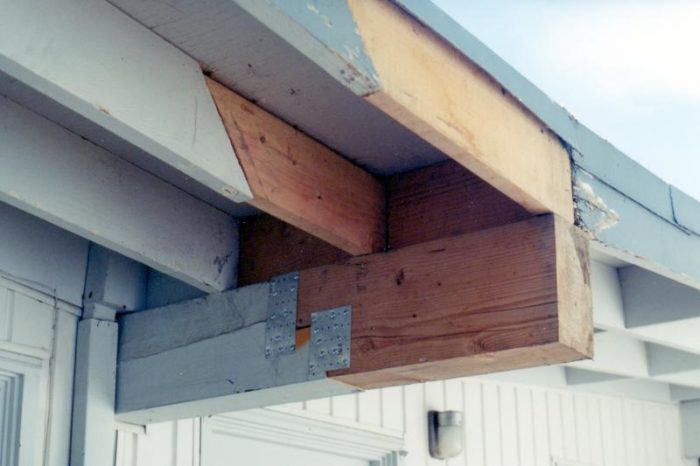
Quick, how many code violations can you find in this picture? (please try to keep it under 100)
Also, do you think that the brainiac who did this should keep his day job?
Quick, how many code violations can you find in this picture? (please try to keep it under 100)
Also, do you think that the brainiac who did this should keep his day job?

Get expert guidance on finding a fixer-upper that's worth the effort.


"I have learned so much thanks to the searchable articles on the FHB website. I can confidently say that I expect to be a life-long subscriber." - M.K.
Dig into cutting-edge approaches and decades of proven solutions with total access to our experts and tradespeople.
Start Free Trial NowGet instant access to the latest developments in green building, research, and reports from the field.
Start Free Trial Now


Replies
OMG.... a thing of beauty.
Was that supposed to be a repair of a damaged area? They should've just cut out the bad sections and called it a day.
I'm not definding the klutz AT ALL, but it could have been worse.
At least the scarfs or miters, or whatever you call them, are directed to bear weight from above; as is the scab joint in the beam. The part that scares me is hidden behind joist #3. What's going on there?
I'm glad they called "thebeamguy" for this one.
The cantalever beam. How far does it extend beyond what is visible in the photo!?! My personal guess is only a few inches, far beyond what is needed.
Reply to various posts:
This is a load-bearing roof beam on a mid-century modern home (sub-division model interior photos below). The beam is exposed on the interior and spans from, and is framed into, opposing exterior walls. The cantilevered ends support the eave framing, with rafters and bridging traveling along it's length (vaulted ceilings inside). In the original construction, the projection of the beam beyond the roof edge was six inches. This was indeed an attempt at a dryrot repair.
I cringe at the thought of two or three roofers gathering in this area of the deck, unaware of the lack of support below...
I imagine this work was accompanied by the customary tail-light guarantee...
On the beam I'd cut away the top 1.5" all the way back to about 2" from the wall, then fit a 2x piece in there. Glue & screw it through to the top of the patch piece (with the top similarly cut away), then slide the assembly in place and glue & toe screw to the beam. Some sort of peg set near the bottom of the vertical joint would be a good idea to hold the pieces in alignment.
(Or, alternatively to the above, if you happen to have an appropriate deep boring auger setup you could bore a couple of holes in the ends of both pieces and glue the assembly together with a couple of large dowels.)
The rafters are hard to do cleanly. First off, at least one of the pieces appears to be mis-sized, so replace that. Then I think I'd glue/screw a sister to the back side of each rafter, making the sister shorter vertically than the rafter so it wouldn't be visible from the angle of the camera shot.
Cut ends and hidden edges that won't be glued should be pre-primed before assembly.
New world craftsmanship
Beautiful joinery. Furniture grade framing.
heck, aint painted yet so the guy isnt done yet, still one rotten joist replacement to go.
1-1/2 wide 1/8" thick straps bolted to the bottom face of the joists, and a 2x2 angle iron bolted to the beam, good structurally (not kidding, will hold up as much as the original).
l0oks wise, Buncha caulking, some paint, and good to put on the market !
Standard So Cal termite repair
Absolutely normal - this is what the termite guys do to get through escrow.
Joe H