Wiring a Whirlpool Combo Wall Oven – 8/4 AWG armored whip is too short
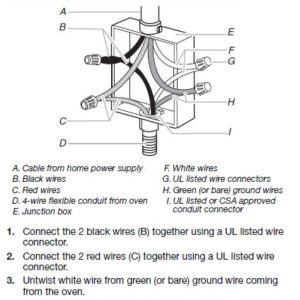
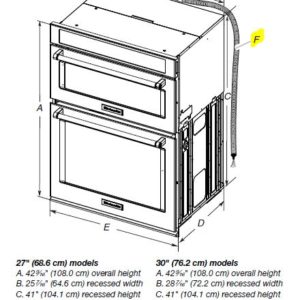
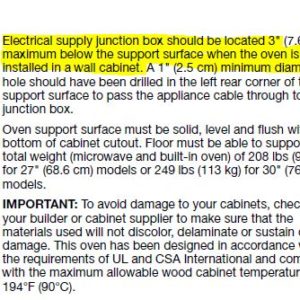
Just purchased a Kitchen-Aid combo wall oven, model #KOCE507EBS. Comes with a pre-wired 8/4 AWG whip that is only 4′ long. However, it’s about 6-8″ too short, if you have a box located BELOW the oven. It is more than enough length, if box is located in cabinet ABOVE the oven. Installation instruction specifically say if box is BELOW the oven, it should be located a min. of 3″ below base of oven. However, the whip ends don’t even reach the bottom of the oven chassis. This was shipped direct from Kitchen Aid, so I know someone didn’t modify or shorten it. Why would they not extend the wires by 6-12″ so it would accomodate most any wiring arrangement – just doesn’t make sense. Anyway, the question is, what is the best way to “extend” the whip by 8″ or so? Really should be significantly longer in order to slide oven out of cabinet.
I looked at various electric distributors/warehouses, and don’t see any 5ft or 6ft armored whips in this wire guage. I really don’t have room between the oven and the back cabinet wall for a junction box (very narrow one). I could obviously buy wire and a roll of armor shielding and create my own to the proper length, but wondering if there was a more ready-made solution. What do other people in the trade do with the Whirlpool/KitchenAid/Jenn-Air ovens that are apparently ALL like this? Looking for some actual assistance and installation assistance, other than the standard answer “call an electrician”. Please let me know how any of you would approach this. Thank you in advance for any advice you can provide.


Replies
How far down fro the top of the oven does the whip start?
With 48” whip plus that distance gives you how much below bottom of unit?
The directions you posted say the junction box cannot be MORE than 3” below the top of the deck the oven sits on.
It looks like the whip starts on the left when facing the front. With the junction box located directly below the drop and the 48” whip plus, it should work. For ease of install, tie/tape a string to the end, drop the string through the hole and feed the whip as you muscle that 200lb thing into the box.
I’m glad to be retired enough to say no thanks to that portion of a kitchen remodel. Oh, the cast iron sinks too. And the dishwashers with poor leveling features. And all the rest.
Best of luck.
Whip actually starts a few inches down from the top on the left side (facing the front), runs horizontally across a "shelf/step" on the rear and down the right hand side. The whip is clamped to the top of the horizontal run, but even if you remove the clamp, it doesn't help much if your junction box is below the oven to the right. The clamp is meant to be installed and not removed anyway. The whip is just as shown in the installation instructions. The wires are about 6-8" short of the bottom right corner - exactly as shown. Obviously, I could move the junction box to the LH side of the oven, then I have enough length on the whip. However, looks like whip is meant to run across the back of the oven, with clamp installed per factory, and down RH rear? Seems odd to me that they'd short the whip, so it limits your options, without extending the wires, or fabricating a slightly longer whip yourself. For me to move the junction box to the LH side of the oven, I will have to extend the feed from the circuit breaker, or install a junction box below the oven to move it 2 ft to the left. Just wondered how most installers/electricians would approach this to simplify wiring/installation.
Not unusual for the wiring of a wall oven to be too short. I changed the one on mine so I could remove it from the wall and place it on a counter and then access the junction box in the opening to disconnect the oven. Good idea to have this done properly as at some point the wall oven will need to be replaced so it is well worth the extra effort.
This is a good time to upgrade the entire cabinet to subpanel wire run if needed or to add a junction box in the opening if this was not done when the home was built.