Decking Over a Roof
Detail the roof and framing correctly, and the decking part of the job is easy.
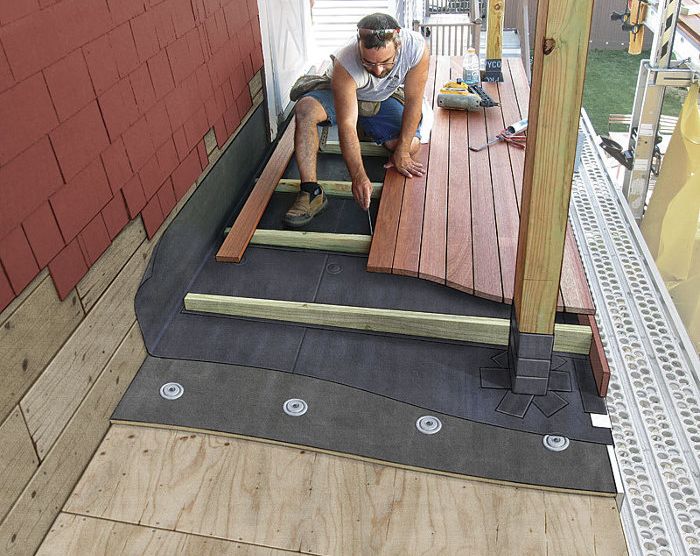
Synopsis: Building a deck above a porch roof allows for sheltered space below and views from above. In this article, builder Emanuel Silva shares his method for building such a deck, which begins with a leak-proof low-slope roof of EPDM rubber. Hardwood decking is then fastened to tapered pressure-treated sleepers that rest on additional strips of EPDM added to protect the roof from abrasion. Silva also demonstrates how to detail the roof edge and to flash the posts.
There are tons of reasons to build a deck over a roof, from creating a romantic outdoor breakfast nook off a second-floor master bedroom to providing a second-floor porch on a city house. No matter the reason, the keys to a long-lasting deck above a living space are the same: a reliable roof membrane and details that minimize any damage to the roof from the deck loads. I like rubber roofing for this, combined with a floating deck floor. The rubber roofing I’ve been using for 15 years—a glue-down, 60-mil EPDM membrane from International Diamond Systems— offers several advantages. It’s reliable, it’s fairly easy to work with, and it requires no special tools. That said, a lot of people subcontract the roofing work and build the deck themselves. Either way, the roofing has to be right.
Framing the roof
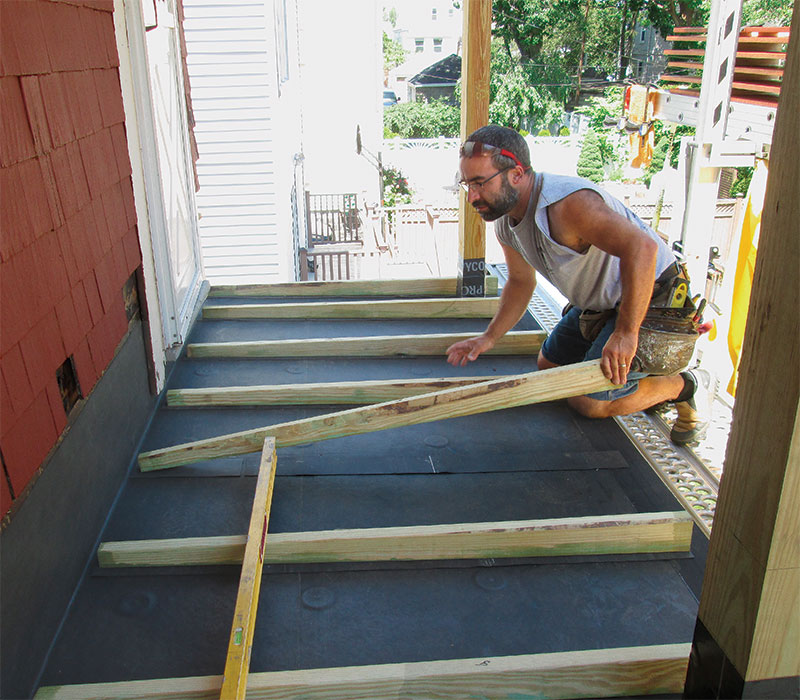
Whenever I install decking over a roof, I make sure the framing is structurally sound and properly pitched to drain water. The project illustrated here was a complete teardown and rebuild, so I framed the roof with 2x8s spaced on 16-in. centers, supported by a beam and a ledger as on most decks. Because these 2x8s were also the framing for the ceiling below, and because I wanted to keep all the cuts square, I framed the roof level. To pitch the upper surface 1/4 in. per ft. for drainage, I ripped 2x4s on a taper and screwed them to the tops of the joists.
It might seem like it would have been easier to start with 2x12s and rip them to a taper. The trouble with that approach is that the allowable span of a joist or rafter depends on both its species and its grade. The grade depends largely on how close knots and other defects are to the edge of the board. In ripping a board, a knot that had existed harmlessly in the center is now close to the ripped edge, compromising the board’s strength. For that reason, code does not allow the use of ripped lumber for structural purposes.
Continuous notched 4×6 posts support the framing and also serve as rail posts. The roof sheathing is 3/4-in. CDX plywood, glued and screwed to the framing.
To create a smooth surface and to protect the bottom of the rubber roofing from any fasteners or rough edges on the plywood, I installed 1/2-in. fiber roof underlayment as a final substrate. Each board is secured with 16 1-5/8-in. screws and 3-in.-dia. sheet-metal washers.
Where the roof ties into the house, I removed the siding about 2 ft. up the wall and about 1 ft. out on each side. This enabled me to fully adhere the roofing membrane about 2 ft. up the sheathing and then counterflash with a self-adhering butyl membrane. I pulled back the existing building paper after stripping the siding, installed the butyl membrane, and lapped the building paper back over it. This procedure makes for a watertight connection on ordinary rainy days, but it also protects against wind-driven rain or deep snow sitting on the deck up against the house.
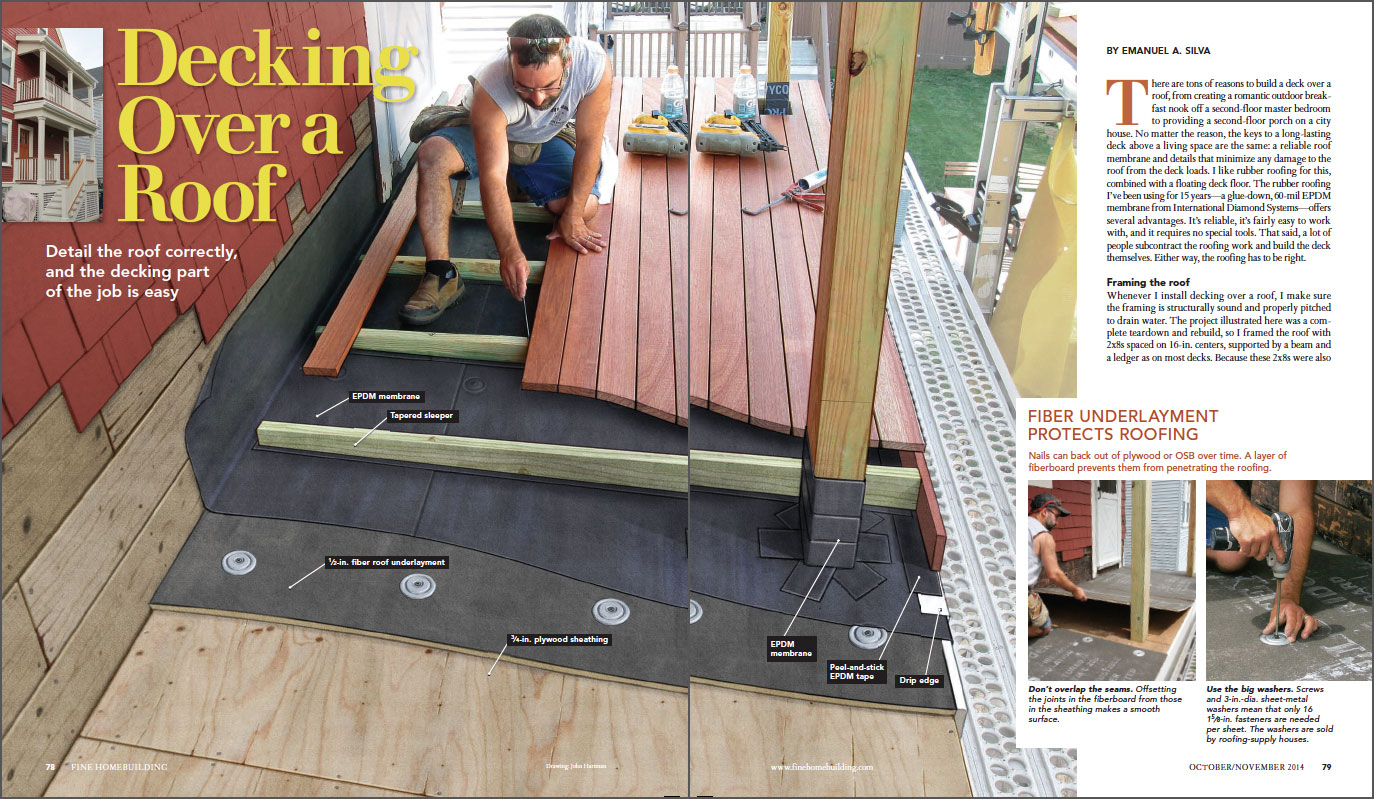
For more detail and photos, click the View PDF button below.
Fine Homebuilding Recommended Products
Fine Homebuilding receives a commission for items purchased through links on this site, including Amazon Associates and other affiliate advertising programs.

Fall Protection

Lithium-Ion Cordless Palm Nailer
Cepco BoWrench Decking Tool


