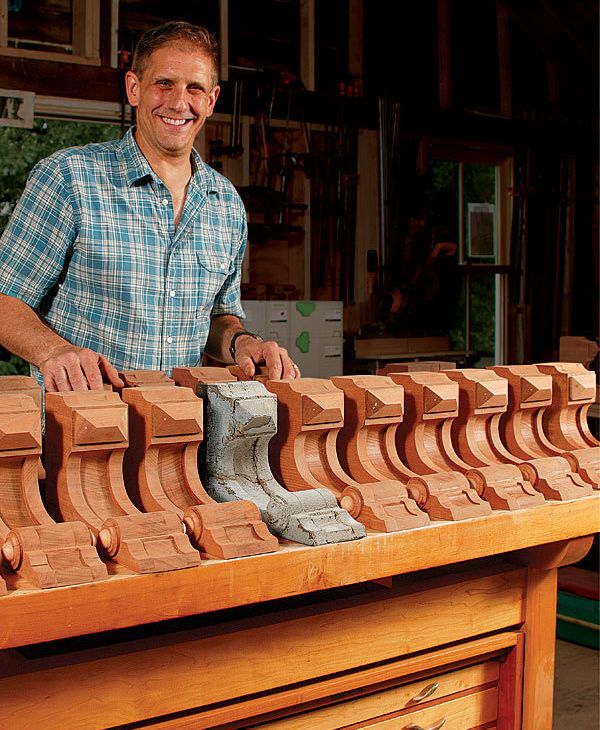
Reproducing a Corbel for a House Built in 1848
When restoring a house, making accurate copies of architectural details is often part of the job.

Synopsis: Old houses are frequently decorated with many classic elements, but as time and weather take their toll, those old wooden decorations can start to deteriorate. Such was the case with the corbels decorating Michael Fitzpatrick’s house in Massachusetts. In this “Master Carpenter” article, Fitzpatrick demonstrates how he re-created over 50 replacement corbels for his historic house. Fitzpatrick started with an original to make templates for the replacements by using an intact existing corbel. After cutting the basic shape of the corbel, he fine-tuned it on his router table. Next, he made the applied details for the corbels: rosettes and pyramids. This article has a companion “Master Carpenter” video as well as a sidebar about manufactured architectural details and a trick of the trade about using specialized push sticks to keep your fingers safe.
A couple of years ago, my wife and I bought a house built in 1848. The building had been neglected for the past 30 years, and over the previous 100 years, a number of significant changes had weakened the structure. While restoring our new house, I discovered that many of the beautiful 19th-century details that I wanted to preserve were in need of repair. There were no significant historical interior parts left, but as a contemporary furniture maker, I was excited to restore the exterior to its original glory while remodelling the interior with a contemporary plan. Armed with a few old photos, some curious craftsmen on the payroll, and an enthusiastic architect, we had at it.
For our renovation, this meant recreating many moldings, a front door, a historically accurate porch, and many new corbels. Of the 80-plus corbels that decorated the house, all but 20 needed replacement. Even though damaged, most of the corbels were intact enough for me to copy the details. After gathering the information, I was ready to make new corbels to match the originals. We had three styles to replicate.
Over my 30 years of remodelling houses, I have often run into situations where decorative elements — corbels in particular — are removed but are almost never replaced by the homeowner. If they are replaced, they’re replaced with synthetic or wood corbels whose details aren’t as crisp as the originals.
In my house, installing new store-bought corbels, which range in price from $40 to $60 each, would cost a lot. I knew, however, that if I copied the originals and made new pieces on a production line, replacing them would be cost-effective. Once the patterns and processes are set up, making 20 of something is not much more work than making five.
First, make two templates
The easiest way to make a template of a corbel is to use the corbel itself. The centers are usually in the best shape, so that’s where I go to get an accurate template. Here, I needed two templates: one for the inner profile and one for the outer. I disassembled the original and used a bandsaw to slice a piece out of the center and one from the outside.
Next, I traced the shapes onto a piece of 1⁄2-in. cabinet-grade plywood. After cutting out the rough shape, I used a rasp and file to refine the shape. Next, I traced the completed templates onto 1 7⁄8-in.-thick blanks of mahogany or sipo (a West African hardwood also known as utile). These species stand up well to exterior use, and they mill nicely. Back at the bandsaw, I cut out the profile about 1⁄8 in. beyond the line, leaving enough to trim with a router.
Create the rough shape
I used a 2-in.-long top-bearing flush-trim bit in a router table to clean up the blanks. I screwed the template to each blank, strategically placing the screws so that the holes could be covered with moldings or applied pieces later. With both hands on the workpiece, I eased the stock into the bit and moved opposite the bit’s rotation.
For more photos and details, click the View PDF button below:


