FHB Logo Facebook LinkedIn Email Pinterest Twitter X Instagram Tiktok YouTube Plus Icon Close Icon Navigation Search Icon Navigation Search Icon Arrow Down Icon Video Guide Icon Article Guide Icon Modal Close Icon Guide Search Icon Skip to content
Subscribe
Log In
  • How-To
  • Design
  • Tools & Materials
  • Restoration
  • Videos
  • Blogs
  • Forum
  • Magazine
  • Members
  • FHB House
  • Podcast
Log In

Fine Homebuilding Project Guides

Painting

Guide Home
  • Intro to Painting
  • Tools & Materials
  • Prep Work
  • Painting Walls, Ceilings, and Trim
  • Wallpaper
  • Windows and Doors
  • Spray Painting Interiors
  • Exterior Painting
How-To

Prep Before You Paint

When the paint dries, these 10 steps will go unnoticed, but skipping one can blow a perfect finish.

By Jim Lacey Issue 209
  • X
  • facebook
  • linkedin
  • pinterest
  • email
  • add to favorites Log in or Sign up to save your favorite articles

Synopsis: People often end up with less-than-satisfying results following a painting job because they failed to do the necessary prep work before they put brush to wall. Professional painter Jim Lacey notes the evidence of such jobs — peeling paint, mildew, and bleeding spots—and then lists 10 steps to take before starting to paint: Drop the entire room, organize and stage essential tools, light the space, remove wall and ceiling obstructions, wash down everything, assess the existing paint, repair any damage and fill any gaps, mask conservatively, prime walls but not ceilings, and give the wall a final sanding and cleaning. He also provides a list of 23 “must-have materials” for prepping a room to paint, from canvas drop cloths to auxiliary lighting.


Must-have materials

  • Step ladder
  • Canvas drop cloths
  • 5-in-1 tool
  • Multibit screwdriver
  • 2-1/2-in. angled brush
  • Acrylic caulk
  • Cut bucket
  • Extension cords
  • Taping knives
  • Paint trays
  • Roller handle
  • 3/8-in. roller sleeves
  • Roller extension pole
  • Bleach or TSP
  • Rubber gloves
  • Sponges
  • Tinted primer
  • Joint compound
  • Tack cloths
  • Sandpaper and sponges
  • Rags
  • Shop vacuum
  • Auxiliary lighting

For a lot of people, painting is dreadful. They complain that it’s messy and fussy, and that they don’t always get the results they hoped for. The truth is that most people end up with less-than-desirable results because they ignore the importance of proper preparation.

In the 20 years that I’ve been painting houses, I’ve learned how to size up quickly the results of poor prep work. The signs include paint peeling in sheets off doors and trim, mildew seeping through layers of paint, and bleeding spots on walls and ceilings — paint failures that easily could have been avoided.

At each job, I follow a basic routine that ensures a long-lasting, attractive paint job. I start by removing items from the room. Large items, such as couches, can be moved to the center of the space and covered with drop cloths. With a fresh canvas, I can begin the real prep work.


1. Drop the entire room

drop cloths for painting

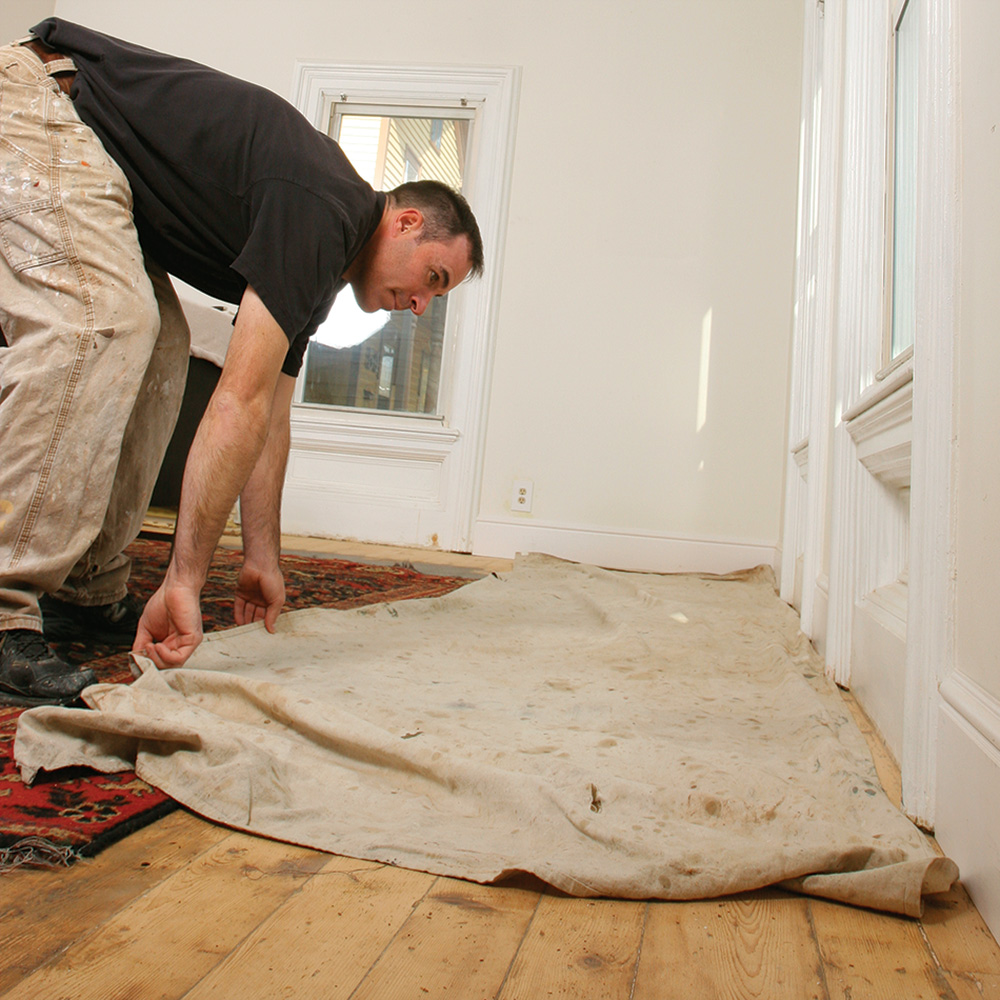
After the furniture is covered or removed, cover the floor with heavy-duty canvas drop cloths. Use 9-ft. by 12-ft. drop cloths near walls, 4-ft. by 5-ft. cloths under tools and paint, and a 12-ft. by 15-ft. cloth to cover a large area of flooring or furniture. Don’t skimp on the drop cloths. Cheap products can allow paint to seep through, and plastic drop cloths can be slippery, especially on hardwood floors.


2. Organize and stage essential tools

painting tools

Keep all commonly used tools close at hand. This helps the work to go smoothly. Place these tools on their own drop cloth in an easily accessible but out-of-the-way area. Large items, such as step ladders and vacuums, also should be kept close by.


3. Light the space

Set up halogen lamps on a stand, and clamp circular incandescent lamps wherever possible. Set the lights in a position that eliminates shadows and works best with the natural light coming into the room. Adjust the lights as conditions change.


4. Remove wall and ceiling obstructions

covering chandelier for painting

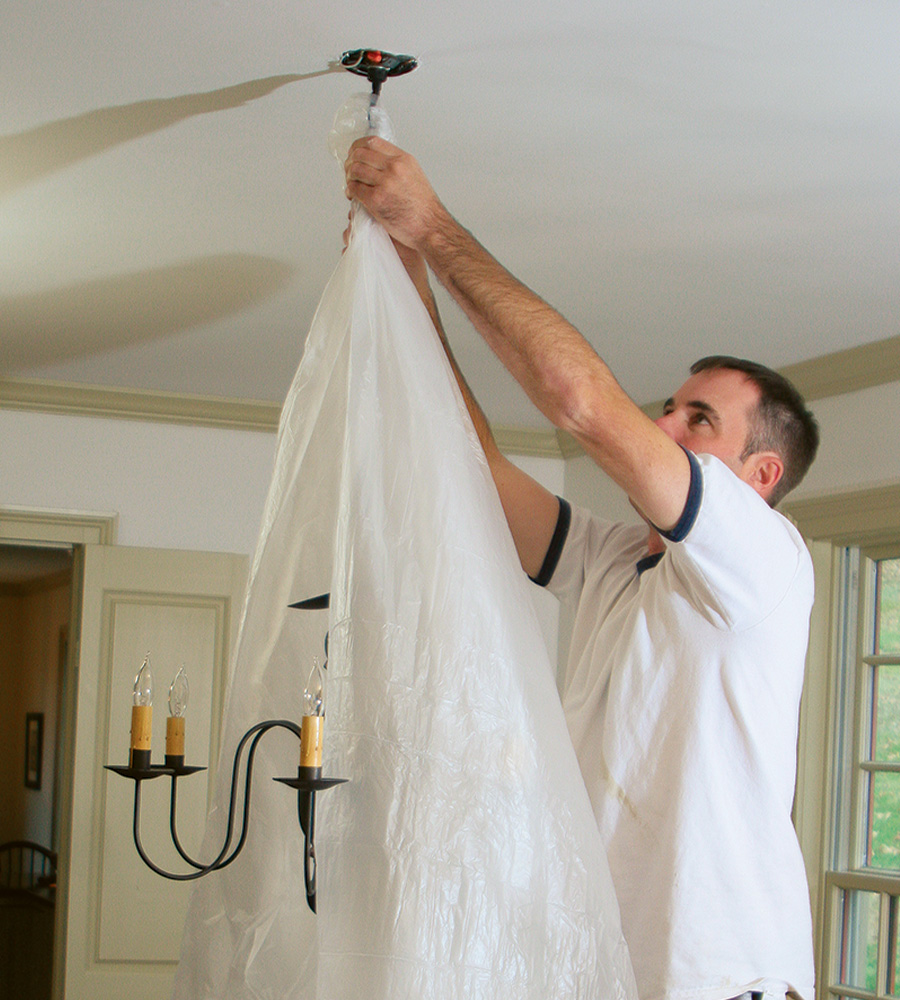
Don’t try to paint around easily removable elements such as window treatments, sconces, outlet covers, switch covers, thermostats, and recessed-light trim rings. Large fixtures, such as chandeliers, can be covered with plastic instead of being removed. The escutcheons can be unscrewed and lowered.


5. Wash down everything

trisodium phosphate for cleaning

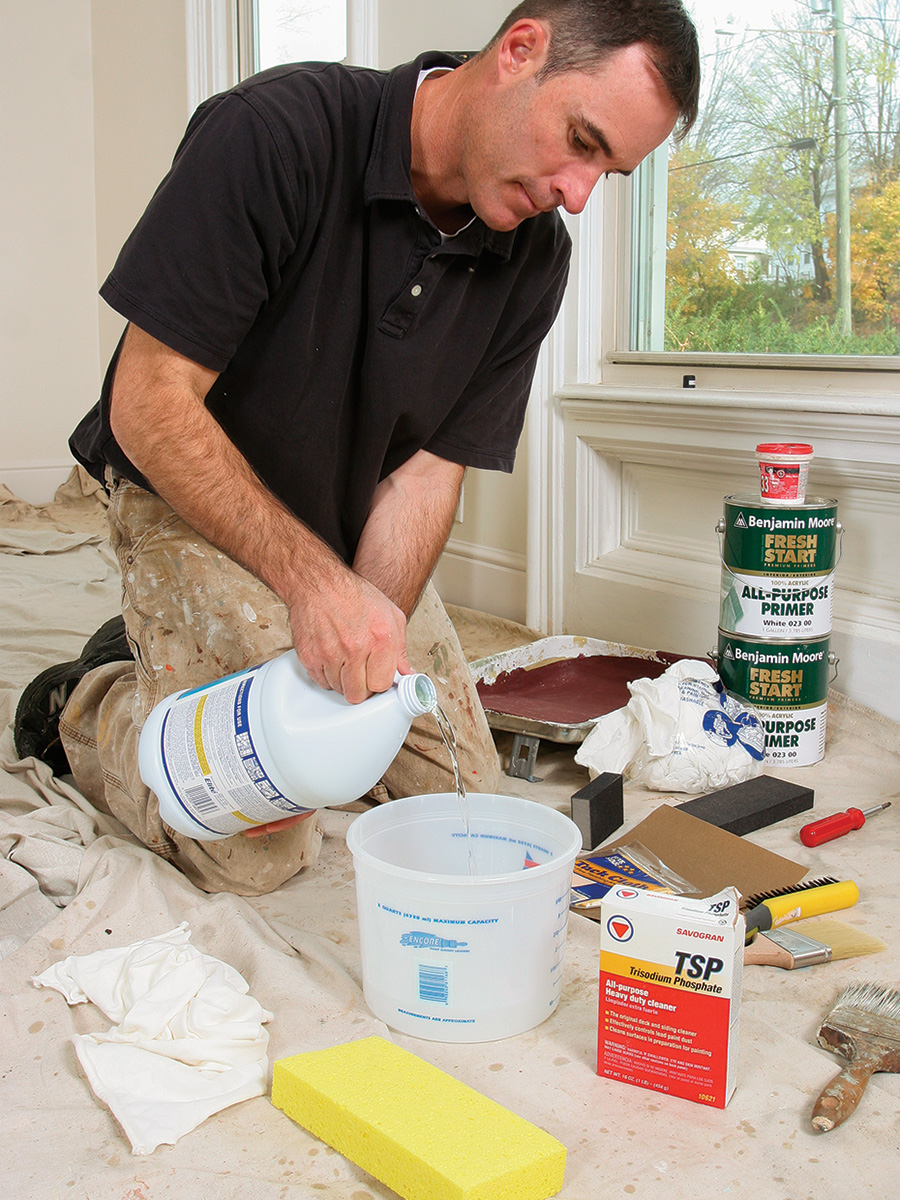
One-quarter cup of trisodium phosphate (TSP) per 2 gallons of water will remove dirt, smudges, smoke residue, and most surface grime. Pay particular attention to high-touch areas such as door jambs and areas around light switches. Bleach and TSP work best on mildew stains. Use a light hand when washing; you don’t want to soak the wall. Also, wear heavy-duty rubber gloves. Allow the walls and ceiling to dry completely before moving on.

Tackle the bulk of the surface prep in the final five steps


6. Assess the existing paint

sanding before painting

Glossy finishes need to be sanded with 120-grit sandpaper, while moderate-gloss paint can be sanded with 120- to 150-grit sandpaper. Very hard surfaces may need to be prepped with a palm sander, but most often, you can get away with using a sanding sponge or sandpaper. Remove dust from the wall with a brush and a tack cloth.


7. Repair any damage, and fill any gaps

caulking trim

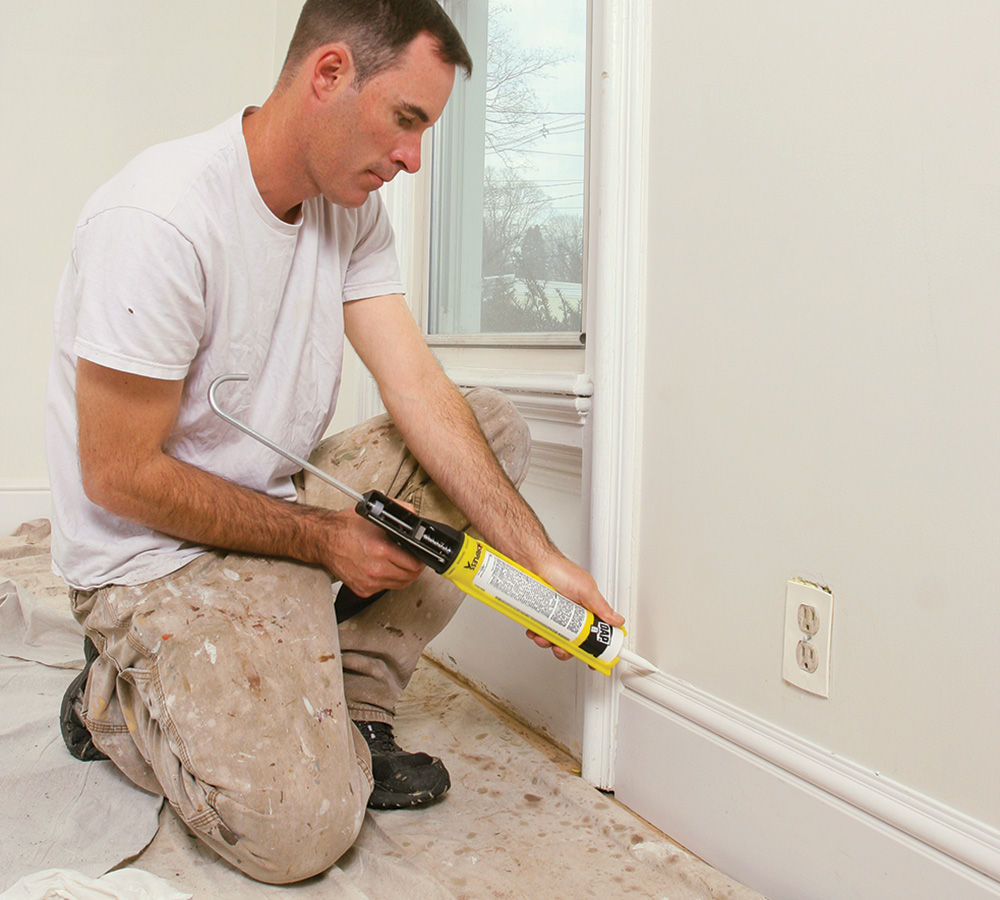
Joint compound is ideal for repairing cracks, holes, or dents in both drywall and plaster walls. Use a high-quality wood filler for repairs on wood trim and doors. Sand the repairs, and remove dust from the wall with a tack cloth, a brush, and a vacuum. Any gaps that have developed between the trim and the wall or ceiling should be caulked. Acrylic caulk performs well in most applications. However, in damp areas such as bathrooms or kitchens, consider a vinyl adhesive-based caulk, such as Phenoseal (phenoseal.com), for greater longevity.


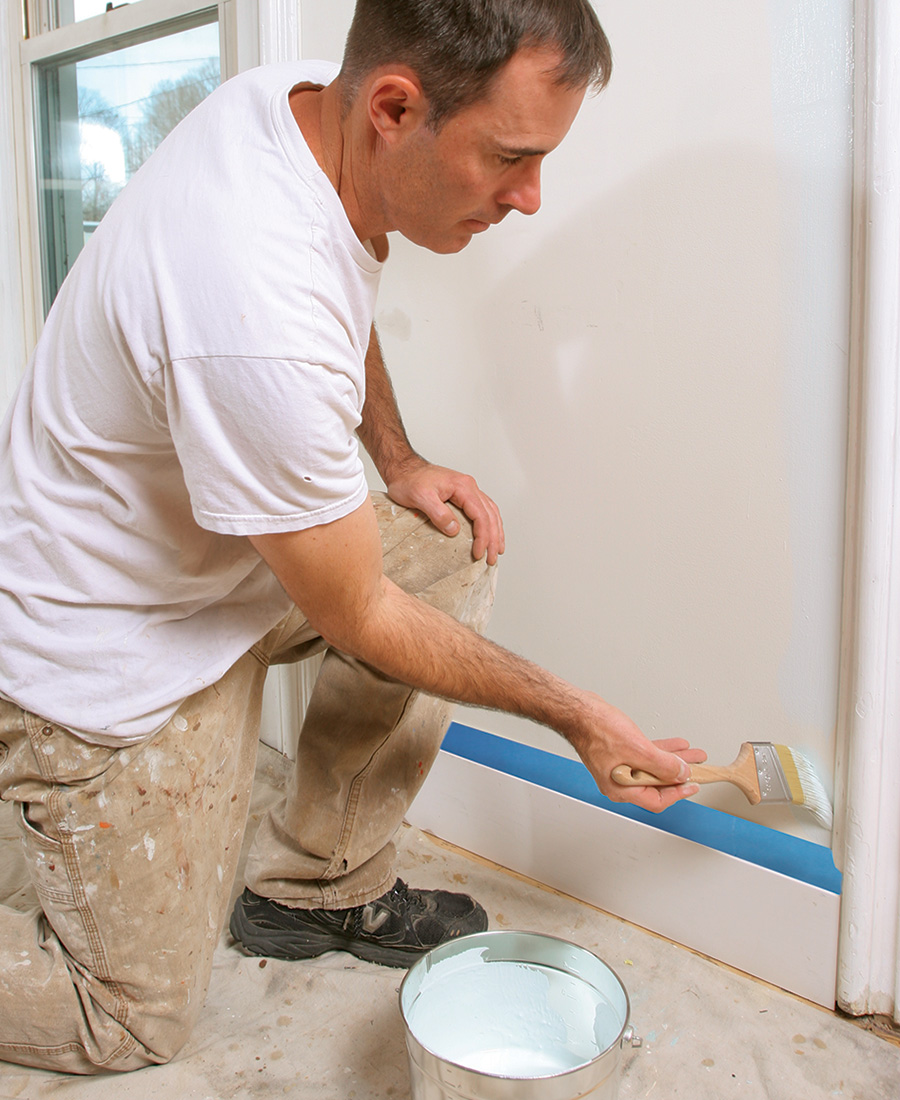
8. Mask conservatively

masking for paint

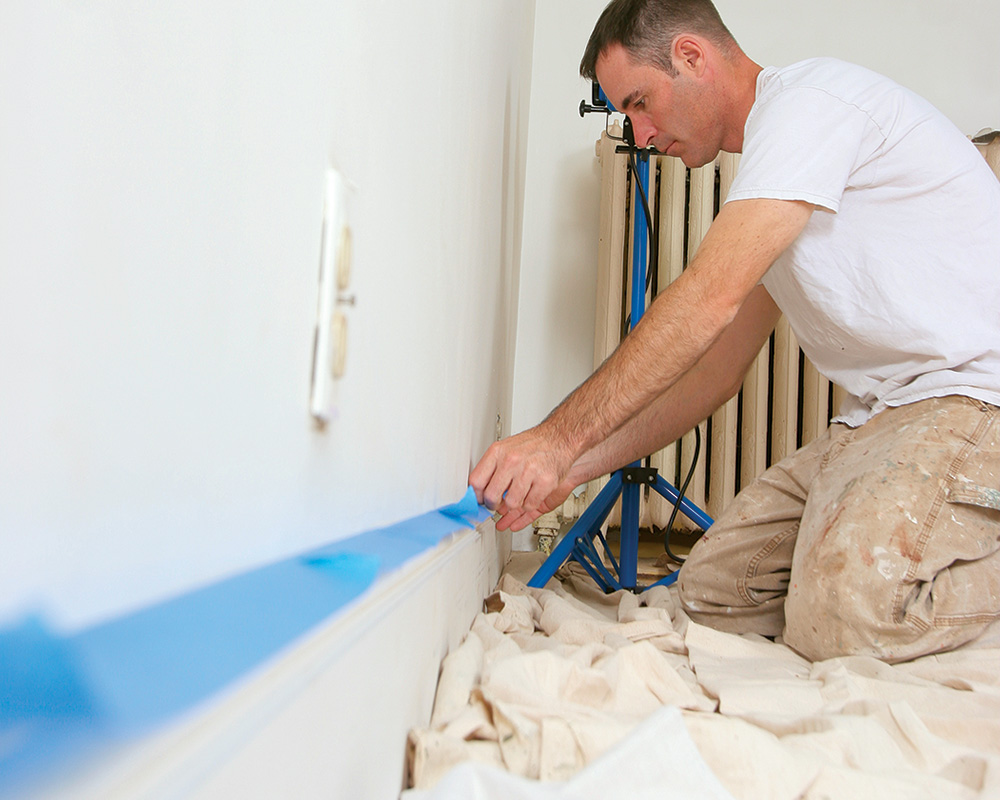
Mask only those horizontal areas that are most vulnerable to paint splatter, like the tops of chair rails and the tops of baseboards if they’re not going to be repainted. If baseboards are going to be repainted, mask the area where the wood flooring meets the baseboard.


9. Always prime walls, but not ceilings

applying paint primer

Roll primer on walls to give paint a flat, uniform base to adhere to. Ceilings don’t always have to be primed because they’re often in good shape and are typically painted with flat paint. Recoating flat paint is less demanding than recoating glossy paint. You should, however, spot-prime areas with repairs, such as places that had water leaks or drywall cracks. Tinting the primer to the finish color helps to improve coverage and gives a better sense of how the room will look when it’s done—much better than small paint swatches, which can bleed through subsequent coats of paint and ruin the final finish. Universal acrylic primers perform better than ever and have little odor.


10. Give the wall a final sanding and cleaning

final sanding before paint

Sand all wall and ceiling surfaces with a medium-grit sanding sponge, and inspect the surface for any irregularities, such as hardened paint or primer drips. This is an ideal time to make any final touch-ups or repairs prior to painting. If you make a repair, remove the dust, and be sure to spot prime the area before starting to paint.

View PDF
Previous: Getting Ready to Paint Next: Caulk This Way

Guide

Painting

Chapter

Prep Work

Sign up for eletters today and get the latest how-to from Fine Homebuilding, plus special offers.

Signing you up...

This site is protected by reCAPTCHA and the Google Privacy Policy and Terms of Service apply.
See all newsletters
See all newsletters

View Comments

  1. user-183982 | Aug 24, 2020 03:22pm | #1

    These guidelines are not for stripping painted wood but only for repainting drywall.

  2. Theresa_in_Tucson | Jul 28, 2022 01:36pm | #2

    Over the years of being a landlord and repainting every now and then my husband and I have found that drop cloths, even the ones bought at the paint store can be too thin. Our solution; flannel backed vinyl table cloths on top the drop cloth. The flannel pile grabs the canvas; they don't slip and the vinyl stops leak through. My best ones have come from Bed Bath and Beyond as I can get the right size for my kitchen table. Old table cloths go to the paint locker, new ones go on the table.

Log in or create an account to post a comment.

Sign up Log in

Become a member and get full access to FineHomebuilding.com

Painting

Painting

Everything you need to know to get the perfect finish, from choosing the right paint to applying the final coat

View Project Guide

View All Project Guides »

Become a member and get unlimited site access, including the Painting Project Guide.

Start Free Trial

Intro to Painting
  • Painting Basics
  • Painting Inspiration
Tools & Materials
  • Paint
  • Brushes and Rollers
  • Caulks and Sealants
  • Spray Equipment
  • Prep and Cleanup
Prep Work
  • Getting Ready For Painting and Finishing
Painting Walls, Ceilings, and Trim
  • Painting Interior Surfaces
Wallpaper
  • How to Prep and Install Wallpaper
  • Removing Wallpaper
  • Wallcovering Choices
Windows and Doors
  • Painting Windows and Doors
  • Video Series: Finishing an Exterior Door
Spray Painting Interiors
  • How To Spray Walls, Trim, Cabinets, and More
Exterior Painting
  • Exterior Paint Prep
  • Exterior Painting Techniques

Fine Home Building

Newsletter Sign-up

  • Fine Homebuilding

    Home building tips, offers, and expert advice in your inbox.

  • Green Building Advisor

    Building science and energy efficiency advice, plus special offers, in your inbox.

  • Old House Journal

    Repair, renovation, and restoration tips, plus special offers, in your inbox.

Signing you up...

This site is protected by reCAPTCHA and the Google Privacy Policy and Terms of Service apply.
See all newsletters

Follow

  • Fine Homebuilding

    Dig into cutting-edge approaches and decades of proven solutions with total access to our experts and tradespeople.

    Start Free Trial Now
    • Facebook
    • Instagram
    • X
    • LinkedIn
  • GBA Prime

    Get instant access to the latest developments in green building, research, and reports from the field.

    Start Free Trial Now
    • Facebook
    • YouTube
  • Old House Journal

    Learn how to restore, repair, update, and decorate your home.

    Subscribe Now
    • Facebook
    • Instagram
    • X

Membership & Magazine

  • Online Archive
  • Start Free Trial
  • Magazine Subscription
  • Magazine Renewal
  • Gift a Subscription
  • Customer Support
  • Privacy Preferences
  • About
  • Contact
  • Advertise
  • Careers
  • Terms of Use
  • Site Map
  • Do not sell or share my information
  • Privacy Policy
  • Accessibility
  • California Privacy Rights

© 2025 Active Interest Media. All rights reserved.

Fine Homebuilding receives a commission for items purchased through links on this site, including Amazon Associates and other affiliate advertising programs.

  • Home Group
  • Antique Trader
  • Arts & Crafts Homes
  • Bank Note Reporter
  • Cabin Life
  • Cuisine at Home
  • Fine Gardening
  • Fine Woodworking
  • Green Building Advisor
  • Garden Gate
  • Horticulture
  • Keep Craft Alive
  • Log Home Living
  • Military Trader/Vehicles
  • Numismatic News
  • Numismaster
  • Old Cars Weekly
  • Old House Journal
  • Period Homes
  • Popular Woodworking
  • Script
  • ShopNotes
  • Sports Collectors Digest
  • Threads
  • Timber Home Living
  • Traditional Building
  • Woodsmith
  • World Coin News
  • Writer's Digest
Active Interest Media logo
X
X
This is a dialog window which overlays the main content of the page. The modal window is a 'site map' of the most critical areas of the site. Pressing the Escape (ESC) button will close the modal and bring you back to where you were on the page.

Main Menu

  • How-To
  • Design
  • Tools & Materials
  • Video
  • Blogs
  • Forum
  • Project Guides
  • Reader Projects
  • Magazine
  • Members
  • FHB House

Podcasts

  • FHB Podcast
  • ProTalk

Webinars

  • Upcoming and On-Demand

Podcasts

  • FHB Podcast
  • ProTalk

Webinars

  • Upcoming and On-Demand

Popular Topics

  • Kitchens
  • Business
  • Bedrooms
  • Roofs
  • Architecture and Design
  • Green Building
  • Decks
  • Framing
  • Safety
  • Remodeling
  • Bathrooms
  • Windows
  • Tilework
  • Ceilings
  • HVAC

Magazine

  • Current Issue
  • Past Issues
  • Magazine Index
  • Subscribe
  • Online Archive
  • Author Guidelines

All Access

  • Member Home
  • Start Free Trial
  • Gift Membership

Online Learning

  • Courses
  • Project Guides
  • Reader Projects
  • Podcast

More

  • FHB Ambassadors
  • FHB House
  • Customer Support

Account

  • Log In
  • Join

Newsletter

Get home building tips, offers, and expert advice in your inbox

Signing you up...

This site is protected by reCAPTCHA and the Google Privacy Policy and Terms of Service apply.
See all newsletters
See all newsletters

Follow

  • X
  • YouTube
  • instagram
  • facebook
  • pinterest
  • Tiktok

Join All Access

Become a member and get instant access to thousands of videos, how-tos, tool reviews, and design features.

Start Your Free Trial

Subscribe

FHB Magazine

Start your subscription today and save up to 81%

Subscribe

We hope you’ve enjoyed your free articles. To keep reading, become a member today.

Get complete site access to expert advice, how-to videos, Code Check, and more, plus the print magazine.

Start your FREE trial

Already a member? Log in

Privacy Policy Update

We use cookies, pixels, script and other tracking technologies to analyze and improve our service, to improve and personalize content, and for advertising to you. We also share information about your use of our site with third-party social media, advertising and analytics partners. You can view our Privacy Policy here and our Terms of Use here.

Cookies

Analytics

These cookies help us track site metrics to improve our sites and provide a better user experience.

Advertising/Social Media

These cookies are used to serve advertisements aligned with your interests.

Essential

These cookies are required to provide basic functions like page navigation and access to secure areas of the website.

Delete My Data

Delete all cookies and associated data