Removing a Bearing Wall
Hide the new carrying beam in the ceiling, and they'll forget that wall ever existed.
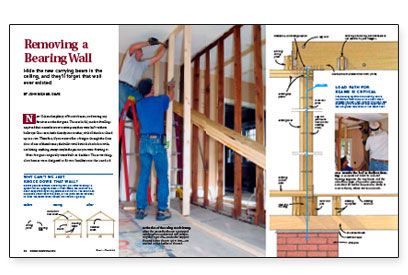
Synopsis: A restoration carpenter explains his methods for opening up a small room by removing the central bearing wall, temporarily supporting the ceiling, and installing a carrying beam hidden in the attic above the ceiling to support the new loads. Includes a sidebar discussion of how the author uses a chain hoist to help install the new beam.
New Orleans has plenty of historic houses, and among my favorites are the shotguns. These colorful, modest dwellings acquired their name because to save space, they were built without hallways: One room leads directly into another, with all the doors lined up in a row. Therefore, if you were to fire a shotgun through the front door of one of these homes, the bullet would exit the back door without hitting anything, except maybe the person you were shooting at.
Most shotguns originally were built as doubles: These working class homes were designed to fit two families onto the standard (30 ft. by 120 ft.) city lots of the time. Unfortunately, the center, or dividing, wall gives these narrow houses a claustrophobic, trailer like feel. Shotguns have become extremely fashionable in recent years, and a common trend is to remove that wall (or part of it) and turn the double into a single. That’s what we did on this job.
Exposed beams are easier to install
Because the center wall of a shotgun house is a bearing wall — this one carried the weight of the attic floor joists, which also served to tie together the exterior walls — we couldn’t remove it without substituting a properly sized beam to distribute the load. If the client had not been offended by the idea of an exposed beam, I could have taken the easy route and placed the beam beneath the floor joists, supported by end posts.
But in a long, skinny home full of tiny rooms, my clients wanted to carve out one expansive space for entertaining, and anything that broke up that space was unacceptable. Although recessing the beam represented significantly more labor, once it was hidden away in the attic, the ceiling would become an unbroken plane with no indication that a wall ever had divided this room.
Verify the load path before the bearing wall comes out
From a structural standpoint, it’s more important to determine how a beam will be supported than where it will be. On this job, I began determining the load path for the beam by stripping all the plaster and lath off the doomed wall. After the bones were exposed, I removed the corner studs from each end of the wall; then I drilled a 3⁄8-in. hole down through each end of its bottom plate — where the sole plate intersected the end wall. I was planning to support the beam with a 4×4 post tucked into each of the end walls, and these holes allowed me to see from below where the posts would go. Knowing the posts’ locations was crucial in determining the path by which the load would be transferred to the foundation.
On those jobs where I don’t find adequate structure to carry the weight of a post and beam, I either call in an engineer or simply pour a new concrete pad and add a post. In this case, I was fortunate: The posts on each end fell directly over the brick piers that supported the 6×6 center beam. All I had to do was wedge in 6×6 blocking to transfer the load from each post to the sill beam.
For more photos, drawings, and details, click the View PDF button below:
Fine Homebuilding Recommended Products
Fine Homebuilding receives a commission for items purchased through links on this site, including Amazon Associates and other affiliate advertising programs.

Short Blade Chisel

DEWALT 18v Cordless Multitool (DCS355)
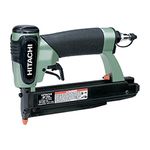
Hitachi Pin Nailer (NP35A)


