Siding With Cedar Shingles
Woven corners are a good-looking and low-maintenance alternative to corner boards.
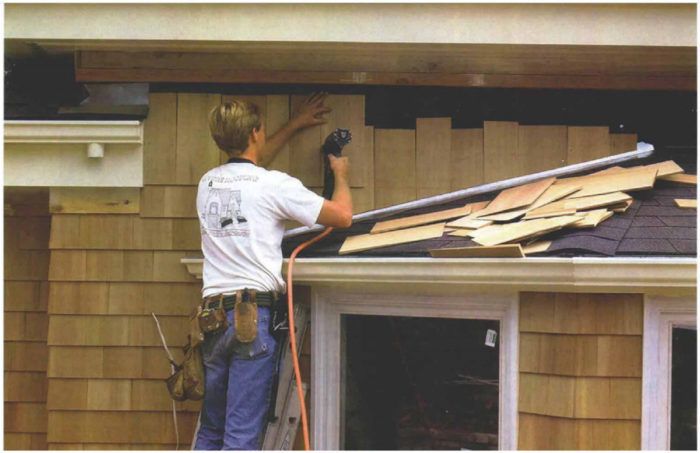
Synopsis: Roofer and shingler Oliver Govers guides us step by step through the installation of cedar shingle siding on a house. Instead of using corner boards, the author prefers woven corners and explains how they’re done. A good primer on the subject.
One of my first siding jobs, a retired and every persuasive reverend had convinced me that his house could be sided with cedar shingles for only a little bit more than his neighbor’s, a house that my helper and I had just completed. Newly self-employed and eager for work, it hadn’t occurred to me that the reverend’s house was half-again as large as his neighbor’s. And all of the little extras that he wanted – at little or no extra charge – kept adding up. Only two days into the job, we were already 35% over budget.
That was several years ago, and I lost a lot of money and a bit of confidence on that job. But the reverend was pleased, and the house came out well. I’m better with estimating now, and despite the rough start, I’m still siding houses with shingles. Cedar is wonderful material to work with, has a lot of curb appeal and is a practical siding choice.
When I side a house with shingles, I like to wrap the corners. I know that many East Coast houses with cedar-shingle siding are traditionally trimmed out with corner boards, but I’m not particularly fond of them. To me they seem like a shortcut, breaking up into many separate sections what should be continuous siding wrapping around the house. So I generally wrap my siding with woven corners, a practice that seems more common here in California; I think this style leaves a cleaner look and a more craftsmanly finish. But whether you weave your corners or butt your shingles into corner boards, cedar-shingle siding is a rewarding and low-tech approach to a traditional, high quality exterior finish.
One thing that I like about siding with cedar is that it doesn’t require an armory of specialized tools. A hammer, a utility knife, a tape measure, a chalkline, a block plane, a drill and some levels are all I need. I’ll occasionally use a table saw or a jigsaw, but I don’t consider them to be necessities. A compressor and a pneumatic stapler can speed up work but also are optional.
Of course, unless you are shingling up only 5 ft. or 6 ft. on the wall, you’ll also need scaffolding. On an extensive job I usually use the pipe scaffolding already set up on the site, or I’ll rent from a supplier. Ladders and ladder jacks also work well in certain situations, as do pump jacks. Whatever type of scaffolding you choose, though, make sure that it is safe. Siding work can take you to high places, and serious injury or death is a distinct possibility if unstable or makeshift scaffolding fails.
For more photos and details, click the View PDF button below:
Fine Homebuilding Recommended Products
Fine Homebuilding receives a commission for items purchased through links on this site, including Amazon Associates and other affiliate advertising programs.
Smart String Line
Plate Level
Original Speed Square


