
A Solid Deck Begins with Concrete Piers
Learn how to size, layout, dig, form, and pour concrete to build a simple but sturdy deck foundation.
Synopsis: Build your deck on concrete piers, and you’ll have a solid foundation that won’t heave or twist as a result of frost or poor soil bearing capacity. Veteran builder Rick Arnold walks us through the how-tos of building deck piers. Rick explains how to size piers for a basic deck and shares his method for a precise layout. You’ll also learn techniques for digging and pouring piers (which include valuable tool tips), when to use spread footings, and how to deal with poor soil bearing capacity.
Dig a hole and fill it with concrete. How hard can that be? I’ve seen old decks built on top of little more than a shovelful of concrete, cinder blocks up on end, and even 8-in. by 12-in. patio blocks. I’ve also seen old decks—not to mention a couple of new ones—sink and pull away from a house, heave up with the same results, and even both sink and heave from one end to the other.
An insufficient design or a bad installation of this simple foundation system can have disastrous consequences in terms of safety, aesthetics, and a builder’s reputation. That’s why I approach piers with the same care as I do a house or addition foundation.
Soil conditions and load requirements determine pier size and spacing
Because piers perform the same job for the deck that the foundation does for the house, it’s critical to size and space them properly.
I begin by figuring out how many piers I’m going to need. This decision depends mostly on deck design. For this project, I was building a simple 12-ft. by 16-ft. rectangular deck with a double rim joist to act as a beam that could span about 8 ft., with posts running down from the beam to the piers. In this type of application, I start with two piers on the corners and divide the 16-ft. double rim joist until I get a figure of 6 ft. or less. Here, I found that dividing the rim joist into three sections gave me a span of roughly 5 ft. 4 in., which came out to four piers. Even though my double rim joist could span 8 ft., I chose to use a 5-ft. 4-in. pier spacing to minimize the pier diameter.
After calculating the number of piers I need, I determine the size they need to be. The size of builder’s tube dictates the size of the bottom of the pier, which is the area that will be in contact with soil at the bottom of the excavation. To figure this out, I calculate the maximum weight each pier must be designed to bear (by code). For the deck in this article, I figured a 1600-lb. load on each of the two inside piers (sidebar left). Then I compared that to the bearing capacity of the soil at the bottom of the hole. I was building on hard-packed gravel, which easily has a bearing capacity of more than 3000 lb. per sq. ft. (psf).
The bearing capacity of a 10-in.-dia. tube in 3000 psf soil is 1650 psf (0.55 x 3000). The design load of each inside pier is 1600 lb., so a 10-in. tube will work. However, by jumping up to a 12-in. tube, the bearing capacity becomes 2370 psf (0.79 x 3000), which can carry the 1600-lb. load more easily. For just a bit more concrete, I ensure the pier is well designed. I typically ignore the pier weight because there is enough fat in these calculations to justify this simplification.
The two outside-corner piers are required to bear only half the weight, but to simplify he work process, I use the same-size tubes for all four of the piers.
The depth you set the piers at depends a lot on the region of the country you’re working in. In climates where frost is an issue, the minimum depth is established by code. For this project, the bottoms of the piers have to be 36 in. below finished grade.
Wherever you live, it is important to dig past soil that contains organic matter (topsoil) and any uncompacted fill. Organic matter decomposes over time and settles; loose fill also settles over time. In most cases, the depth of undisturbed soil is not known until the excavation is well under way.
Begin layout with deck dimensions
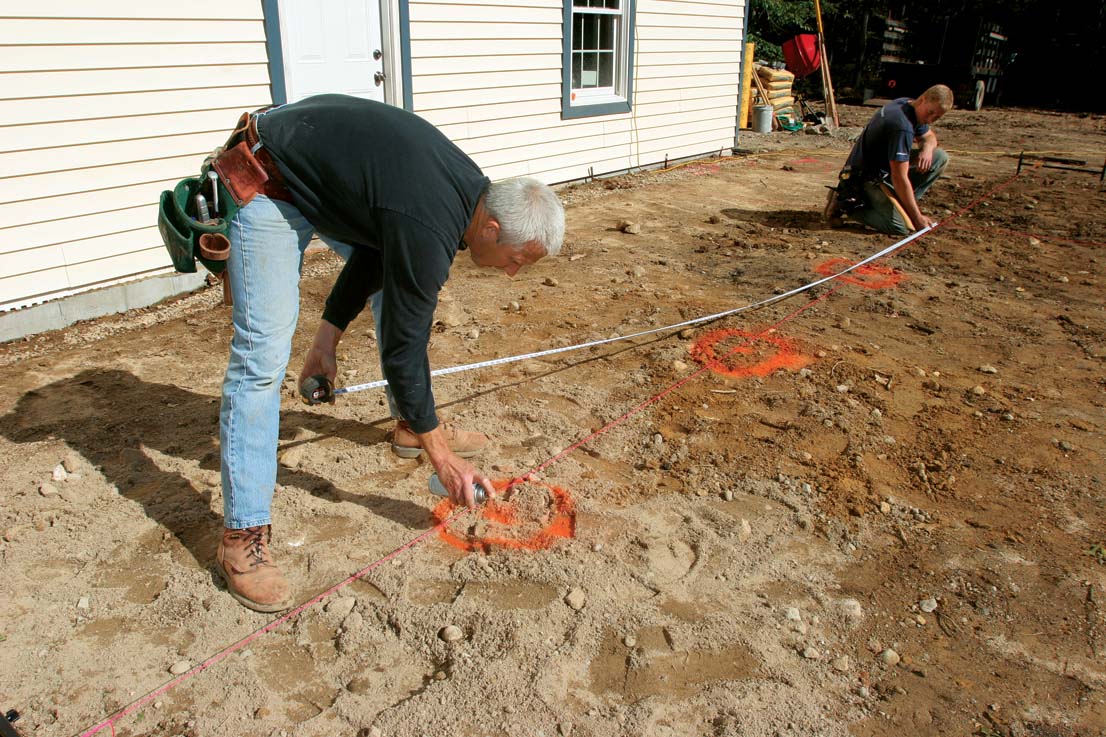
Once I know the size and the number of piers I’m going to use, the next step is to lay them out on site. If the deck details aren’t drawn on the plans, I sketch the outside deck framing to determine exactly where the center of the supporting posts are in relation to the outside dimensions of the deck. Then I use those locations to form a layout rectangle. I use batterboards and string to locate the exact center of the post, which is also the location for the anchor bolts that hold the post hardware in place.
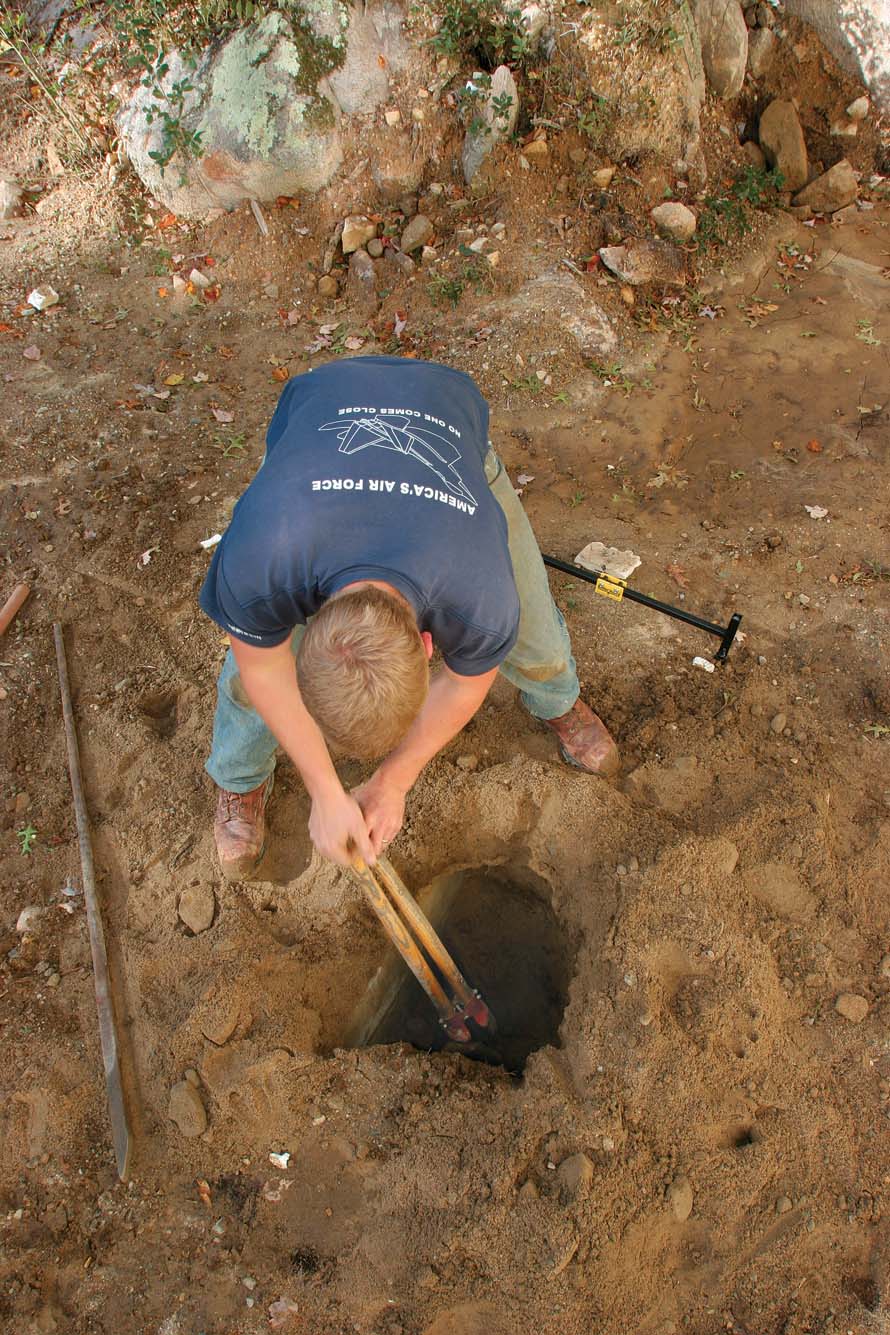
Once the post locations are identified and marked with surveyor’s paint, I remove the strings and dig the pier holes. When the holes are deep enough, I rough-cut the builder’s tubes, drop them in, and replace the stringlines. I keep the tubes centered on the strings while they are backfilled, and I double-check the measurements with a tape measure.
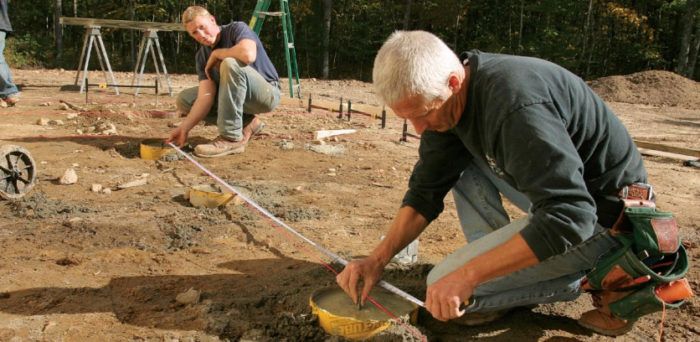
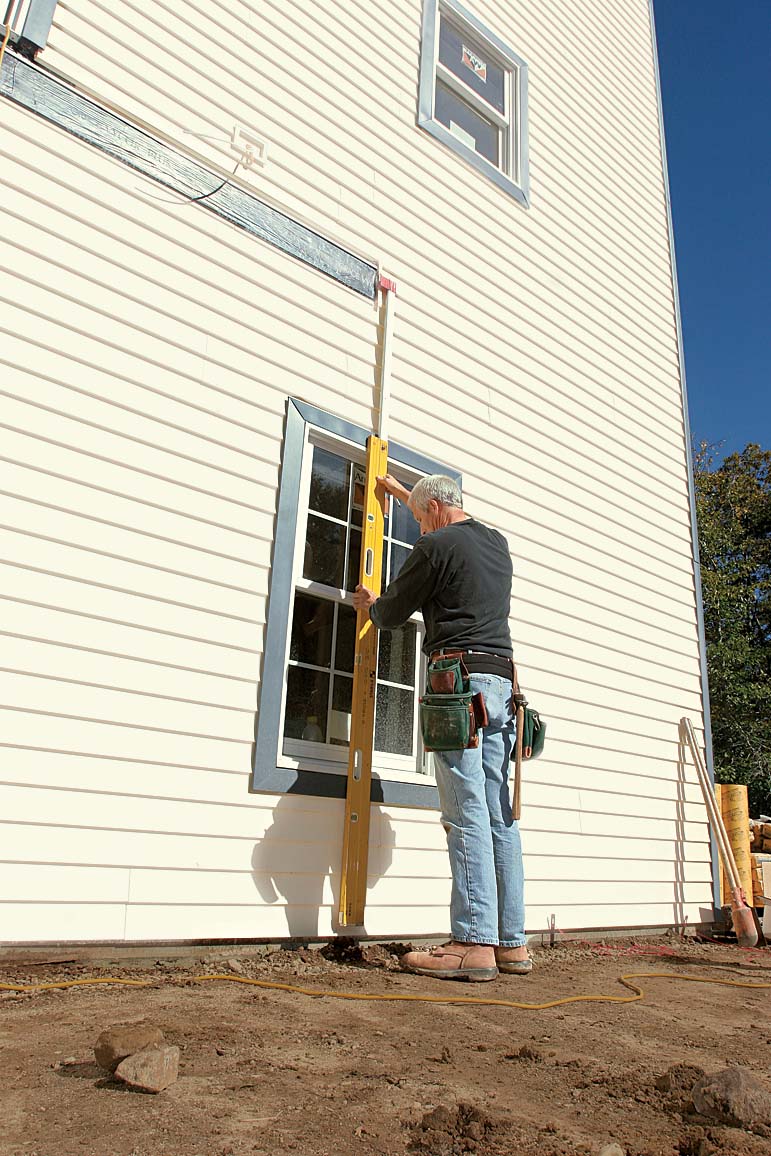
Rather than try to cut tubes to exact height, I leave them long and pour concrete to the desired height inside the tube. In most cases, I like the pour to come a couple of inches above the finished grade. If the piers are on a pitched elevation, the tops of the piers won’t be level with each other. On this job, the finished grade was level, so I used a long level to carry the elevation across the piers.
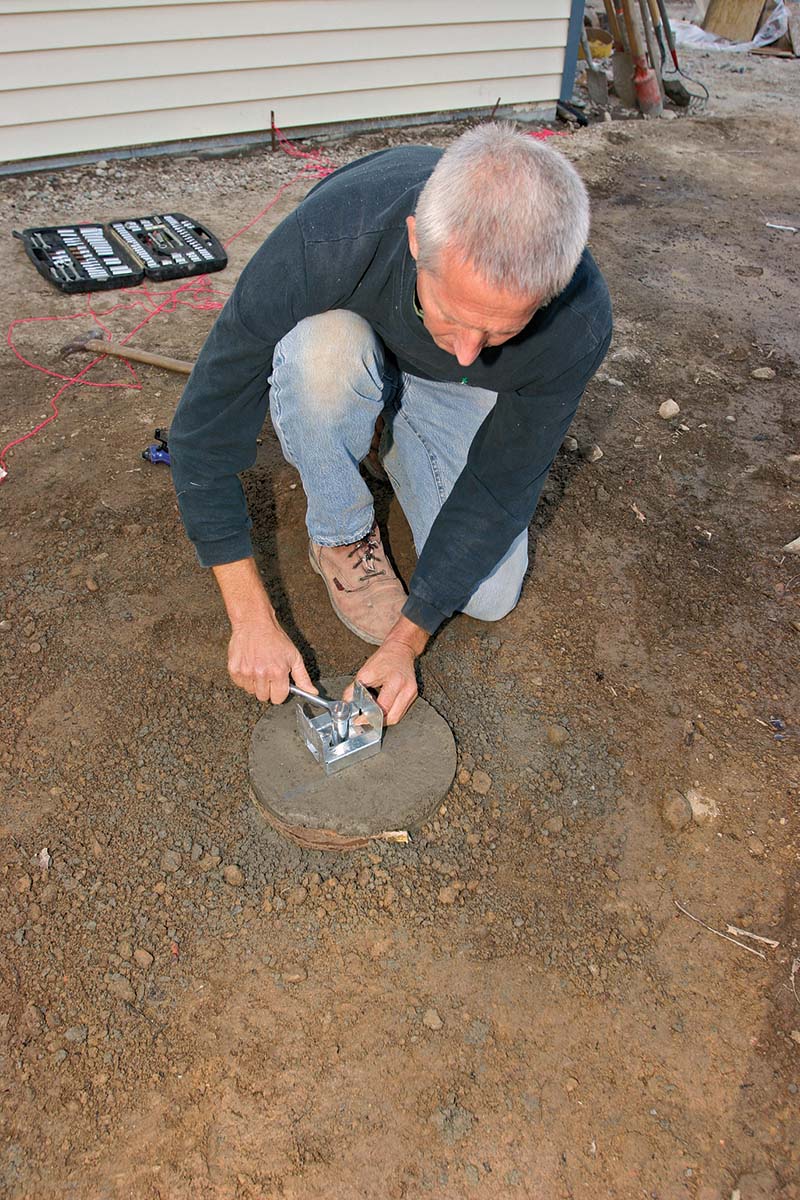
After marking each pier with a small nail pushed through at the right height, I again remove the strings so that I can pour the concrete into the tubes. Once they’re filled to the right height, I float the concrete smooth with a scrap of wood. Then I replace the string, and using a slight up-and-down motion to prevent air from becoming trapped, I insert the anchor bolts in their proper locations.

Everything you need
A few tools, even fewer materials, and a little sweat will get most deck foundations out of the ground in less than a day.
- Builder’s tubes
- 80-lb. bags of ready-mix concrete
- Garden hose
- Foundation spikes
- Batterboards
- 1⁄2-in. by 8-in. anchor bolts, nuts, and washers
- Adjustable post bases
- Post-hole digger
- Digging bar
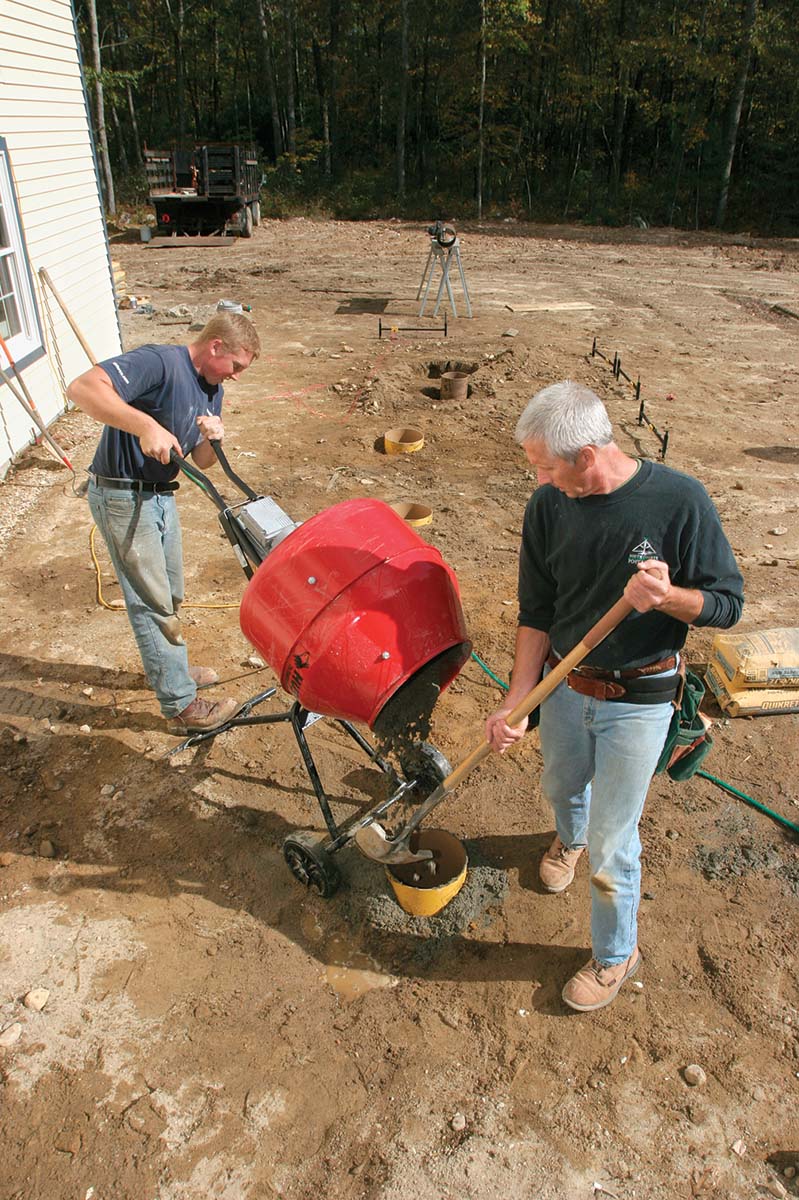
- Electric concrete mixer
- Stabila plate level
Piers transfer the deck’s weight to the soil
To do so effectively, they need to be sized and spaced according to the deck’s design load and the soil’s bearing capacity. In cold climates, piers always should sit below the frost line to prevent frost heaves. Check your local code for pier-depth requirements.
Footings spread the weight over a larger area
If the piers will be used in soil with poor bearing capacity or if the deck has a heavy design load, use a spread footing to distribute the load over a greater surface area. The more expensive, labor-intensive way to do this requires a relatively large excavation for each pier. After forming and pouring the footings, you have to install the tubes and backfill around them, then complete a second pour for the piers. But plastic footing forms bring this process down to just one pour.
For most of these systems, a builder’s tube is fastened to the top of the form; then the assembly is lowered into the hole, backfilled, and poured in one shot. See the manufacturer’s Web site for sizing and load requirements.
Square Foot:
- www.sqfoot.com
- Available from 22 in. to 32 in. dia.
- Cost: $16 to $30 per form
BigFoot Systems:
- www.bigfootsystems.com
- Available from 20 in. to 36 in. dia.
- Cost: $18 to $75 per form
The Footing Tube:
- www.foottube.com
- A builder’s tube and spread footing in one. Top diameter sizes range from6 in. to 12 in.
- Cost: $33 to $47 per form
Redibase:
- www.redibase-form.com
- Available in 24 in. dia.
- Cost: $9 to $12 per form
How many and what size?
Three things affect the number and the size of piers you use: the way you frame the deck, the weight the deck is designed for, and the load-bearing capacity of the soil. For the deck I’m building, I chose to support the double rim joist with piers instead of a cantilevered approach that uses piers beneath a beam. I use the International Residential Code’s design load for decks, which is 50 lb. per sq. ft. (psf) (40 psf live load, 10 psf dead load). Different soils have different bearing capacities (measured in psf); consult table 401.4.1 of the IRC for the bearing capacities of different soil types.
Step 1. Space piers evenly beneath the double rim joist
Because I’m using a double rim joist to support the floor joists, I support this 16-ft. deck with four piers.
Step 2. Distribute the deck’s weight onto the piers
A 12-ft. by 16-ft. deck is 192 sq. ft. Multiply by 50 psf to determine the design load, 9600 lb. Half of that weight (4800) is carried by the ledger; the other half is carried by the piers. Because the corner piers carry only half the weight that the inside piers carry, dividing 4800 lb. by three tells me the two inside piers must each bear 1600 lb.
Step 3. Transfer the weight to the soil
For this project, I was working in hard-packed gravel, which I estimate to have a bearing capacity of 3000 psf. Using the table below, I multiply the square-foot equivalent of each tube by 3000 psf to find one that will work in this soil. A 10-in. tube will bear 1650 psf, which is close, but I chose to bump up to 12-in. piers for peace of mind. To keep things simple, I made the corner piers the same size.
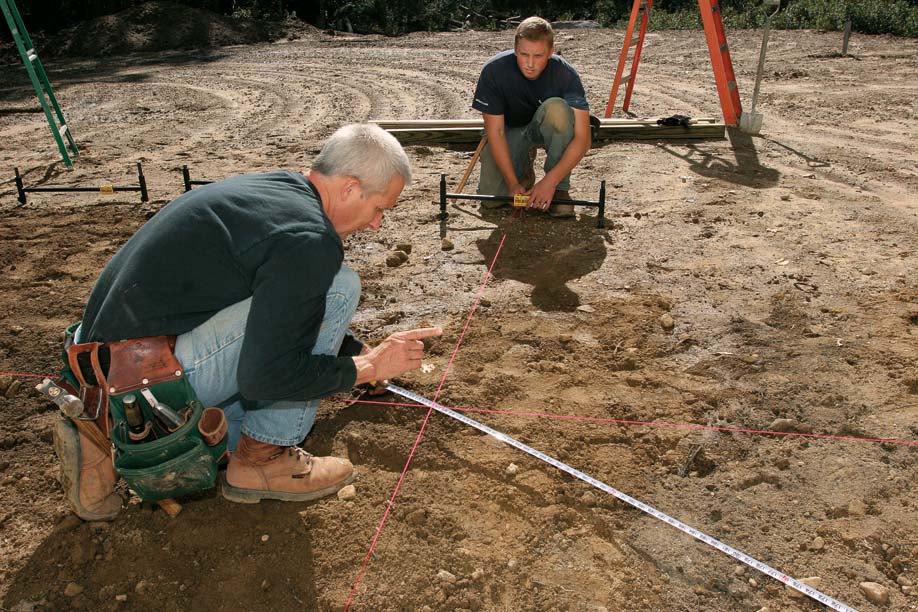
Use two lines for a dead-on layout
With the ledger location transferred to grade level, I can measure out from the house foundation and run a stringline to represent the centerpoint of the piers. A single line parallel to the house intersecting a line perpendicular to the house locates the center of the far-corner pier. Measurements for the rest of the piers are taken from this intersecting point. Batterboards help to set the lines accurately.
Tool tip: Rousseau makes a reusable batterboard system that is easy to install with foundation spikes, and allows for horizontal, vertical, rough, and precision adjustments of the string with a couple of thumbscrews. Cost for a set of four: $64. www.rousseauco.com.
Fine-tune the layout before and after the pour
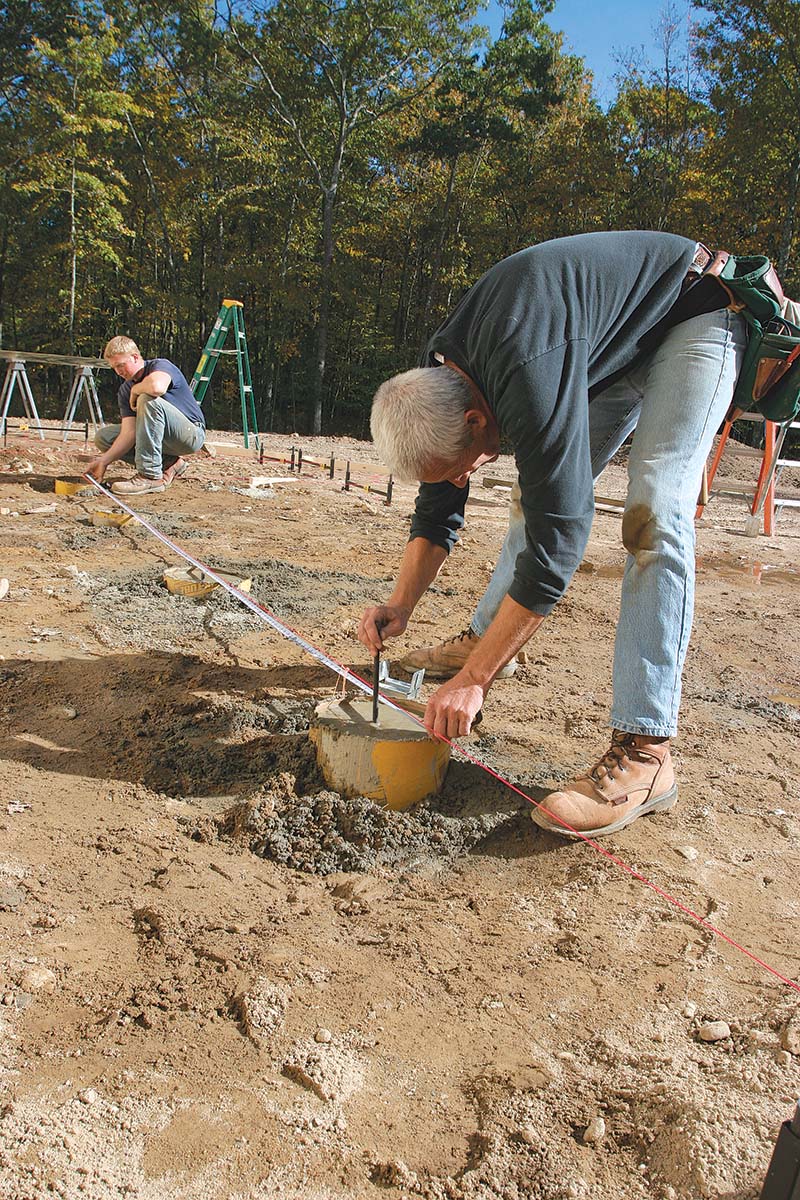
Once the holes are dug, put the stringlines back on the batterboards. When setting each builder’s tube, use the lines and a tape measure to center them according to layout, adjusting the hole locations as needed. Take the time to check the tube locations often as you backfill to keep them on layout. After all the fill is in place and the final layout check is made, fill the tubes with concrete, and insert the anchor bolts.
1. Backfill with measuring tape and shovel. I cut the builder’s tubes so that they stick out a few inches above grade when placed in the hole. To make sure a tube is placed precisely, I hold it on its layout while a helper backfills. Pack the soil around the tube every so often as you go.

or a transit to locate their finished height.
after the post is attached.
How much concrete do I need?
To pour the piers for an average-size deck, I use 80-lb. bags of concrete and an electric mixer, which rents for about $45 a day or sells for $250 or so.
For major pours, I have a concrete truck deliver a 2500-lb. mix. Either way, the basic formulas below will help you to estimate the number of bags or cubic yards of concrete required based on pier size and depth.
- Example Size of tubes: 8 in.
- Number of tubes: 8
- Average depth per tube: 4 ft.
- 0.53 (8 x 4) = 17 bags
Photos courtesy of Christopher Ermides
RELATED LINKS
- Are Spread-Base Deck Footings Worth the Effort?
- Make Your Own Spread Footing Deck Forms
- Choosing a Deck Foundation
Fine Homebuilding Recommended Products
Fine Homebuilding receives a commission for items purchased through links on this site, including Amazon Associates and other affiliate advertising programs.
Angel Guard Deck Demon
Cepco BoWrench Decking Tool
FastenMaster Screw Bolt Fastening System

View Comments
nice
Curious why you use such an expensive level. I use two plumb bobs attached to each end of a long string and tie a quick pull (fishing knot for docking the craft) loop in the middle and drape it across the ledger so that is pinpoints the exact location on both sides of the deck to the ground perfectly level on each end all at once. Saves a ton of time repositioning a level to do both sides. Considering they both work on gravity a plumb bob is far cheaper than the level you used and cheaper than the standard made in USA levels that are more than adequate than buying what I admit is a super cool level I’d love to have I just couldn’t justify it. I know it was a plug but I hope they gave it to you as those things are so expensive it feels like sandpaper in places it doesn’t belong if you catch my drift. Either way in my case I had only Donne small porches where you buried the post according to code so this article really helped me when it came to doping piers. Sis there a minimum sized pier for 6x6 posts? The math is all good and well but when using it the 6x6 looks very tight on a 12 inch pier. Should I be concerned my deck is a 12x12 using 2x10 joists per code I can’t extend them beyond 9foot and some inches we will say 9’6” the span is like you say no more than 6 foot on centre per post. What I want to know is where are you that you can use 4x4 posts. The IBC requires 6x6’s and has been adopted for safety reasons here for quite such time. As such they require us to put no less than 3 pieces of rebar to reinforce the pier. Okay okay I won’t go overboard on the code as I know it can vary but most of the USA uses the IBC as does a lot of the western world so I had to ask as it’s possible I am misreading something, Like I said I did small landings or porches that usually were only a few feet off the ground and much of what is required for a deck isn’t required there for example if building over clay which is most of the soil here one can use the prefab above ground footers. Believe 3 feet is the maximum though they make exceptions if one post happens to be a bit longer due to terrain. Anyway I’m not asking you to write a novel but any more info you can add to cover these questions would be great. Ultimately in my state we get unrestricted access to the inspectors to ask questions and as the home owner can sign off as a contractor making things easier but make no mistake they can and will make sure you meet code. I have always made it a policy when building for my home to get the inspector out there to answer all you questions and to place them on the notes section of you permit with his signature for the answers as not all inspectors know what they are doing to the same level of experience. Anyway thanks for hearing me out and hope this helps others thinking of DIY a deck.