Laying Out Basic Stair Stringers
Former editor and veteran stairbuilder Andy Engel demonstrates the necessary steps, from finding the crown to using the first stringer as a template for the second.
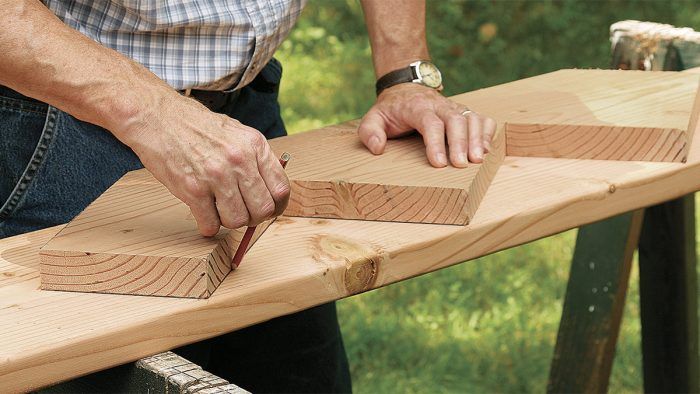
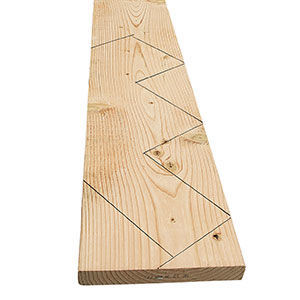
The essence of laying out stair stringers is straightforward. You use a framing square to draw the stair’s notches on the stringer, then you cut them out. If you’ve done the math (it’s grade-school stuff) and the layout right, the tread cuts will be level and the riser cuts plumb. Most stairbuilders use dimensional lumber for stair framing, but if you want super strong and straight stringers, consider making them out of engineered lumber.
The International Residential Code (IRC) governs the maximum rise (the height of each step) and the minimum run (the depth of each step), which are 7-3/4 in. and 10 in., respectively. Many jurisdictions, particularly in the Northeast, allow an 8-1/4-in. rise and a 9-in. run. Treads on stairs with a run of less than 11 in. must overhang the riser below by a minimum of 3/4 in. and a maximum of 1-1/4 in., so tread depth is actually larger than the run.
Finding rise and run
Measure from the finished floor at the bottom of the stairs to the finished floor at the top to find the overall rise. If the finished floor isn’t in place, measure from the subfloor, adding the thickness of the upper flooring and subtracting the thickness of the bottom flooring. If the finished floor won’t be in place when you install the stringers, add its thickness to the height of the bottom riser, or shim the stringers. Let’s say the overall rise is 46 in.
To find the minimum number of risers required for the stair, divide the overall rise by the IRC’s maximum rise of 7.75 in. That works out to 5.93, which rounds up to six risers. (Always round up; rounding down results in a taller rise that’s not code compliant.) Now divide the overall rise by the number of risers: 46 in. ÷ 6 = 7.66 in., or 7-11/16 in. There is always one less tread than there are risers. This stair would have five treads.
Maximum run is governed by materials and building limitations. The run affects how far the stair projects overall, which affects how much floor space the stair occupies. Common nominal 12-in. tread material measures 11-1/4 in., creating a code-compliant tread overhang on stairs with runs between 10 in. and 10-1/2 in. Using a 10-in. run, this six-riser, five-tread stair would project out 50 in. from the top landing. If you wanted a stair that was not quite as steep, you could add another riser and tread: 46 in. ÷ 7 = 6.57 in., or a riser height of 69/16 in. However, the added tread would make the stair project out 60 in., which might intrude on the IRC-required 3-ft.-deep landing at the bottom. The IRC also requires 80 in. of headroom measured plumb above the line of the tread nosing. Shallower stairs can impinge on this headroom.
You can make a stair shallower by using a bigger run, but this creates another problem. There should be at least 5 in. of stringer stock left at the back after cutting the notches. Using 2×12 stringer stock and a 10-in. run barely leaves 5 in., and a bigger run would leave even less. After you’ve decided the rise and run, lay out the stringer with a framing square. Consistent layout is crucial. The IRC allows no more than a 3/8-in. variation in riser height or run depth over a stair. Aim for none. Clamp a strip of wood to the square so that its edge aligns with the stair’s rise and run dimensions. This creates a precise guide that helps make the layout accurate.
Step-by-step
1. Clamp a guide to the square.
To make it easy to align the framing square on the stringer consistently, clamp a straight wood strip to the square. On the outer edges of the square, align the strip with the run dimension on one leg and the rise dimension on the other.
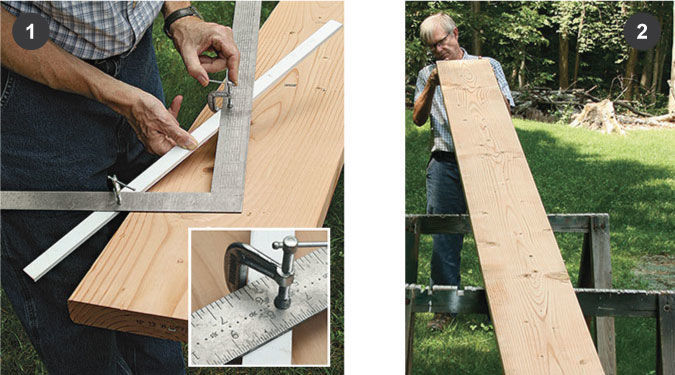
2. Find the crown.
Sight down the edge of the stringer stock to determine if it crowns. If it does, lay out the stringer so that the crown on the completed stair will face upward.
3. Lay out the first tread and the second riser.
Hold the square so that the leg with the tread dimension is closest to the end of the stringer stock but far enough from the end to allow for a riser below. Try to lay out the notches so that cutting them gets rid of knots and defects.
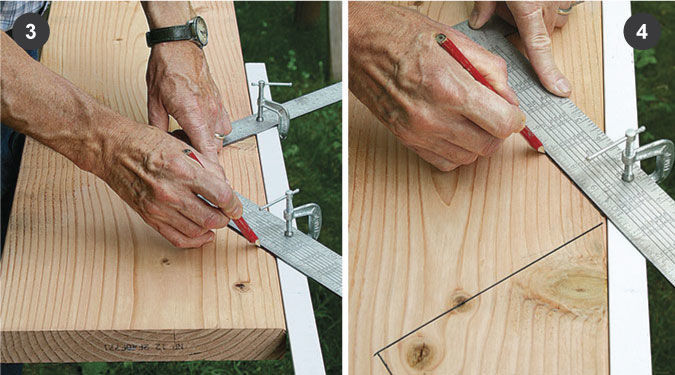
4. Lay out the second tread and the third riser.
Slide the square up, and carefully align the tread dimension with where the riser line below intersects the edge of the stringer. Continue up the stringer until you’ve laid out as many treads as are needed.
5. Mark the back of the top tread.
You don’t have to lay out the upper riser; just make a mark so you know exactly where the tread ends.
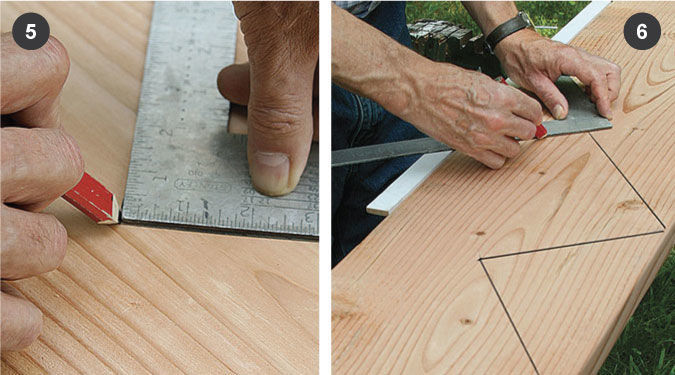
6. Mark the plumb cut at the top of the stringer.
Flip the square around to the bottom of the stringer, and mark a cutline from the back of the top tread to the bottom of the stringer.
7. Lay out the bottom riser.
Holding the guide tight to the stringer, align the riser dimension with where the first tread intersects the stringer, and mark the first riser. Extend this line all the way.
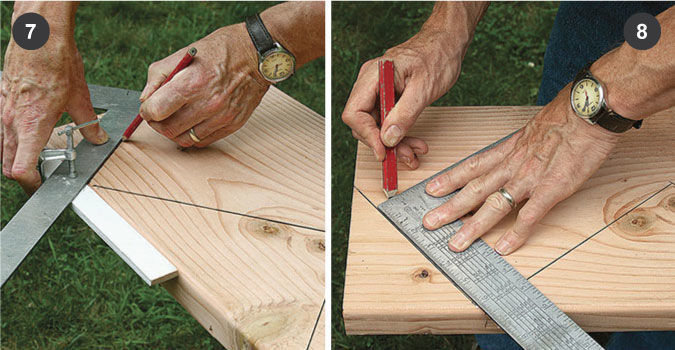
8. Adjust the first riser height.
Deduct one tread thickness from the first riser, or that step will be higher than the rest. Add the thickness of the finished floor to the riser if the flooring isn’t installed.
9. Don’t overcut the notches.
Stop the circular saw at the back of the notch, and finish the cuts with a handsaw. Cutting beyond the notch with the circular saw is faster, but it weakens the stringer.
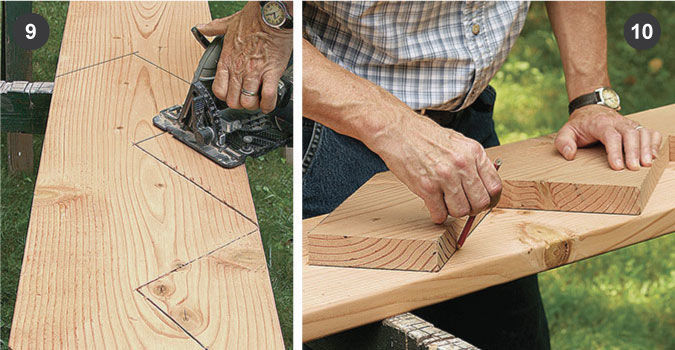
10. Use the first stringer as a template.
To lay out subsequent stringers, align the cut stringer with the edge of the stringer stock, and draw lines. Make the cut, removing the pencil line.
Photos: Patricia Steed
More on Stairs:
Shop-Built Housed-Stringer Stairs – Building in the shop makes assembly easier on the carpenter
2 Rules for Comfortable Stairs – Do your stairs feel cramped? Are your treads too short? Learn two different techniques for determining and guaranteeing a safe and comfortable rise and run.
Deck-Stair Layout 101 – Deck stair layout is simple, right? Probably right, unless it’s the first time you’ve tackled the task. With numerous “stair calculators” available, figuring rise and run dimensions is easy. Applying those dimensions is another matter. Watch this tutorial to see how to layout a basic set of deck stairs.
Lay Out Accurate Stair Stringers With This Custom Tool – If you’re framing a staircase, you could hope that the stair gauges on your framing square bear against the edge of a nice straight board, but they might not—in that case there’s a better way. Watch this video to learn how to lay out accurate stair stringers.
Framing a Staircase – Regardless of the method you choose, every set of stairs requires the same basic approach to get from one floor to another safely, comfortably, and legally. In this photo slideshow, Fine Homebuilding author John Spier takes you through the steps of framing a staircase.


View Comments
Nice. However you can make it yourself. Just google woodprix and learn how to do it easily.
Hello. Where did you get your framing square gauges??? I must purchase a pair. Thanks!
Thats a great explanation of stair geometry. One additional, optional step to keep it precise it to calculate the hypotenuse of the riser/treat triangle (the linear distance along top of the 2x12) and mark it off to make sure your framing square marks are just right :) First 5 stair layouts you do are real stressful, then it becomes fun!