Replacing a Door Threshold
Learn how to make and fine-tune the template, then measure, cut, and replace the threshold like a pro.
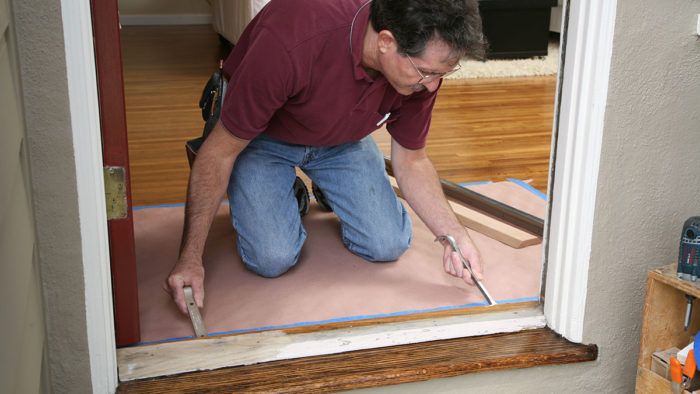
There was a time when I cringed when I had to replace a threshold. Getting a tight fit on both sides of the jamb was a time-consuming challenge. But replacing the threshold on an exterior door is not a job to put off; a worn threshold compromises the weather seal. Once I started specializing in finish work, especially doors, I had to come up with a system that would get the job done right the first time.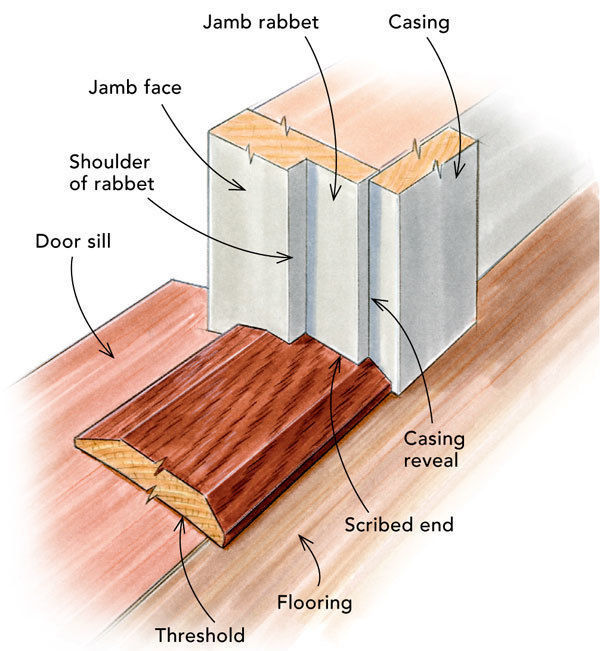
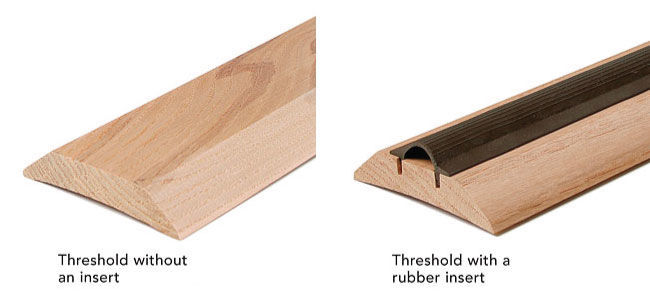
Hardware stores, home centers, and lumberyards stock a variety of wood thresholds. I prefer 3/4-in.-tall thresholds without a rubber insert. In my experience, the rubber insert can’t be adjusted to contact the door and the jamb precisely. Also, it can become clogged with mud, snow, and ice, so I always take the time to install a sweep rather than use a rubber insert for a weather seal.
The key to getting an exact fit on a new threshold is to use a template to transfer the jamb’s contours to the ends of the threshold, where matching contours must be cut. I make my templates from 1/4-in.-thick hardboard ripped to the width of the threshold. I’ve used this system for almost 20 years, and it never has failed me.
Make The Template First
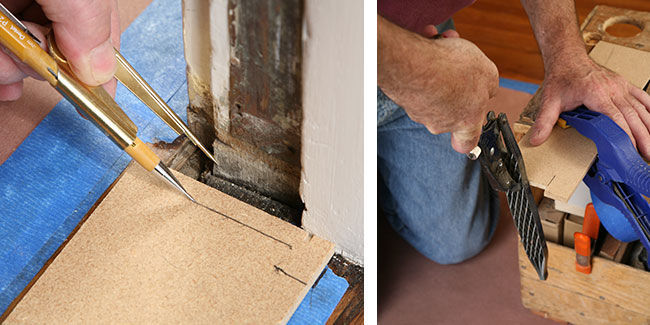
| Step 1: Scribe the template. Butt the template against the face of the jamb where the new threshold will sit. Spread the scribes to make up the widest distance. Hold them perpendicular to the jamb, and trace the profile. | Step 2: Sneak up on the line. Cut the template wide of the line with a jigsaw; then fine-tune the fit with a file. You can use a bastard file, but I use a saw rasp to make the work go faster with better results. Whatever tool you use, take extra care to make the cuts square. |
Measure And Cut The Threshold
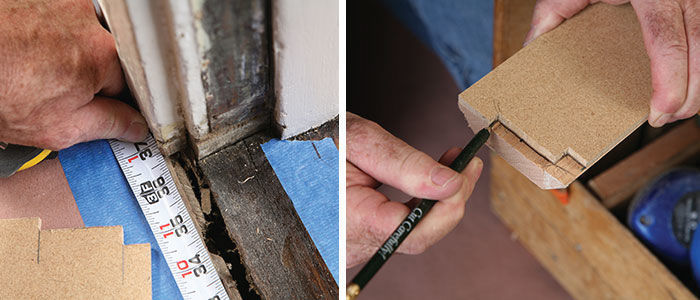
| Step 3: Measure the opening, and make the initial cut. Take the measurement from inside the casing. In this instance, it was 36-5/8 in. I added 1/16 in. for touch-up at the final fit. | Step 4: Transfer the profile of the door jamb. Hold the template on the bottom of the threshold flush to the end. With a sharp pencil, trace the profile onto the threshold; then use the same template to mark the other end of the threshold. |
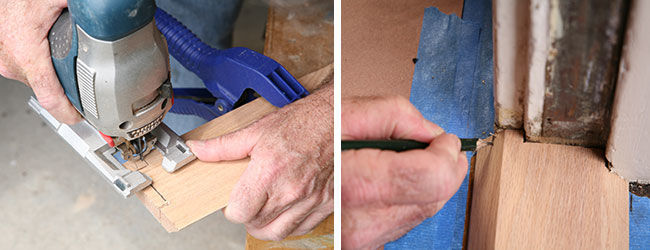
| Step 5: Cut the notches in the threshold. Use a jigsaw, and clean up the notches with a rasp just as you did with the template. Remember that although you are cutting from the bottom, the side everyone will see is the top. Keep the saw straight. The newer Bosch jigsaw has a precision-control feature (you can read about it in the tool review A Better Breed of Jigsaws from Fine Homebuilding #181 [Aug/Sept, 2006], p. 81) that is indispensable when making perpendicular cuts. | Step 6: Ease the edge of the threshold. When you check the threshold for fit, it’s a good time to make a small tick at the edge of the casing. Before you finish the threshold with your choice of stain and varnish, ease this edge with a sanding block. |
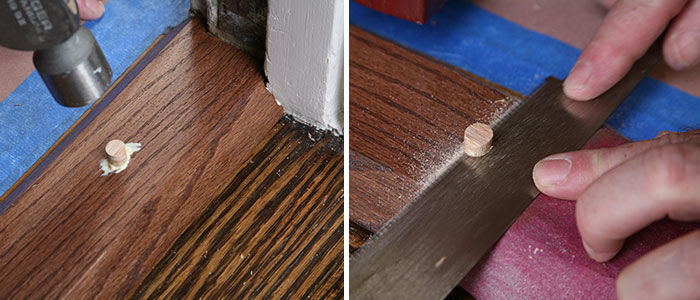
| Step 7: Cover counterbored screws with wood plugs. To hide installation screws, I drill pilot holes that have a 3/8-in.-dia. by 1/2-in.-deep counterbore. After driving #8 x 2-1/2-in.-long flathead screws (one in the sill’s center, one 4 in. from each end), I glue in 3/8-in. plugs, trimming and finishing them after the glue dries. |
Shinto Saw Rasp
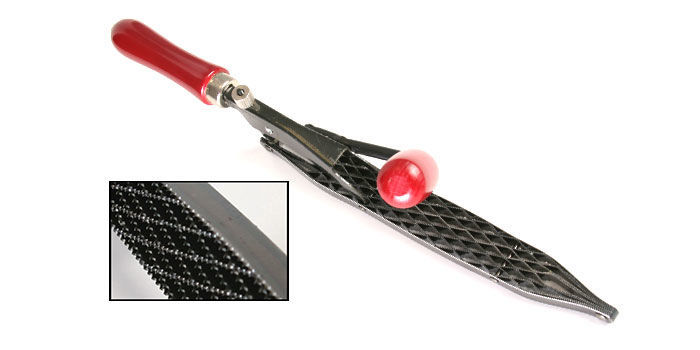
I’ve been using a Shinto Saw Rasp for a couple of years now, and it’s a dream come true. The serrations go all the way to the edge of the file, and there are two surfaces (one fine and one coarse). The tool cuts wood quickly, without a lot of effort. I no longer hesitate to use a jigsaw for making notch cuts or pocket cuts. A couple of swipes with the rasp, and corners are clean and square. You can order a planer-style Shinto Saw Rasp online for about $30 (www.japanwoodworker.com).
Photos by: Krysta Doerfler
A Final Note On Rubber Inserts
Thresholds come with and without inserts. I prefer a threshold without a rubber insert. It should have a smooth top and low profile that won’t catch mud or your feet. The slightly concave underside ensures good contact with the floor at the edge, and the beveled sides ease the transition. A threshold with an insert is designed for a door that doesn’t have a weather-sealing sweep installed along its bottom edge.
Photos by: Dean Della Ventura, except where noted
Drawing by: Dan Thornton

