FHB Logo Facebook LinkedIn Email Pinterest Twitter X Instagram Tiktok YouTube Plus Icon Close Icon Navigation Search Icon Navigation Search Icon Arrow Down Icon Video Guide Icon Article Guide Icon Modal Close Icon Guide Search Icon Skip to content
Subscribe
Log In
  • How-To
  • Design
  • Tools & Materials
  • Restoration
  • Videos
  • Blogs
  • Forum
  • Magazine
  • Members
  • FHB House
  • Podcast
Log In

Fine Homebuilding Project Guides

Wiring

Guide Home
  • Working with Electricity
  • Tools and Materials
  • Receptacles and Switches
  • Lights and Fans
  • Rough-In
  • Outdoor Wiring
  • Panels and Subpanels
How-To

Running Electrical Cable

Builder Andy Engel shares his tricks for pulling cable through framing.

By Andy Engel Issue 236 - June/July 2013
  • X
  • facebook
  • linkedin
  • pinterest
  • email
  • add to favorites Log in or Sign up to save your favorite articles

When I was a builder, I wired all of my houses with my partner, an electrician. Of course, that doesn’t fully qualify me as an electrician, but I know a bit about grunt work, such as pulling cable. Even something seemingly as simple as pulling wire through the framing goes better when you know a few tricks.

There’s a difference between cable and wire. Wire refers to the individual conductors the electricity runs through. Cable is a group of wires wrapped in some sort of outer sheathing, usually vinyl. Electrical cable typically is composed of two or three insulated 12-ga. or 14-ga. copper wires, plus a bare ground wire. The name for this configuration is nonmetallic sheathed cable, or NM, or Romex, which is Southwire’s brand of NM. A few jurisdictions require NM to be run in conduit, but most residential wiring is done with NM run through holes in the framing or stapled to the sides of framing members.

If not installed correctly, NM cable can kink and twist. Repeated bends at a kink can break the wire. Plus, kinky cable is much harder to pull through the framing. Finally, neatly installed cable looks professional and is easier to trace if you find yourself confused about which cable does what. With the proper technique, anyone can pull cable like a pro.

Align the holes 
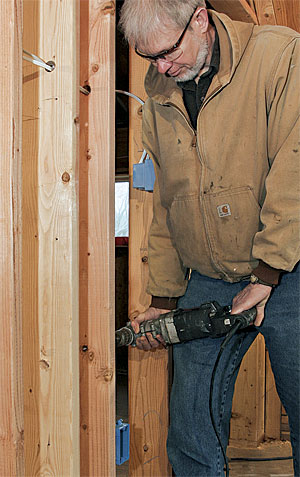
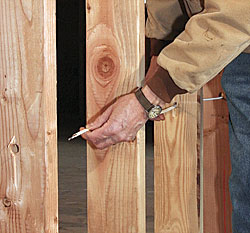
1) Align the holes. It’s easier to pull cable if the holes through the framing are in a straight line. Eyeball the line, and use a consistent body posture to keep the holes aligned. Drill 3⁄4-in. holes. Center holes in the framing members, and never drill closer than 2 in. to the edge of a joist or rafter. Put the holes about 1 ft. away from electrical boxes so that there’s room to staple the cable near the box.
Prep the cable 
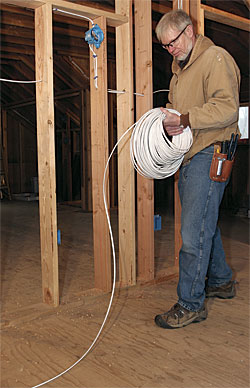
2) Prep the cable. Before running cable through the framing, unroll 10 ft. or 20 ft. on the floor. This will prevent the cable from twisting and kinking as it would if you just pulled it off the roll. Although special tools are available for unrolling cable, you can simply unroll the cable using your arms like a football referee indicating illegal formation.
Work carefully 
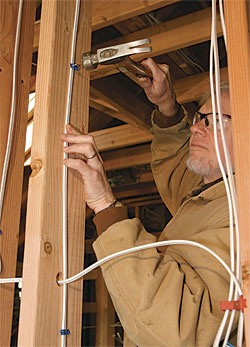
3) Work carefully. Thread the cable through the holes, and give it a tug. Keep an eye on the cable roll; you may need to feed more out as you go.
Feed the boxes
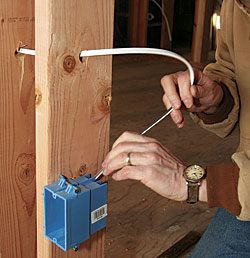
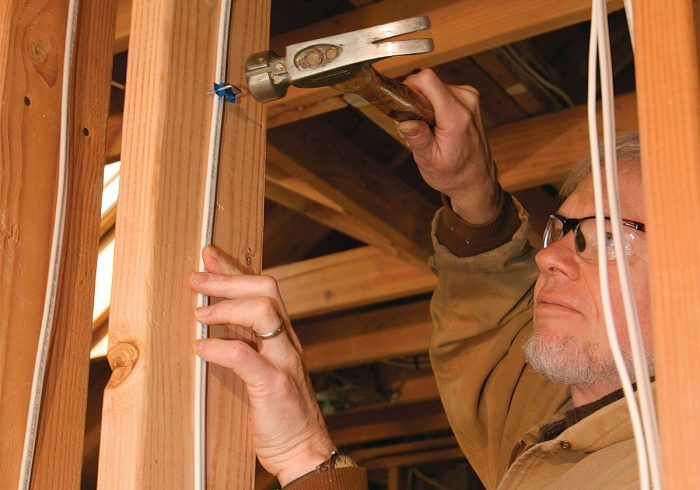
4) Feed the boxes. After running all the cables in an area, strip the sheathing back at least 6 in. (9 in. is better), feed the wire into the boxes, and staple the cable to the framing within 8 in. of plastic boxes and within 12 in. of metal boxes. Make sure there’s no unsheathed wire outside the box.
Staple wire flat
5) Staple wire flat. When cable runs along studs, joists, or rafters, keep it flat and neat, and staple it about every 4 ft. The maximum distance code allows between staples is 4-1⁄2 ft. Don’t damage the sheathing by driving the staples too hard, and keep the cable at least 1-1⁄4 in. from the edge of the framing.
Keep the work neat
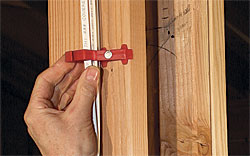
6) Keep your work neat. You can arrange multiple parallel cables neatly using stackers. Stackers also provide airspace to keep wires from overheating and are especially handy near multiple-switch boxes and breaker panels.
Use nail plates when necessary
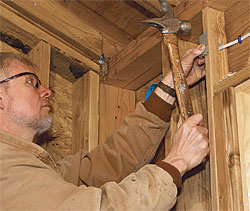
7) Use nail plates when necessary. When a cable hole is within 1-1⁄4 in. of the edge of a stud, code requires nail plates to prevent drywall fasteners or finish nails from damaging the cable.

Wiring tool kit

Although pricey, a heavy-duty 1⁄2-in. angle drill is essential for running more than a few feet of cable. It fits between studs on 16-in. centers, and its self-feeding bits pull themselves through the wood, saving operator fatigue. You’ll also need a cable stripper and lineman’s pliers.

Milwaukee 3107 heavy-duty right-angle drill
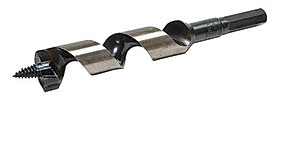
Greenlee self-feeding drill bit
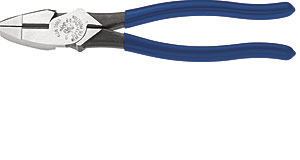
Klein lineman’s pliers
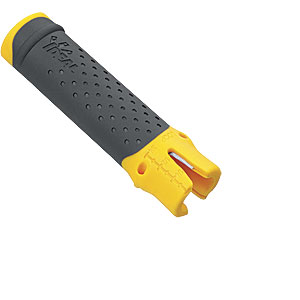
Ideal Lil’ Ripper Stripper

Step-by-step photos by Patrick McCombe

Product photos courtesy of the manufacturers

Previous: Drilling Holes Through Studs in Tight Places Next: Pulling Cable vs. Fishing Cable

Guide

Wiring

Chapter

Rough-In

Sign up for eletters today and get the latest how-to from Fine Homebuilding, plus special offers.

Signing you up...

This site is protected by reCAPTCHA and the Google Privacy Policy and Terms of Service apply.
See all newsletters
See all newsletters

View Comments

  1. MarthaRBurciaga | Jun 14, 2018 01:32am | #1

    Thanks for sharing this amazing tricks with us!

Log in or create an account to post a comment.

Sign up Log in

Become a member and get full access to FineHomebuilding.com

Wiring

Wiring

Trusted, code-compliant guidance from the pros for working safely on any wiring project

View Project Guide

View All Project Guides »

Become a member and get unlimited site access, including the Wiring Project Guide.

Start Free Trial

Working with Electricity
  • Basics
  • Safety
  • Troubleshooting and Upgrades
Tools and Materials
  • Electrical Tools
  • Electrical Boxes
  • Cables and Wires
Receptacles and Switches
  • Materials
  • Wiring Receptacles
  • Wiring Switches
Lights and Fans
  • Lighting Design
  • Installing Lights
  • Fans
Rough-In
  • Planning
  • Installing Electrical Boxes
  • Running Cable
  • Retrofit Work
  • Making Connections in Boxes
  • Electrical Conduit
Outdoor Wiring
  • Basics
  • Outlets
  • Installing Lighting
Panels and Subpanels
  • Understanding Panels
  • Circuits
  • Installing a Subpanel

Fine Home Building

Newsletter Sign-up

  • Fine Homebuilding

    Home building tips, offers, and expert advice in your inbox.

  • Green Building Advisor

    Building science and energy efficiency advice, plus special offers, in your inbox.

  • Old House Journal

    Repair, renovation, and restoration tips, plus special offers, in your inbox.

Signing you up...

This site is protected by reCAPTCHA and the Google Privacy Policy and Terms of Service apply.
See all newsletters

Follow

  • Fine Homebuilding

    Dig into cutting-edge approaches and decades of proven solutions with total access to our experts and tradespeople.

    Start Free Trial Now
    • Facebook
    • Instagram
    • X
    • LinkedIn
  • GBA Prime

    Get instant access to the latest developments in green building, research, and reports from the field.

    Start Free Trial Now
    • Facebook
    • YouTube
  • Old House Journal

    Learn how to restore, repair, update, and decorate your home.

    Subscribe Now
    • Facebook
    • Instagram
    • X

Membership & Magazine

  • Online Archive
  • Start Free Trial
  • Magazine Subscription
  • Magazine Renewal
  • Gift a Subscription
  • Customer Support
  • Privacy Preferences
  • About
  • Contact
  • Advertise
  • Careers
  • Terms of Use
  • Site Map
  • Do not sell or share my information
  • Privacy Policy
  • Accessibility
  • California Privacy Rights

© 2025 Active Interest Media. All rights reserved.

Fine Homebuilding receives a commission for items purchased through links on this site, including Amazon Associates and other affiliate advertising programs.

  • Home Group
  • Antique Trader
  • Arts & Crafts Homes
  • Bank Note Reporter
  • Cabin Life
  • Cuisine at Home
  • Fine Gardening
  • Fine Woodworking
  • Green Building Advisor
  • Garden Gate
  • Horticulture
  • Keep Craft Alive
  • Log Home Living
  • Military Trader/Vehicles
  • Numismatic News
  • Numismaster
  • Old Cars Weekly
  • Old House Journal
  • Period Homes
  • Popular Woodworking
  • Script
  • ShopNotes
  • Sports Collectors Digest
  • Threads
  • Timber Home Living
  • Traditional Building
  • Woodsmith
  • World Coin News
  • Writer's Digest
Active Interest Media logo
X
X
This is a dialog window which overlays the main content of the page. The modal window is a 'site map' of the most critical areas of the site. Pressing the Escape (ESC) button will close the modal and bring you back to where you were on the page.

Main Menu

  • How-To
  • Design
  • Tools & Materials
  • Video
  • Blogs
  • Forum
  • Project Guides
  • Reader Projects
  • Magazine
  • Members
  • FHB House

Podcasts

  • FHB Podcast
  • ProTalk

Webinars

  • Upcoming and On-Demand

Podcasts

  • FHB Podcast
  • ProTalk

Webinars

  • Upcoming and On-Demand

Popular Topics

  • Kitchens
  • Business
  • Bedrooms
  • Roofs
  • Architecture and Design
  • Green Building
  • Decks
  • Framing
  • Safety
  • Remodeling
  • Bathrooms
  • Windows
  • Tilework
  • Ceilings
  • HVAC

Magazine

  • Current Issue
  • Past Issues
  • Magazine Index
  • Subscribe
  • Online Archive
  • Author Guidelines

All Access

  • Member Home
  • Start Free Trial
  • Gift Membership

Online Learning

  • Courses
  • Project Guides
  • Reader Projects
  • Podcast

More

  • FHB Ambassadors
  • FHB House
  • Customer Support

Account

  • Log In
  • Join

Newsletter

Get home building tips, offers, and expert advice in your inbox

Signing you up...

This site is protected by reCAPTCHA and the Google Privacy Policy and Terms of Service apply.
See all newsletters
See all newsletters

Follow

  • X
  • YouTube
  • instagram
  • facebook
  • pinterest
  • Tiktok

Join All Access

Become a member and get instant access to thousands of videos, how-tos, tool reviews, and design features.

Start Your Free Trial

Subscribe

FHB Magazine

Start your subscription today and save up to 70%

Subscribe

This is your last free article.

Don't miss another expert tip or technique from building pros. Start your free trial today.

Start your FREE trial

Already a member? Log in

We hope you’ve enjoyed your free articles. To keep reading, become a member today.

Get complete site access to expert advice, how-to videos, Code Check, and more, plus the print magazine.

Start your FREE trial

Already a member? Log in

Privacy Policy Update

We use cookies, pixels, script and other tracking technologies to analyze and improve our service, to improve and personalize content, and for advertising to you. We also share information about your use of our site with third-party social media, advertising and analytics partners. You can view our Privacy Policy here and our Terms of Use here.

Cookies

Analytics

These cookies help us track site metrics to improve our sites and provide a better user experience.

Advertising/Social Media

These cookies are used to serve advertisements aligned with your interests.

Essential

These cookies are required to provide basic functions like page navigation and access to secure areas of the website.

Delete My Data

Delete all cookies and associated data