Fast and Accurate Wall Framing
An experienced carpenter shows you his no-nonsense approach to building the structure of a house.

Synopsis: As builder Mike Norton explains, framing a house is hardly glamorous work. Nevertheless, because the framing embodies the physics of a house, if it’s not done right, the house will fail. In this Master Carpenter article, Norton shares his methods for framing walls efficiently and accurately.
If there’s a glamorous job in carpentry, it’s not framing. It might be finish carpentry; everything looks so good after that final piece of molding is nailed in place and the job is complete. Framing, on the other hand, is called “rough,” and it requires an experienced imagination to see the finished product in its earliest stage. But framing embodies the physics of the structure, and if you don’t get it right, the house will fail. You’ll also have a hard time nailing your fancy trim where there is no blocking.
Whether the plans call for traditional stick framing or optimum-value engineering, the skills are relatively simple: straight and square cuts, a good hammer technique, economy of motion, and a strong back. There are a few tricks, however, that make the job easier and the results more professional. Here, I’ll explain some of the methods I’ve picked up, using a simple exterior wall as an example.
Layout is critical
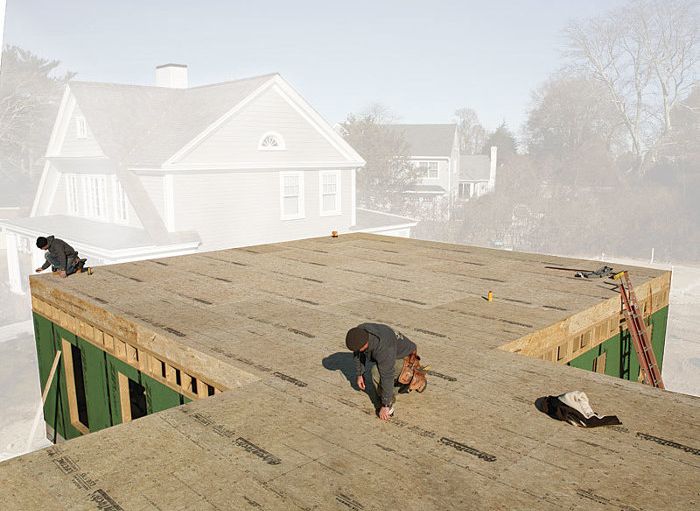
Even though you’re probably the one who laid the sill plates and framed the deck, it’s still a good idea to make sure that the deck is square before framing the walls. The simplest method to use is to check the corners by measuring a 3/4/5 triangle and then extending the angle with a reference chalkline. I’ve found it faster, however, to use a laser that shoots two lines at 90°. Two people can square up a deck in about 10 minutes, and there’s less chance for error. If the deck isn’t square, it’s usually within a 1/4-in. tolerance that we can correct by moving the plate location marks out beyond the deck edge or inward toward the center of the deck.
After squaring up the deck, we snap lines for the plates. While we’re at it, we also snap a reference centerline across the deck so that we can check that walls are parallel or, when it’s snapped to represent the ridgeline, use it to lay out a gable wall.
We frame the walls flat on the deck by first toenailing the bottom plates down on edge along the chalklines. After double-checking the window and door schedule, we mark these locations on the plates. I also figure out where the partitions intersect the wall and mark the location of the backers. If there’s a conflict between the partition’s placement and the eventual locations of interior trim, I usually call the architect before making the necessary adjustments.
Framing layout is a critical part of the process, so I always double-check my measurements. I cut the bottom plate to length first, then the top plates. I usually wait to install the second top plate until adjoining walls are raised so that the plate ties the walls together.
With the bottom and top plates placed together temporarily, I start marking the layout from the left and go right. After I mark the first stud on the bottom plate, I drive a nail at the line and pull 16 in. from there, marking the X beyond the line that indicates the stud location. At the same time, I transfer the layout to the top plate.
If I have a straight wall and a simple floor frame above, I mark the floor-joist layout onto the second top plate’s face so that we don’t have to do it after we lift the wall.
From Fine Homebuilding #242

For photos and more information about wall framing and production-style assembly, click the View PDF button below.
Fine Homebuilding Recommended Products
Fine Homebuilding receives a commission for items purchased through links on this site, including Amazon Associates and other affiliate advertising programs.

Portable Wall Jack

Leather Tool Rig

11" Nail Puller
Videos in the Series
-
Master Carpenter: Fast and Accurate Wall Framing
-
Fast and Accurate Wall Framing: Episode 2 – Tips for Layout
-
Fast and Accurate Wall Framing: Episode 3 – Assembly
-
Fast and Accurate Wall Framing: Episode 4 – Raise and Straighten the Walls
-
Tips for Setting Up a Cutting Station for Wall Framing
-
 Fast and Accurate Wall Framing


View Comments
Couple of useful tips here