Installing Engineered Flooring on a Concrete Slab
When gluing prefinished engineered flooring to concrete, detailing the prep and ensuring a careful layout are key.
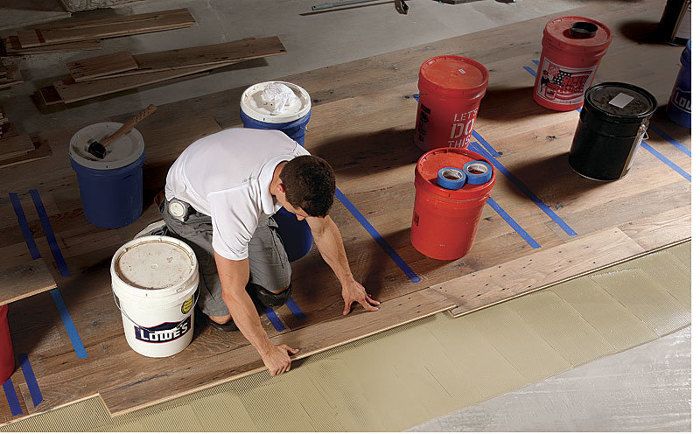
Synopsis: Part of FHB‘s Master Craftsman series, this article is a detailed look at the process of gluing engineered flooring to a slab. Installer Kevin Ward begins with a thorough look at the preparation of the slab, which must be flat, clean, and smooth. Using a 10-ft. straightedge, he checks the floor for high and low spots, marks them, and either fills them with a patching compound or grinds them down. After sweeping the floor, he next applies a sealer to the concrete. To install the flooring, Ward snaps a chalkline as a guide, then applies the urethane glue with a notched trowel. Working in increments of three to four board widths, he spreads the glue, then puts the flooring down along the chalkline. Buckets filled with sand are used to weight the flooring down in place until the glue dries. The article also features techniques used for scribing flooring into doorways and walls.
Originally from Olympia, Wash., Kevin Ward grew up in a flooring family. His father was a flooring salesman who liked to work on his own house. After college, Kevin took a couple of construction jobs that led him to his next job, where he learned to install tile, sheet goods, carpet, and hardwood floors. With that experience under his belt, he partnered with a friend and built up a business specializing in hardwood floors. In 2010, Ward moved to Austin, Texas, and got a job as the installation supervisor with custom-flooring manufacturer Hardwood Designs. His other job these days is helping girlfriend Naomi Seifter run Piknik, a food-truck restaurant, in downtown Austin.
Here in Texas, as in much of the South and West, houses are built on concrete slabs. For a flooring contractor like me, a slab can be a mixed blessing. Concrete is stable, doesn’t bounce, and won’t expand or contract seasonally like wood. However, it does limit the clients’ choices for wood-flooring installations. Obviously, you can’t use nails to attach the flooring. The advent of engineered flooring (hardwood veneer glued to a plywood substrate) made the choice of hardwood on a slab an easy one. Glued down with a urethane adhesive, engineered flooring doesn’t move in service as much as solid wood, is easy to install with the right prep work, and looks great for years.
There are a few tricks to a successful installation, and in this case, preparation is more than half the job. recently, my company was contracted to install more than 1000 sq. ft. of reclaimed-oak engineered flooring of random widths in a new house outside of Austin, and the job provided a good example of how we work.
Ensure the substrate is flat and dry
Before the job starts, I go to the site and check the slab’s moisture content. There are a couple of different methods for doing this, but the easiest and most accurate is to use a moisture meter. The slab’s moisture content should register about 4% or less. If you’re working with a new slab, it’s a good idea to allow it to cure for at least 90 days before checking its moisture content. If the slab is too wet, the flooring adhesive won’t bond properly. Alternatively, you can use either a moisture-barrier membrane that’s applied before the adhesive or a moisture-barrier/adhesive combination. (These alternatives are available from many manufacturers, but they cost twice as much as the simple adhesive process.) Even if I know the slab is dry, I always check and record the moisture reading in case something goes wrong later.
Next, I use razor scrapers to clean the accumulated paint, dirt, and gunk off the slab. Then I sweep and vacuum it clean so that nothing interferes when I check the slab’s flatness.
For more photos and details, click the View PDF button below:


