FHB Logo Facebook LinkedIn Email Pinterest Twitter X Instagram Tiktok YouTube Plus Icon Close Icon Navigation Search Icon Navigation Search Icon Arrow Down Icon Video Guide Icon Article Guide Icon Modal Close Icon Guide Search Icon Skip to content
Subscribe
Log In
  • How-To
  • Design
  • Tools & Materials
  • Restoration
  • Videos
  • Blogs
  • Forum
  • Magazine
  • Members
  • FHB House
  • Podcast
Log In
How-To

Using plywood in built-up beams

By Jim Thompson Issue 92
  • X
  • facebook
  • linkedin
  • pinterest
  • email
  • add to favorites Log in or Sign up to save your favorite articles

Q:

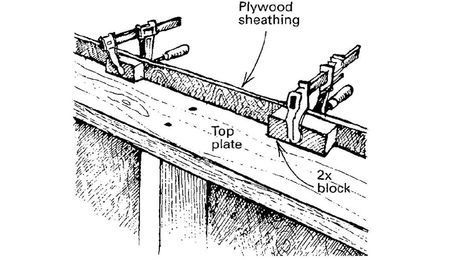
The traditional carpenters I learned from insist on ripping a sheet of 1/2-in. CDX plywood into 9-1/4 in. strips and sandwiching these strips between the three 2x10s that make up a beam. I’ve always maintained that the plywood strips add little to the strength of the beam, but the guys will have none of it and continue with their plywood sandwiches, both in beams and in 2×10 headers. They also use construction adhesive when building up beams and headers. Is either practice worth the time and trouble it takes to execute it?

David Carse, Hinesburg, VT

A:

Jim Thompson, a former framing carpenter and currently a structural engineer with McCormac Engineering Associates in Ellicott City, Maryland, replies: Let’s look at what the additional plywood buys you, and then you can answer the question yourself. To compare the stiffness of wood beams, multiply beam width by beam depth cubed and divide the product by 12. A built-up beam of three 2x10s has a relative stiffness of 297. Add 1/2-in. plywood between the 2x10s, and the relative stiffness jumps 15% to 341. An assumption I have made for the plywood is that only two of the three plies have the grain oriented along the ength of the beam, so only two of the three plies contribute to the strength of the beam. This may be a little conservative, but not much.

If you use four 2x10s and no plywood, the relative stiffness is 18% more than three 2x10s with plywood spacers. Make the beam from a pair of 2x12s only, and you get 5% more stiffness than three 2x10s with plywood. Three 2x12s yields 65% more stiffness.

Another consideration to keep in mind when you are specifying a beam is its resistance to bending. To compare built-up wood beams, I multiply beam width by beam depth squared, and then I divide the product by 6. A triple 2×10 beam has a bending-resistance factor of 64.2; add plywood between the 2x10s, and the factor increases 15% to 73.7. A beam of four 2x10s and no plywood has 18% more bending resistance than three 2x10s with plywood, but a beam of two 2x12s has 1.5% less bending resistance than the triple 2×10 beam with no plywood. Finally, three 2x12s offer 48% more bending resistance than three 2x10s.

Now let’s look at how much material comprises each beam. If we consider the triple 2×10 beam as a reference point, adding plywood between the 2x10s increases its area by 22%. A fourth 2×10 adds 33% more area to the triple 2×10 beam. Switching to a pair of 2x12s reduces area by 19%; three 2x12s increases area by 2%.

After comparing these beams, you have to wonder if a 22% increase in material, with its associated increase in material and labor costs and in weight, is worth an extra 15% in stiffness and strength. Using four 2x10s seems like a better answer for beams if you need additional strength; for headers, two 2x12s are stiffer than a pair of 2x10s padded with plywood.

The only reason I can see for packing a beam out with 1/2-in. plywood is to make the beam match the width of the dimension lumber it’s sitting on, in the case of a wall, or to fill the opening fully in the case of a header.

If the plans call for a beam made up of three 2x10s, that’s what I would install. The same applies for headers of two 2x10s. If you don’t need the extra material, why bother? If you doubt the adequacy of a beam in a house you are building, you should consult a structural engineer. The engineer can specify a beam that will satisfy all applicable code criteria, and you’ll sleep better knowing the beam is adequately sized.

Regarding the use of construction adhesive between layers of a built-up beam: If the practice does not cost you much time or money, it’s probably a good idea for nailed built-up beams.

Because construction adhesive serves to bond the parts together better, it can’t hurt. Again, if the architects or engineers who designed the house do not specify the construction adhesive, they are not counting on it for the additional strength, so the adhesive would be only for your own satisfaction. I just hope that you never have to take one of those beams apart after the adhesive has set.

Fine Homebuilding Recommended Products

Fine Homebuilding receives a commission for items purchased through links on this site, including Amazon Associates and other affiliate advertising programs.
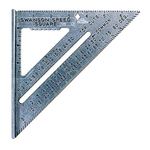
Original Speed Square
A Speed Square or rafter square can help you cut rafters, measure angles, and accurately guide your saw for straight and angled cuts. It's a must have.
Buy at Amazon

Guardian Fall Protection Pee Vee

This tool is a gem! You can use it to align plates with your snapped lines, and it’s especially helpful when working alone.
Buy at Amazon

Leather Tool Rig

This is tool rig is heavy duty, professional, and well-thought-out for tool storage — plus it can help reduce fatigue throughout the day.
Buy at Amazon

Sign up for eletters today and get the latest how-to from Fine Homebuilding, plus special offers.

Signing you up...

This site is protected by reCAPTCHA and the Google Privacy Policy and Terms of Service apply.
See all newsletters
See all newsletters
×

Get home building tips, offers, and expert advice in your inbox

Signing you up...

This site is protected by reCAPTCHA and the Google Privacy Policy and Terms of Service apply.
See all newsletters
See all newsletters

New Feature

Fine Homebuilding Forums

Ask questions, offer advice, and share your work

  • X
  • facebook
  • linkedin
  • pinterest
  • email
  • add to favorites Log in or Sign up to save your favorite articles

View Comments

  1. Gravinaut | Jun 02, 2019 11:15pm | #1

    This seems to be the perfect start to a conversation about beams. Especially the possibilities of creating beams stronger using readily available products rather than specialized.

  2. Unwanted | Sep 02, 2019 11:11pm | #2

    Ran this example in order to be sure understand in part to calculate a beam myself (years after not using what was learned in Structural Engineering class and never used because of my Autism), however, the formula for stiffness not clear and running all three ways does not produce the same result. (b*d^2)/12 produces 32, ((b*d)^2)/12 produces 144, and b*((d^2)/12) produces 3. Going about using algebra, 297*12 is 3,564, square root is 59.7, which is not 4.5*9.25 (41.6). Therefore, my mathematics are correct and the formula needs clarification please.

    I am considering four 2x12s to span 12'. (15PSF dead load, 15PSF live load, TW 8', therefore S required is 117.82in^3. S of 2x12 is 31.61in^3 or about 126.46in^3. Selecting such, deflection is 0.00035".)

    By the way, where are the percentages derived from?

    Thank you in advance.

  3. rudy_rodz | May 09, 2020 10:30pm | #3

    Help please. We are building a home and we are in the framing stage now . The framing plans calls for 2 Anthony power beams, side by side to each other from kitchen to Living room. My builder used 2- 2x12 lumber and 1/2” plywood in between. I was wondering if he’s doing right . I thought these Antony power beams would have to be factory made to carry the load of my kitchen /living room ceiling . I am attaching pictures of the beam they made and a picture of my print. Thanks for y’all help .

Log in or create an account to post a comment.

Sign up Log in

Become a member and get full access to FineHomebuilding.com

Up Next

Video Shorts

Featured Story

FHB Summit 2025 — Design, Build, Business

Join some of the most experienced and recognized building professionals for two days of presentations, panel discussions, networking, and more.

Featured Video

SawStop's Portable Tablesaw is Bigger and Better Than Before

The 10-in. Jobsite Saw PRO has a wider table, a new dust-control port, and a more versatile fence, along with the same reliable safety mechanism included in all SawStop tablesaws.

Related Stories

  • Tall Deck on a Sloped Lot
  • Making and Installing Wood Wall Paneling
  • Simple, Site-Made Trusses
  • FHB Podcast Segment: Sometimes Spray Foam Makes Sense, Sometimes It Doesn't

Discussion Forum

Recent Posts and Replies

  • |
  • |
  • |
  • |
  • |
  • |
View More Create Post

Highlights

Fine Homebuilding All Access
Fine Homebuilding Podcast
Tool Tech
Plus, get an extra 20% off with code GIFT20

"I have learned so much thanks to the searchable articles on the FHB website. I can confidently say that I expect to be a life-long subscriber." - M.K.

Get home building tips, offers, and expert advice in your inbox

Signing you up...

This site is protected by reCAPTCHA and the Google Privacy Policy and Terms of Service apply.
See all newsletters
See all newsletters

Video

View All Videos
  • Adding Windows, Siding, and a Brick Lime-Wash Coating
  • Control Layers for a Remodel
  • Replacing Old Shingles with a New Metal Roof
  • Framing a Second Story on an Existing House
View All

Lumber and Sheet Goods

View All Lumber and Sheet Goods Articles
  • Sheathing Walls Solo
  • No-Downside Decking
  • PT Ain't What It Used to Be
View All Lumber and Sheet Goods Articles

Fine Homebuilding Magazine

  • Issue 332 - July 2025
    • Custom Built-ins With Job-Site Tools
    • Fight House Fires Through Design
    • Making the Move to Multifamily
  • Issue 331 - June 2025
    • A More Resilient Roof
    • Tool Test: You Need a Drywall Sander
    • Ducted vs. Ductless Heat Pumps
  • Issue 330 - April/May 2025
    • Deck Details for Durability
    • FAQs on HPWHs
    • 10 Tips for a Long-Lasting Paint Job
  • Issue 329 - Feb/Mar 2025
    • Smart Foundation for a Small Addition
    • A Kominka Comes West
    • Making Small Kitchens Work
  • Issue 328 - Dec/Jan 2024
    • How a Pro Replaces Columns
    • Passive House 3.0
    • Tool Test: Compact Line Lasers

Fine Home Building

Newsletter Sign-up

  • Fine Homebuilding

    Home building tips, offers, and expert advice in your inbox.

  • Green Building Advisor

    Building science and energy efficiency advice, plus special offers, in your inbox.

  • Old House Journal

    Repair, renovation, and restoration tips, plus special offers, in your inbox.

Signing you up...

This site is protected by reCAPTCHA and the Google Privacy Policy and Terms of Service apply.
See all newsletters

Follow

  • Fine Homebuilding

    Dig into cutting-edge approaches and decades of proven solutions with total access to our experts and tradespeople.

    Start Free Trial Now
    • Facebook
    • Instagram
    • X
    • LinkedIn
  • GBA Prime

    Get instant access to the latest developments in green building, research, and reports from the field.

    Start Free Trial Now
    • Facebook
    • YouTube
  • Old House Journal

    Learn how to restore, repair, update, and decorate your home.

    Subscribe Now
    • Facebook
    • Instagram
    • X

Membership & Magazine

  • Online Archive
  • Start Free Trial
  • Magazine Subscription
  • Magazine Renewal
  • Gift a Subscription
  • Customer Support
  • Privacy Preferences
  • About
  • Contact
  • Advertise
  • Careers
  • Terms of Use
  • Site Map
  • Do not sell or share my information
  • Privacy Policy
  • Accessibility
  • California Privacy Rights

© 2025 Active Interest Media. All rights reserved.

Fine Homebuilding receives a commission for items purchased through links on this site, including Amazon Associates and other affiliate advertising programs.

  • Home Group
  • Antique Trader
  • Arts & Crafts Homes
  • Bank Note Reporter
  • Cabin Life
  • Cuisine at Home
  • Fine Gardening
  • Fine Woodworking
  • Green Building Advisor
  • Garden Gate
  • Horticulture
  • Keep Craft Alive
  • Log Home Living
  • Military Trader/Vehicles
  • Numismatic News
  • Numismaster
  • Old Cars Weekly
  • Old House Journal
  • Period Homes
  • Popular Woodworking
  • Script
  • ShopNotes
  • Sports Collectors Digest
  • Threads
  • Timber Home Living
  • Traditional Building
  • Woodsmith
  • World Coin News
  • Writer's Digest
Active Interest Media logo
X
X
This is a dialog window which overlays the main content of the page. The modal window is a 'site map' of the most critical areas of the site. Pressing the Escape (ESC) button will close the modal and bring you back to where you were on the page.

Main Menu

  • How-To
  • Design
  • Tools & Materials
  • Video
  • Blogs
  • Forum
  • Project Guides
  • Reader Projects
  • Magazine
  • Members
  • FHB House

Podcasts

  • FHB Podcast
  • ProTalk

Webinars

  • Upcoming and On-Demand

Podcasts

  • FHB Podcast
  • ProTalk

Webinars

  • Upcoming and On-Demand

Popular Topics

  • Kitchens
  • Business
  • Bedrooms
  • Roofs
  • Architecture and Design
  • Green Building
  • Decks
  • Framing
  • Safety
  • Remodeling
  • Bathrooms
  • Windows
  • Tilework
  • Ceilings
  • HVAC

Magazine

  • Current Issue
  • Past Issues
  • Magazine Index
  • Subscribe
  • Online Archive
  • Author Guidelines

All Access

  • Member Home
  • Start Free Trial
  • Gift Membership

Online Learning

  • Courses
  • Project Guides
  • Reader Projects
  • Podcast

More

  • FHB Ambassadors
  • FHB House
  • Customer Support

Account

  • Log In
  • Join

Newsletter

Get home building tips, offers, and expert advice in your inbox

Signing you up...

This site is protected by reCAPTCHA and the Google Privacy Policy and Terms of Service apply.
See all newsletters
See all newsletters

Follow

  • X
  • YouTube
  • instagram
  • facebook
  • pinterest
  • Tiktok

Join All Access

Become a member and get instant access to thousands of videos, how-tos, tool reviews, and design features.

Start Your Free Trial

Subscribe

FHB Magazine

Start your subscription today and save up to 70%

Subscribe

This is your last free article.

Don't miss another expert tip or technique from building pros. Start your free trial today.

Start your FREE trial

Already a member? Log in

We hope you’ve enjoyed your free articles. To keep reading, become a member today.

Get complete site access to expert advice, how-to videos, Code Check, and more, plus the print magazine.

Start your FREE trial

Already a member? Log in

Privacy Policy Update

We use cookies, pixels, script and other tracking technologies to analyze and improve our service, to improve and personalize content, and for advertising to you. We also share information about your use of our site with third-party social media, advertising and analytics partners. You can view our Privacy Policy here and our Terms of Use here.

Cookies

Analytics

These cookies help us track site metrics to improve our sites and provide a better user experience.

Advertising/Social Media

These cookies are used to serve advertisements aligned with your interests.

Essential

These cookies are required to provide basic functions like page navigation and access to secure areas of the website.

Delete My Data

Delete all cookies and associated data