The Challenge:
Crown molding installation has always been a trim carpenter’s litmus test. Its a challenge to get an acceptable fit at inside, outside and off-angle corners which can require full use of every trick in the handbook. But the end result is a classy touch and the satisfaction of a job well done. Creating crown molding for a 3D model in SketchUp can be quite a challenge as well. In both cases however, a bag of tricks can make all the difference in how long the job takes and how well it comes out. This session on The Digital Job Site is a tutorial for using SketchUp’s digital tricks handbook for a complex trim installation.
Setting the Stage:
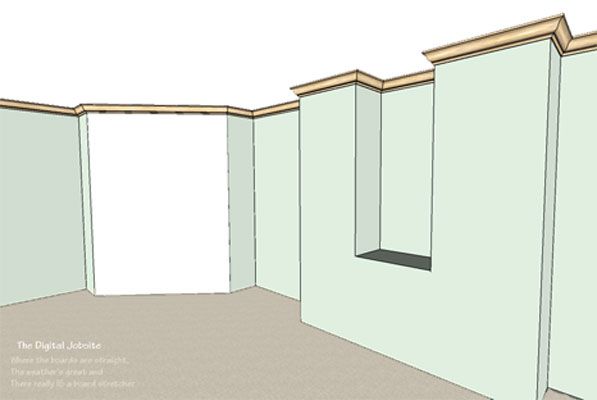
I begin this session with an outline of an unrealistic room. The room includes a bid-busting array of inside and outside corners, a bumped-out 45 degree wall and even a half-circle nook! The video shows how I like to “set the stage” for installing crown molding with an arbitrary 9′ ceiling height and “smoothing out” the half circle by upping the line segment count. As if that’s not enough of a challenge for the Follow-Me tool to tackle I add geometry to represent what you might encounter with built-in casework to trim around. The main thing NOT included in this room is the bumpy walls and corners out-of-square from taping mud that are typically encountered on a real-world jobsite… I TOLD you it’s unrealistic!
Quick and Slick: Follow Me Crown molding
With the stage set we’ll take a few VERY KEY steps in preparing the crown molding “profile path” before putting the Follow Me tool to work. First I add a “handle” to the outline geometry for lining up our finish molding group to the wall group. Without a handle it can be frustrating to properly position the completed crown molding. Then, carefully selecting certain geometry and “grouping” it, we’re ready for the next step: a “drawing plane” provides a canvas for drawing a representative crown molding profile with assistance from guidelines, the line and the arc tools. With all that the stage is set and the Follow Me tool takes care of the rest. Quick and slick, no nails, no glue, no putty. Another fine day on the Digital Job Site…
Beyond the Basics
With a little imagination you can see how to use similar methods to add all manner of trim and moldings to your 3D models: chair rail, applied moldings, casings, base, shoe. The possibilities are endless.
The model created for this blog post is available for download in the Google SketchUp Component Warehouse. Click here, or go Window>Components and type Quick and Slick in the search box, download the model to check into some of its features.
Stay Tuned…
The next session of The Digital Job Site will cover methods you can use to copy the actual profile of the specific crown molding you are working with and add it to your model to show EXACTLY how it will look in your particular application. I’ll also show how you can use this information to calculate compound miter angles for cutting that actual crown molding to fit any angle you encounter: 90, 45, 30, or maybe even 23 degrees. Hope this helps you embellish your 3D models and impress your clients.
Fine Homebuilding Recommended Products
Fine Homebuilding receives a commission for items purchased through links on this site, including Amazon Associates and other affiliate advertising programs.

The New Carbon Architecture: Building to Cool the Climate

Pretty Good House

A Field Guide to American Houses
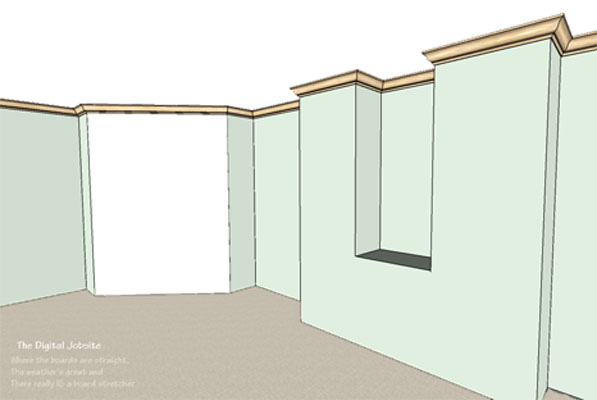
Once the stage is set, you can install digital crown moulding in seconds!
