
Beginning at the End:
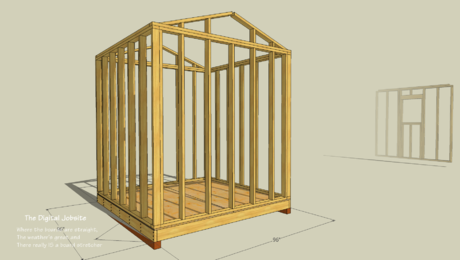
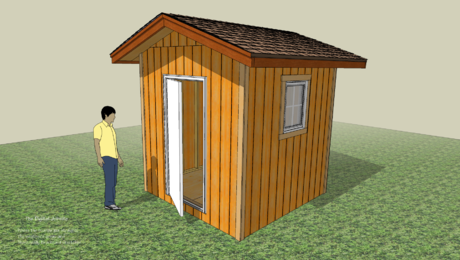
To accomplish the goal of building a simple, sturdy, practical, and useful shed, a few design and material choices need to be made. Begin by imagining the shed you want to end up with and work back from there to know where to start. Fir siding was chosen for this project for its durability, appearance, and high value. Its high value comes from its durability which allows sturdy construction without the need for a sheathing layer which would be necessary with horizontal lap siding. Preplanning wall layout so vertical siding seams land on studs is an important consideration. Fir siding is available in 9-ft.-long sheets, which works well for this practical design too. The shed needed to be 8 ft. square and 8 ft. high for adequate storage volume, so planning starts from there.
Video Apprenticeship:
This video will illustrate layout principles to optimize use of 4×9 siding panels. Even though this shed is 8 ft. square, the principles apply to framing in general and could be adapted to a shed of any size. While doing this screen-capture video it became clear that I’m trying to pack a lot of information into this blog post. Like a real carpentry apprenticeship, it can be difficult to grasp too many new concepts all at once. There are bound to be gaps in my presentation, so help fill them in with questions and comments.
A Work in Progress:
I continue to get comments about “jittering” and “jiggling” cursor movements during these screen-capture video recordings. It’s embarrassing, like visual stuttering that I’m not conscious of until after-the-fact. I completely understand how annoying it is for viewers to try to learn from the tutorial while being constantly distracted by cursor movement. I didn’t learn much in sophomore algebra class because my attention was riveted on counting how many times the teacher bobbed up and down on his toes trying to emphasize key points in his lectures. Video production, for me, is a work in progress. I’m focused on continual improvement and fully expect to overcome annoying production issues like JMS (Jittery Mouse Syndrome) and frequent “UMMs” and “UUHHs” as part of the process
Floor Framing Process:
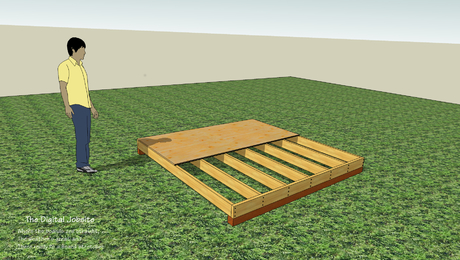
With clear understanding of the shed size, function, and design, it’s time to start building. Here I give an overview of assembling floor joists on 4×4 support beams and discuss principles of getting the assembly squared up. Two other shed-building series (a Garden Shed and a Tool Shed) have additional information for setup and framing methods for shed floors that you might find helpful to understand this phase. The good thing is that here you can learn a lot about shed-building without getting muddy, cold, or wet…
Interactive Building:
If you watched “A Step Ahead to Build a Shed” prior to seeing this blog post, you’ll remember that it can be an interactive process. I’m open to design, material, and tutorial content input from viewers to enhance your learning experience, so feel free to post comments or questions as this series develops. I’ll try to incorporate answers and responses into future installments. As a reminder, the shed model used for this tutorial series is available at the SketchUp Component Warehouse by clicking HERE.
Fine Homebuilding Recommended Products
Fine Homebuilding receives a commission for items purchased through links on this site, including Amazon Associates and other affiliate advertising programs.
Get Your House Right: Architectural Elements to Use & Avoid

All New Bathroom Ideas that Work

A House Needs to Breathe...Or Does It?: An Introduction to Building Science
-
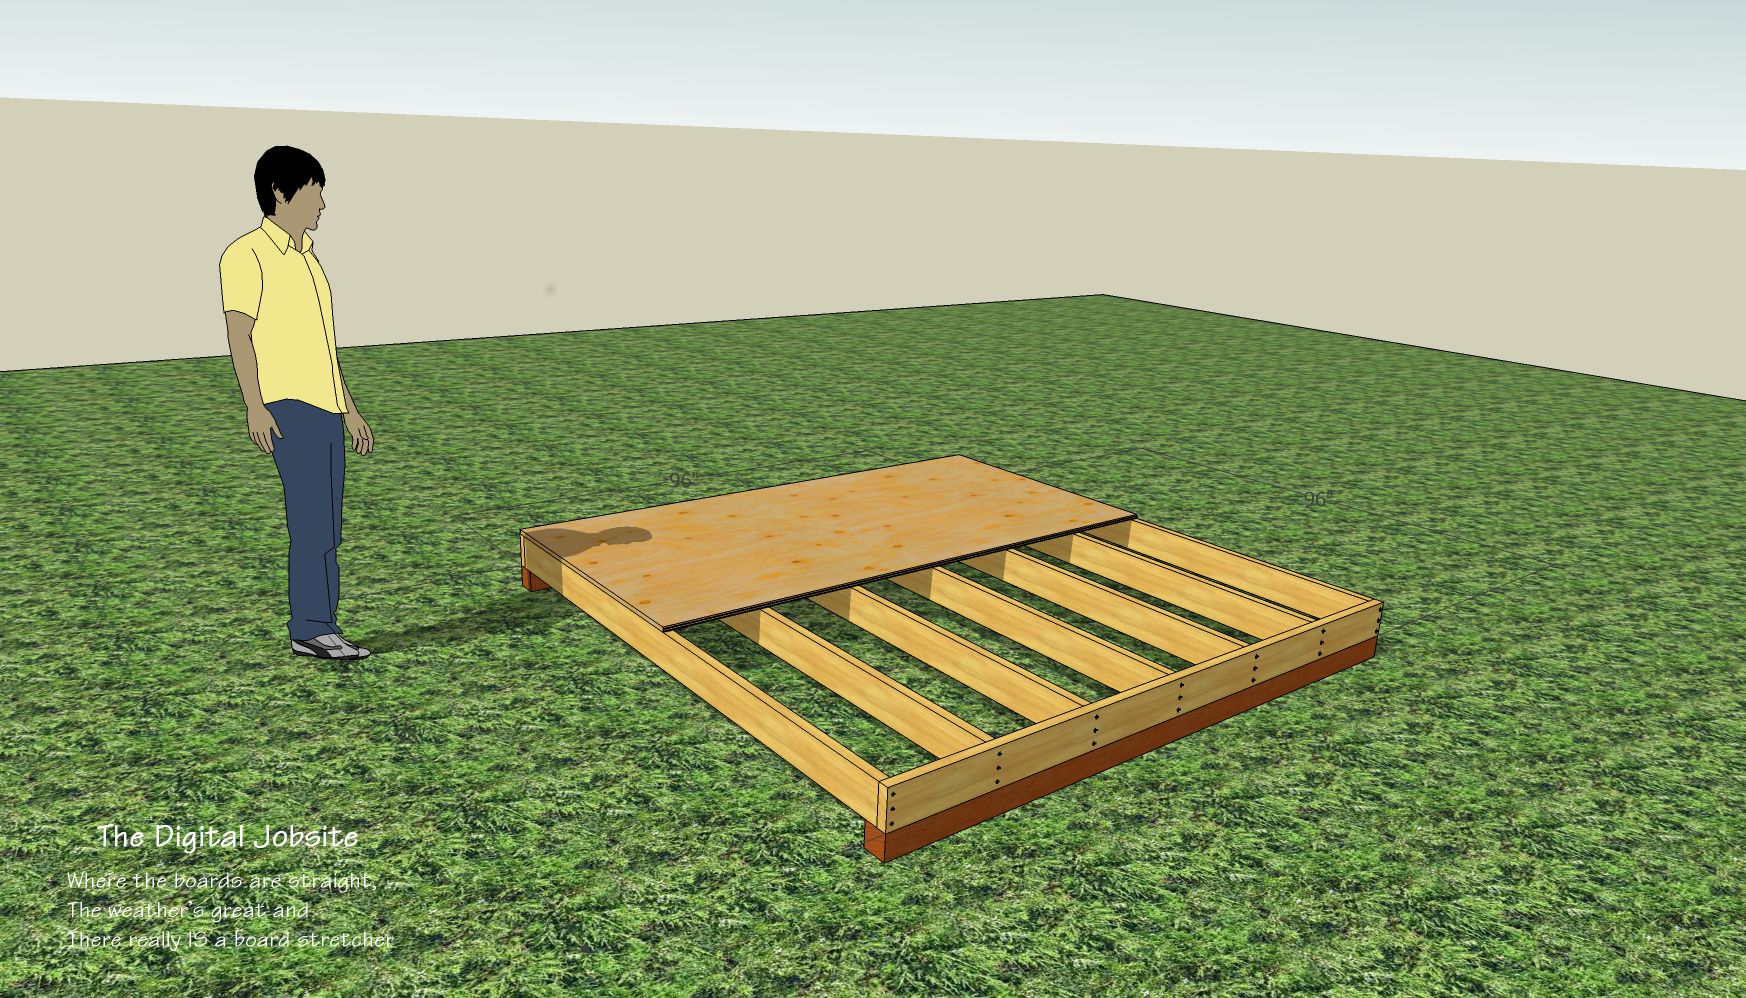
Sang inspects floor framing for the shed
-
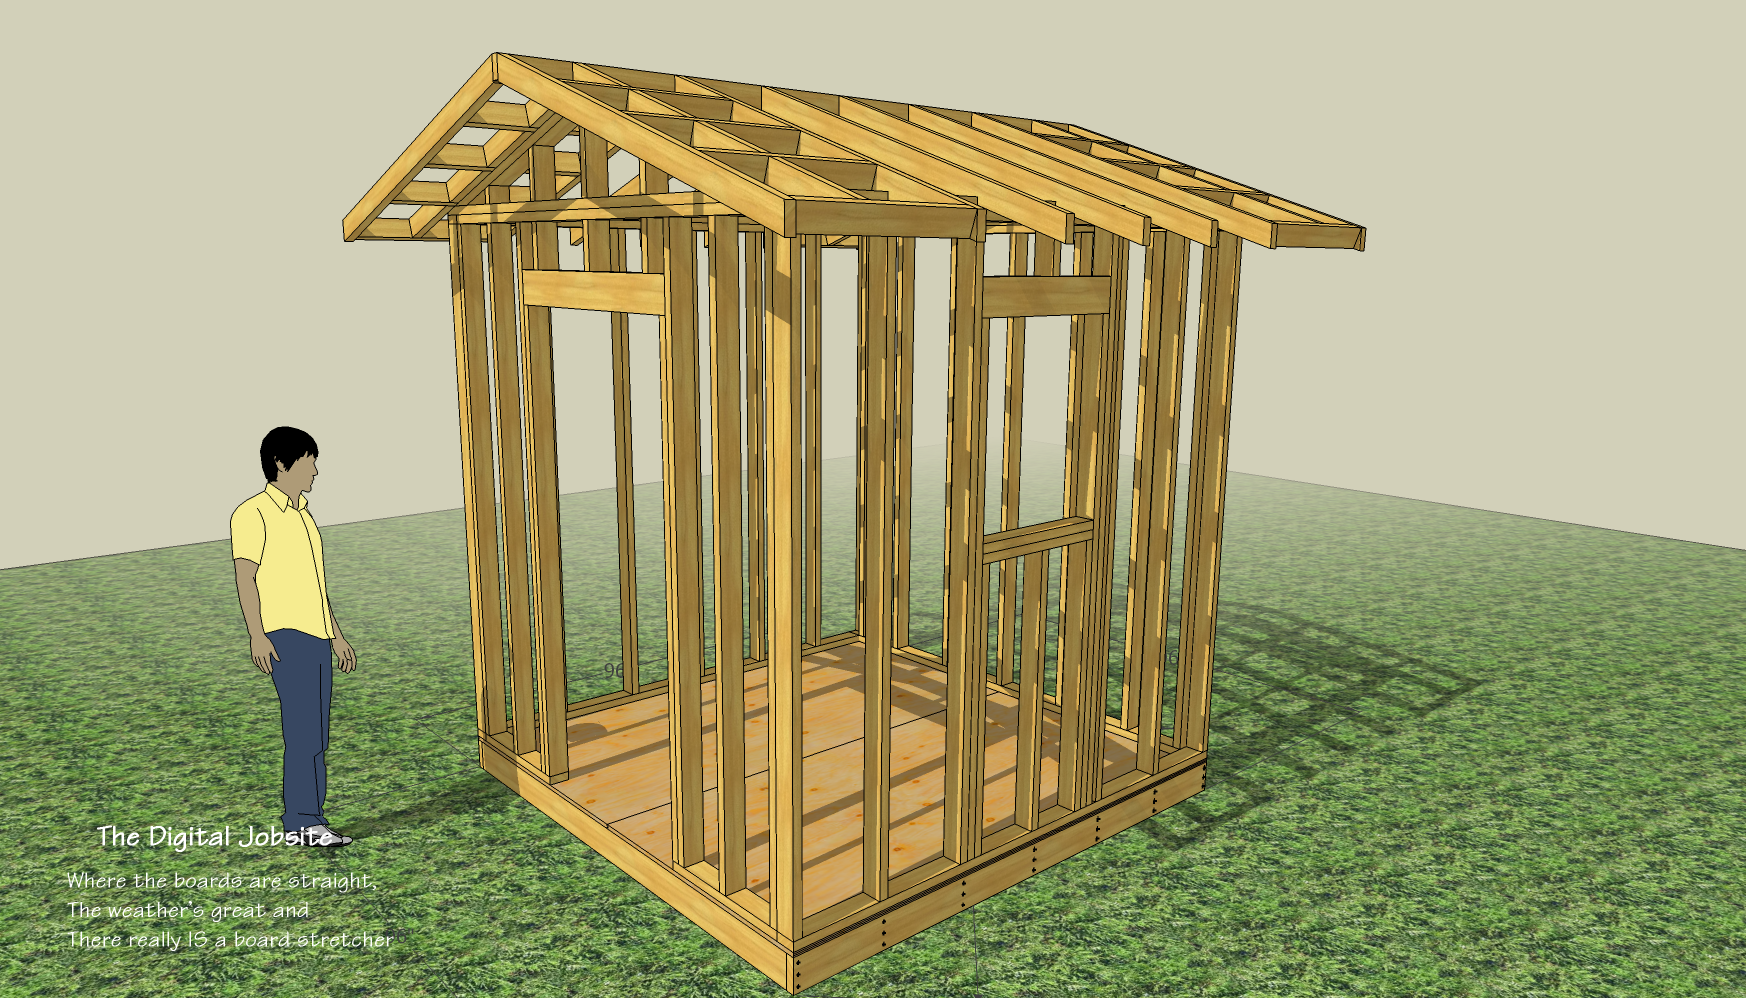
Wall framing choices determine floor framing layout


View Comments
I seen some sheds with the 4x4 sleepers cantilevered. Is one way better than the other?
"Beginning with the end in mind" @14:00
You mention nailing along the edge to fix the bows. Once I get the floor squared, would I then remove those nails or leave them there and start wall framing?
Shamisen,
Good question:
I chose to show the 4x4's even with the floor framing to make it easier to enclose the space beneath the shed to keep critters out. Moving them in 12" or so from either side would make the floor stiffer by reducing the span of the floor joists by 2', which is fine, but would make it difficult to enclose the space under the shed. If I was going to put really heavy stuff in the shed and wanted a stiffer floor I would just add a 3rd 4x4 right in the middle.
I can add these features to the shed model in the next post if it would help you understand the variables here.
Matt
Shamisen,
The nails used to fasten each joist to a layout mark are permanent.
Its important to straighten out each joist to a measured mark as shown @14:00 to make sure they are all straight when nailing is done. Make sure the first joist is aligned to the end of the sheet of plywood and nail it. Since the long edge of the plywood is straight and holding the framing straight, attaching that first joist flush with the end guarantees its straight and square. Measuring the other joists from the first one thats straight and square assures that they are "on layout" as well. If you are screwing the plywood down and don't want ANY nails in it then you could "tack" the end joist, measure and "tack" intermediate joists in place, screw everything down and then remove the nails you used to temporarily "tack" things in place.
Make sense?
Keep me posted on your progress and let me know if there's anything you'd like to see addressed in the next blog segment. (I'll probably put it together over the weekend of 13/14 April)
Hi, I downloaded the sketchup model. But there are not nails in the joists in the model that you showed in the video. I wanted to use them in my model of the shed. Also the walls overlap at the corners.
user-2404946,
I re-uploaded the shed model so it should now include the nails you mention. The nails in the model are just a 3 1/2" line with a 5/16" circle attached to it to represent nails. I made accurate 16cc sinkers with countersunk heads, chiseled points, grip rings and waffled heads but all that extra geometry really slows down model manipulating speed making it cumbersome to draw. If you're interested, I uploaded the 16cc sinker model to the Warehouse too. You can find it at:
http://sketchup.google.com/3dwarehouse/details?mid=427cfe21bc59eba063dfa538ac47623b
I'll try to remember to re-upload the current version after each successive progress tutorial to keep it complete.
I'm not sure what you're referring to about walls overlapping at the corners. I'll cover wall framing in the next tutorial which might help understand how the walls intersect at the corners with one running past the other for connection strength.
Thanks for watching this tutorial and commenting... hope it helps with your shed modeling and planning.
Thanks for the 16 cc nail model, looks good.
When I wrote that walls overlap at the corners, I meant that all 4 walls are through walls, so they overlap, instead of one wall butting into the other wall. There should be 2 through walls and 2 butt walls.
Araltan_Mandzhiev,
From your previous comment I noticed that some of the 2x4 plates did indeed overlap at the corners. It was an oversight in building the model so thanks for pointing it out. I "fixed" the plate lengths in the current model in the 3D Warehouse so they are now as they should be: 2 through walls, 2 butt walls as you correctly state.
Even The Digital Jobsite needs an inspector now and again :-) so let me know anytime something is amiss.