
Adding a Bathroom Fan
A quiet fan, airtight ductwork, and a leak-free vent combine to clear moisture from the bathroom and the house.
Synopsis: A remodeling contractor offers a step-by-step guide to the installation of a bathroom fan, stressing the importance of preventing any moist air from leaking into the attic. A sidebar in the PDF below illustrates how to wire a high-tech switch that will keep the fan running for 20 minutes after you leave the room.
If you’re like me and enjoy a hot shower, the last thing you want in your bathroom is a fan that sounds like a helicopter. The reality is that hot showers create moisture that, left alone, will lead to mold and mildew problems. Lucky for us, the bathroom fan has come of age.
Today’s fans are quieter and move more air than yesterday’s models. Whether I’m building a new house or remodeling a bathroom, I install an ultra-quiet exhaust fan because a quiet fan is more likely to be used. And a properly installed fan clears excess moisture from the bathroom and the house to where it is unable to find a way back in. The fan should be near the shower, and the ductwork should be airtight and vented out the roof or a gable-end wall. Vapor exhausted through a soffit often will be drawn back into the attic through the soffit vents. The entire system must be airtight to keep moisture from leaking into the attic or wall and ceiling cavities.
Once installed, the fan must be used properly. As long as moisture is in the bathroom, the fan should continue to run. To eliminate the risk of it being left on for hours at a time, I install a delay-timer switch with the fan, which keeps it running for up to 60 minutes.
This may sound like a lot of work for a bathroom that has a window in it. But as a remodeler, I’ve seen the mold and mildew problems that moisture can cause. Opening a window is a good idea, but it isn’t reliable enough to eradicate moisture effectively.
A fan beats an open windowWired to a timer switch that allows it to run until steam is cleared, a fan in the center of the bathroom is the best defense against problems that are caused by moisture. 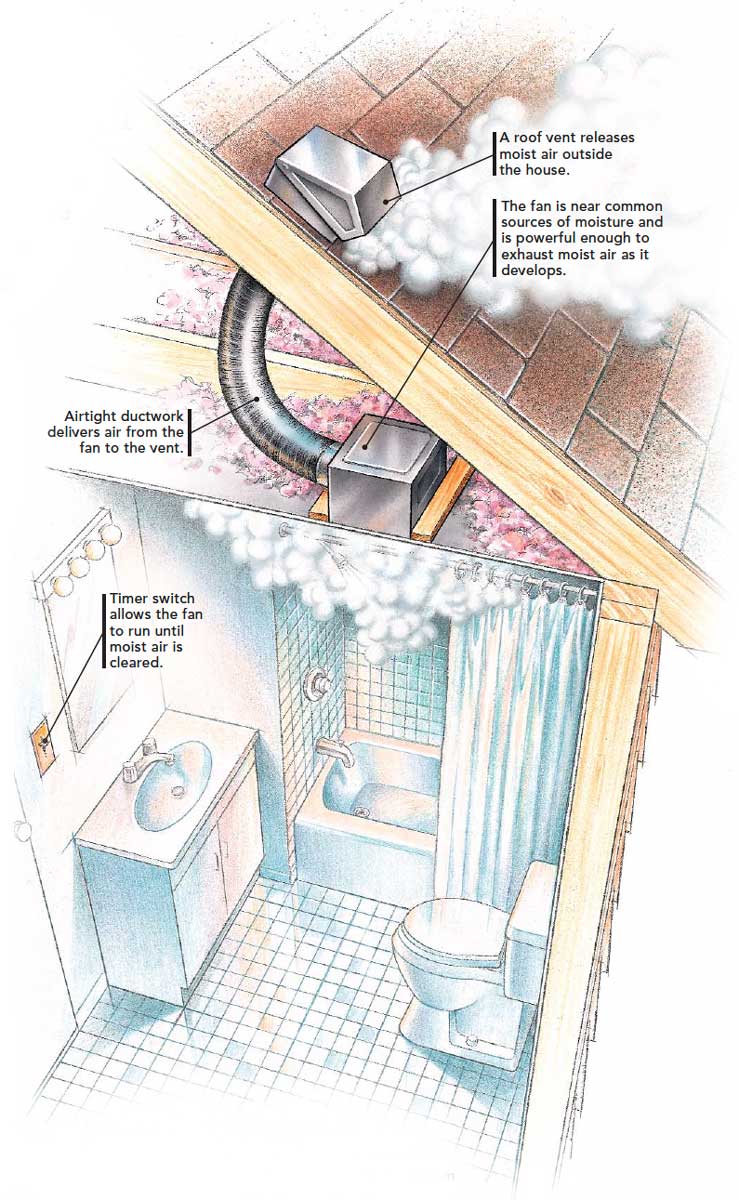 |
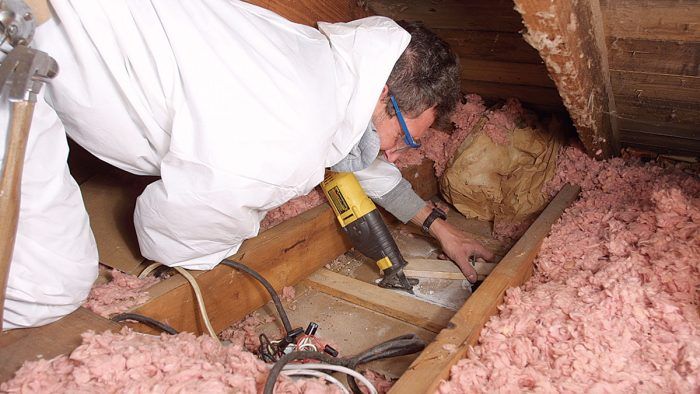
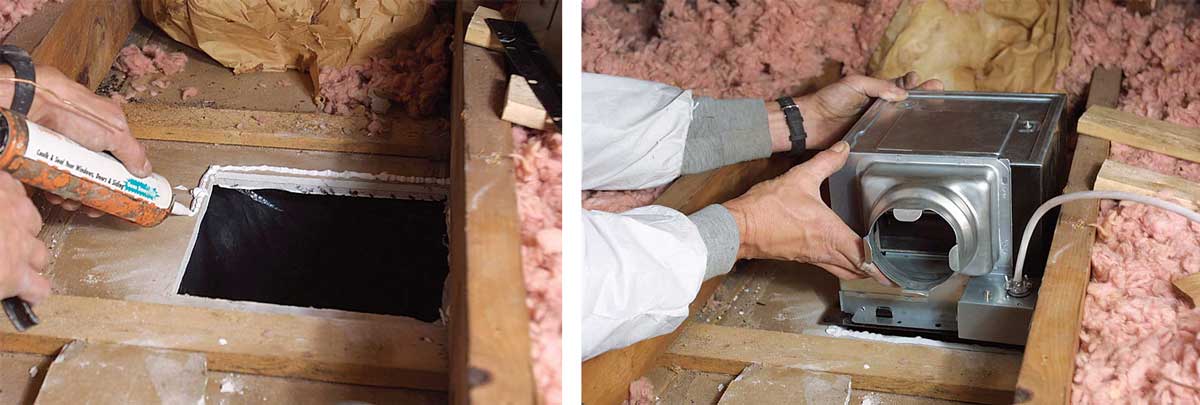
Protect the bathroom and yourself
Cut the ceiling and keep clean with a plastic bag and a plastic suit.

Today’s fans are stronger yet quieter than everWalk into any big-box store, and you’ll find dozens of bathroom fans priced from$20 to $200. Here are a few important things to consider when choosing a fan.
|
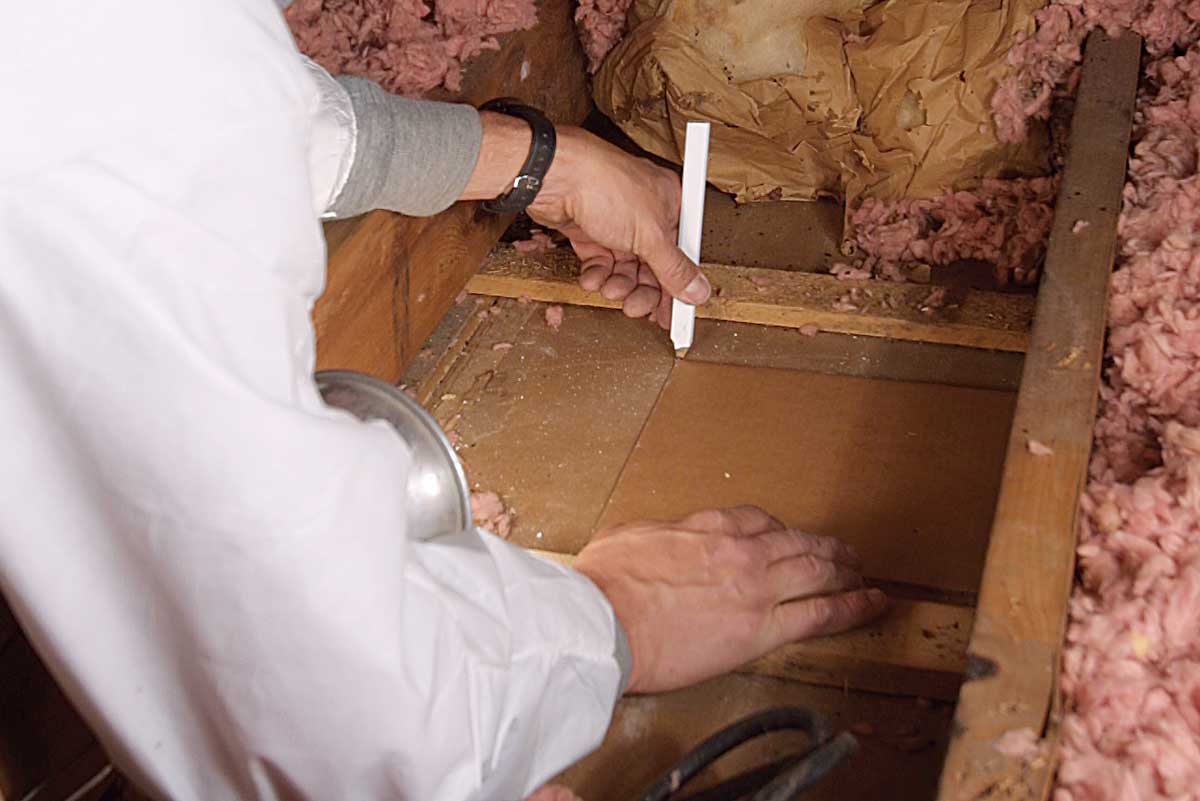
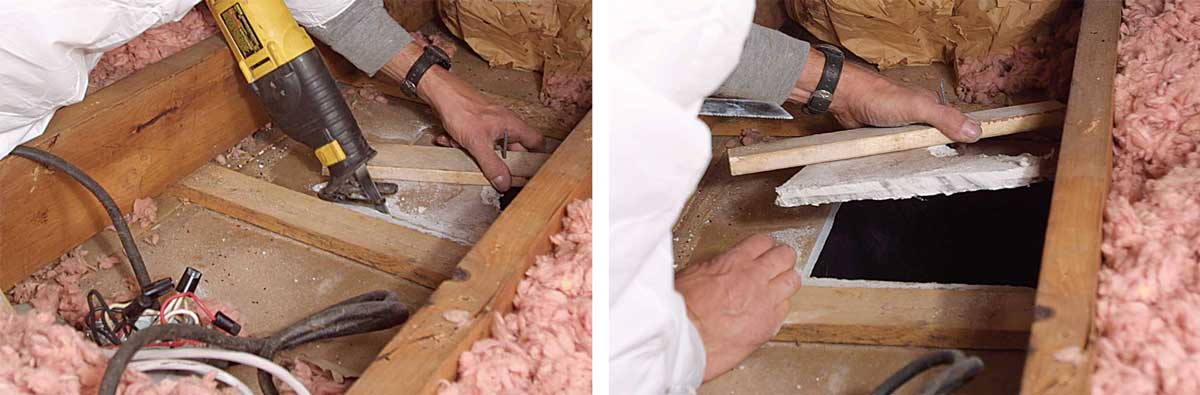
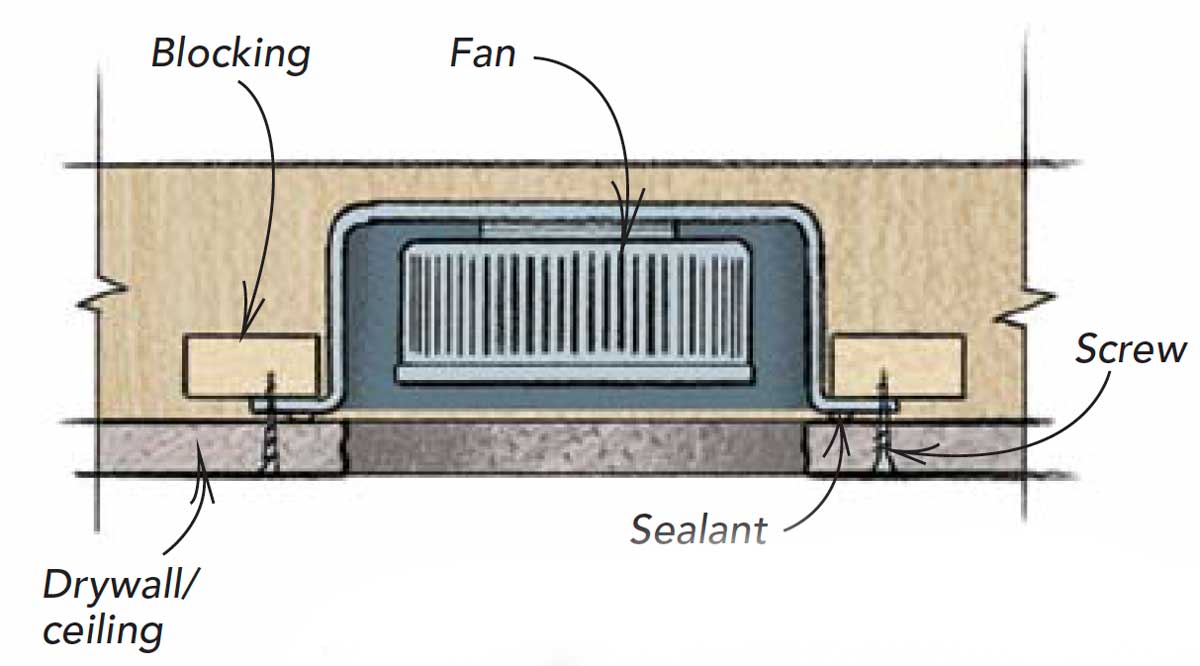
Prevent air leakage in the attic
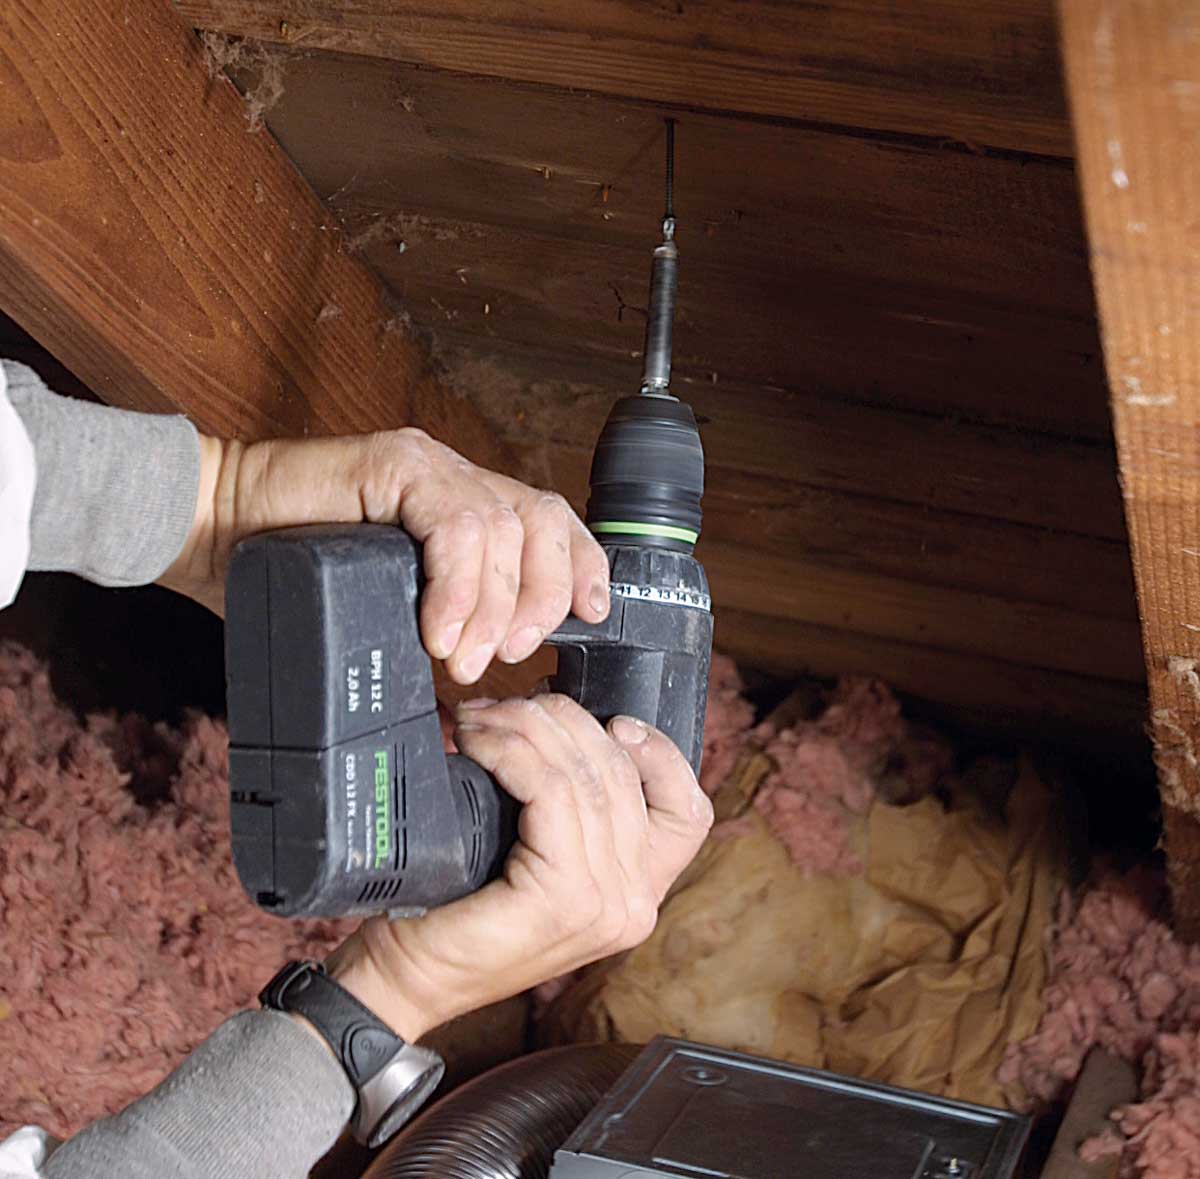
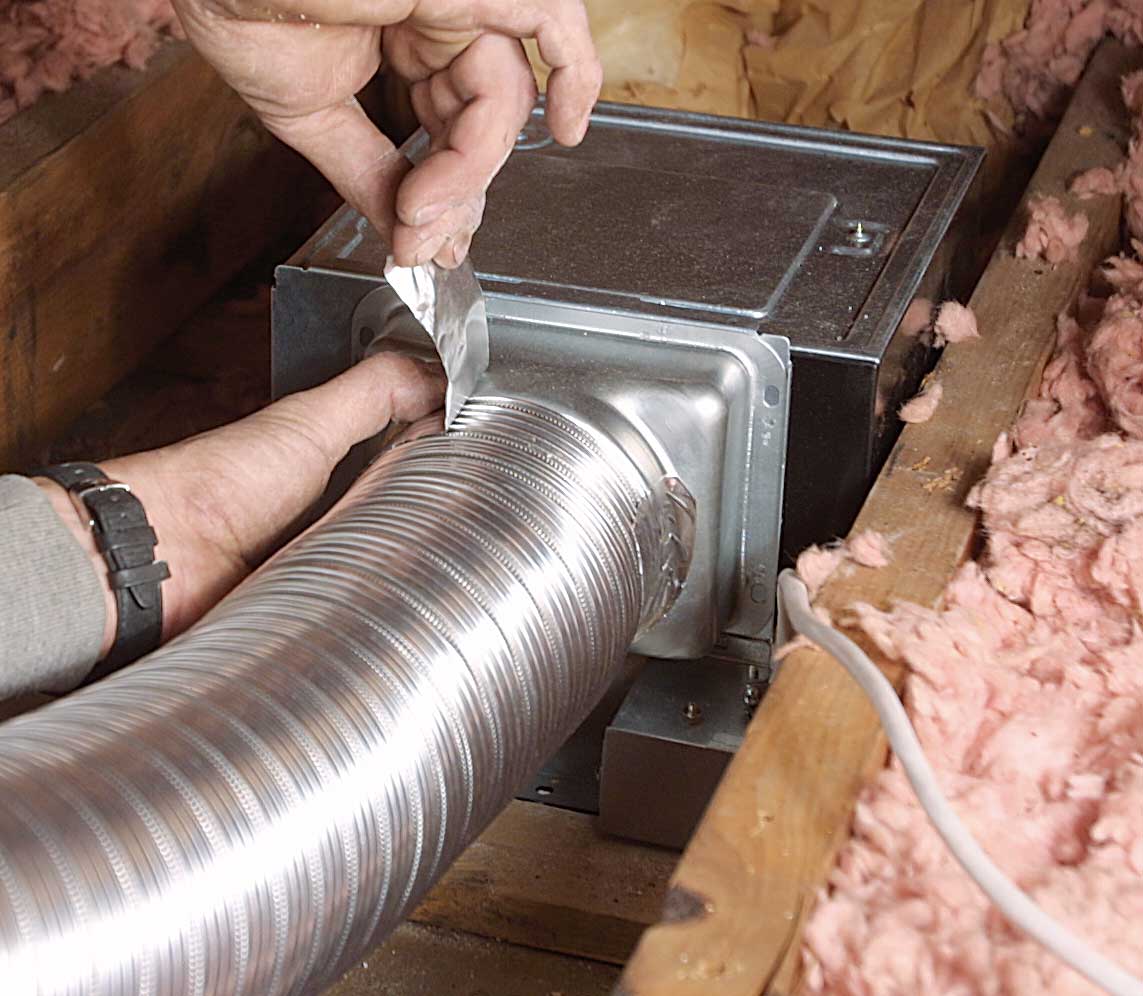
Sealant, blocking, and screws secure the fan.
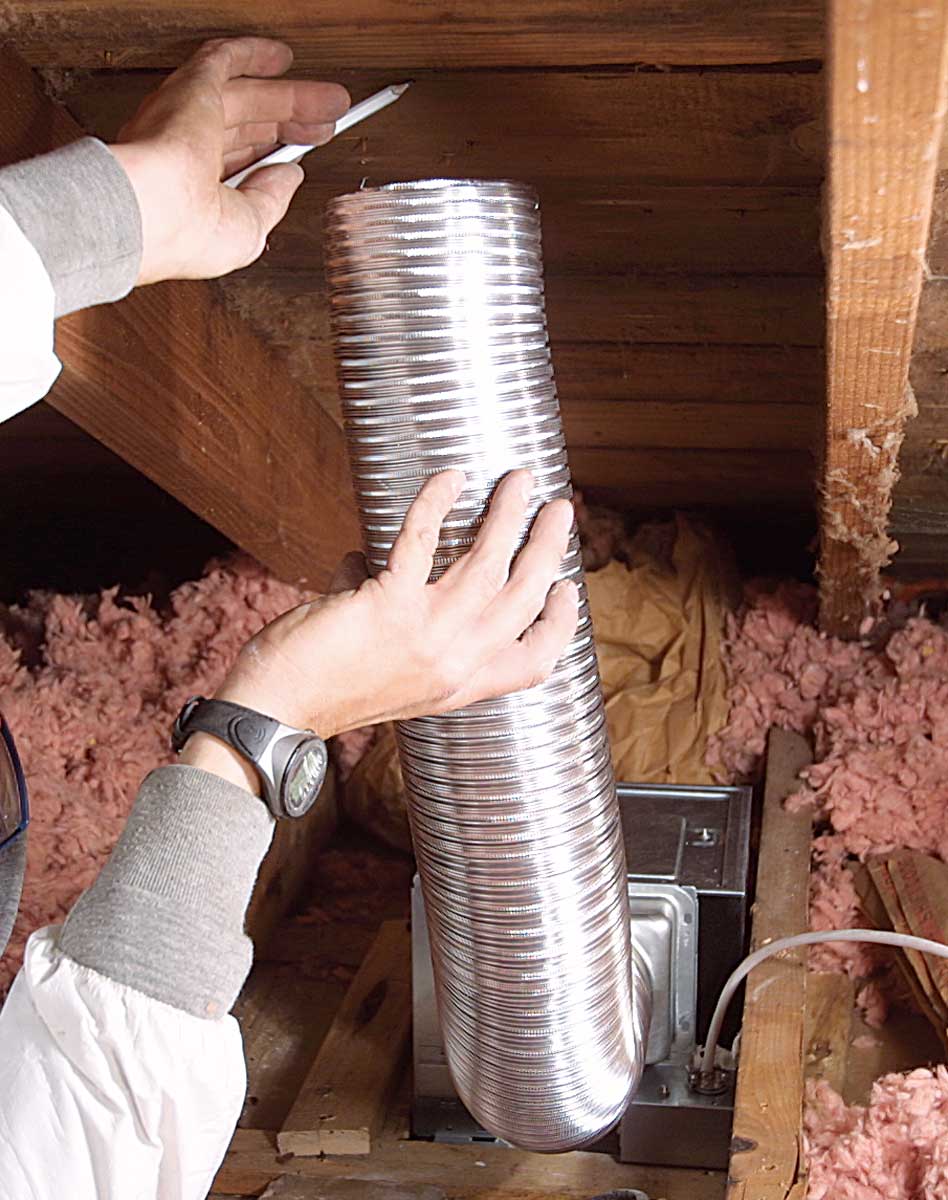
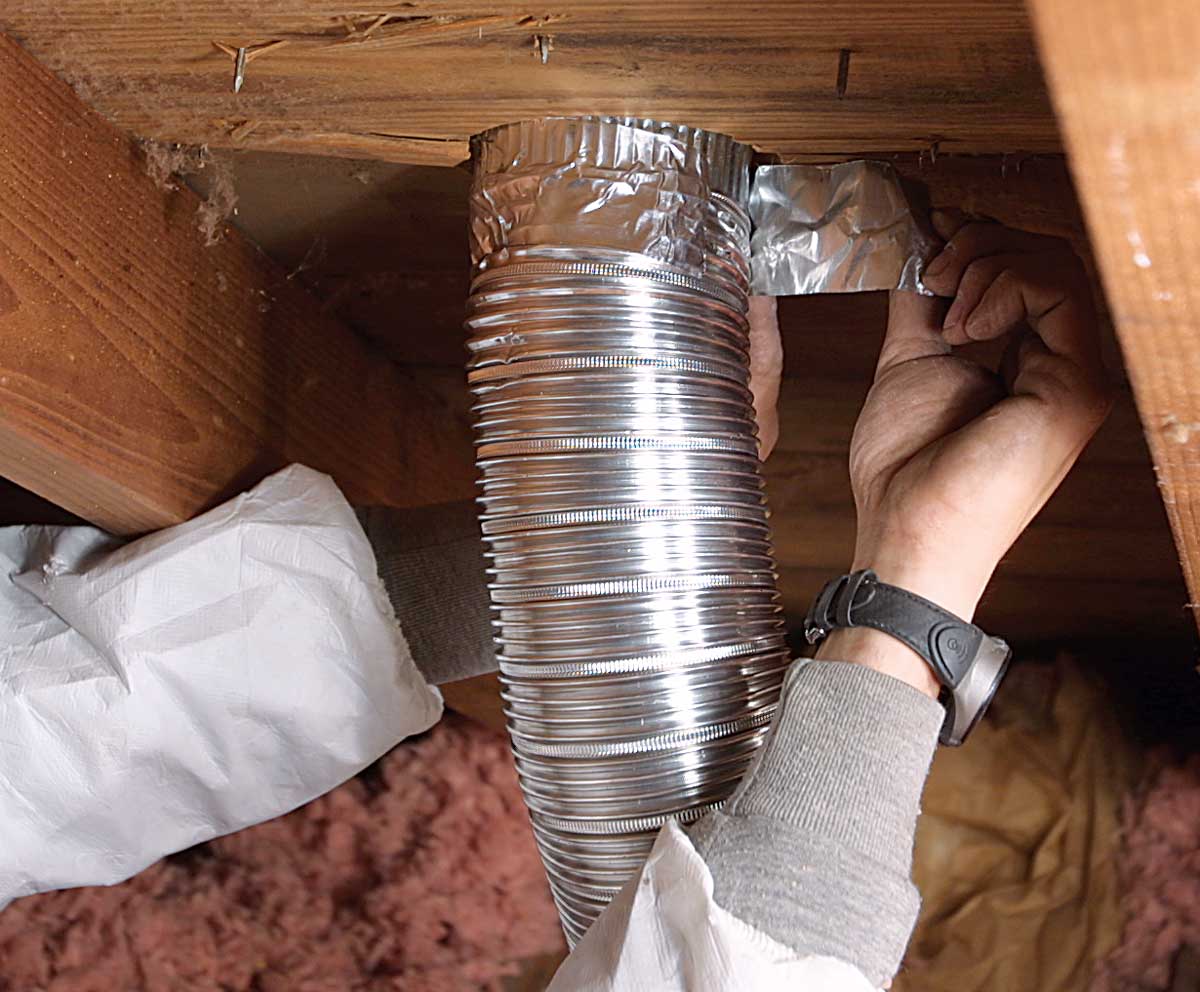
Keeping moisture out of the attic is critical. The two key points are installing a leak-free duct and keeping air from the bathroom from leaking around the fan.
Short, straight ductwork vents air efficiently.
When a curve is necessary, attach the duct to the fan, and create a short, sweeping arc toward the ceiling to determine the length of duct and the best location for the roof vent. Trace around the duct’s perimeter onto the inside of the roof sheathing.
Venting a bathroom fan: Get vapor out, and keep it outThe fan can exhaust air through the roof using a roof vent or out a gable-end wall using a clothes-dryer vent. But under no circumstances should the fan vent through or into the eaves or soffit. Airflow will draw vapor back into the attic through the soffit vents, making the fan little more than a waste of energy. 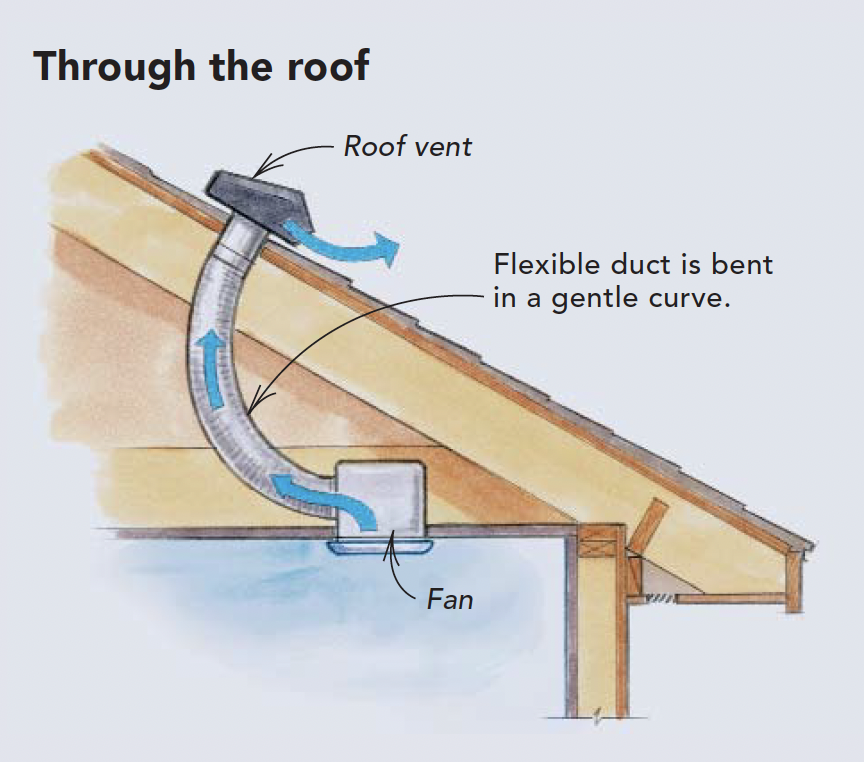 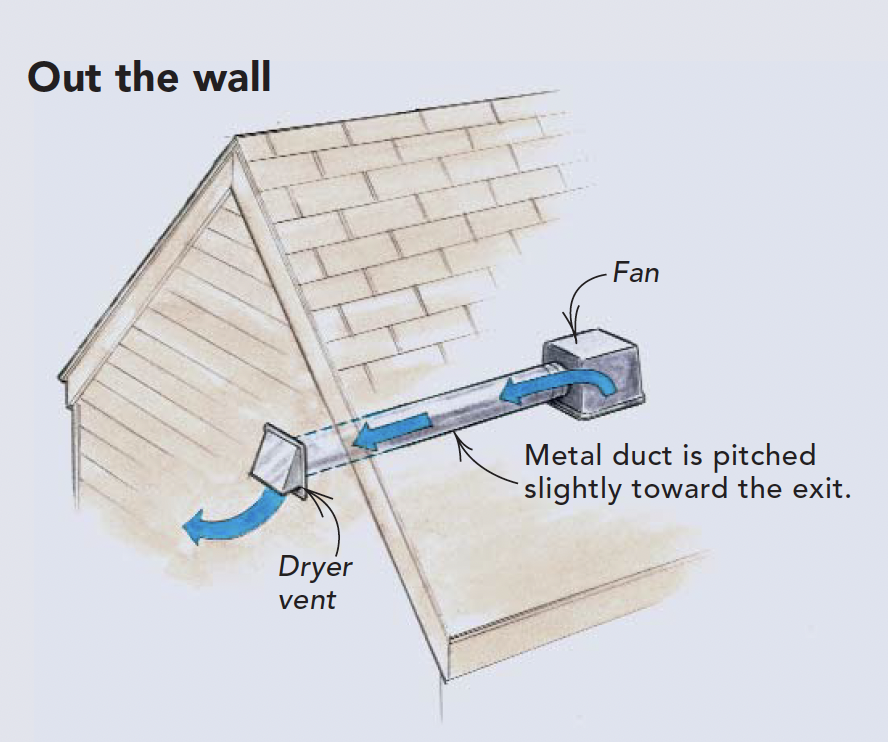 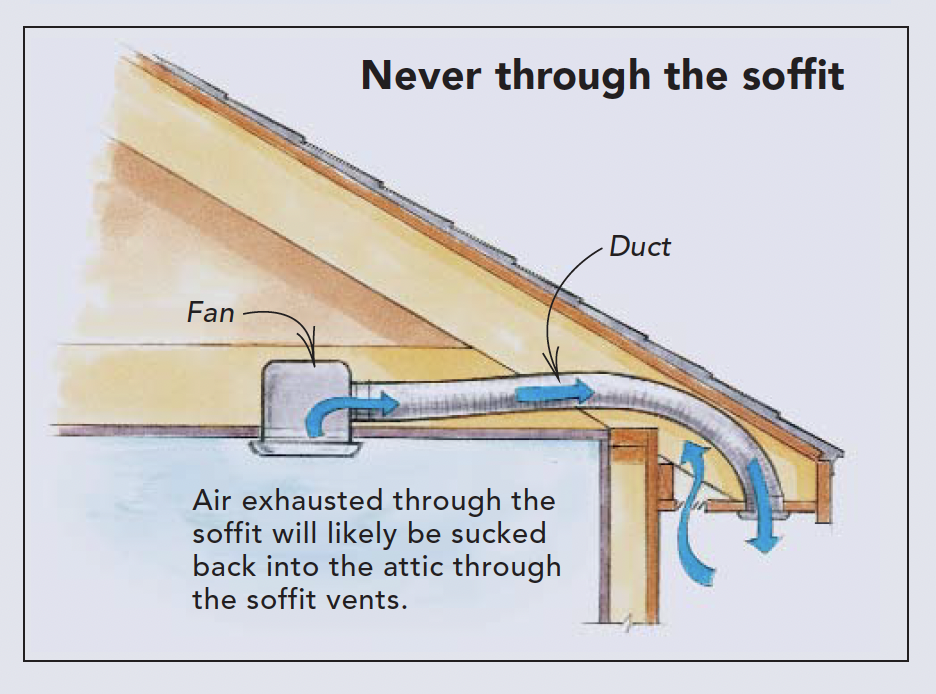 |
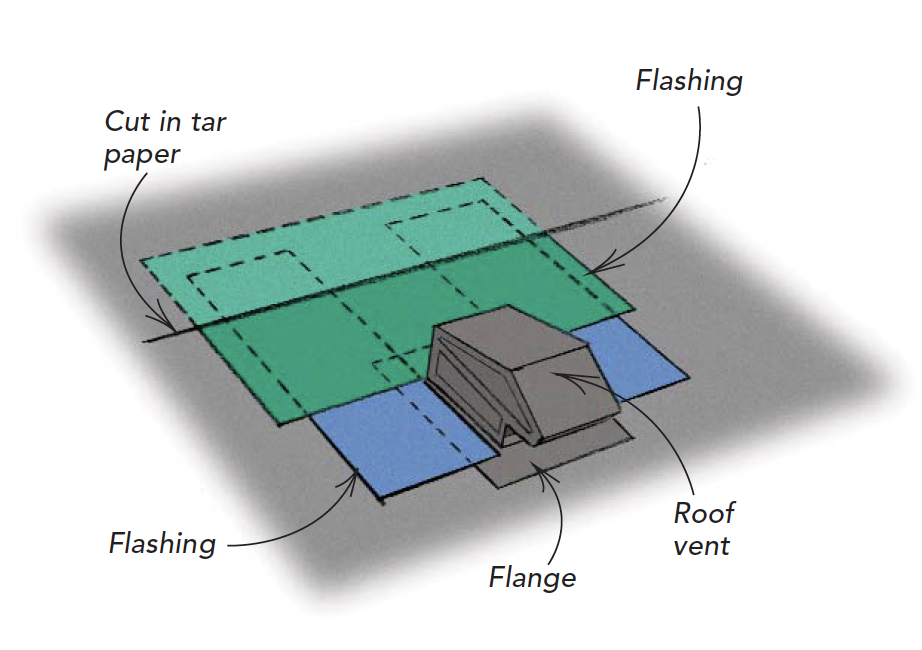
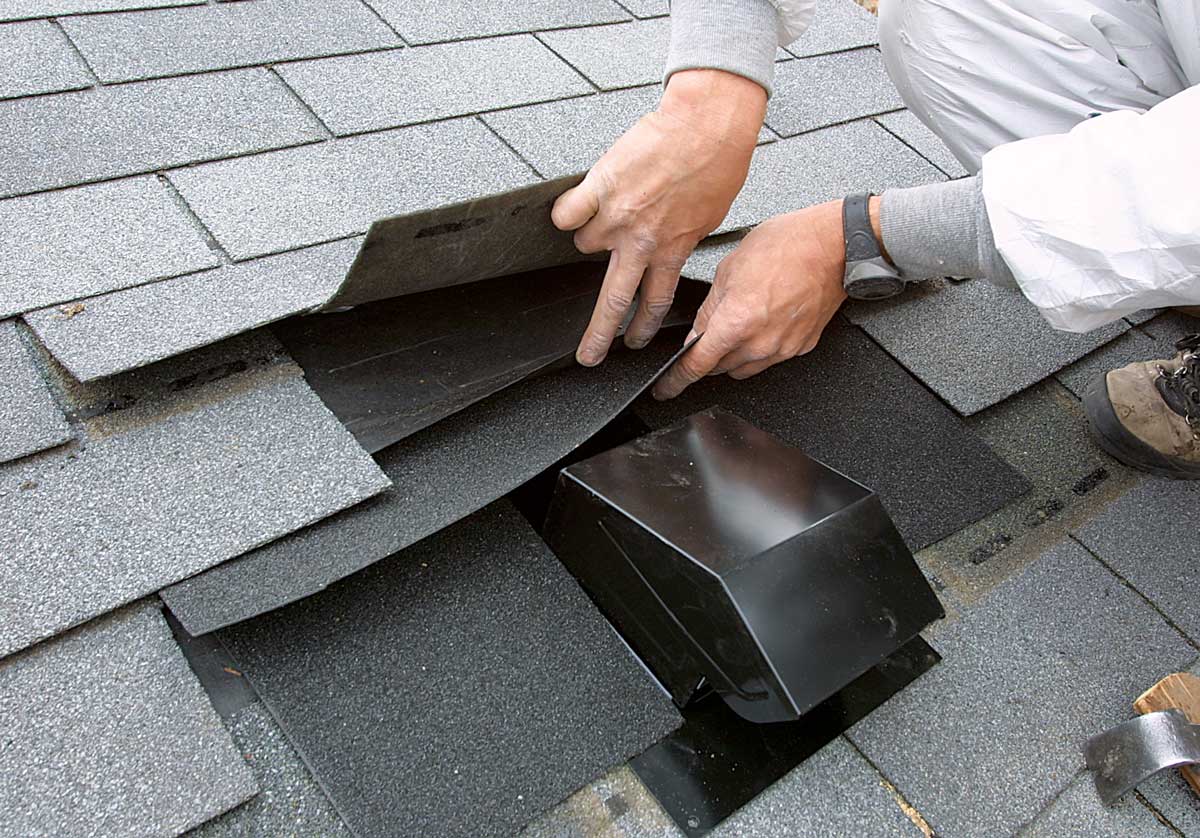
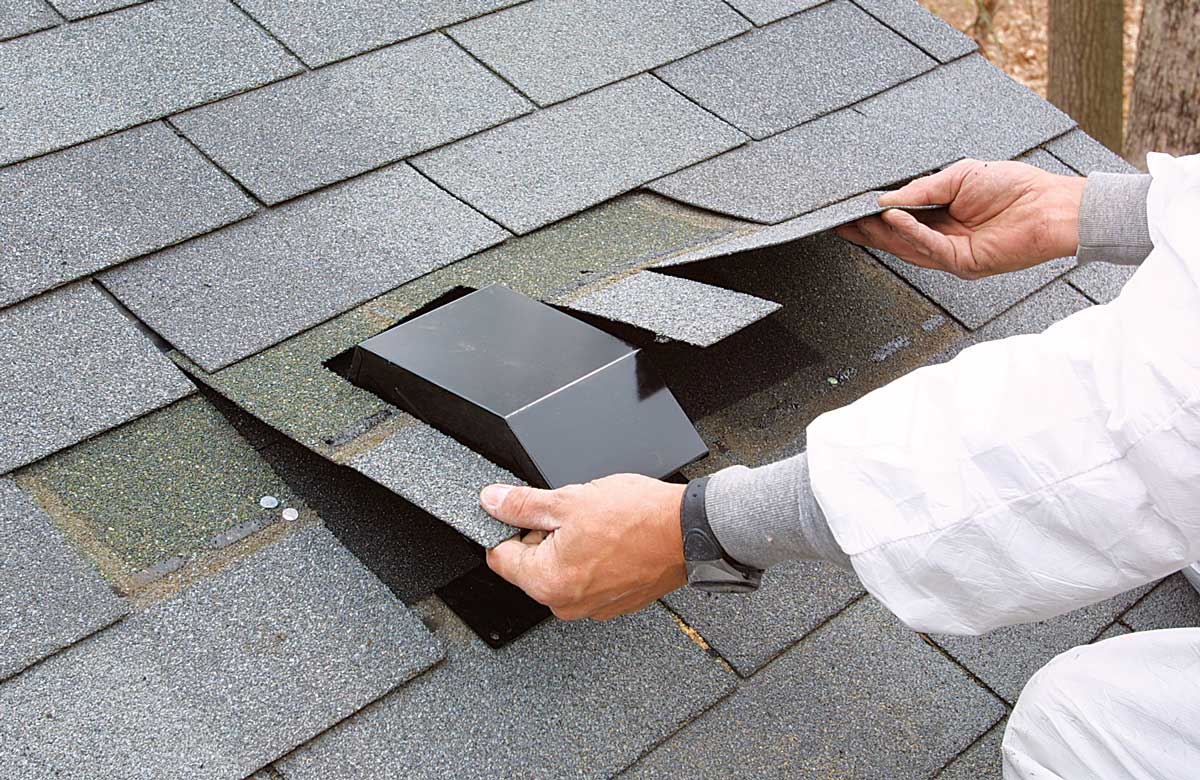
Install a leak-free proof vent
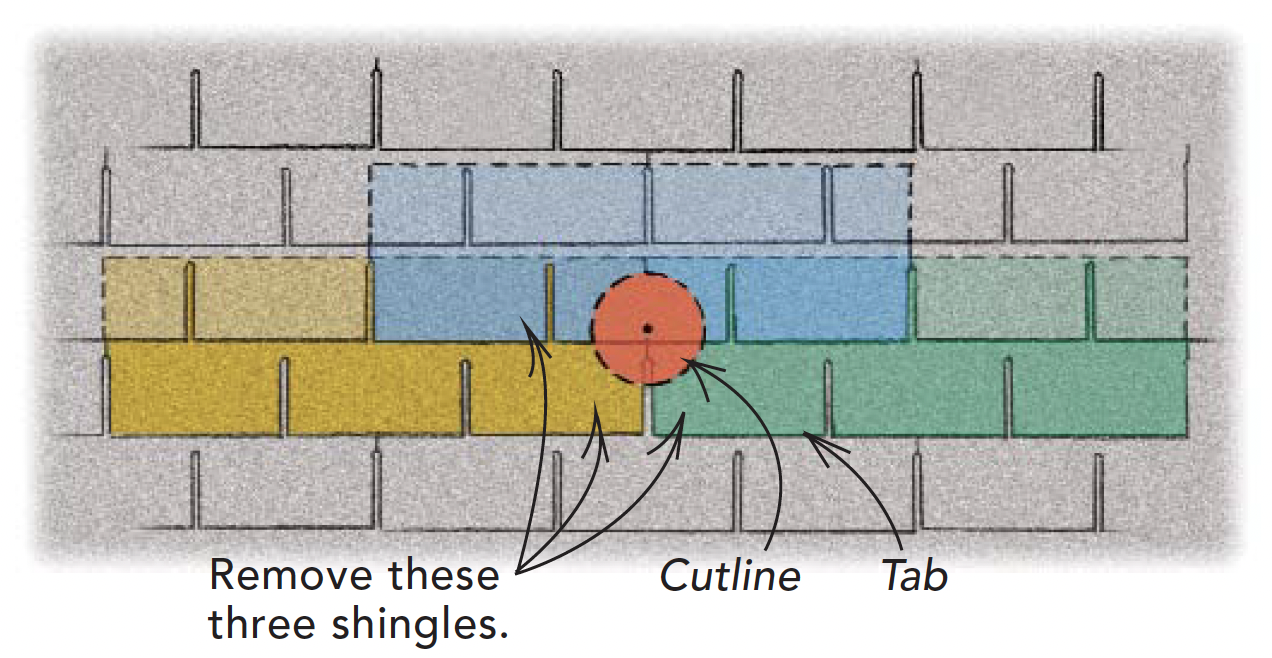
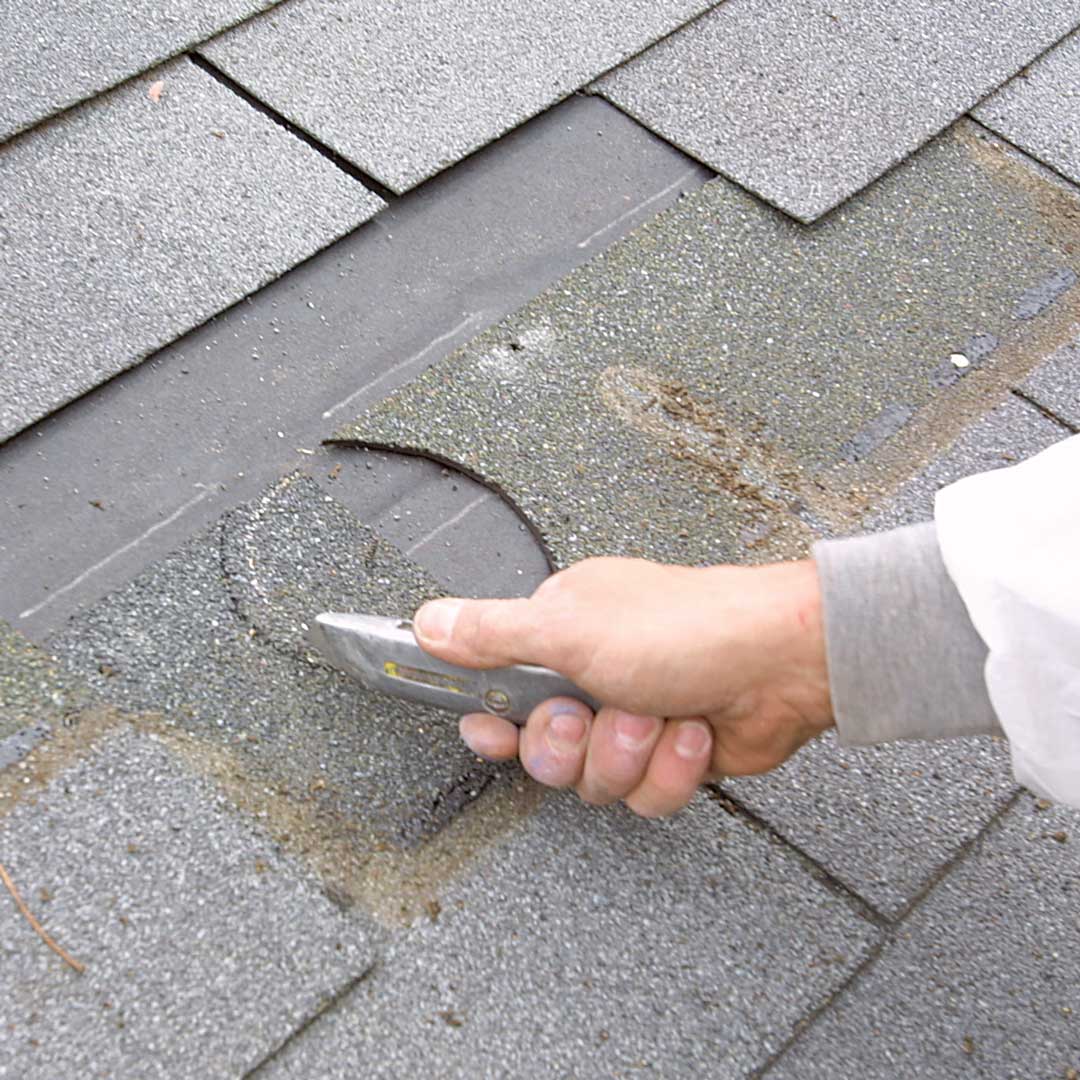
Don’t cut through tabs
Trace the vent receptacle onto the roof around the driven screw. If the circle is touching a shingle’s tabs, remove that shingle before cutting the hole.
 |
 |

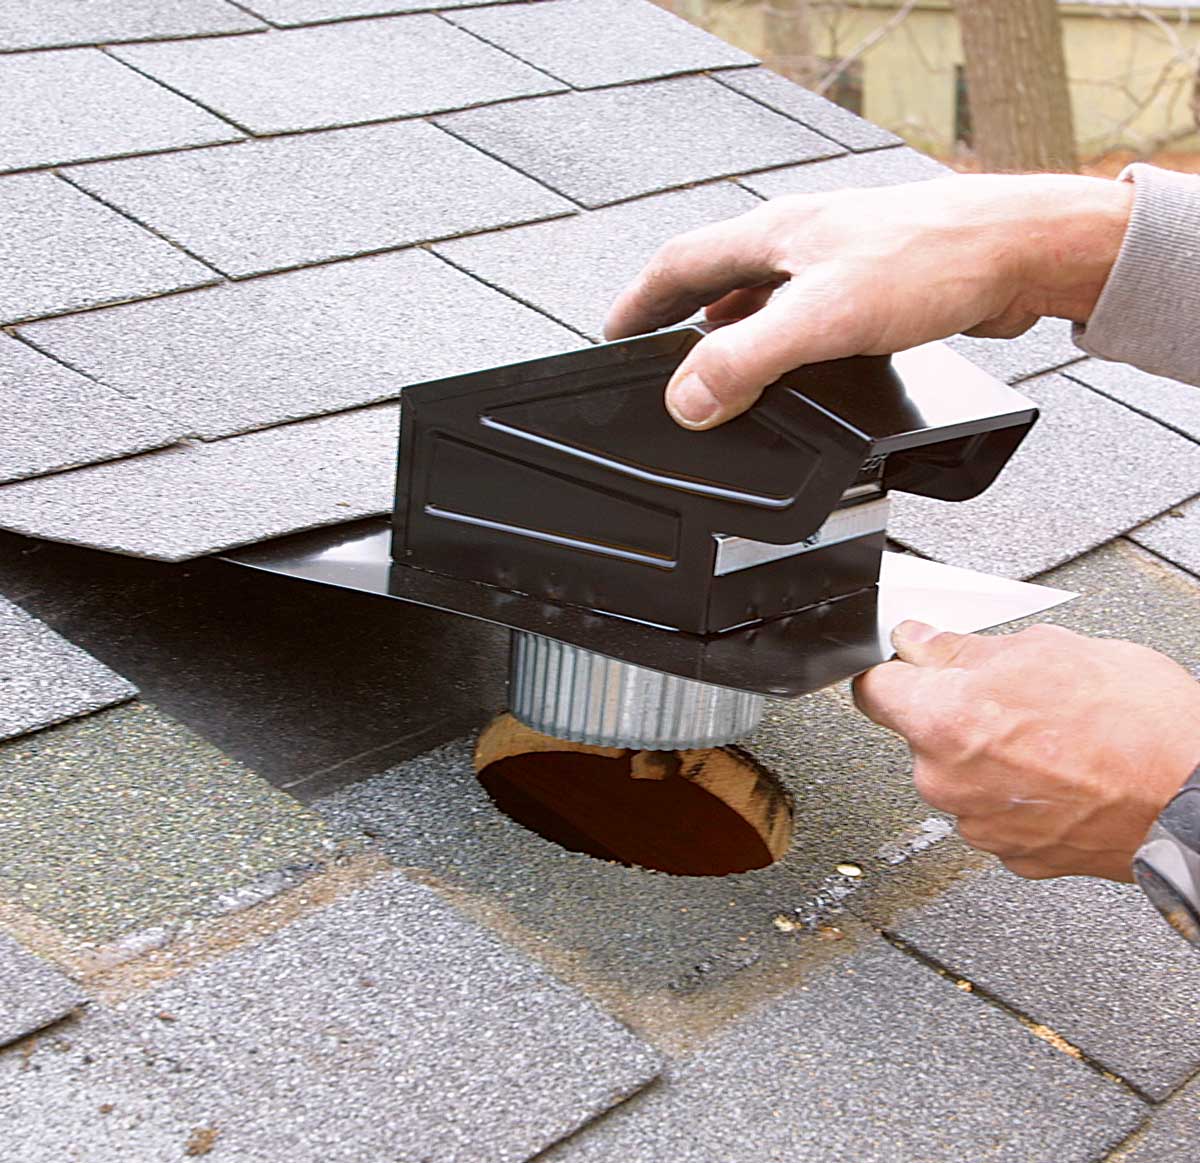
Flashing prevents water leaks
Keep water out of the attic by flashing around three sides of the roof vent.

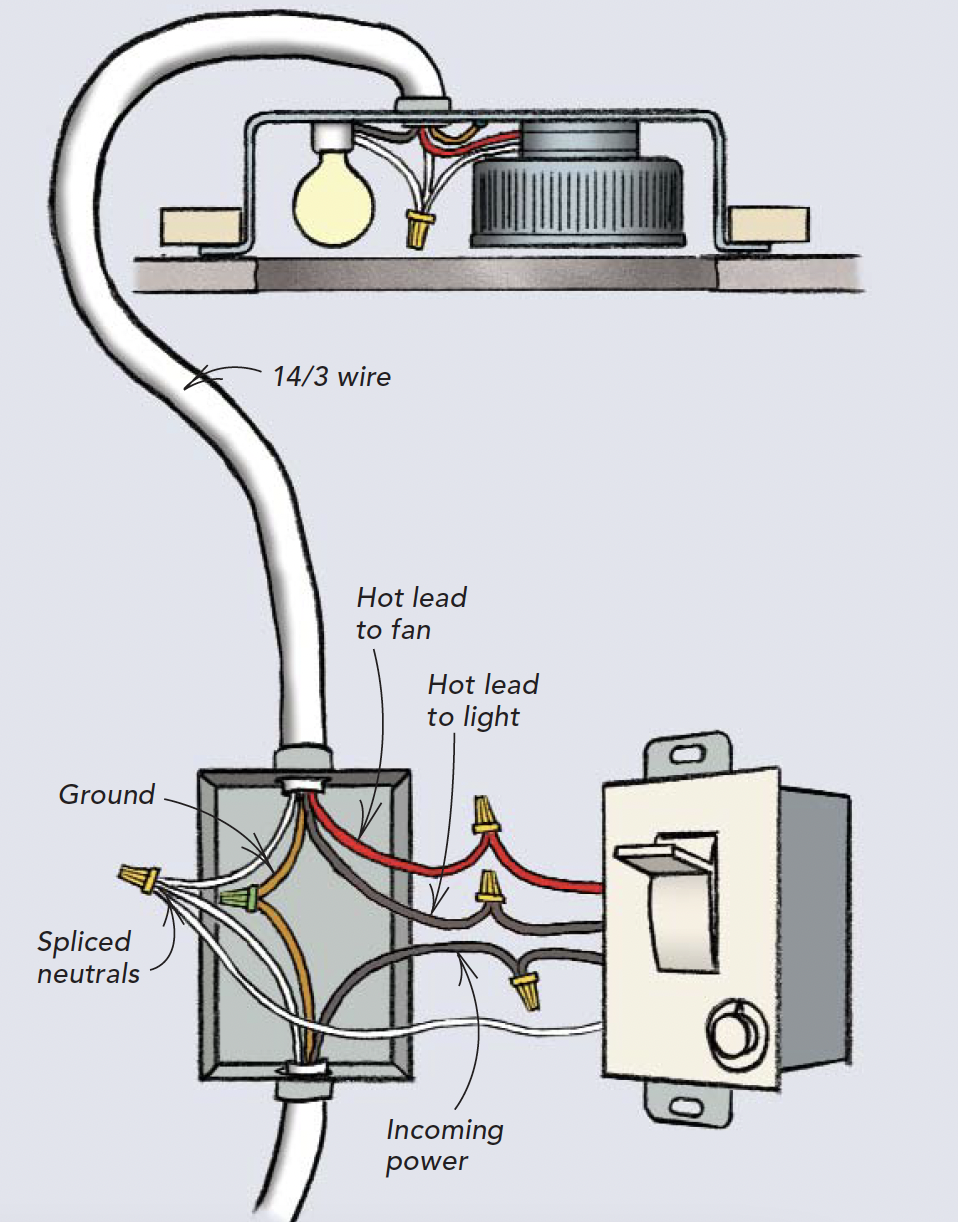
One switch controls the light and fanBathroom fan and light combination units often are used to replace existing lights. A new fan could easily be wired to the existing switch, which would operate both the fan and the light. But for a bathroom fan to be effective, it needs to remain running after the user has left the bathroom. By wiring the light and fan on separate switches, the light can be turned off to conserve energy while the fan clears moisture from the room. Better yet, an electronic timer switch (www.efi.org) turns the fan and light on together, but has an integral timer that keeps the fan running for up to an hour after the switch and light are turned off. 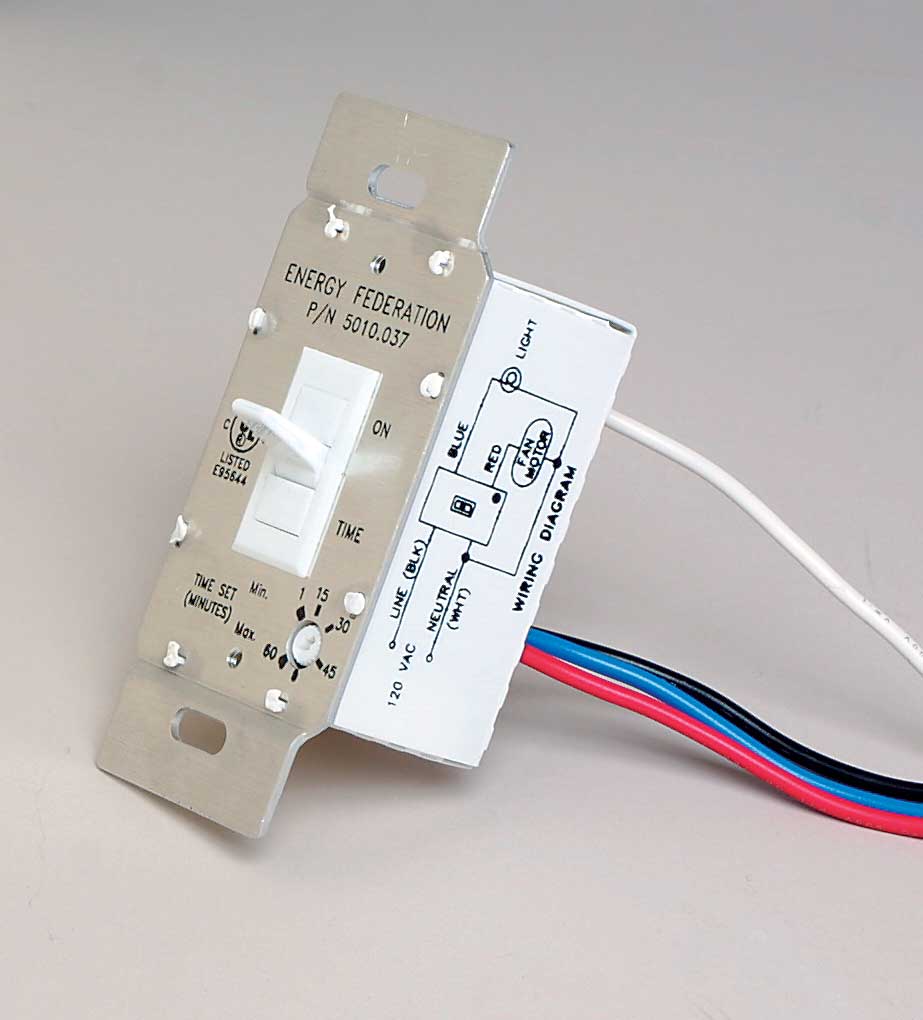 Wiring the fan to a delay-timer switch Although the neutrals can be spliced together and share a wire leading back to the switch box, separate power supplies are necessary for the light and fan to operate individually. A 14/3 wire, which you’ll probably have to add, is ideal for this situation.
|
Mike Guertin is a builder, remodeler, and contributing editor to Fine Homebuilding from East Greenwich, R.I. Photos by Brian Pontolilo.
From Fine Homebuilding #157

