
Gutting One Bath to Build Two
Reconfiguring an existing space requires an iterative process that allows the designer to try ideas on paper and the builder to improvise on site.
My favorite type of customer is a repeat customer because it typically means that we’ve had a positive experience working together and that we’ve already learned each other’s habits and idiosyncrasies. So when homeowners for whom I had already remodeled a powder room approached me about reconfiguring their large upstairs bathroom into two bathrooms, I jumped at the opportunity. Due to the complexity of the redesign, I recommended that an architect create floor plans for the new baths as well as plumbing and electrical plans. My interior designer, Rachel Grace—who also happens to be my wife—then worked with the homeowners to select and specify all of the fixtures, finishes, materials, and decor.
Even with qualified help, a project like this can be complex. And remodeling projects are always happy to throw you a curveball; you never know what you might find when you start opening up walls, floors, and ceilings. I would also need to hire and manage subcontractors for the plumbing, electrical, and tiling. And given that we were designing two baths that would sit right next to one another, they needed to be both aesthetically distinct and complementary.
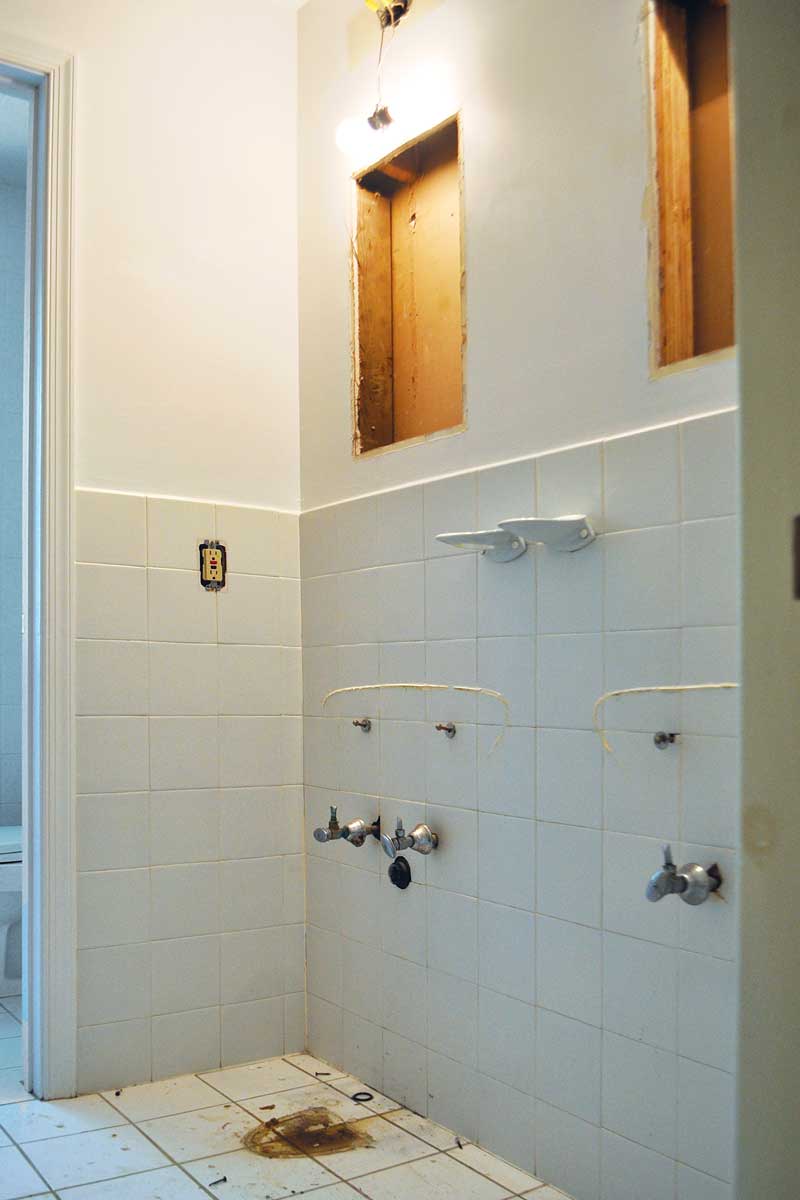
The existing Jack-and-Jill bath, which served the kids’ bedroom as well as the guest bedroom, was worn and outdated. The floor plan was awkward and contained a ridiculous amount of wasted space. We couldn’t take any space from the adjacent bedrooms, but by annexing some space from the hall and relocating a few doors, I was sure we could make two baths fit.
I often find that there are differences between a designer’s perspective and a contractor’s perspective, so after receiving the initial plans from the architect, I had some minor tweaking to do. Some of these changes were aesthetic, some were out of necessity, and some were to reduce the budget. Fortunately, the homeowners trusted me enough to allow me to make some adjustments to the design without continuing to consult with the architect.
One change that we made to the design occurred after I gutted the space. When I removed the floor, I learned that there was a recessed light directly where the drain for the toilet in the front bathroom was planned. Rather than moving lights in the finished kitchen below, we chose to swap the vanity and toilet positions.
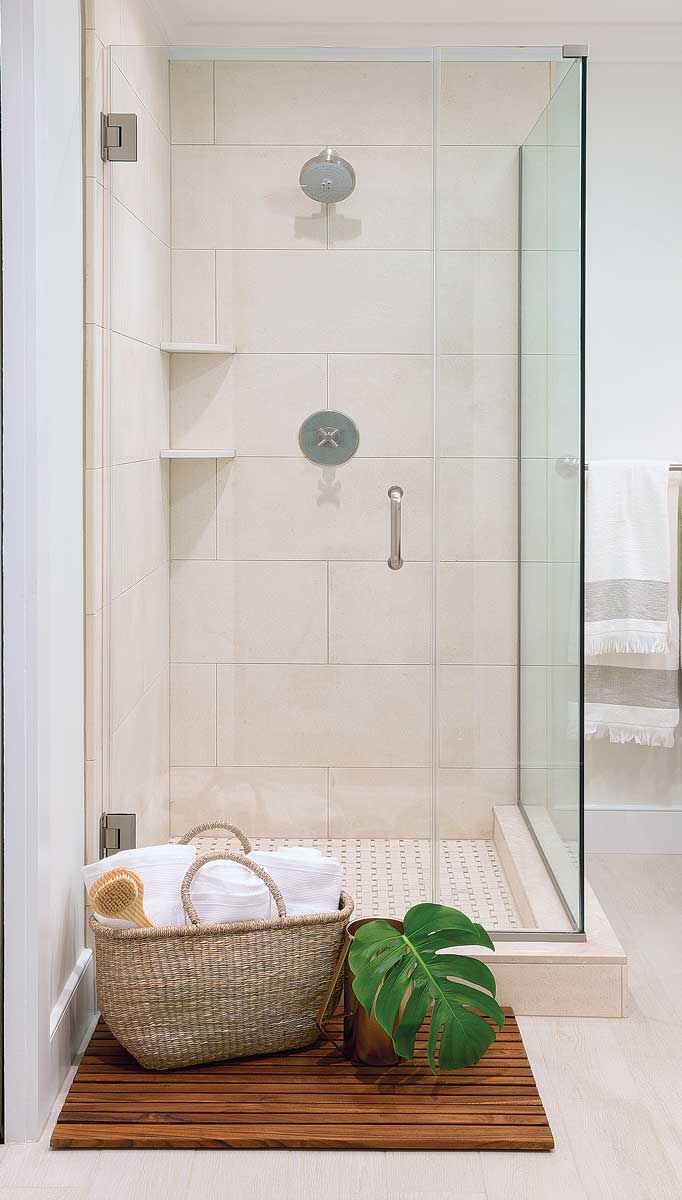
From site visit to as–built planReconfiguring an existing space requires an iterative process that allows the designer to try ideas on paper and the builder to improvise on site. Here, I made a rough sketch on the initial site visit that allowed me to start estimating the project, but I hired an architect to design the initial plan. Taking into account the budget and site conditions, I then tweaked the architect’s drawings to arrive at this as-built plan. 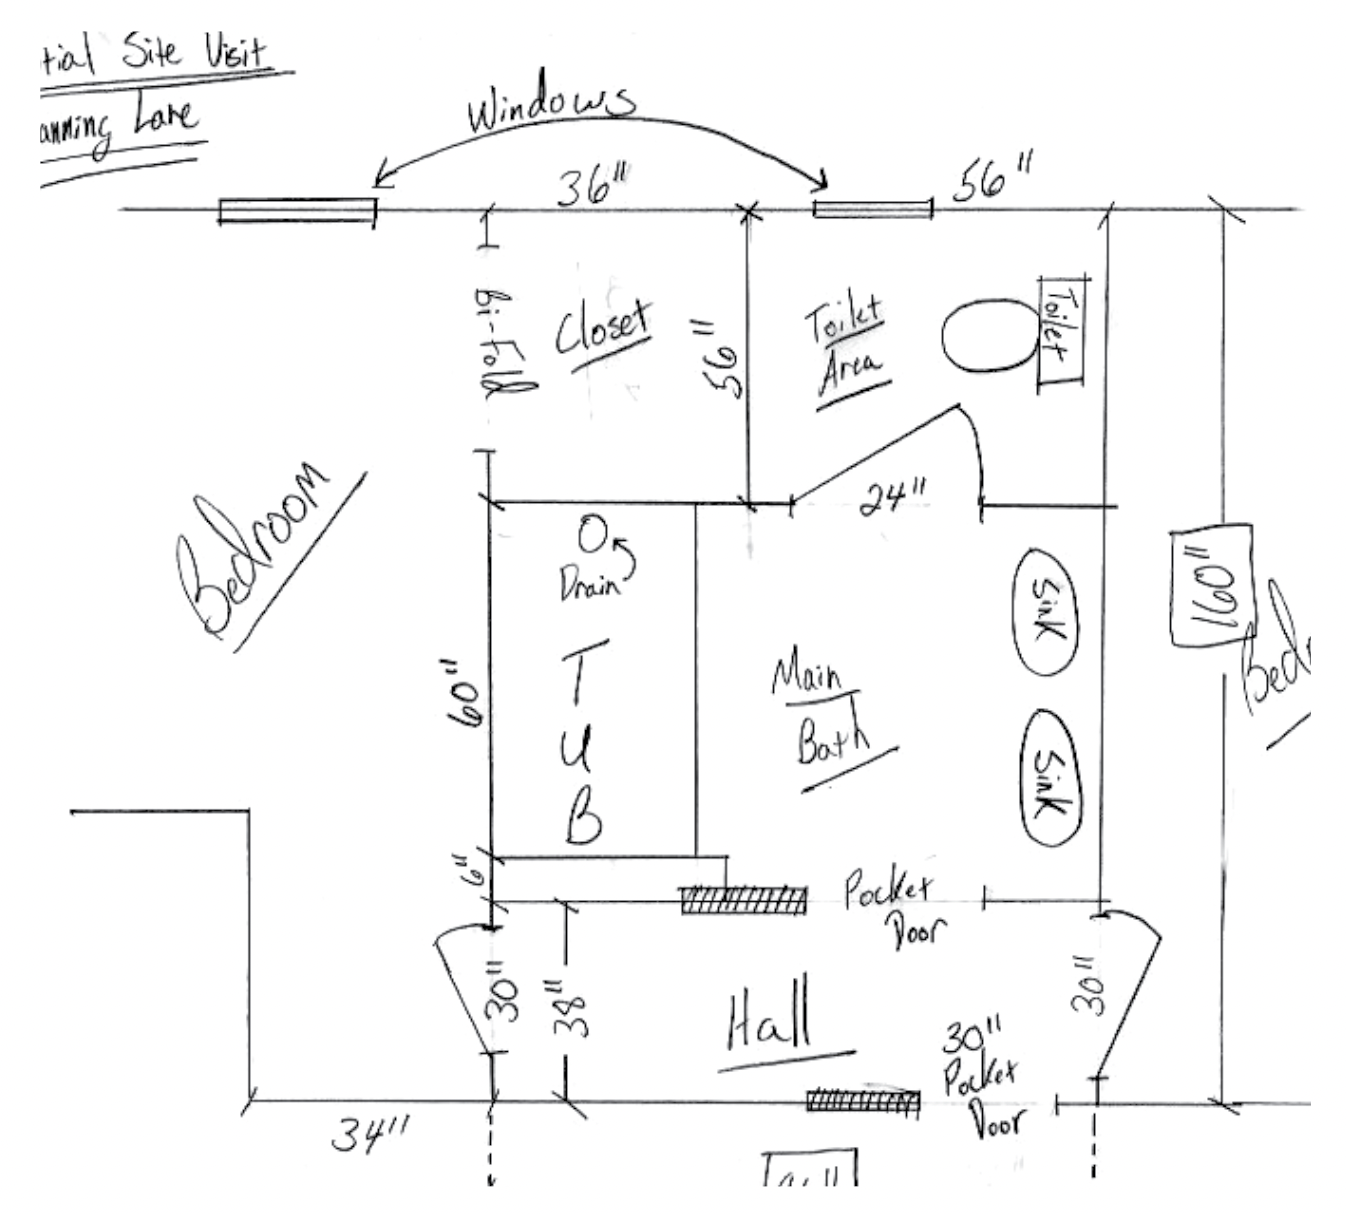 Sketch the existing space I make a dimensioned sketch of the existing space at the initial site visit, which I use to create an initial quote. The sketch allows me to avoid frequent trips to the site with different subcontractors before even being hired for the job. If the quote is accepted, I will start scheduling separate site visits with subs to refine and finalize pricing and the scope of the work. 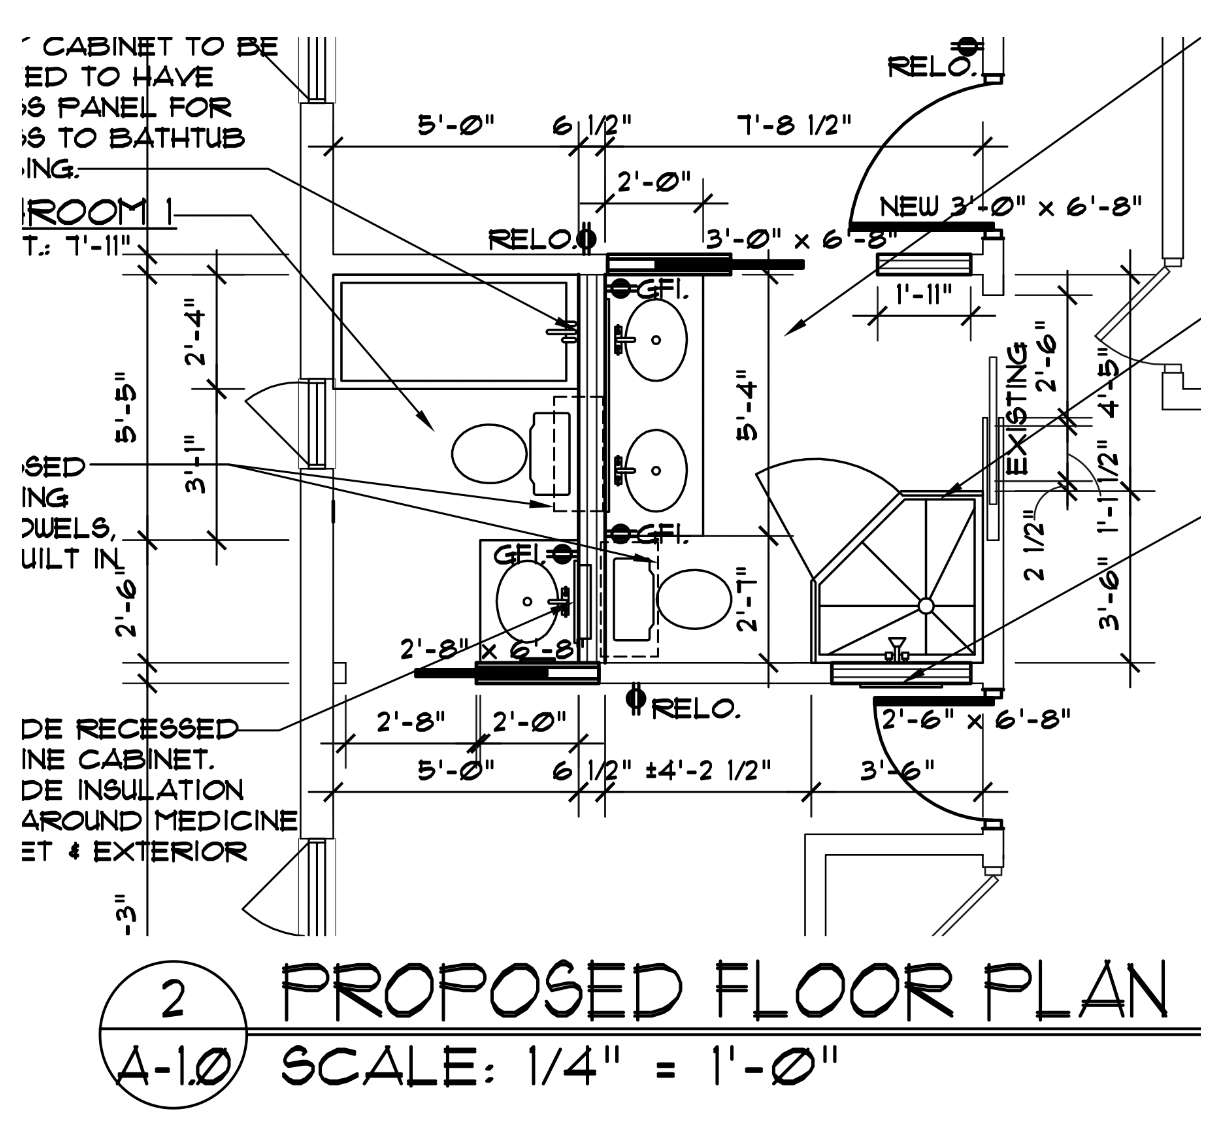 Let a designer do the design I hired an architect on this project for several reasons. First, drawings would need to be submitted to the township in order to obtain permits, and those done by an architect would facilitate the permitting process. Second, sending a detailed schematic to subcontractors would make it easier to bid the project. Finally, it makes more sense to pay someone who designs on a daily basis to lay out the overall flow of a floor plan. 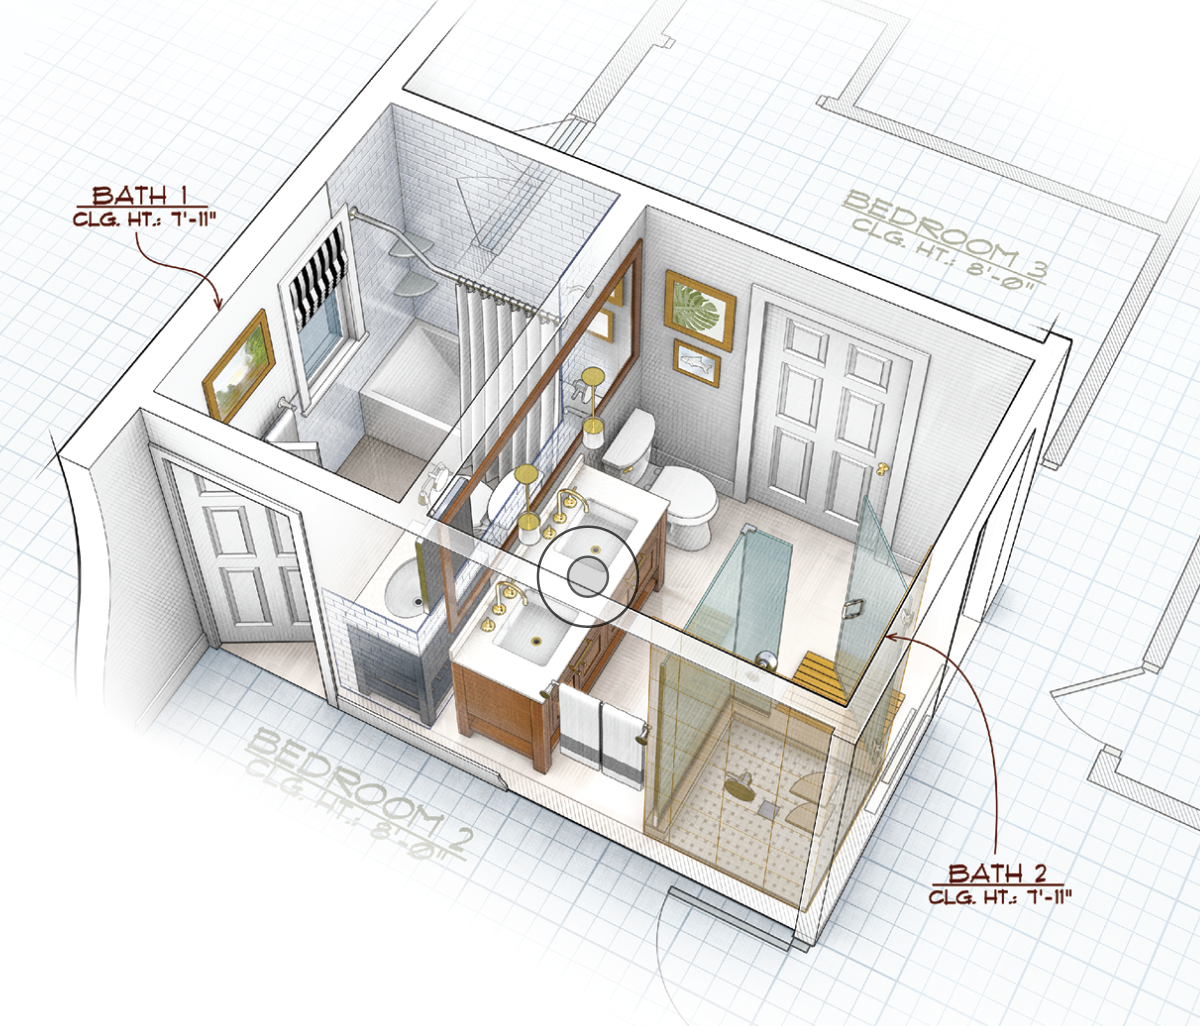 Aesthetics and site realities I omitted or altered a few things from the architect’s design, including two pocket doors as a cost-saving measure. For aesthetic reasons, I changed the neo-angle shower to a square shower. I also chose not to install the built-in medicine cabinet, which saved space to run the plumbing and electrical for both baths. I also tweaked the electrical layout, making sure that the light-switch locations worked properly with the door swings. Finally, I decided simply to swap the toilet and vanity locations instead of moving a first-floor can light. |
Working with others
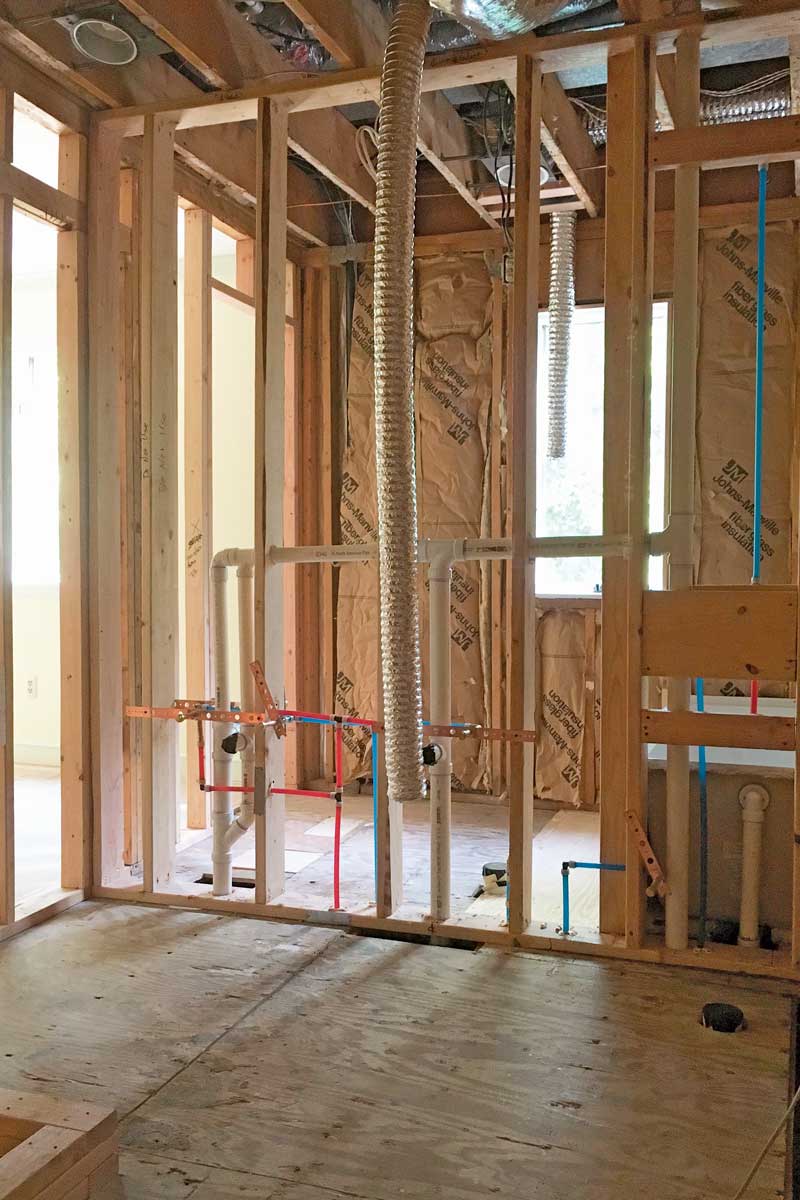
I like to do the work of all the trades that I am legally allowed to do, including framing, drywall, and finish carpentry. If I am not legally qualified to perform the work, as is the case with plumbing and electrical, I generally decide where I think everything should be located before my subcontractors walk on the job. Then I get their expert opinions, and together we determine a final plan. I try to account for everything I can think of from day 1. Although this may seem overzealous, it saves me an unbelievable amount of time later on, and it yields results that are above average.
On this project, there was a lot of plumbing going into a relatively small space, so that trade was a priority. We were taking a bathroom with four plumbing fixtures, completely relocating them, and adding three more. When I framed the wall that separates the two bathrooms, I used 2×6 studs to make it easier on the plumber when he roughed in all of his supplies, venting, and drains. I also took the time to locate where the center of every fixture would be on both sides of that wall to ensure that none of the studs would have to be moved to install the plumbing.
Next, all of the electrical had to be relocated to work in the new baths and with the new door layouts. Using a permanent marker, I marked on all of the studs where I wanted boxes and on all of the ceiling joists where I wanted lighting and ventilation. When the electrician came, we went over this in detail. After making some minor adjustments, he got right to work roughing in the wiring.
I also had a tile subcontractor, but after this job and a few others, I realized it is not worth the headache of trying to articulate exactly what I need to be done on each job. I am quite particular about tilework and layouts, and it seems to make more sense just to do it myself. This is an obstacle that I have found when working with subcontractors. You have to be able to trust them enough to listen to your ideas, process your design, retain the information, and then install everything properly. I am on the job working everyday, and I find it difficult to manage my own tasks while managing subcontractors at the same time.
I brought in a floor-refinishing sub at the absolute end of the job so that I did not damage any of the finished flooring. He sanded, stained, and finished both bedrooms’ hardwood floors with three coats of waterborne polyurethane, paying careful attention to the transitions where new doors connect the bathrooms with existing floors. After he was done, I went back in and touched up the paint around the baseboards and doorjambs.
Materials make these baths sing
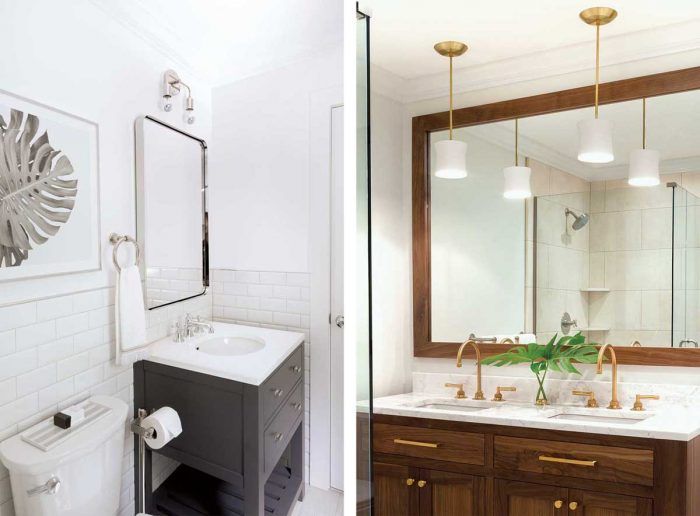
In the nearly 10 years that Rachel and I have been working together, we’ve come to appreciate and implement simple designs that allow for the finishes, trims, and fixtures to speak for themselves. This was our goal for these baths, which were designed around the floor material: a light, neutral-colored, faux-wood-plank ceramic tile. Using hues from this floor tile, Rachel created a cool bathroom and a warm bathroom.
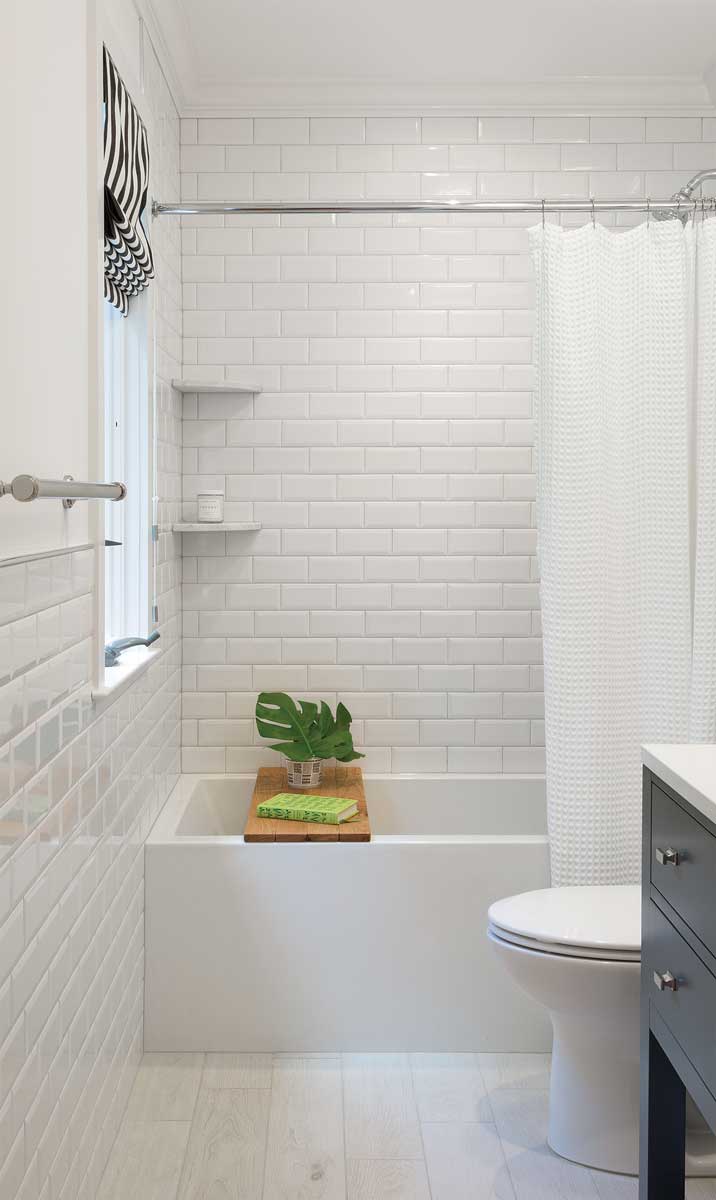
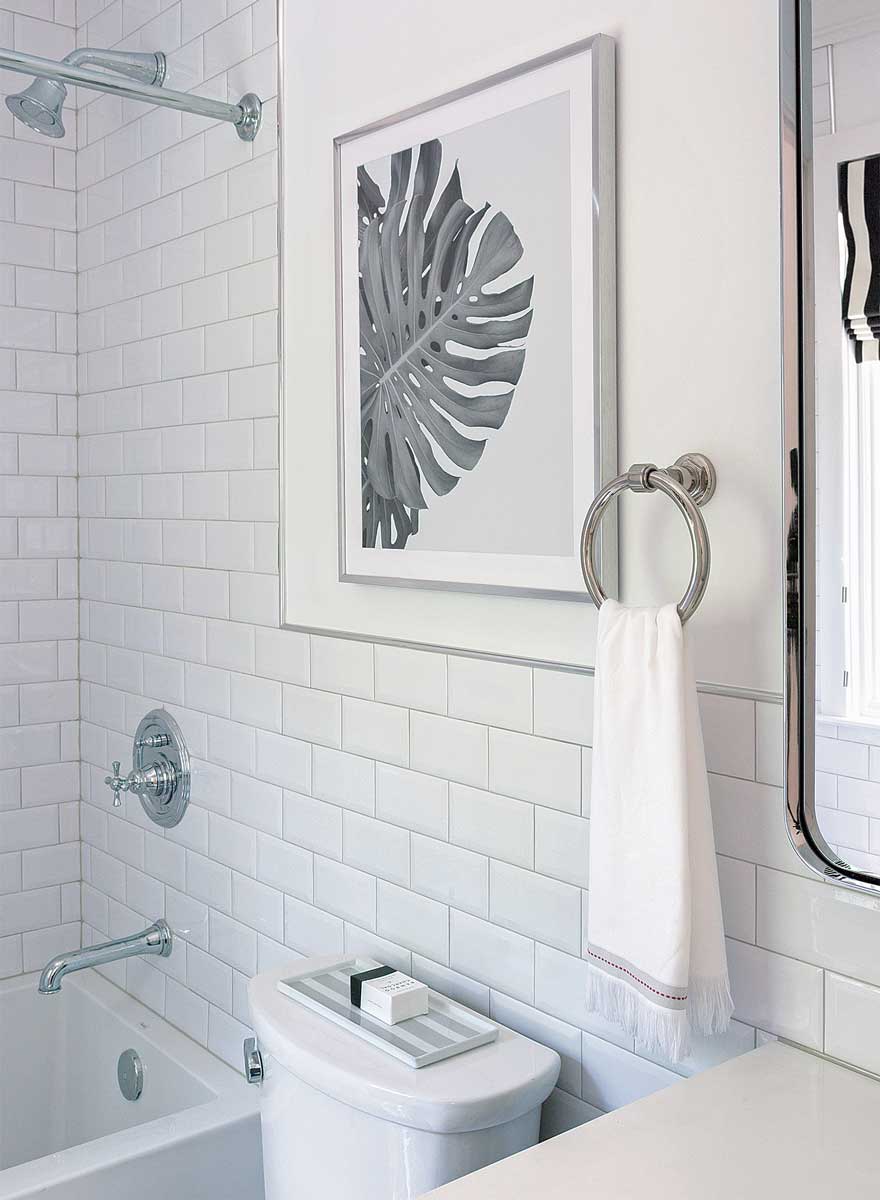
Inspired by the cool tones of the saltwater pool visible through the window, Rachel chose a slate-gray vanity and bright polished-
nickel fixtures from Restoration Hardware for the back bath. The walls have white beveled subway tile, installed up to the ceiling in the tub area and as wainscoting throughout the rest of the space. Installing the tile in this fashion and then adding crown molding made the small bathroom feel larger. Rachel also selected Mirabelle’s Edenton soaking tub for its straight lines and minimal footprint. Minor details such as chrome-dipped lightbulbs in the vanity sconce and grayscale artwork reiterate the cool, simple theme.
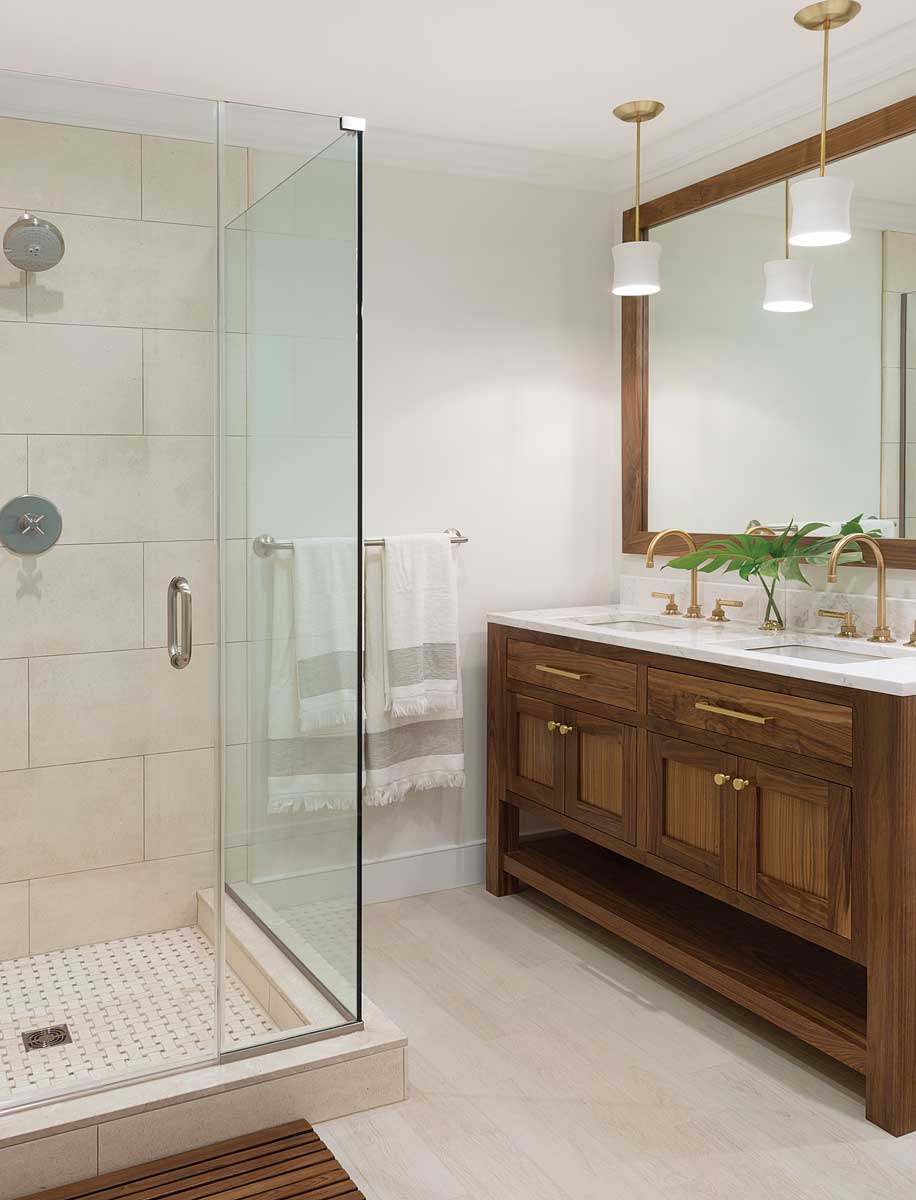
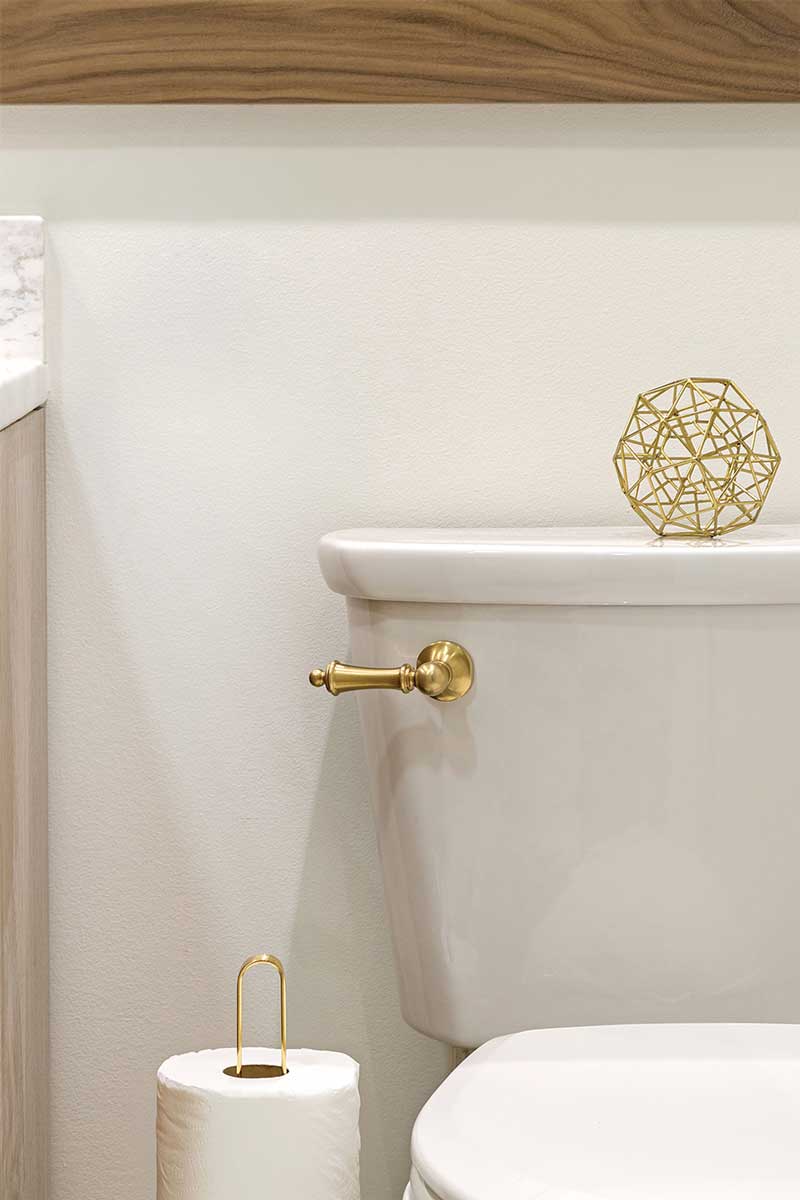
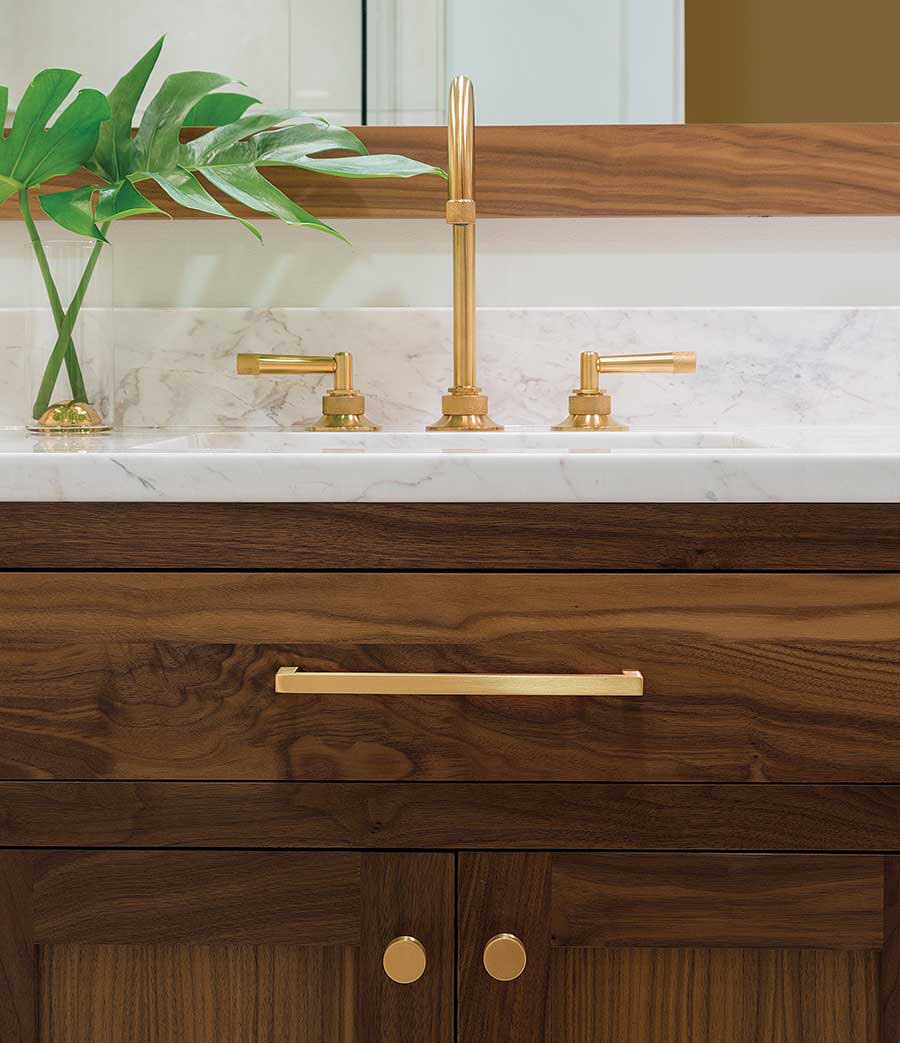
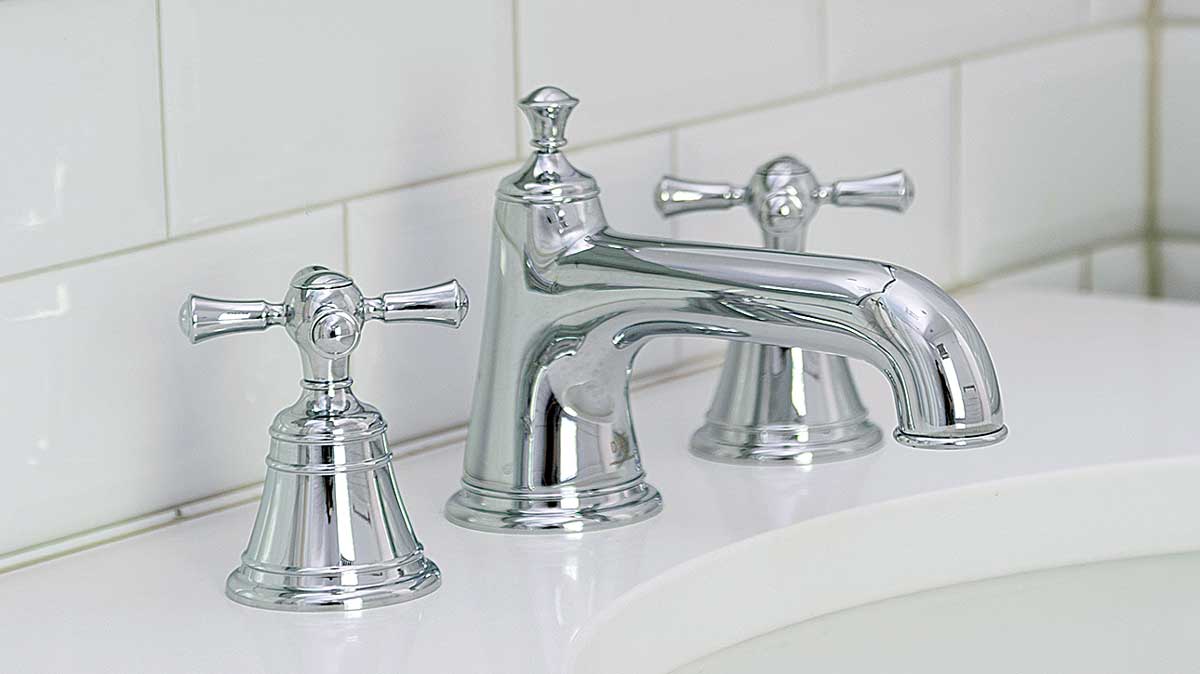
Rachel and I have a design bucket list, and pairing brushed brass with walnut was high on that list, so we chose that combination in the front bath. We created a warm space there with the ceramic plank flooring and a custom walnut vanity and mirror. We focused on straight lines and simple proportions to allow the rich wood finish to speak for itself. With its moderately priced slab of white-diamond marble, Schoolhouse Electric brushed-brass hardware, Rohl’s satin-gold Michael Berman faucets, and Cedar & Moss brass and stoneware pendants, the room glows.
What I love most about this career is the constant opportunity for growth and self-improvement. On each job, I’m faced with new challenges, from how to interact with clients, to how to manage subs, to how to approach the work once a space is gutted. This was a large project, and I can say that I drove off the job a better contractor and with clients who love their new bathrooms.
Before, during, and after
Interior design completes the processRemodels like this are the result of a team effort coordinated by the general contractor. With the subs long gone and the final trimming done, it’s possible to see the last aspect of a complete project: interior design. For that part of the job shown here, Rachel chose everything from tile and cabinetry, to countertops, to plumbing and lighting fixtures. The design builds upon the floor tile, which is the same in both baths. From there, however, each room has unique colors, fixtures, and materials.
|
Tyler Grace is a Fine Homebuilding ambassador and the co-owner of TRG Home Concepts in Haddon Heights, N.J. (trghomeconcepts.com). Photos by Courtney Apple and others.
RELATED STORIES

View Comments
Would have been nice to see both the before AND after images.