How to Remodel a Bath for Accessibility
Even if you don’t require accessible spaces today, you can design bathrooms that are functional, comfortable, and flexible for long-term living.
Remodeling an existing house presents many design challenges. Modern living requires different functions and spaces than a house built 50, 20, or even 10 years ago. Designing homes and remodels that consider long-term livability has become a greater priority in residential design as we embrace an aging baby-boomer population.
Whether you’re looking to age in place in your current home, to accommodate aging family members, or simply to consider resale value and appeal to a broad market, issues of wheelchair access and accessible design are critical. Even if you don’t require accessible spaces today, you can design spaces that are functional, comfortable, and flexible enough to accommodate any accessibility needs that arise in the future.
Recently, I was charged with redesigning the existing full bath in the Fine Homebuilding Project House to create a more accessible suite. This 1950s ranch has a floor plan common to many homes of a similar style and vintage. By looking at the problems with the existing bath and the solutions in the new bath, you’ll easily be able to recognize the flaws and opportunities in your own projects.
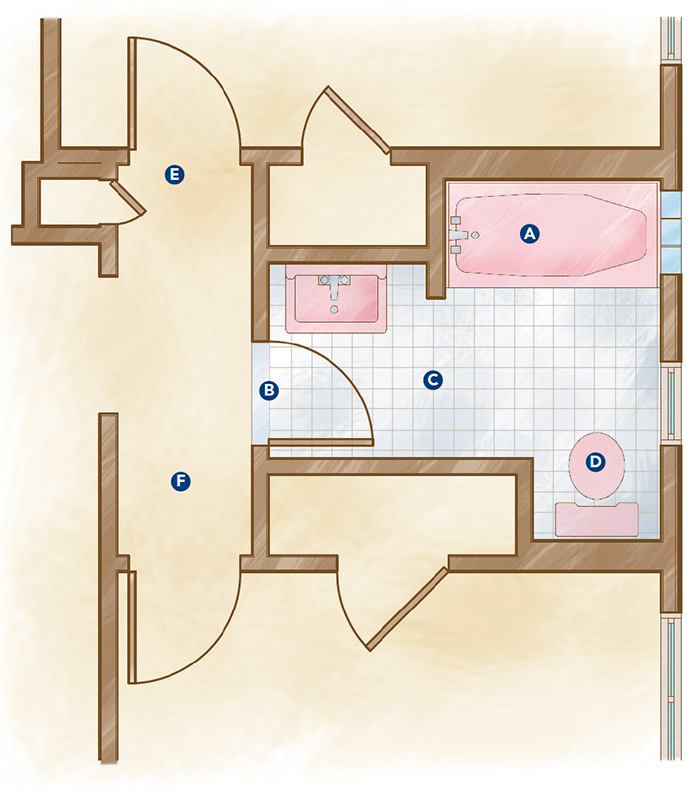
Identify problems with the existing bathroomThe existing bathroom has several problems. A narrow doorway leads to a claustrophobic space only 3-1⁄2 ft. wide at its widest point. All the services—the toilet, the tub, and the sink—would be extremely difficult to access if the user had limited mobility or were confined to a wheelchair. Adding grab bars to improve the functionality of this bath would be a hit-or-miss proposition because the blocking is missing from the appropriate locations. Also, despite the need for it, the bathroom doesn’t contain any storage for toiletries or towels. |
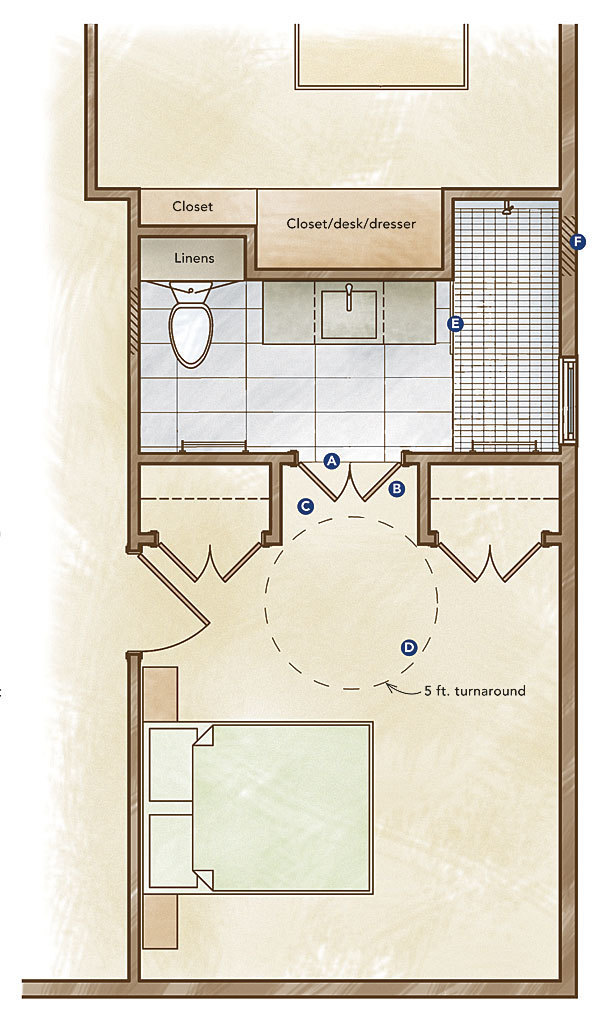
Create an accessible plan with integrated solutionsThe first step in designing flexible spaces is determining which design elements need to be included initially and which can be installed later if they are needed. For example, building a bathroom with access to a 5-ft. clear turnaround area that improves wheelchair maneuverability should be incorporated initially, because it would be difficult and expensive to make accommodations for such a space later. Below are the elements that make this new bathroom accessible while still maintaining a comfortable, style-appropriate aesthetic. |
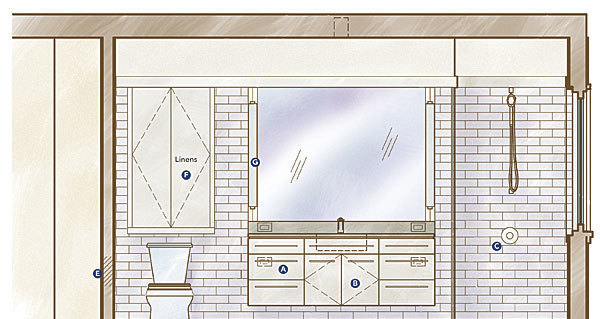
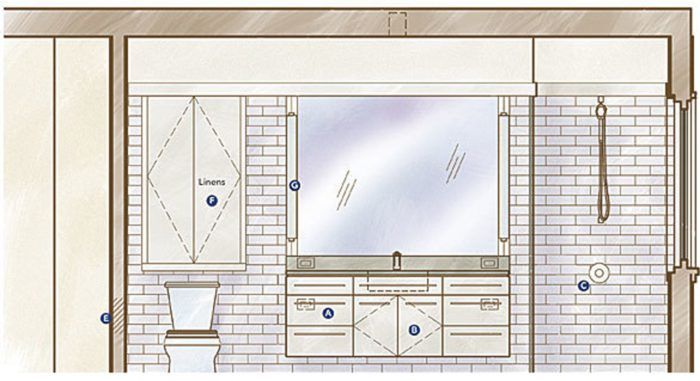
| A: Vanity provides plentiful storage that can be used from both seated and standing positions.
B: Vanity is built so that the middle cabinet is removable to allow for knee space below the sink. C: Shower valves, light switches, and thermostat controls should be from 38 in. to 48 in. above the floor. D: There is less than a 1 ⁄ 2-in. transition between the bathroom floor and the shower floor to enable roll-in access. |
E: Blocking is integrated into the walls so that grab bars can be installed around the toilet and shower in the future.
F: A linen cabinet integrates additional storage opportunities in the bath where none had existed previously.Typical grab-bar height is from 33 in. to 36 in. G: Two light fixtures mounted at eye level provide adequate illumination at the vanity. |
Drawings: Duncan McPherson
From Fine Homebuilding #228
More about accessible design:
3-Tiered Checklist for Aging in Place – Incorporate as many of these design considerations as possible to build a home that is accessible and comfortable for people of all ages and abilities.
Redefining Retirement – Architects Sarah Susanka and Tina Govan collaborate on a one-of-a-kind project that provides lessons in comfort, craft, and flexible living at all stages of life.
