
Benches and Planters
Built-in seating and simple wooden planting boxes are appealing additions to any deck.
Built-in benches are a good way to provide seating for a lot of people at social gatherings. Permanent benches near doors are a convenient place for changing muddy shoes or resting bags of groceries while you fumble to unlock the door, while seats built into deck corners can foster private conversation. If your deck has long sections of railing, attractive built-in seating can add character and break up the monotony. And on a low deck that doesn’t require a railing, a perimeter bench is a useful and appealing addition.
Having said this, though, I must admit that I’m not a big fan of built-in deck furniture. For one thing, hard benches offer seating that is less than comfortable. And built-in seating usually faces the wrong direction if you want to see a view. My advice is to limit built-ins to small benches that are located near doors and serve dedicated functions. But if you need a lot of seating regularly, benches can be the way to go.
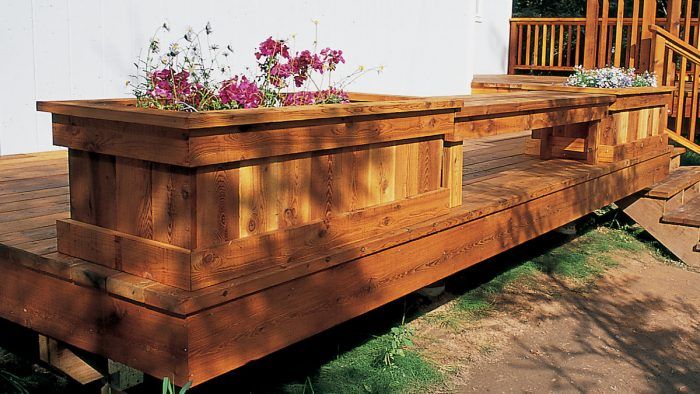
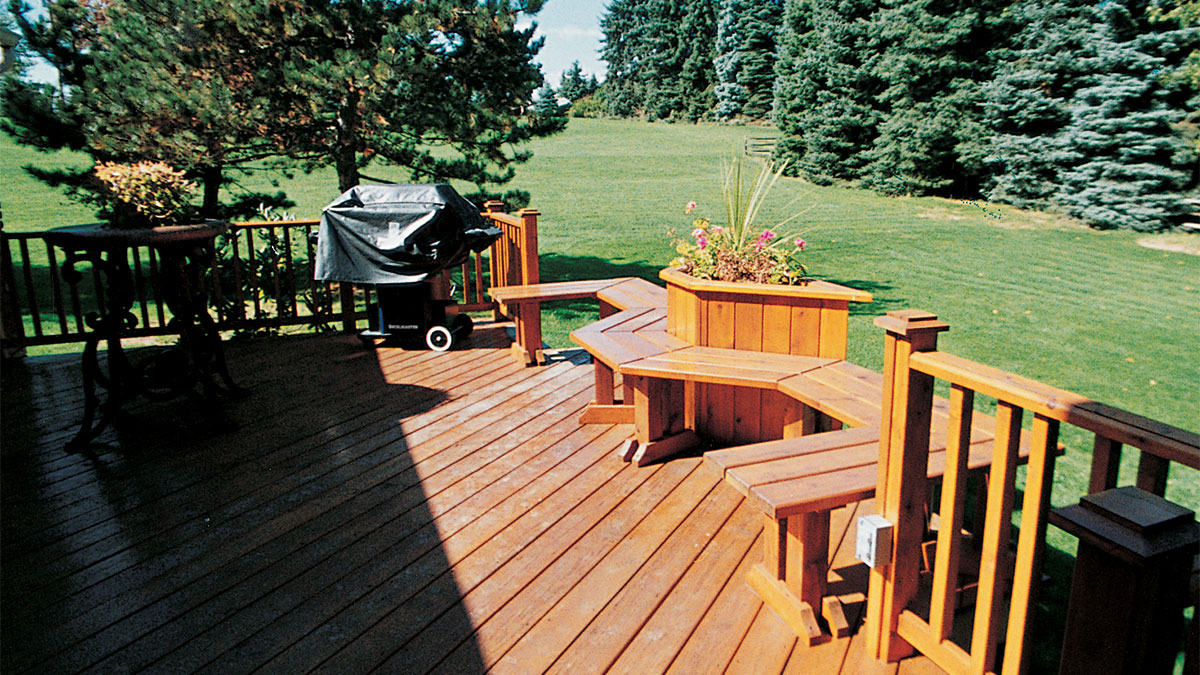
Planters, on the other hand, are a natural for a deck—they can be as important as pictures on a blank wall. Planters can be built in a variety of shapes and sizes to fit their location. They can be built in pairs. They can frame the opening of a stairway or door, define an access, or delineate a level change. Planters can serve as dividers or barriers, adding privacy by replacing sections of railings.
Built-in benches
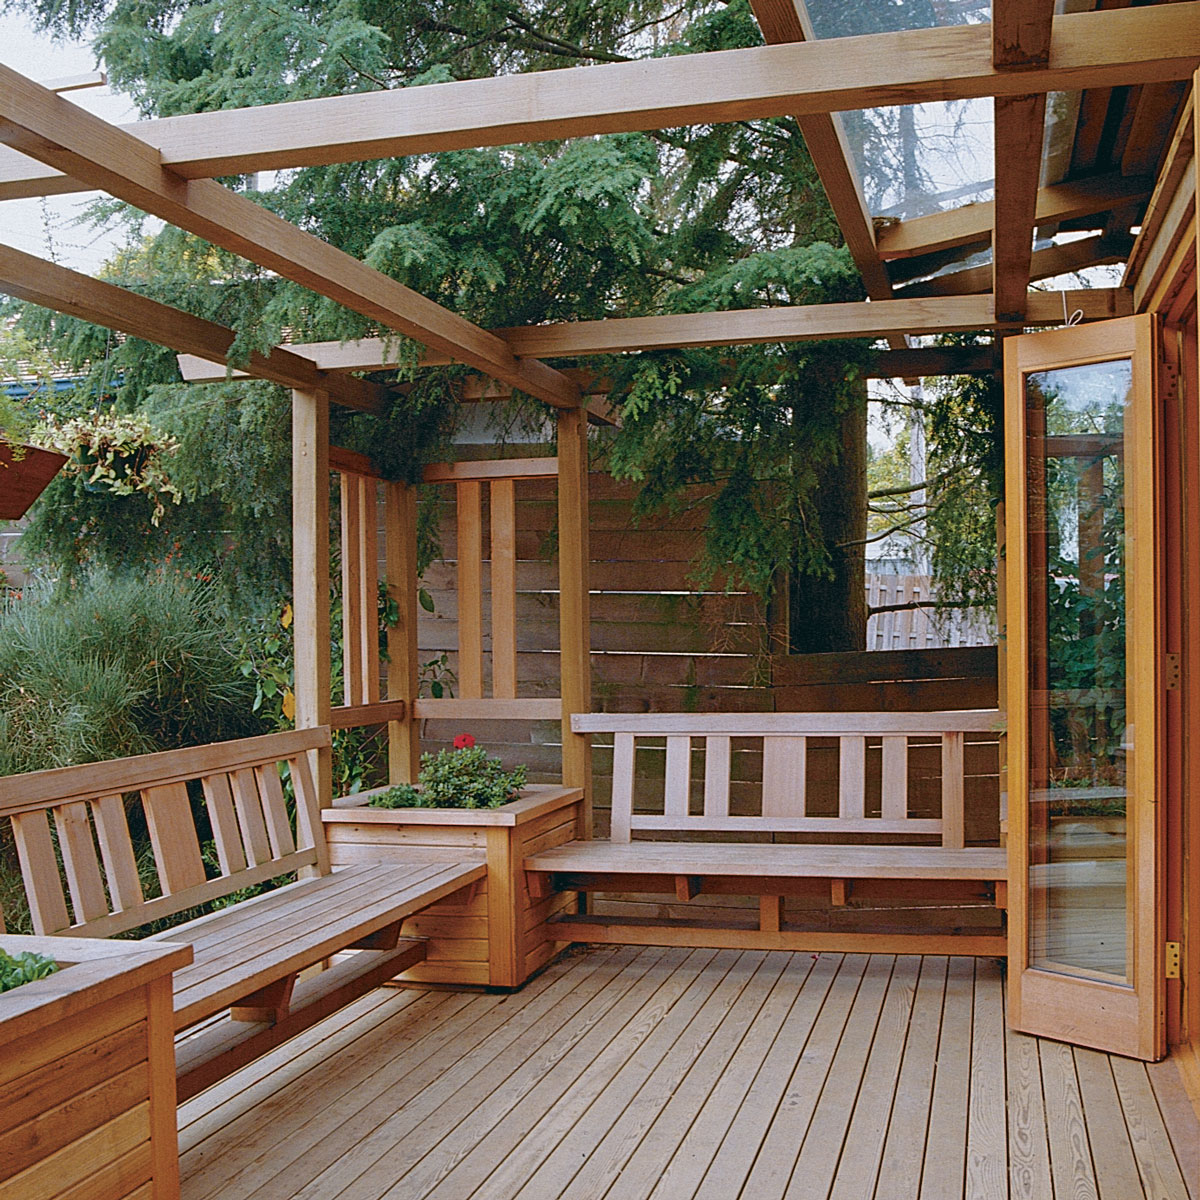
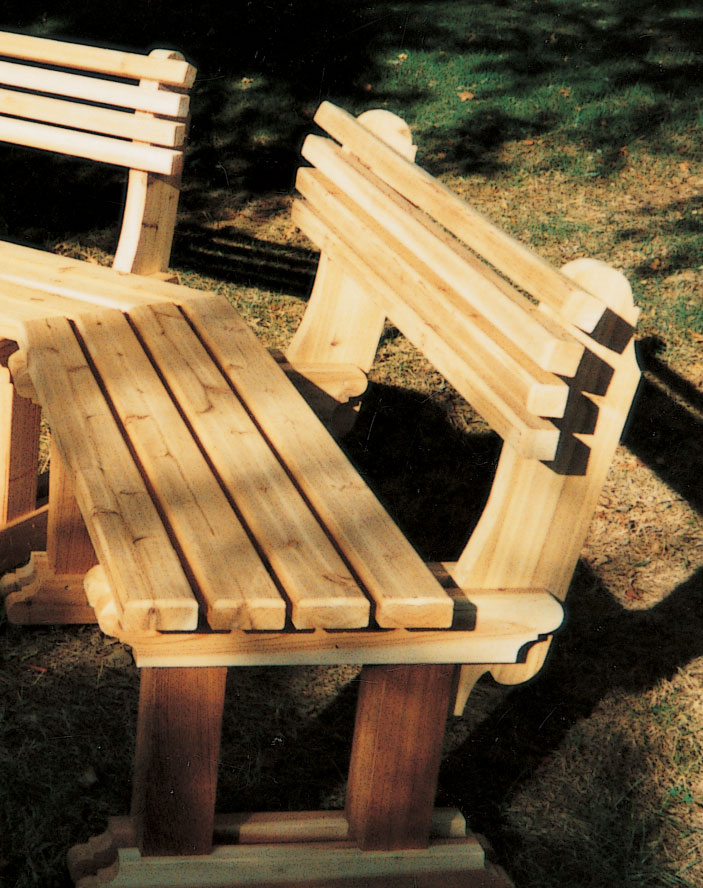
There are several ways to construct built-in benches. You can simply modify a section of railing to form an angled back for the bench (though this creates a mismatch with the rest of the railing that is very visible from the outside). Another option is to build a bench without a separate back, but this isn’t very comfortable for long sits. I think the best option is to build a bench (with a back) that is built independently of the railing system. Although this bench style requires only a little more work and material than the other two options, it does need advance planning to make sure that posts are located in the right position. The benches can be added after the deck and railing are built, and they can be removed in the future without affecting the railing’s integrity.
IN DETAILThe surest way to get a comfortable seat is to use your favorite chair as a model. But here are some general guidelines to get you started:
|
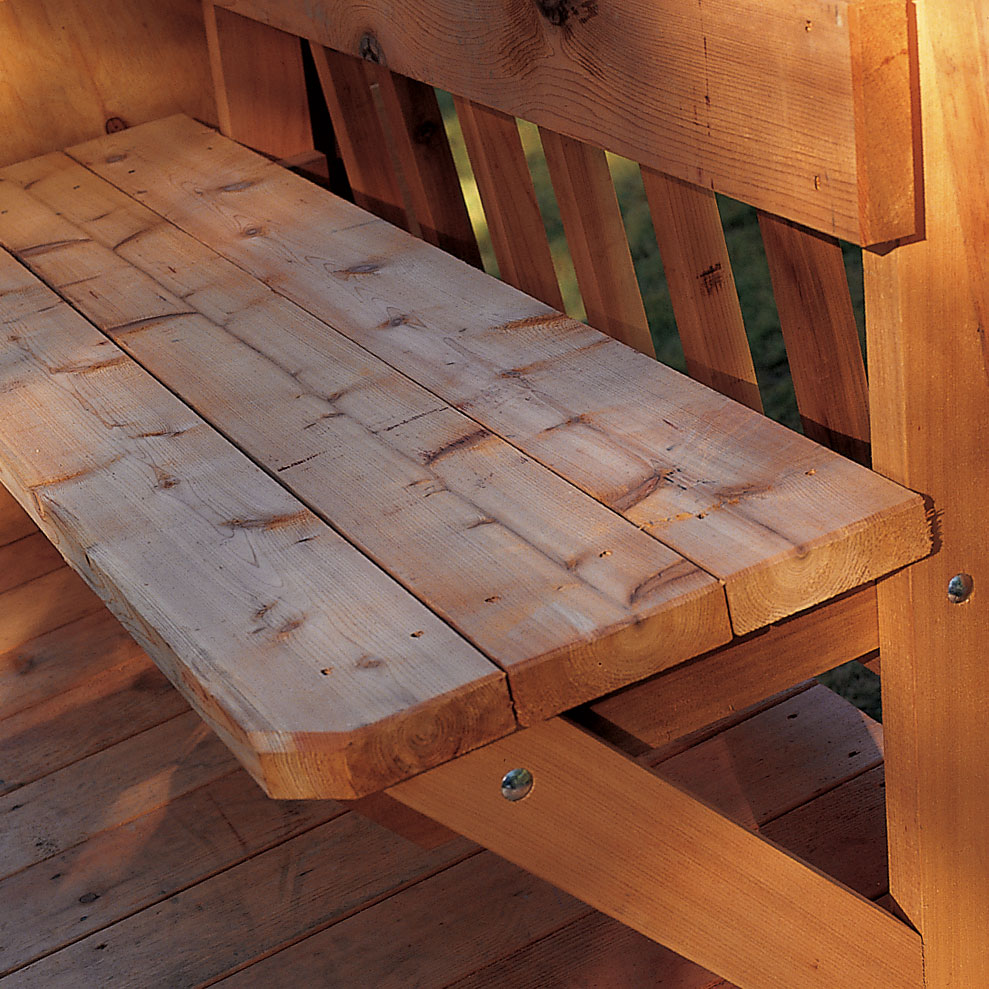
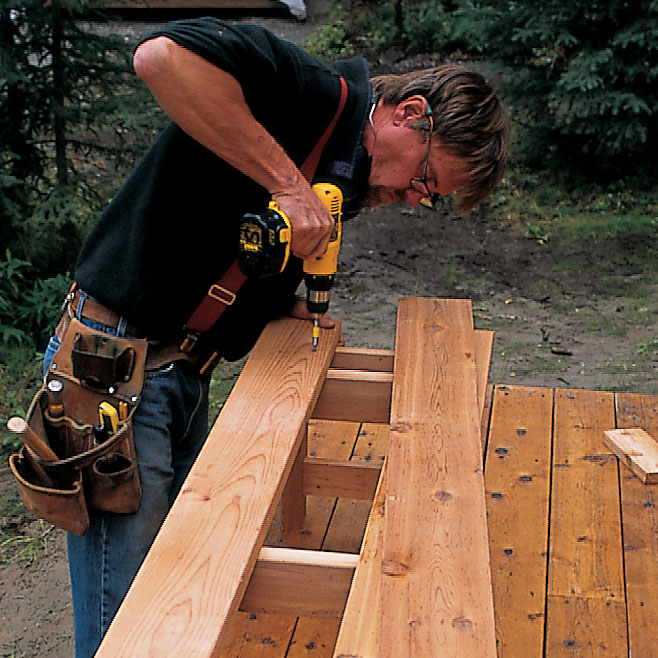
I use an angled support system for the bench and back support, which I build with the help of a simple jig. The bench support involves only three pieces: a long back leg, a horizontal base for the seat, and a short front leg. I precut the pieces, place them in the jig, then drill and bolt them together. Then I attach the supports to existing deck posts with bolts (built-in benches need legs about every 4 ft. for adequate support). Finally, I use decking material to connect the supports and form the seat and back.
A frame attached to the railing supports seat and backrest planks. A simple jig makes the construction of multiples of this frame quick and accurate.

TRADE SECRETA bench with a vertical, flat backrest should have a 4-in. to 6-in. gap between the back and the seat to make the bench more comfortable. Continue the backrest up to 32 in. to 36 in. above the floor. For the most comfort, a backrest should be angled between 15 and 20 degrees from vertical (or a 10-in. to 12-in. tilt over 36 in.).
Benches with backs are definitely more comfortable but require a sturdy connection so that the backrest remains firmly attached. |
Adding a simple bench
Benches without backs can be added just about anywhere. Although flat benches aren’t as comfortable as sloped seats with back supports, they’re great for casual sitting and can be a good place to take a nap.
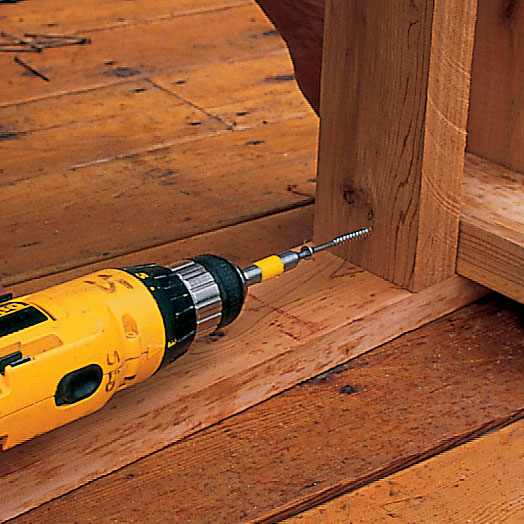
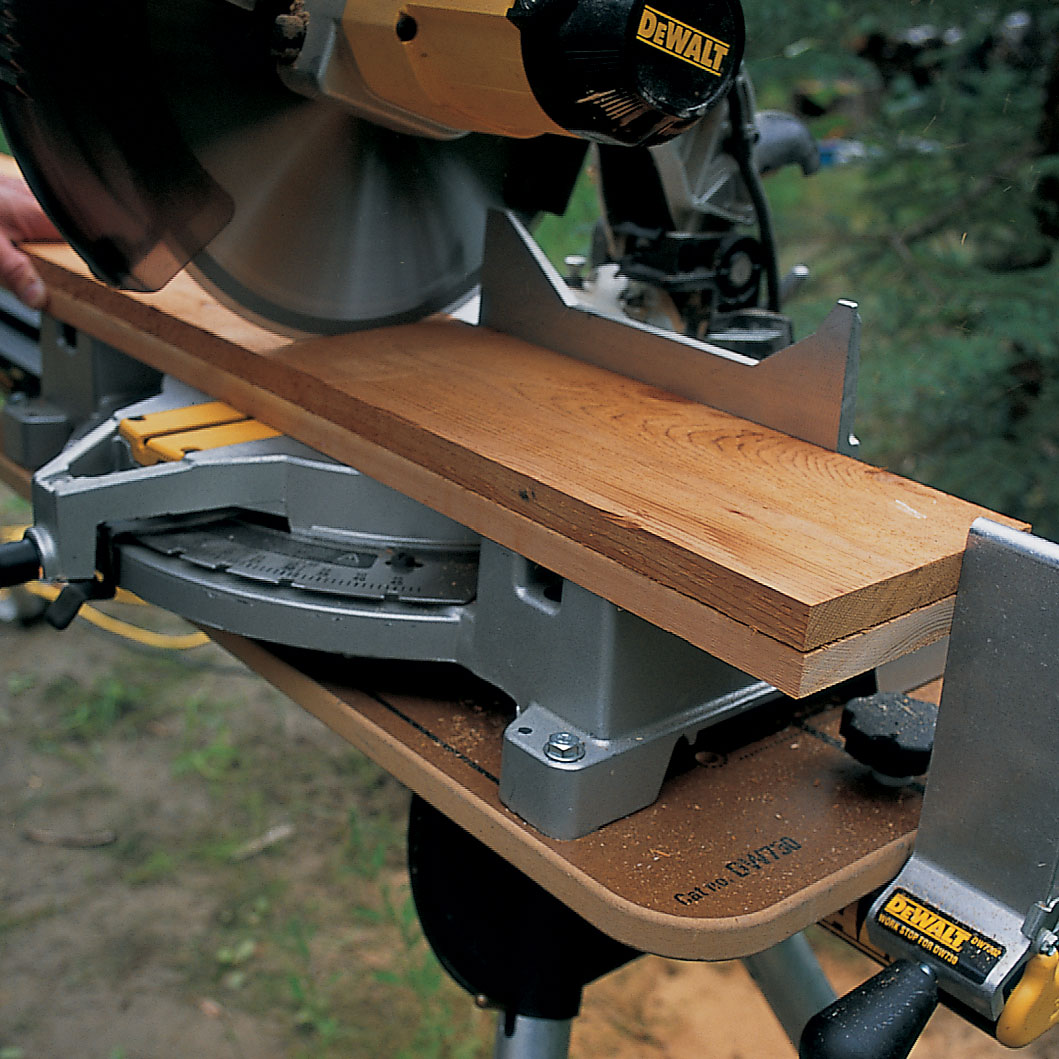
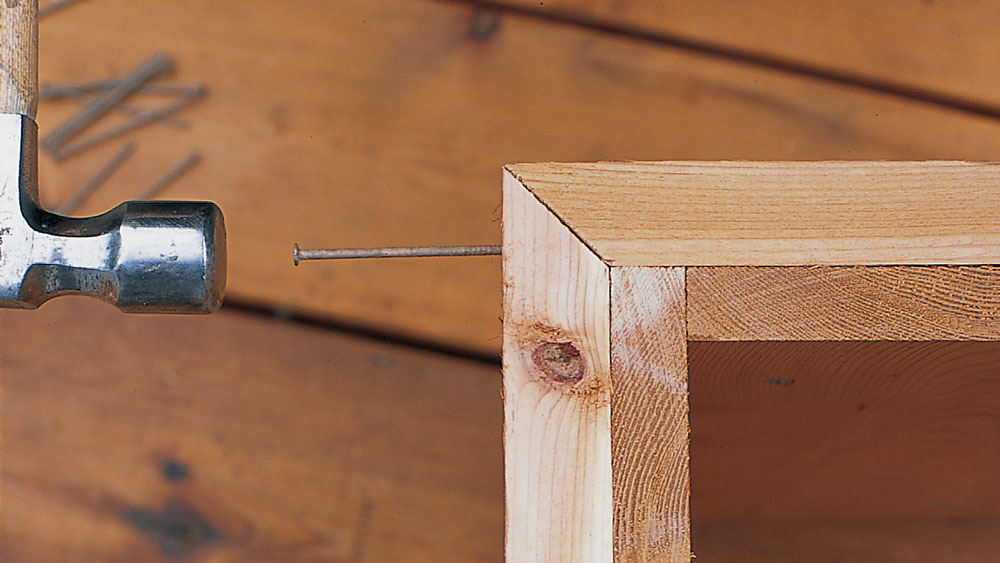
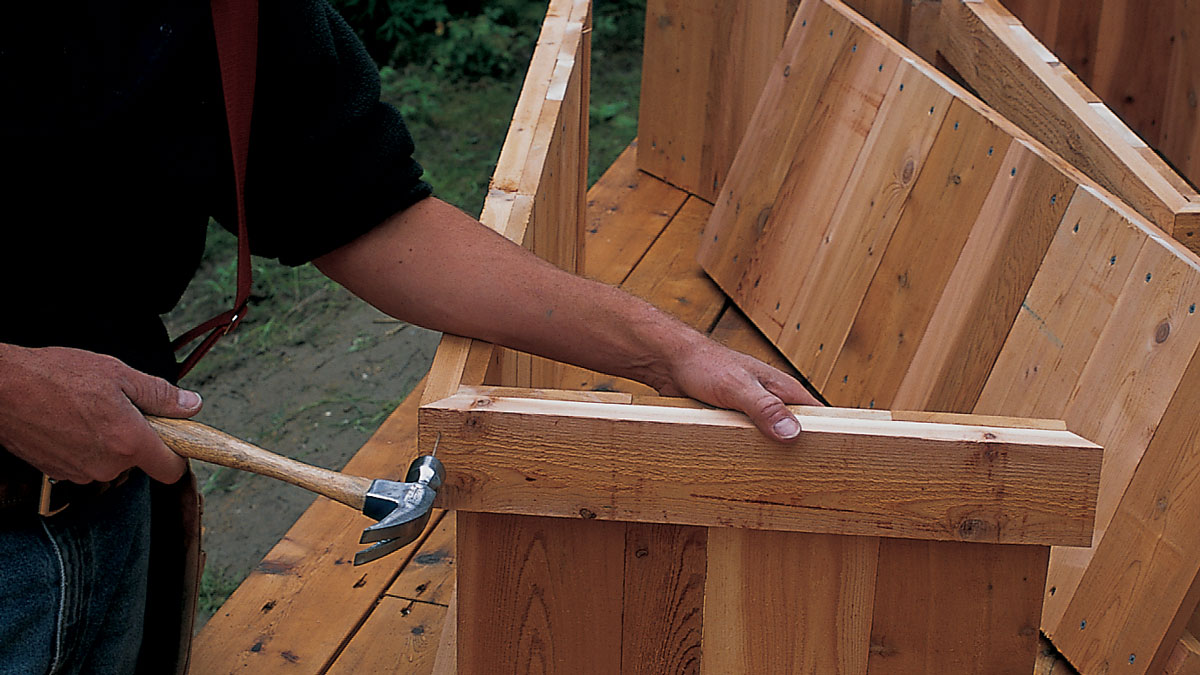
A quick and easy freestanding bench without a back may be a good option for your deck. This bench starts with a 5/4×4 cedar frame with nailed and mitered corners that is sized to allow a small overhang of the finished seating surface of cedar deck boards. Adding some 2×4 cross blocking will give more support for attaching the legs and seat boards. Then use screws or bolts to attach 2×4 legs to the cross blocking and 5/4 frame. To keep the legs more stable and to improve the styling, I also add 2×4 rungs between the legs and nail them in place.
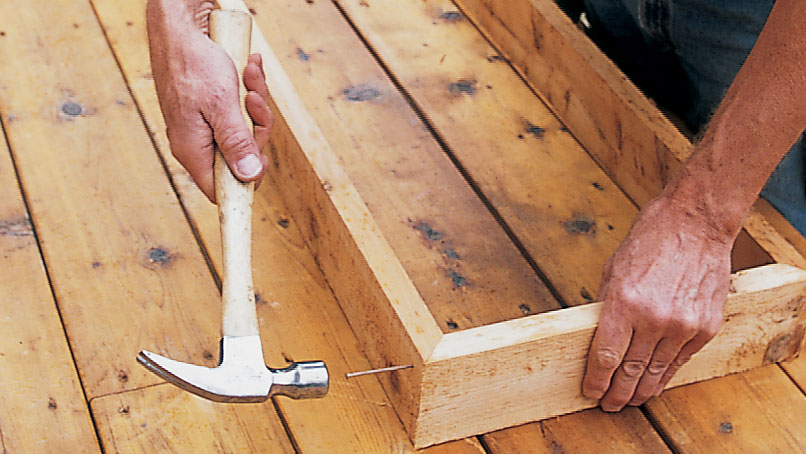
This bench starts with a 5/4×4 cedar frame with nailed and mitered corners that is sized to allow a small overhang of the finished seating surface of cedar deck boards.
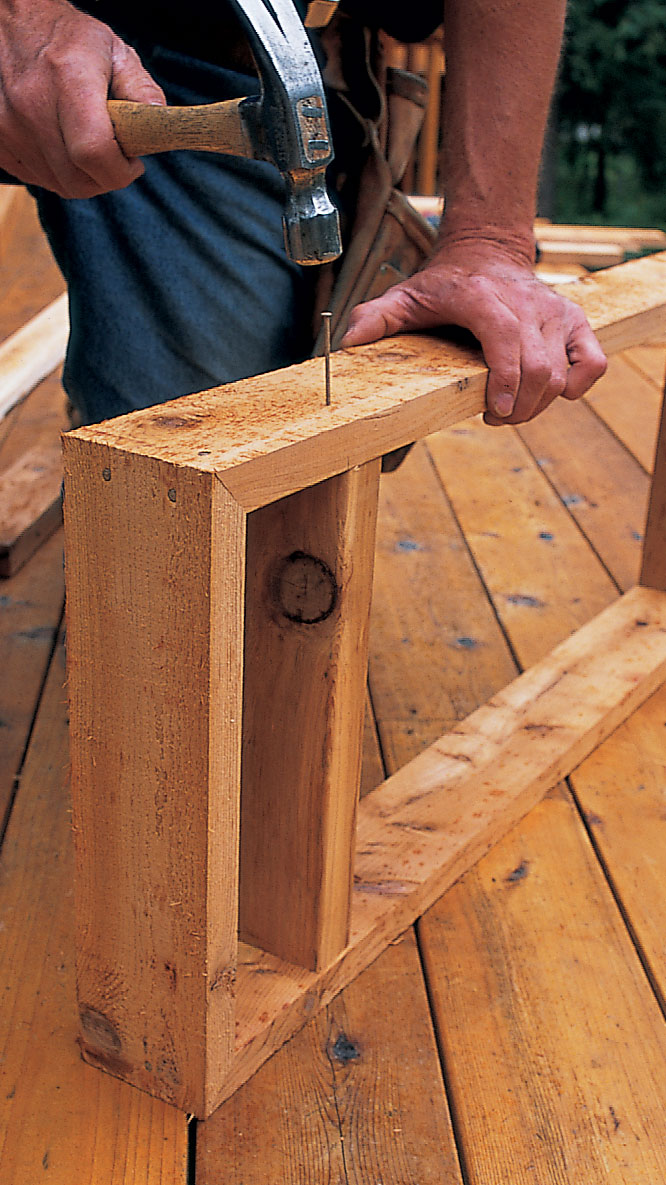
Adding some 2×4 cross blocking will give more support for attaching the legs and seat boards.
 |
 |
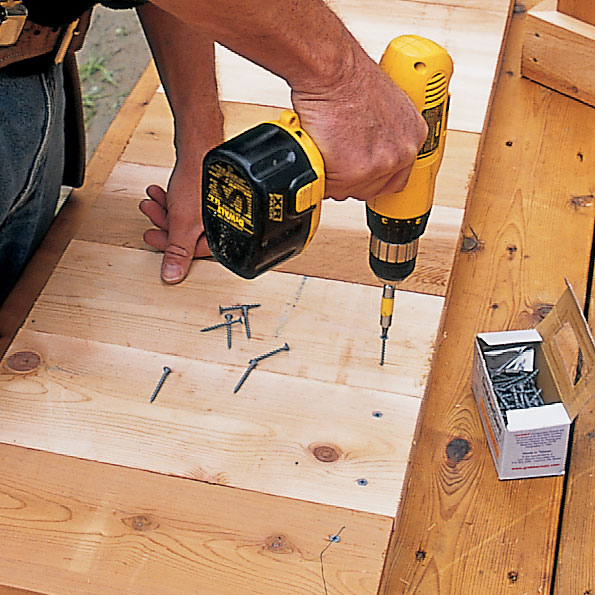
| Then use screws or bolts to attach 2×4 legs to the cross blocking and 5/4 frame. | I also add 2×4 rungs between the legs and nail them in place. |
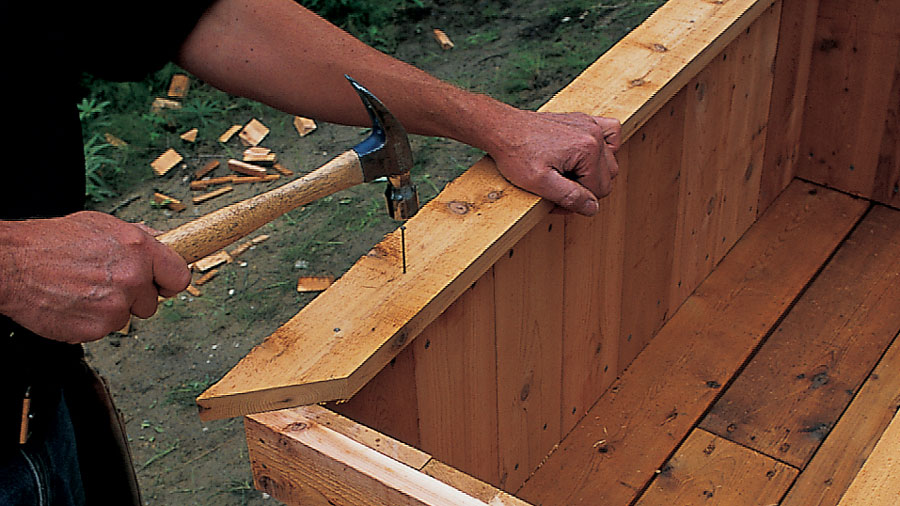
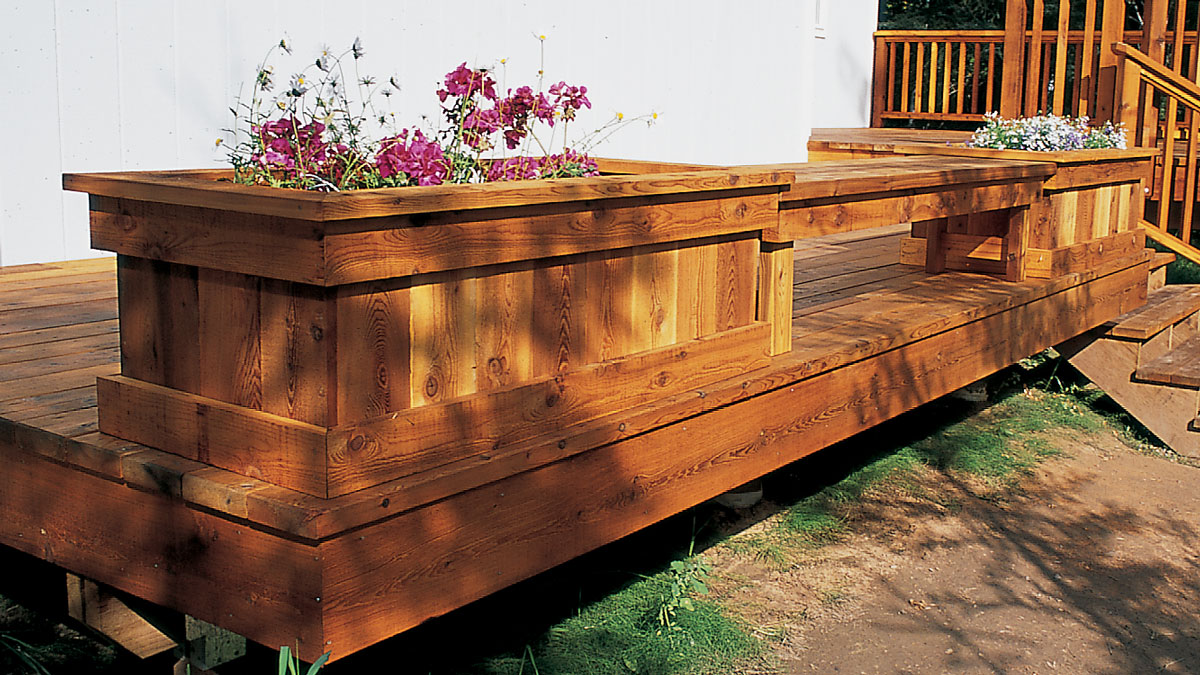
Although any thickness of seat material would work, here we used extra 2×6 deck boards, which are screwed in place as you would the deck surface. After completing the bench, clean up the sawn edges with a block plane or router to improve the look of the bench and minimize splinters. The completed bench is flanked with matching planters on either side.
Here we used extra 2×6 deck boards, which are screwed in place as you would the deck surface.
Clean up the sawn edges with a block plane or router.

The completed bench is flanked with matching planters on either side.
A more elegant alternative is a freestanding bench that includes a backrest (though this bench takes a little more work to notch the legs). For added stability, these kinds of benches can be screwed temporarily to the deck.
Planters
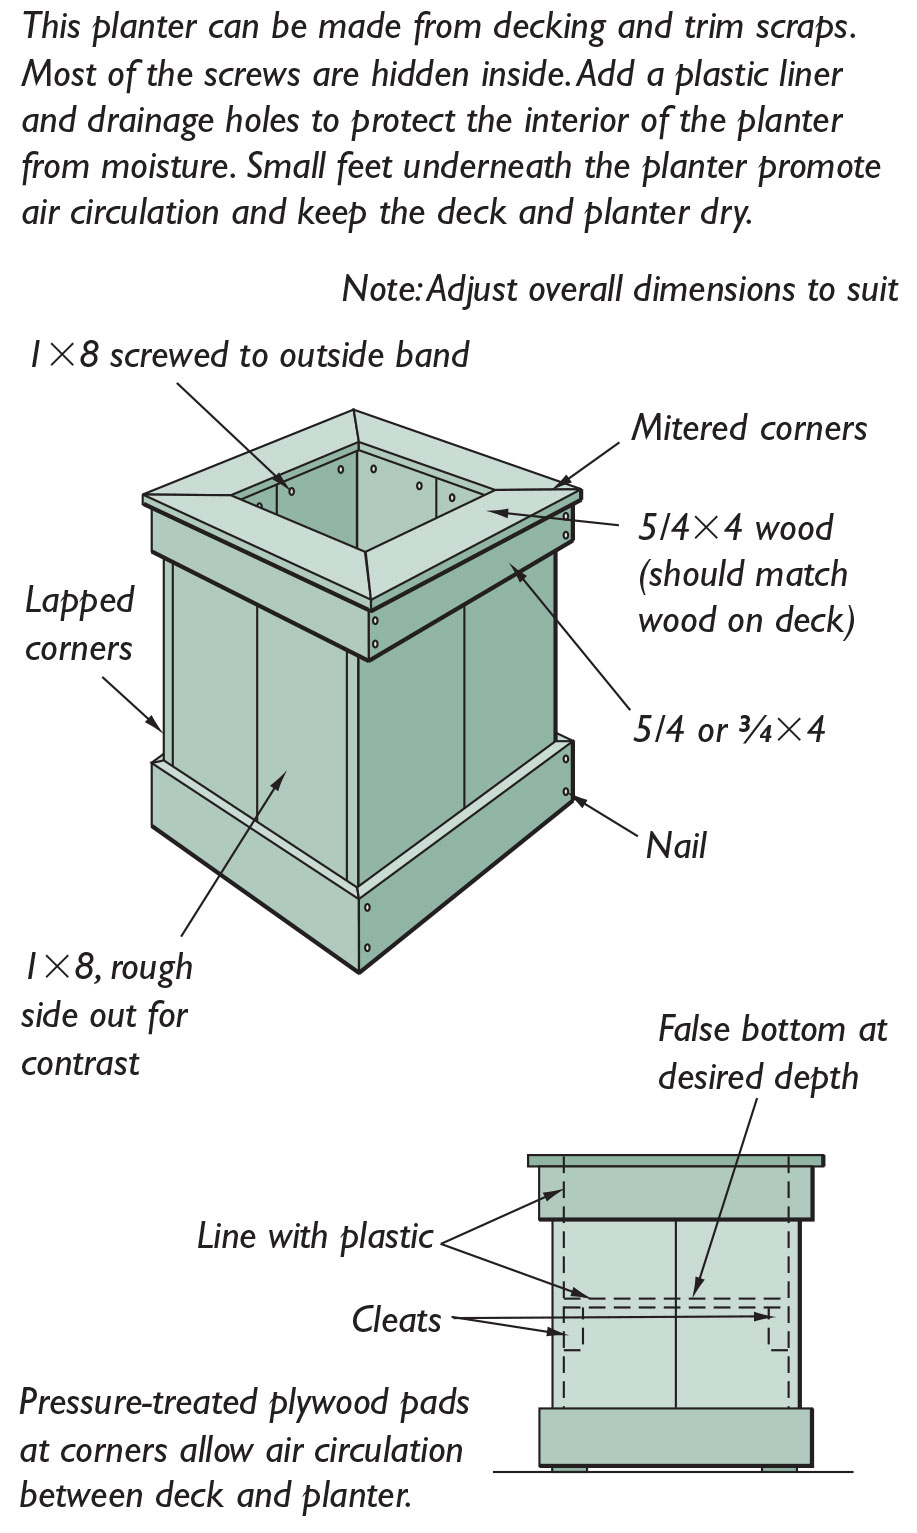
Planters should be made of rot-resistant material (usually there are plenty of leftovers from deck construction). Boxes can be made from treated plywood and then sheathed with cedar siding or trim. The boxes can also be made from heavier 2x material that is fastened together with rustproof screws. It’s seldom necessary to use waterproof glue unless you are making a planter that needs to have all its fasteners hidden.
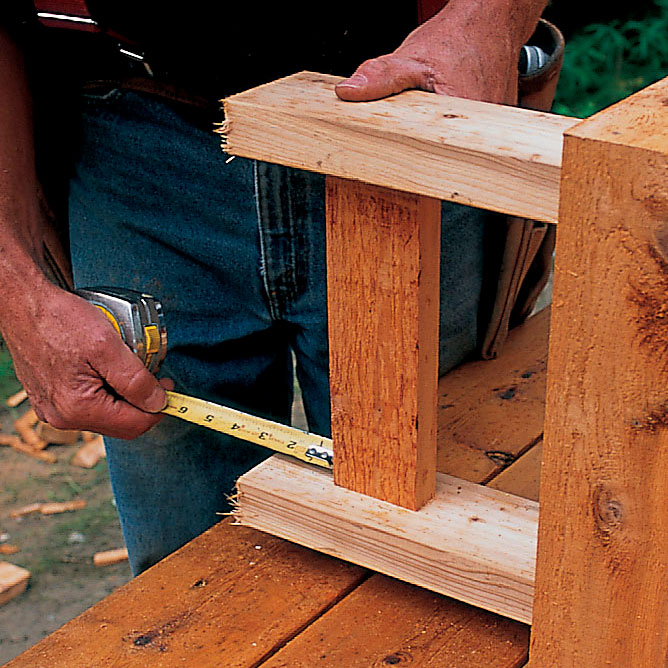
To assemble the planters that flank the bench on this deck, I first precut enough 1×8 material for the vertical parts of all the sides. Boards can be ripped to fit a predetermined planter width, or the planter size can simply be a multiple of whole boards. These side boards are then screwed from the back side to horizontal 5/4 bands that are mitered on the ends. I make the length of the bands longer on two opposite sides to accommodate lapping of the vertical pieces at the corners.
 |
 |
| Boards can be ripped to fit a predetermined planter width, or the planter size can simply be a multiple of whole boards. | These side boards are then screwed from the back side to horizontal 5/4 bands that are mitered on the ends. |
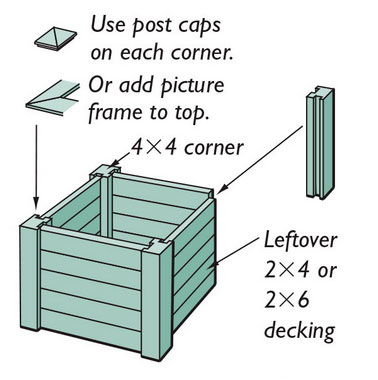
Grooves cut in the 4×4 corners with a router or table saw equipped with a dado blade accept leftover decking material. Adjust the grooves to match the siding martial thickness.
 |
 |
1. The sides are then nailed together through the miters in the bands and along the vertical laps of the side boards.
2. After assembling all the sides, I nail on a 5/4×3 mitered top cap that slightly overhangs the sides and band.
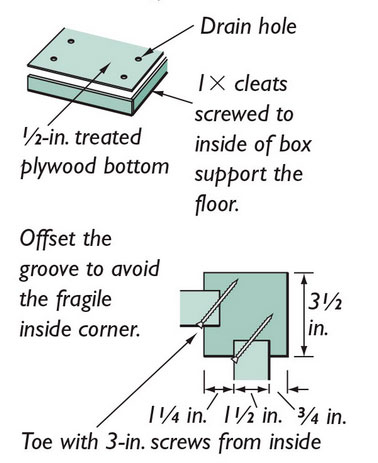
3. At the bottom, I attach cleats that I rip from leftover stock, screwing them to the inside of the box at a height to accommodate pots or a liner.
Safety firstUse caution when choosing a planter liner, particularly if your planters are used for growing food. Petroleum-treated products and treated plywoods may leach unwanted chemicals into the soil, as will extra preservatives used to treat cut lumber. |
 |
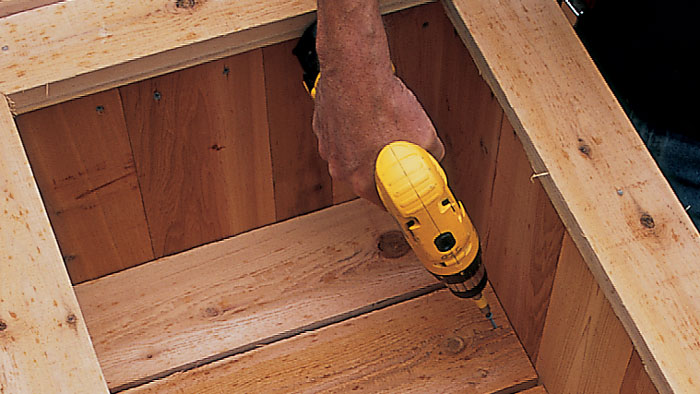
4. Finally, I attach boards to the cleats, leaving spaces between the boards for circulation and drainage. The completed planter can be placed on the deck, or attached with screws for a more permanent installation.
Fine Homebuilding Recommended Products
Fine Homebuilding receives a commission for items purchased through links on this site, including Amazon Associates and other affiliate advertising programs.

4-Gallon Piston Backpack Sprayer

Metal Connector Nailer

Lithium-Ion Cordless Palm Nailer
