Better-Built Wood Railings
Elegant, site-built, rot-resistant railings don’t have to break the bank.
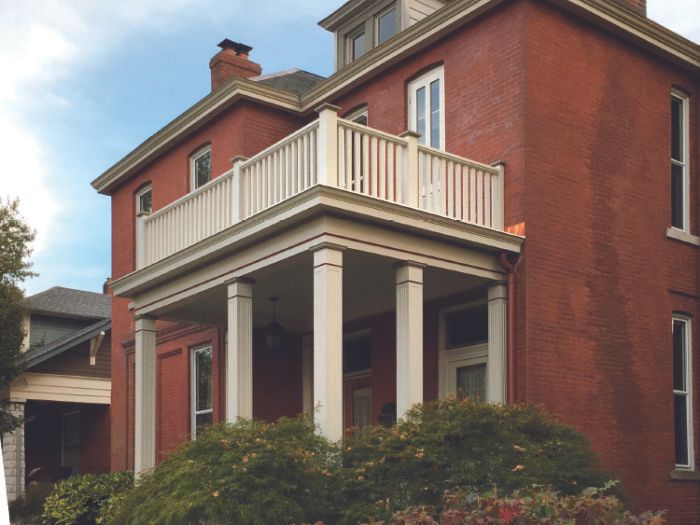
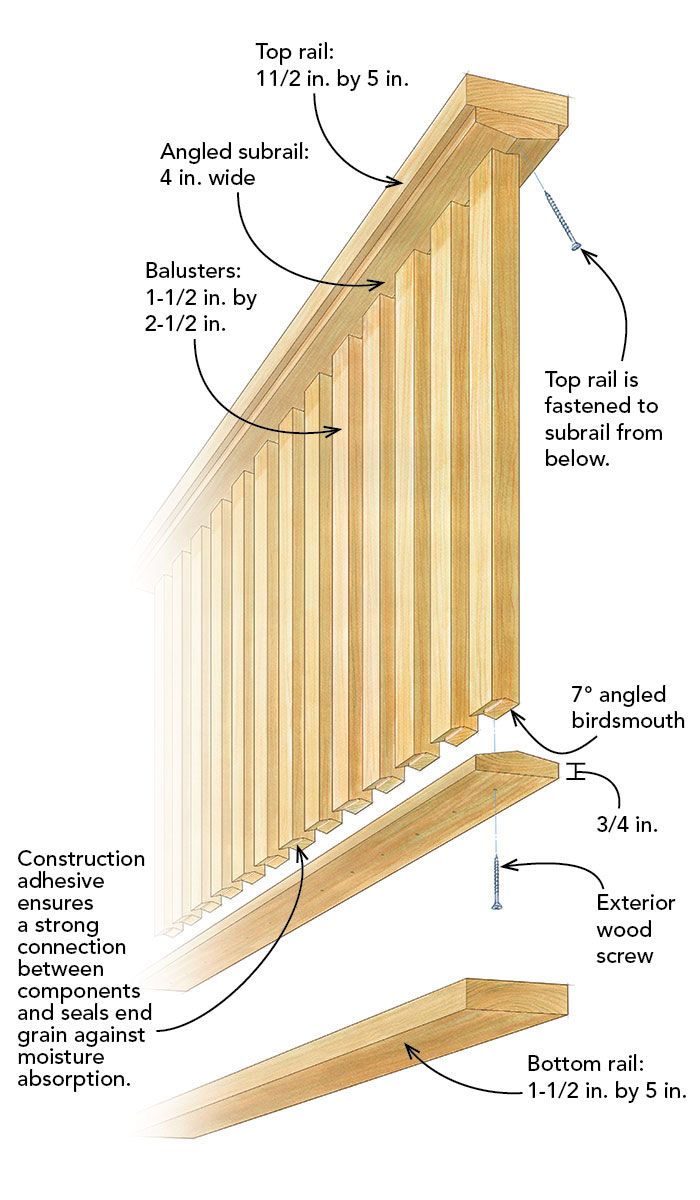
Synopsis: Aaron Rosburg has repaired many rotted wooden deck and porch railings. In many of these structures, water pools on the flat bottom rail and eventually the railings fall apart. In this article, he outlines a better way to build a wood railing and protect it from water damage: add an angled subrail connected to the balusters with a birdsmouth joint, which will shed water when it rains.
When I started out on my own about 15 years ago, I was doing mostly repair work, and many of those repairs were focused on rot. Fixing wooden deck and porch railings always seems to be on the to-do list, particularly the traditional-style railings in which the balusters land on a flat bottom rail or subrail. Water pools near this susceptible joint and then is drawn into the thirsty end grain of the balusters where it rots the wood and corrodes the fasteners, and eventually the railing falls apart.
On a recent job, I was asked to rebuild a two-story porch on a historic 1800s brick building in my neighborhood. While I was researching some period-appropriate railing designs, I stumbled across an old illustration that detailed what I quickly realized was a better way to build a wooden railing.
The illustration showed balusters with a birdsmouth cut at each end that mate with angled subrails to create a water-shedding joint. Eliminating standing water in this critical spot gives the balustrade a significant advantage over just about every other wooden railing I’ve seen and repaired over the years, but there are some perks beyond that, too. The angled connection allows balusters to be attached with a single fastener on the top and bottom — the preferred method if you want to avoid splitting the stock — yet they aren’t prone to spinning like most wooden balusters are.
For our paint-grade version of these better-built railings, we use premium KDAT (kiln-dried after treatment) yellow pine. Compared to typical pressure-treated lumber, the KDAT stock is really straight and true and doesn’t twist and move much, even when ripped down into balusters.
I can only guess why all historic railings don’t follow the design I saw in that old illustration; perhaps it’s due to the labor involved with cutting the more complex joints with hand tools. Luckily, the same durable design can easily be cut with common power tools and is only slightly more time consuming than the rot-prone railings we’ve all been assembling for years, but with a far longer expected lifespan.
Fitting birdsmouth balusters
 |
 |
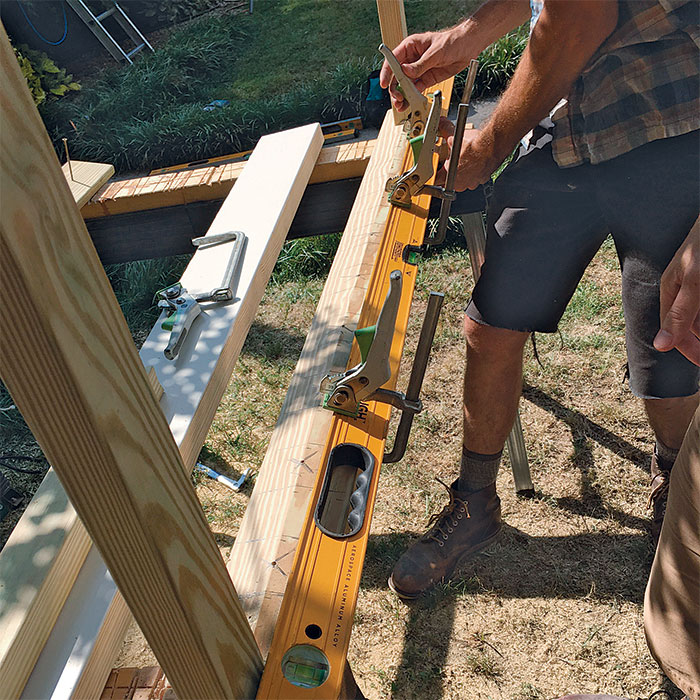 |
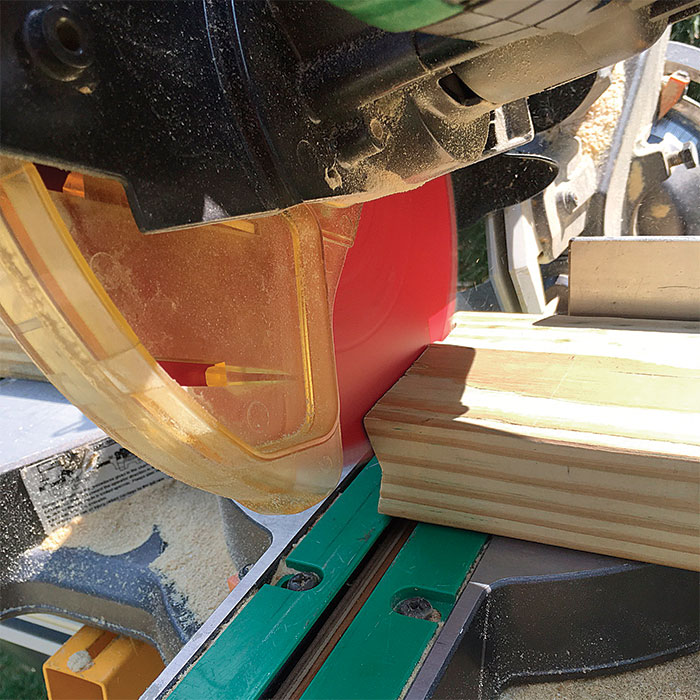
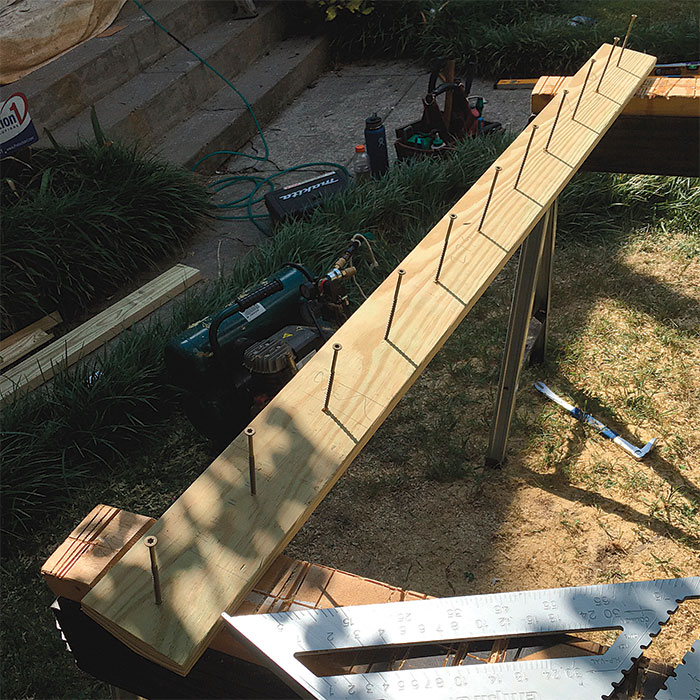
| Birdsmouth bevels. The angled baluster ends look tricky, but are easy to cut on a sliding miter saw. Use a stop to ensure that each baluster is the same length, set the saw to a 7° bevel angle, and set the saw’s cutting-depth stop to limit the blade depth to half the thickness of the stock. The birdsmouth is then made in two cuts that meet in the middle. | Pilot holes are a must. KDAT lumber is dry and prone to splitting, so it’s crucial to lay out and drill pieces before assembly. Exterior wood screws are driven from the flat side of the subrail, where they will later be concealed and protected from the weather by the top and bottom rails. | A level for alignment. The birdsmouth joint between baluster and subrail helps with alignment, but doesn’t guarantee it. Start each rail section by fastening the two outermost balusters, and then clamp a level against their faces to create a guide for the placement of each additional baluster. |
For more photos, drawings, and details, click the View PDF button below:



View Comments
Good day Mr. Rosberg,
Thank you for this article. Could you kindly provide a drawing of or a link to the illustration you found? Many thanks.
Helene Kommel
The design of the baluster-railing assembly is inspiring, but the design doesn't address what I see as a common problem with railings, that is the attachment of the top & bottom rails to the posts. Usually there's not much more than a couple of 3" toe screws, which look very vulnerable to splitting under the 200 lb. code load, especially after aging and when subjected to the standard 250% safety factor.
We give lots of attention to the railing itself and the connection of the post to the deck or porch structure, but not much to the connection between post and railing.