
Bracing Deck Posts
Learn how to temporarily hold posts plumb until beams are permanently attached to them.
The framing process would move a lot faster if nothing had to be braced. Unfortunately, even a post base that will hold a beam upright on its own won’t hold the post securely without a brace. Decide on a bracing scheme before setting the post. This will save you time and materials because you can avoid redundant bracing—or worse, incomplete bracing that may allow the framing to fall down during construction.
Bracing framing temporarily
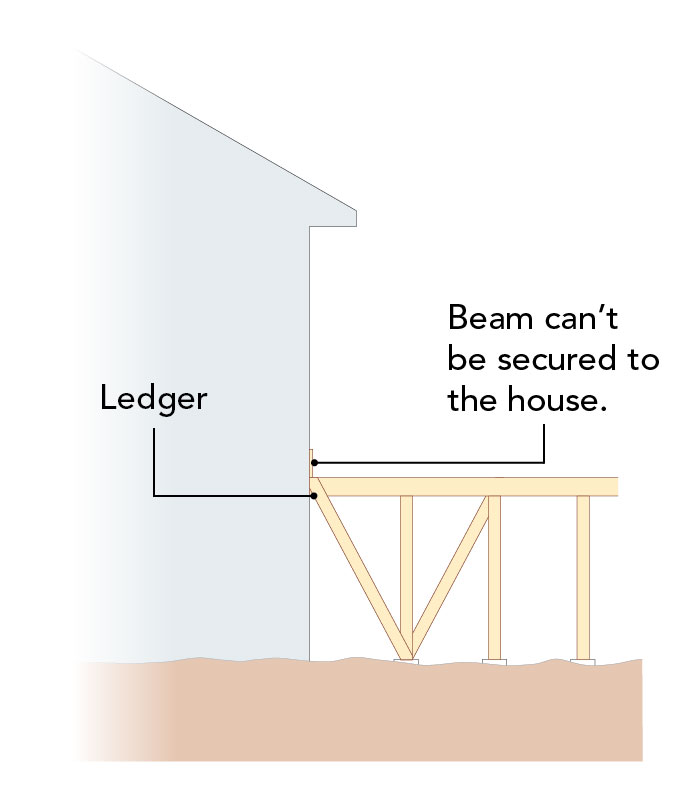
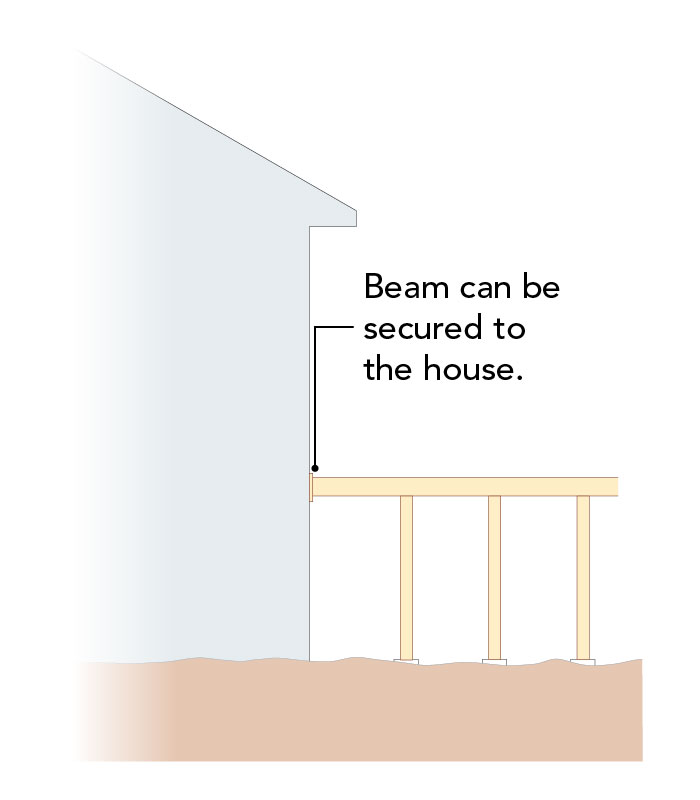
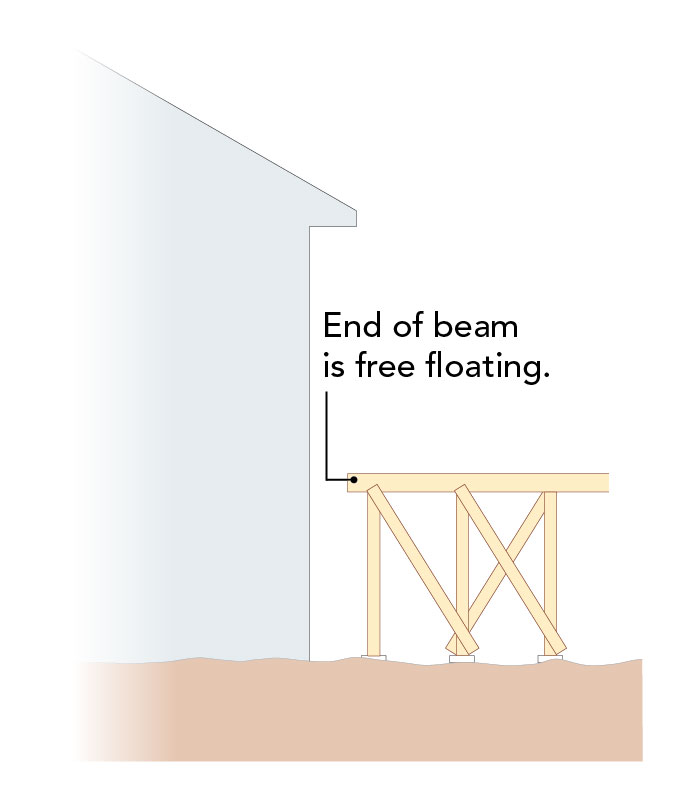
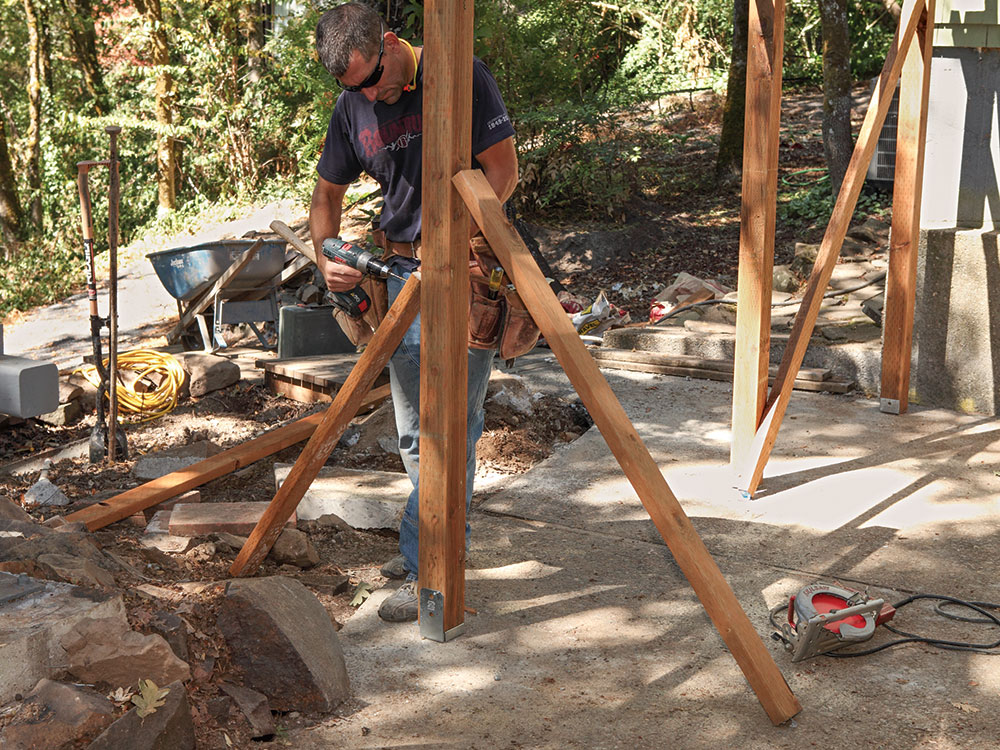
Shown here are three common bracing strategies, depending on the specifics of your job. If the house provides a good reference but you can’t securely attach the beam to it, cross-bracing can hold posts (Method 1). When the beam can be secured to the house, the combination of fixed post bases and the beam stabilizes the structure and no cross-bracing is required (Method 2). At times the deck framing cannot be tied to the house at all, and in those scenarios cross-bracing is the best choice and may have to be permanent (Method 3).
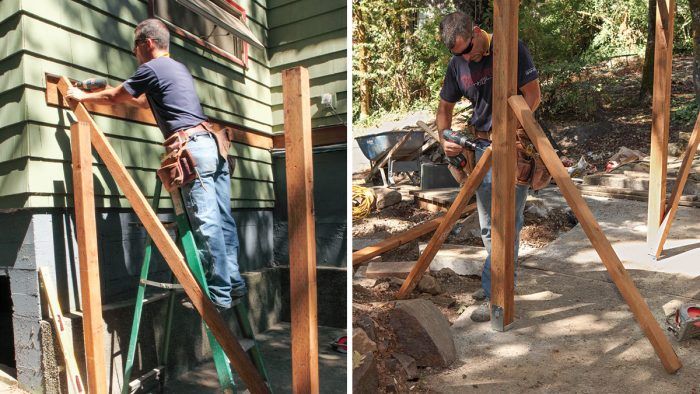
To temporarily brace a run of posts laterally, use stakes to secure the posts at the ground and then screw them to the posts halfway up.
 |
 |
| Method 1 | Method 2 |
 |
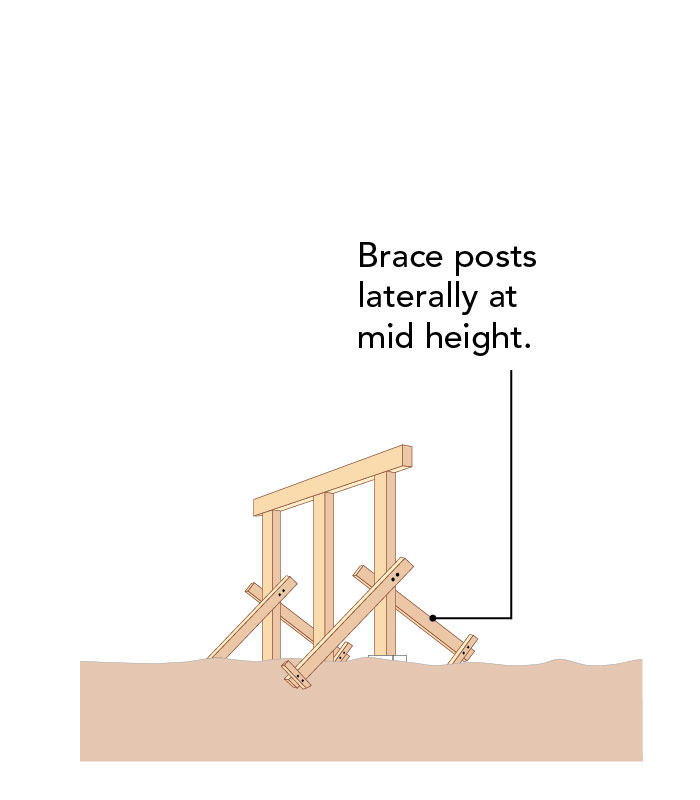 |
| Method 3 | Lateral Bracing |
What Can Go Wrong
Take the time to set aside any warped, twisted, or bowed stock even if it means another trip to the lumberyard. Pressure-treated lumber can be of questionable quality, so if you didn’t select the lumber yourself, plan on finding a few posts that are better for modern sculpture than for structural support.
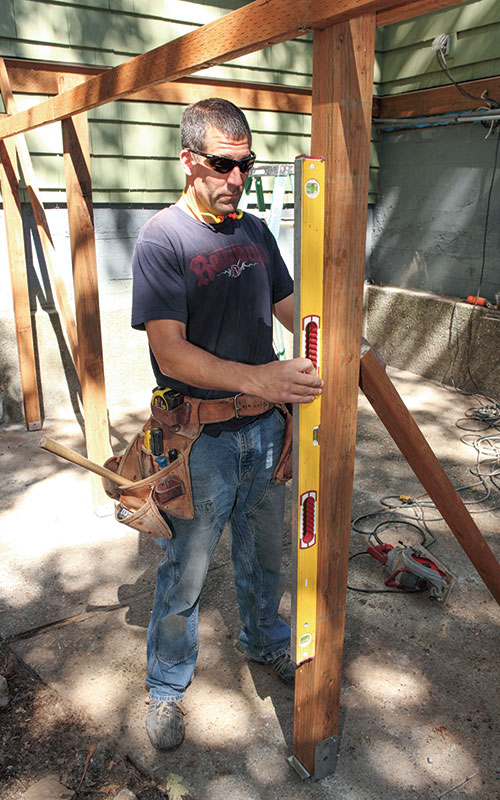
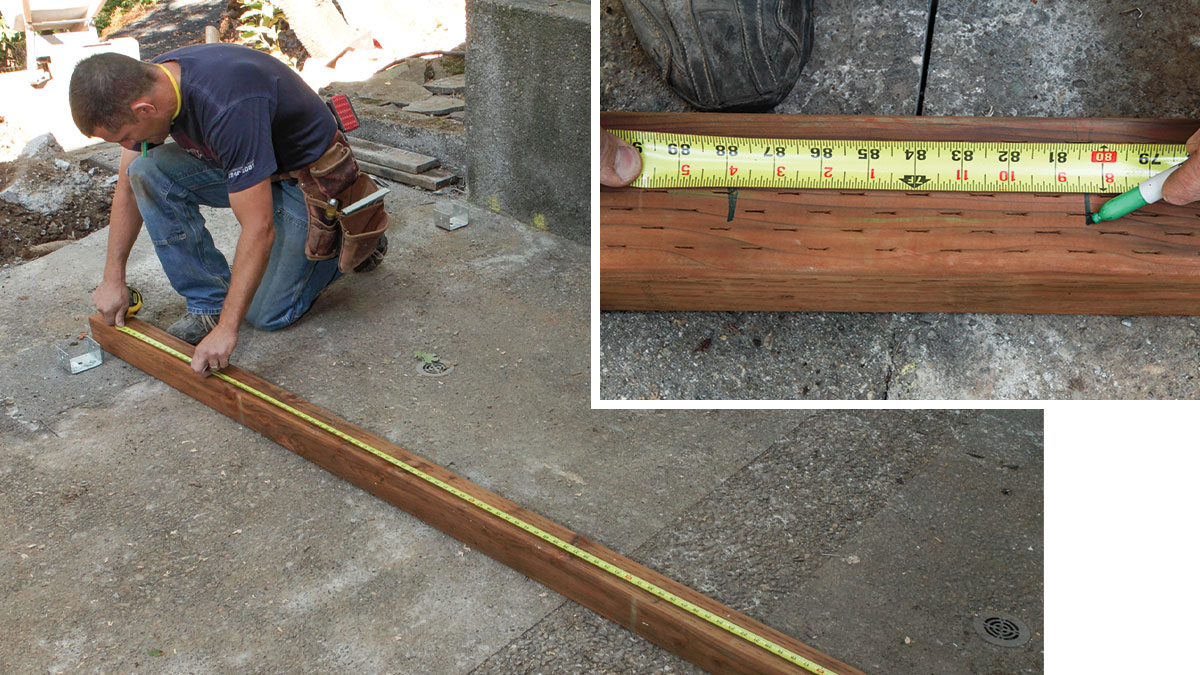
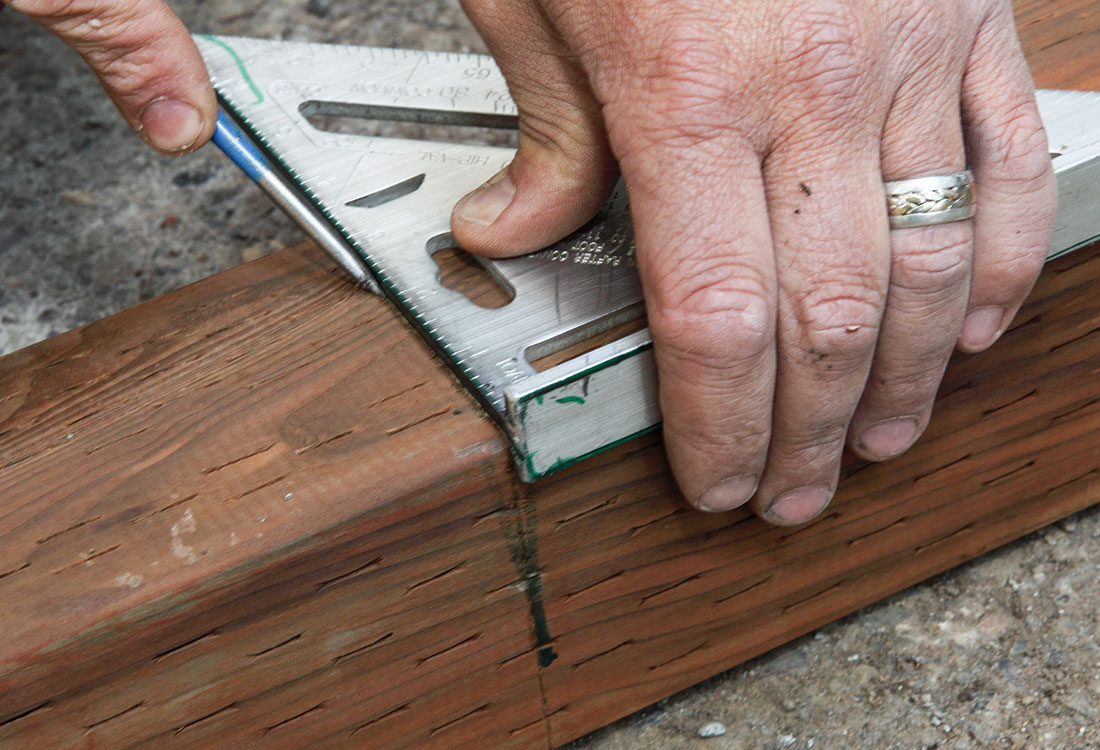
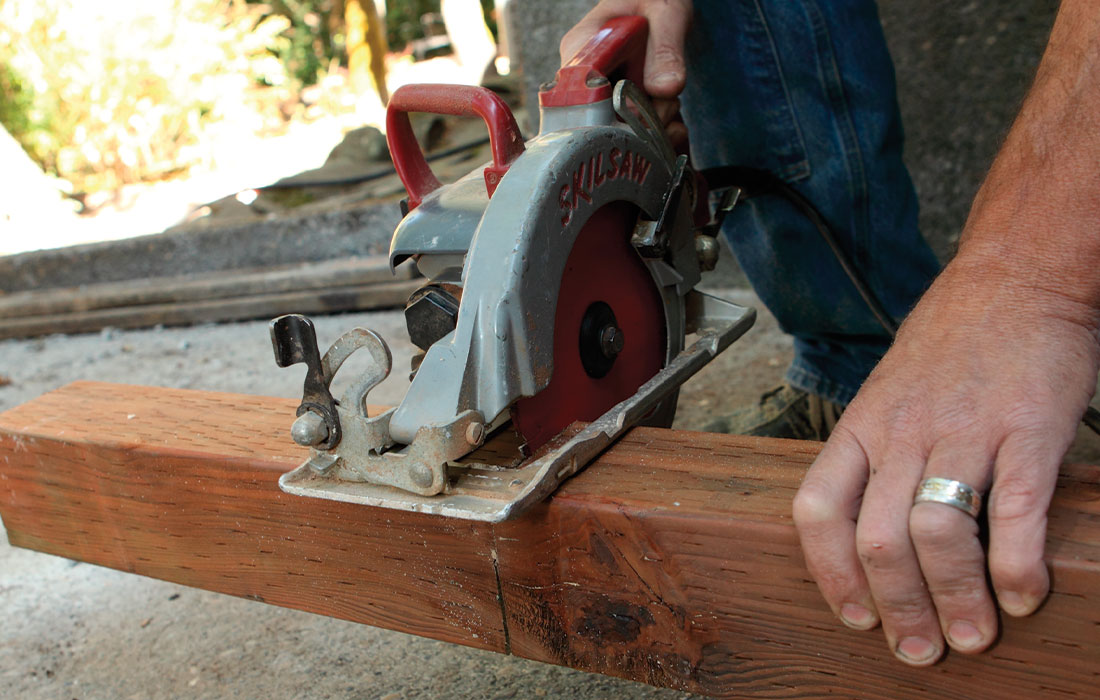
For this deck, we chose to cross-brace the two end posts with an additional tie to the house and brace laterally to the posts between the ends. Before cutting the first post, we like to mark all the elevations on the post and then double-check the actual measurements against the ledger already installed. This may seem like an unnecessary step, but it takes only an extra minute and eliminates the possibility of a math error. Likewise, take the time to mark the cutline all around the post rather than on just one side. When framing, a series of small errors in accuracy can compound to make the final product noticeably out of level or out of square. Tracing the line all around the post saves time when cutting because you can flip the beam to make the second cut on the opposite side instead of running around it with the blade while cutting the adjacent side.
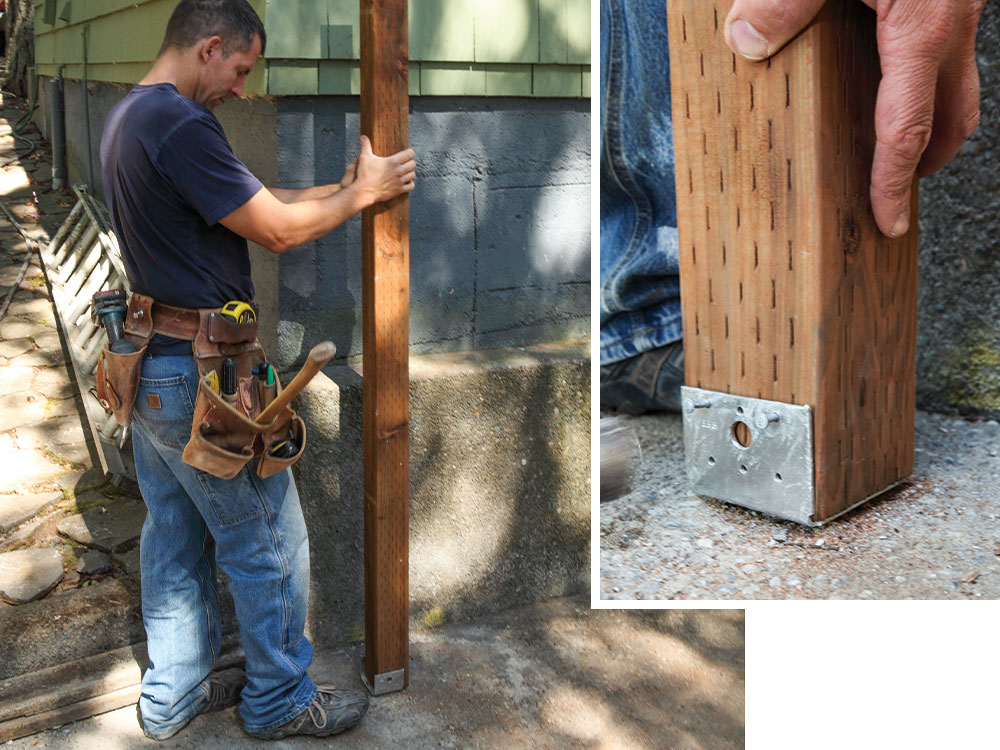
Once the post is cut, you need to apply wood preservative. Use a brush or pour a small amount into a bucket and dip the cut end into the preservative. Position the post onto the base and fill every hole with a hanger nail to secure the post to the base. In some cases, the plans may call for a bolt installation to connect the post and base for protection against wind uplift.
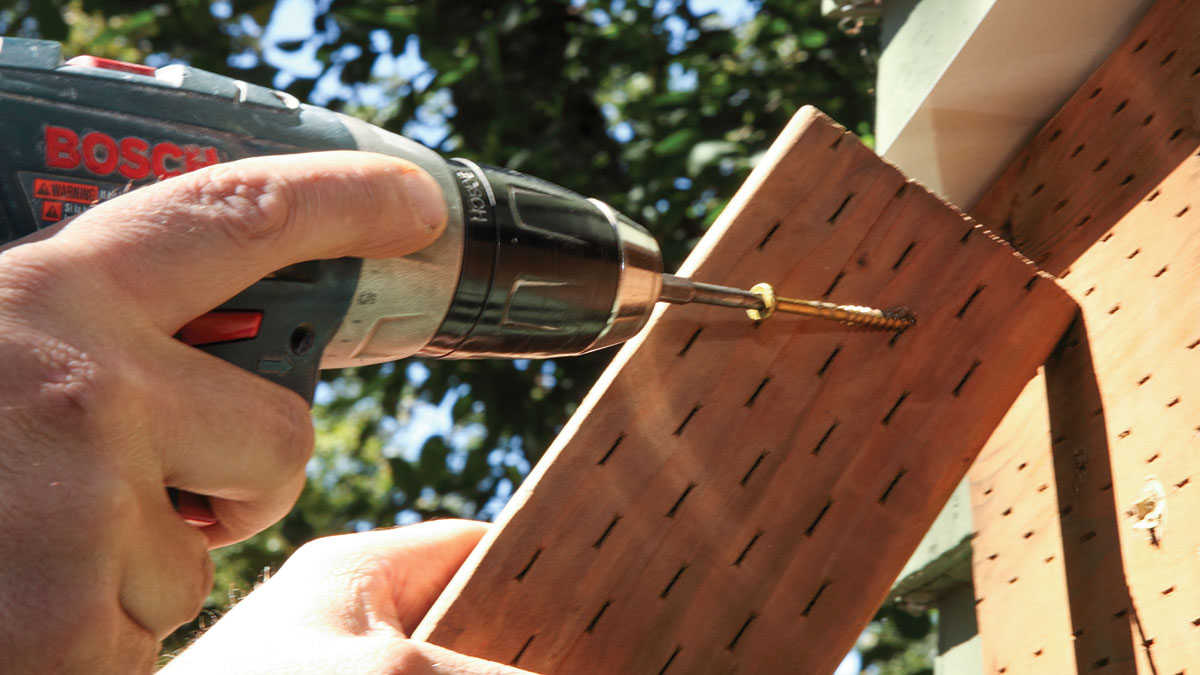
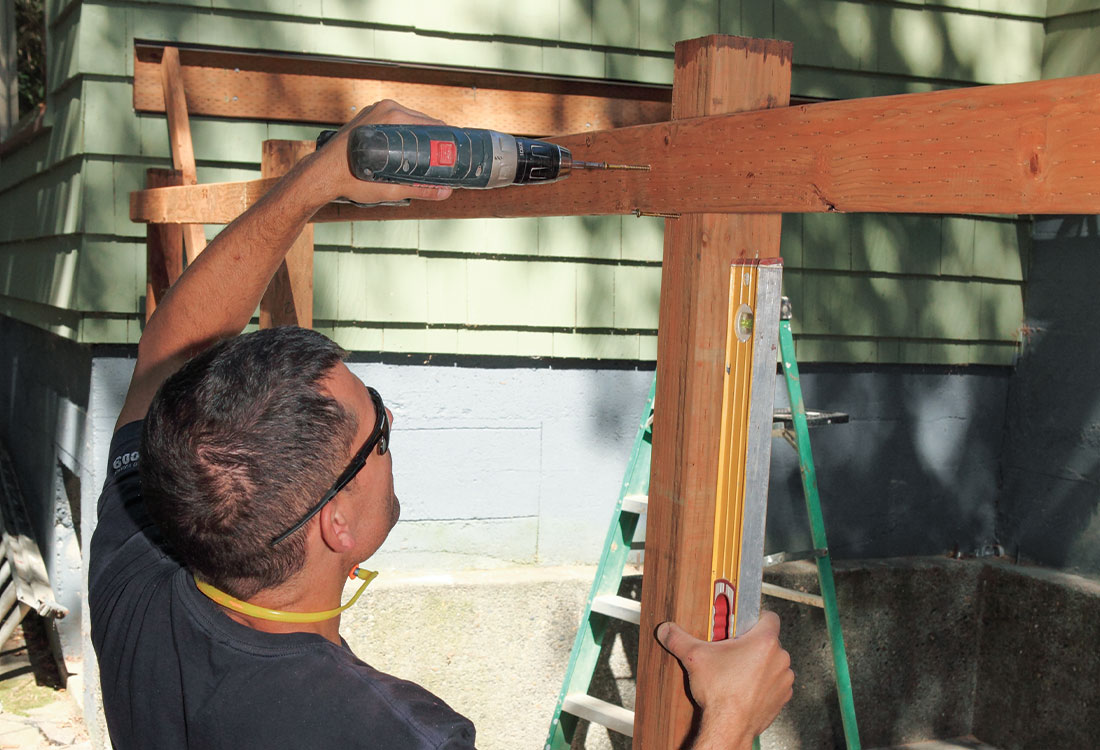
When you have two posts installed, brace the posts according to your bracing scheme. Run the brace long so you can secure it to the ledger with a toe screw. Generally, although posts are secured to the bases with galvanized nails, all the bracing is secured with star-headed screws. Screws are easier to remove than nails, and the star-headed screws won’t strip as easily as Phillips®-head screws.
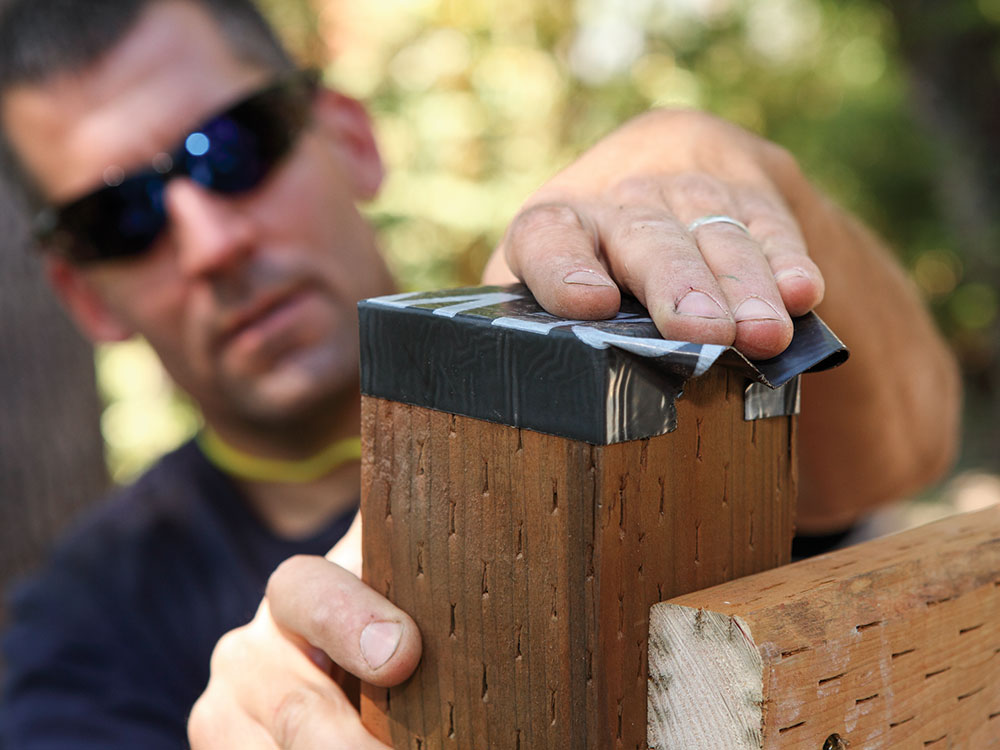
Once the bracing is anchored, by either a section of cross braces or a leg that is tied into a stable structure, additional posts can be adequately secured with lateral bracing at the top. As long as the cross brace on the first post remains secure, the rest of the posts will remain in place. After a run of posts is in place, plumb and brace each post perpendicular to the beam direction. These braces can be shorter, bracing the post in the center as opposed to the top. The last step when setting posts is to protect the top of the beam from water and rot. This will also help minimize hardware corrosion.
1. Mark all the important elevations on one post to use as a story pole before making any cuts.
2. Clearly mark the cutline on at least two sides to help guide your cuts.
3. Cut the post to length.
4. Secure the post in the base with 1 1/2-in. hanger nails, being sure to use every hole.
5. Brace the posts as you install them rather than bracing them all at once after installation.
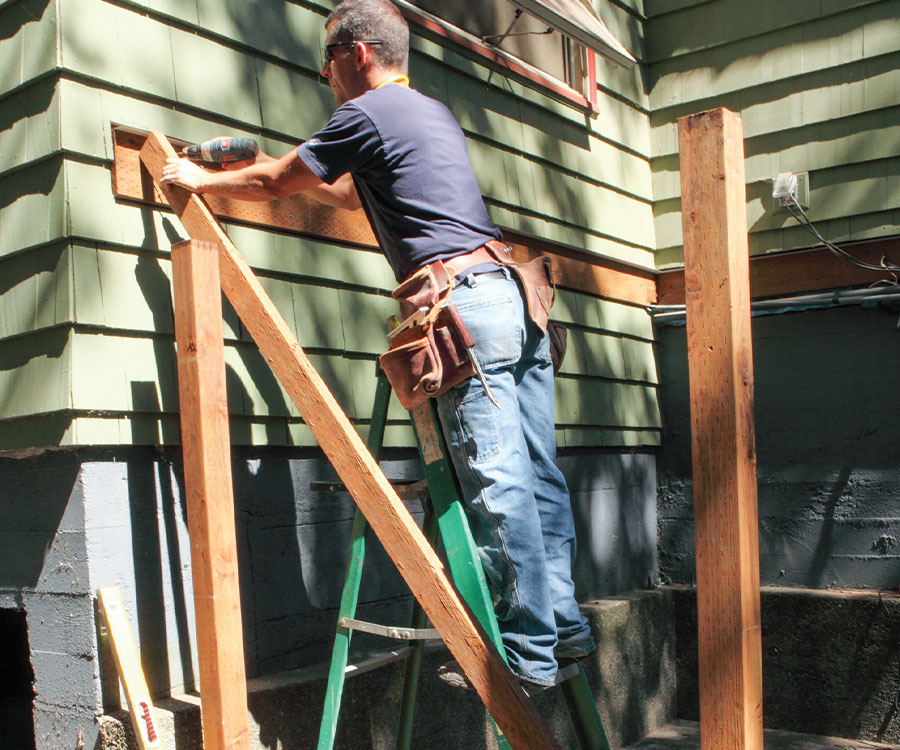
6. Screw the brace to the ledger to add stability.
7. Secure the tops of the posts with lateral bracing as well as attachment to the post base.
8. Install perpendicular bracing in both directions to temporarily hold the bracing until the beams and joists are installed.
9. Fold a square of self-adhesive flashing over the top end of the post to protect it from rot and the post hardware from corrosion.
Trade Secret:Don’t assume that the beam dimensions are consistent. Lumber dimensions can vary by as much as 1/4 in. or more, especially with pressure-treated wood. Take the time to measure the actual size of your beam before making any calculations of post height. |
Fine Homebuilding Recommended Products
Fine Homebuilding receives a commission for items purchased through links on this site, including Amazon Associates and other affiliate advertising programs.
N95 Respirator

MicroFoam Nitrile Coated Work Gloves
4-Gallon Piston Backpack Sprayer
