
Building a Pergola: Prepare and Install the Posts
Notch, bolt, and brace...and then fill in the post holes.
For this pergola, three of the posts have 1-1/2-in.-deep notches to fit over the deck rim joists. The notches are to accommodate the design of a deck railing that will be added later, so you can skip the notches if you don’t need them. If you are notching the posts, you’ll tamp down the gravel, then use a length of 2×4 as a “story pole” to mark the location of the notch on each post. If you won’t be notching the posts, skip to “Install the Posts.”
 Dressing Up the Posts
To dress up the posts a little, we routed a chamfer along the four edges. Put a piloted chamfering bit in your router. We set ours to make a chamfer of about 1/4 in., but you can make your chamfer any width that pleases you. Be sure to rout from left to right so the bit will scoop the wood out cleanly. |

1. Mark a story pole. Put a length of 2×4 in the hole and use a 4-ft. level to plumb it. Mark where the 2×4 meets the top and bottom of the rim joist.

2. Lay out the notch on a post. On sawhorses, place the story pole along a post with the ends flush as shown. Transfer the top and bottom of the notch layout to the post and use a square to extend the layout across the face of the post.
Laying Out and Digging Post Holes
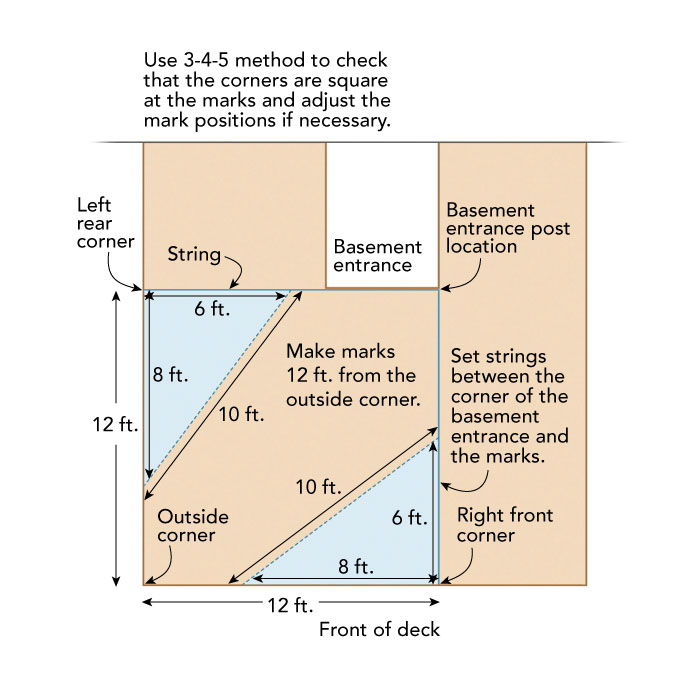
The sequence illustrated here is for a square pergola with four posts that are 12 ft. on center. The pergola covers only part of a preexisting deck, which predetermines the location of two of its posts. One is located at an outside corner, while the other is diagonally across at an inside corner of an opening for the basement door. If your pergola will be attached to four corners, all of your post locations are predetermined.
A. From the outside corner of the deck, measure 12 ft. toward the house and make a mark. Then measure from the same corner along the front of the deck and make another mark at 12 ft.
B. Drive a nail or screw partway in at the marks and at the basement entrance post location. Run strings between the basement entrance post location and the two marks you made at the deck perimeter.
C. The 3-4-5 method is an easy way to check if something is square: If one side of a right triangle is 3 ft. long and another side is 4 ft. long, the diagonal hypotenuse will be 5 ft. long. Of course, you can use any multiple—here we used 6 ft., 8 ft., and 10 ft. Use this method to check if the right front corner and the left rear corner are square. Adjust the position of the marks if necessary to form square corners.

Dig the post holes
Holes for posts that will be set in concrete should be approximately three times the width of the posts, so you’ll want the holes for the nominal 6×6 posts used here to be about 18 in. in diameter. Make the holes about 42 in. deep to provide plenty of lateral support. Since the post holes are oversized, they need not be perfectly centered across the post-center layout marks, so you can eyeball their locations.
You can use a post-hole digger as shown here, or, if your ground is hard or rocky, you might want to rent a power post-hole auger. Add a few inches of gravel to the hole and tamp it down with a length of 2×4 or 4×4.
Tip: On this pergola, two of the posts are not located at corners. These two posts will be notched 1-1/2 in. deep all the way across one face. The post at the inside corner by the basement door is not notched at all, while the post at the outside corner gets the corner notch described in steps 7 and 8. If your pergola will be notched over all four corners of a deck, skip to step 7.

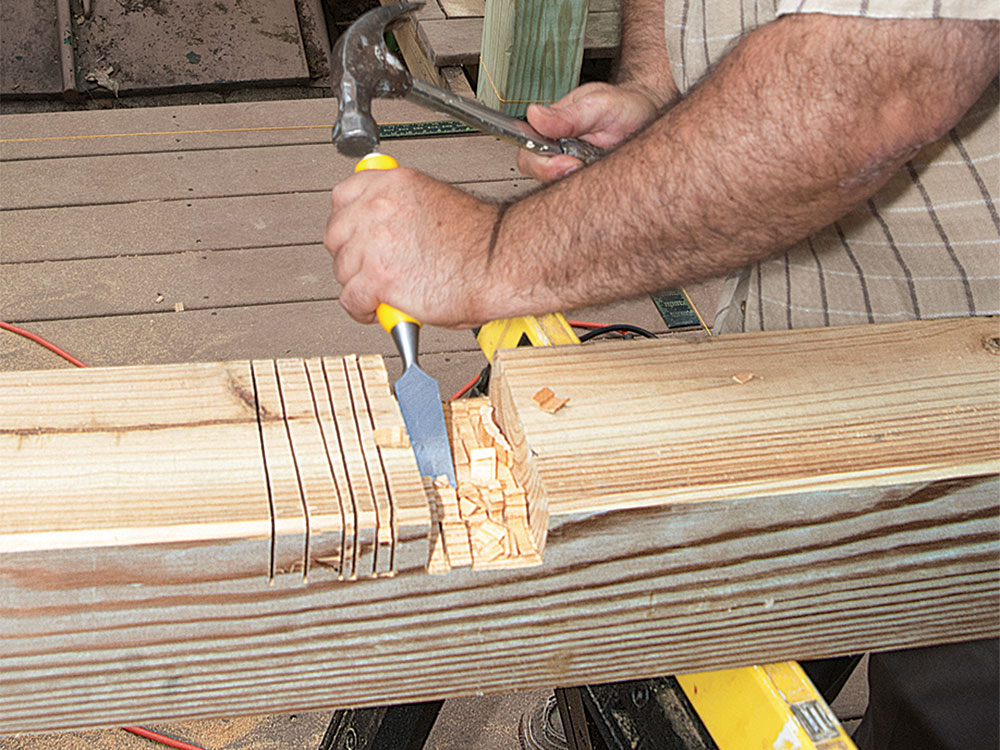
3. Kerf the full notches. Set the circular saw to cut 1-1/2 in. deep. Make cuts along the layout lines on the face of the post—be sure to cut to the inside of the lines. Then make a series of cuts, or kerfs, through the face of the notch, spacing the kerfs about 1/2 in. apart.
 |
 |
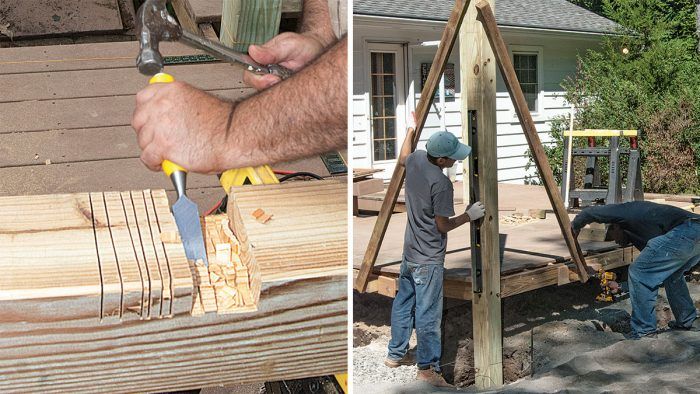
| 4. Chop out the full notches. Use a hammer and chisel to chop the waste out of the notch. Then use the chisel to clean out the bottom of the notch. Use the saw marks at the bottom of the notch as a guide to get a flat notch of the right depth. | 5. Drill bolt holes through the full notches. Use a square to extend the notch layout to the opposing face of the post. Then use a 5/8-in. spade bit to drill two holes that are centered across the post and about 1 in. from the top and bottom of the notch. |
 |
 |
| 6. Lay out the corner notch. Set a combination square to 1-1/2 in. and use it to scribe a line across the top and bottom notch layout lines. | 7. Kerf the corner notch. With the circular saw still set to cut 1-1/2 in deep, cut the top and bottom of the notch and a series of kerfs, stopping when the cut meets the line you made with the combination square. |

8. Chop out the corner notch. Use a chisel and hammer to knock out as much of the corner-notch waste material as you can. Then, working from both sides of the notch, chop straight down to clean out the two faces of the notch. Outside corner posts won’t be bolted to the deck, so there is no need to drill bolt holes.
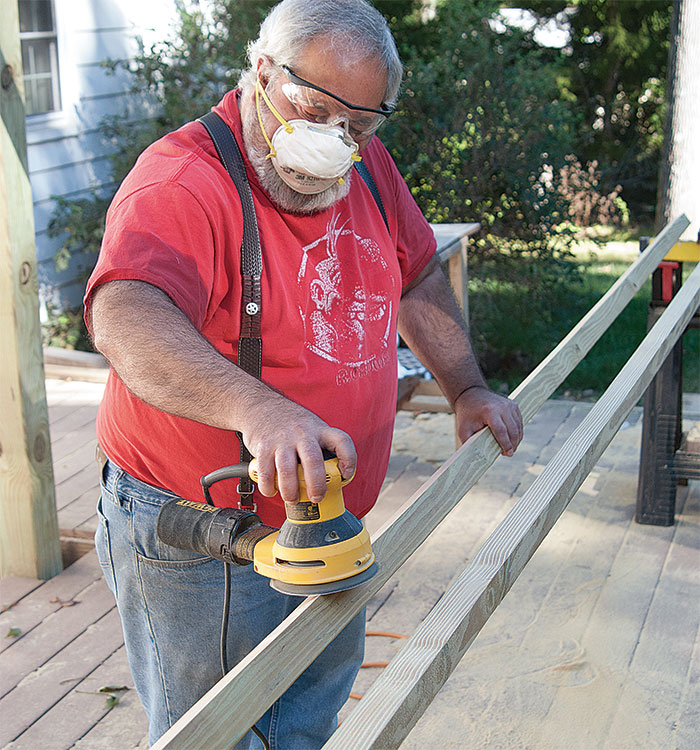
Sanding the Pergola Parts
If you want to give your project a more refined look, take the time to sand the posts, beams, and joists with #80 grit. You can do the entire job with a random-orbit sander, or you can speed the job by using a belt sander on the wide surfaces.
You’ll make the top slats by ripping 2x4s down the middle. There is no need to sand the surfaces of the slat. After each rip, just use the random-orbit sander as shown here to quickly round the newly cut edges to match the factory edges. To avoid moving pieces around more than necessary, sand each piece after you cut it.
Install the Posts
If you are attaching your pergola to a deck, you’ll start by bolting into place any posts that are not at outside corners. Outside corner posts won’t be bolted, so you’ll need to brace those when you place them. Once the posts are bolted or braced, you’ll fill the holes with concrete. Because your post-hole locations are likely to be at different elevations, the posts’ heights will vary. You’ll cut them all off to the same height after the beams and joists are installed.
Tip: If your drill bit isn’t long enough to go through the post notch and all the way through the rim joist, drill as deep as you can, and then move the post to one side so you can drill the joist hole through.
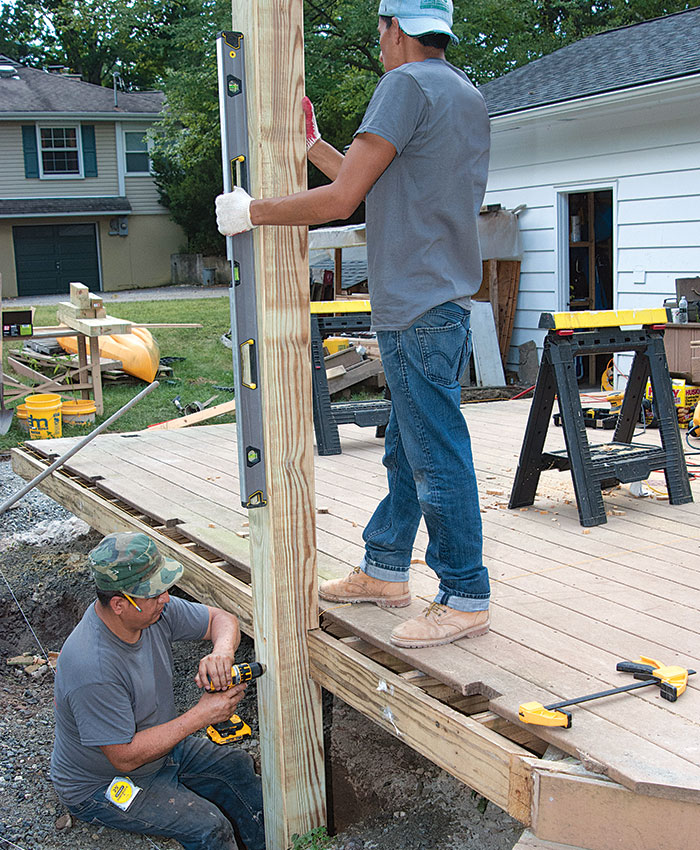
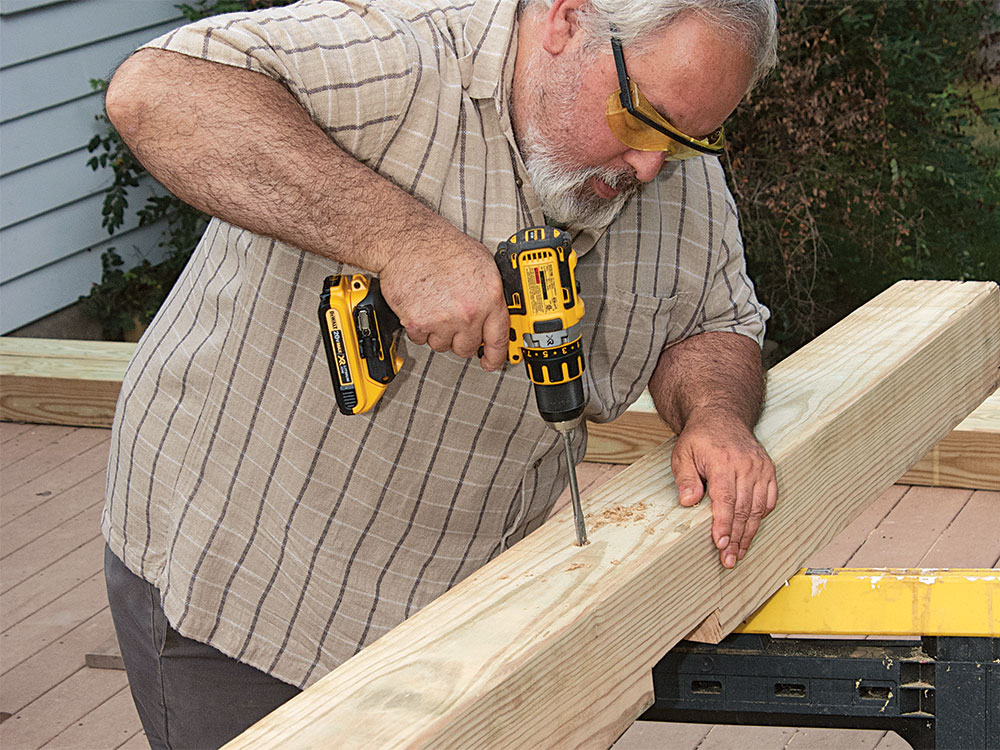
1. Install bolted posts. Strike a line down the side of the rim joist. Locate the line 2-3/4 in. from the post’s on-center point. Fit the post notch over the joist and align the post to the line you just drew. Plumb the post and drill through the holes in the post into the joist.

2. Brace the corner post. Use 2x4s to brace the corner post or posts against the deck rim joists. Because of the notch, the corner post or posts will protrude 4 in. from the joists at each side of the corner. To bring the bottoms of the 2×4 braces into approximately the same plane as the outside of the post, make a “pack-out” by clamping a piece of 4×4 and a piece of 5/4 scrap to the joists about 3 ft. from the posts. Attach two 2×4 braces near the top of the outside faces of the post using one screw in each brace. Put the post in place with the notch overlapping the corner. Plumb one side of the post and drive a screw through the brace into the packout. Then plumb the other side and fix the post in place with a screw in the other packout.
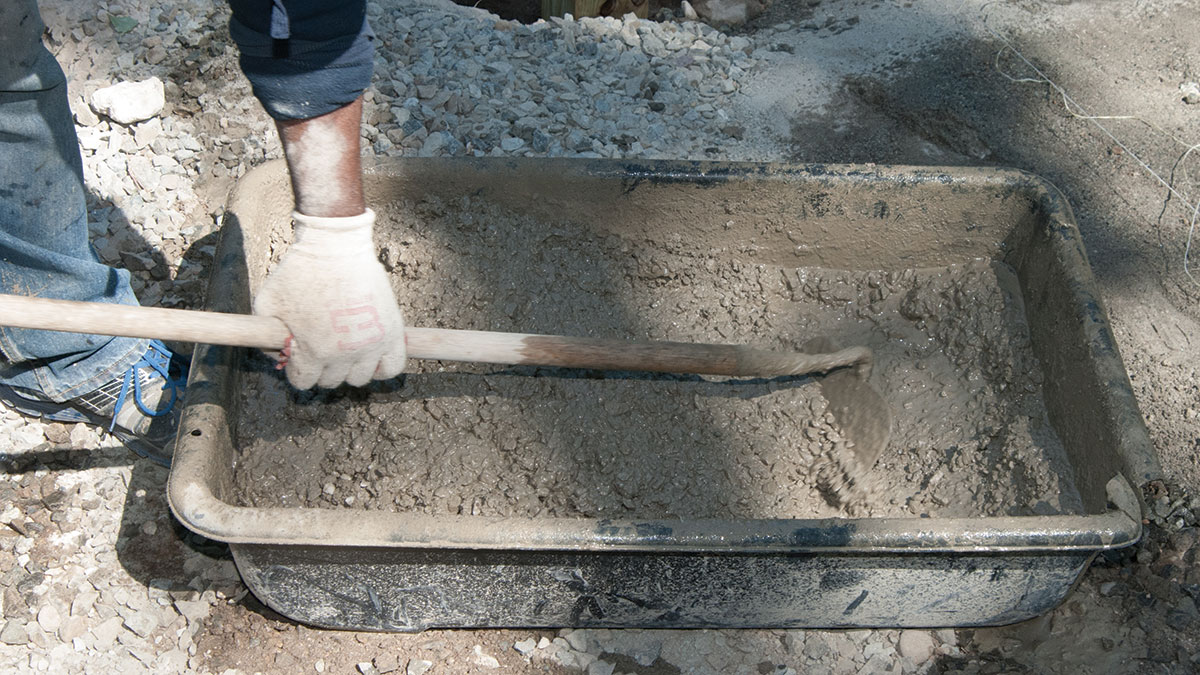
3. Mix concrete and fill holes. Pour a bag of concrete into a mixing bin or wheelbarrow and gradually add water while you mix it with a hoe. You want the mix to be wet but not soupy. Then use a shovel to fill the holes to the top with concrete. Let the concrete cure overnight before removing the braces.
Tip: If you want to avoid mixing concrete, you can use quick-setting concrete. Just pour water and the dry concrete directly into the hole as described on the package.
Fine Homebuilding Recommended Products
Fine Homebuilding receives a commission for items purchased through links on this site, including Amazon Associates and other affiliate advertising programs.
Flashing and Joist Tape
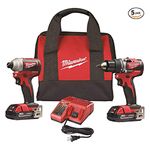
Drill Driver/Impact Driver
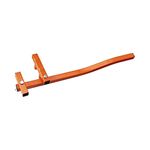
Cepco BoWrench Decking Tool

